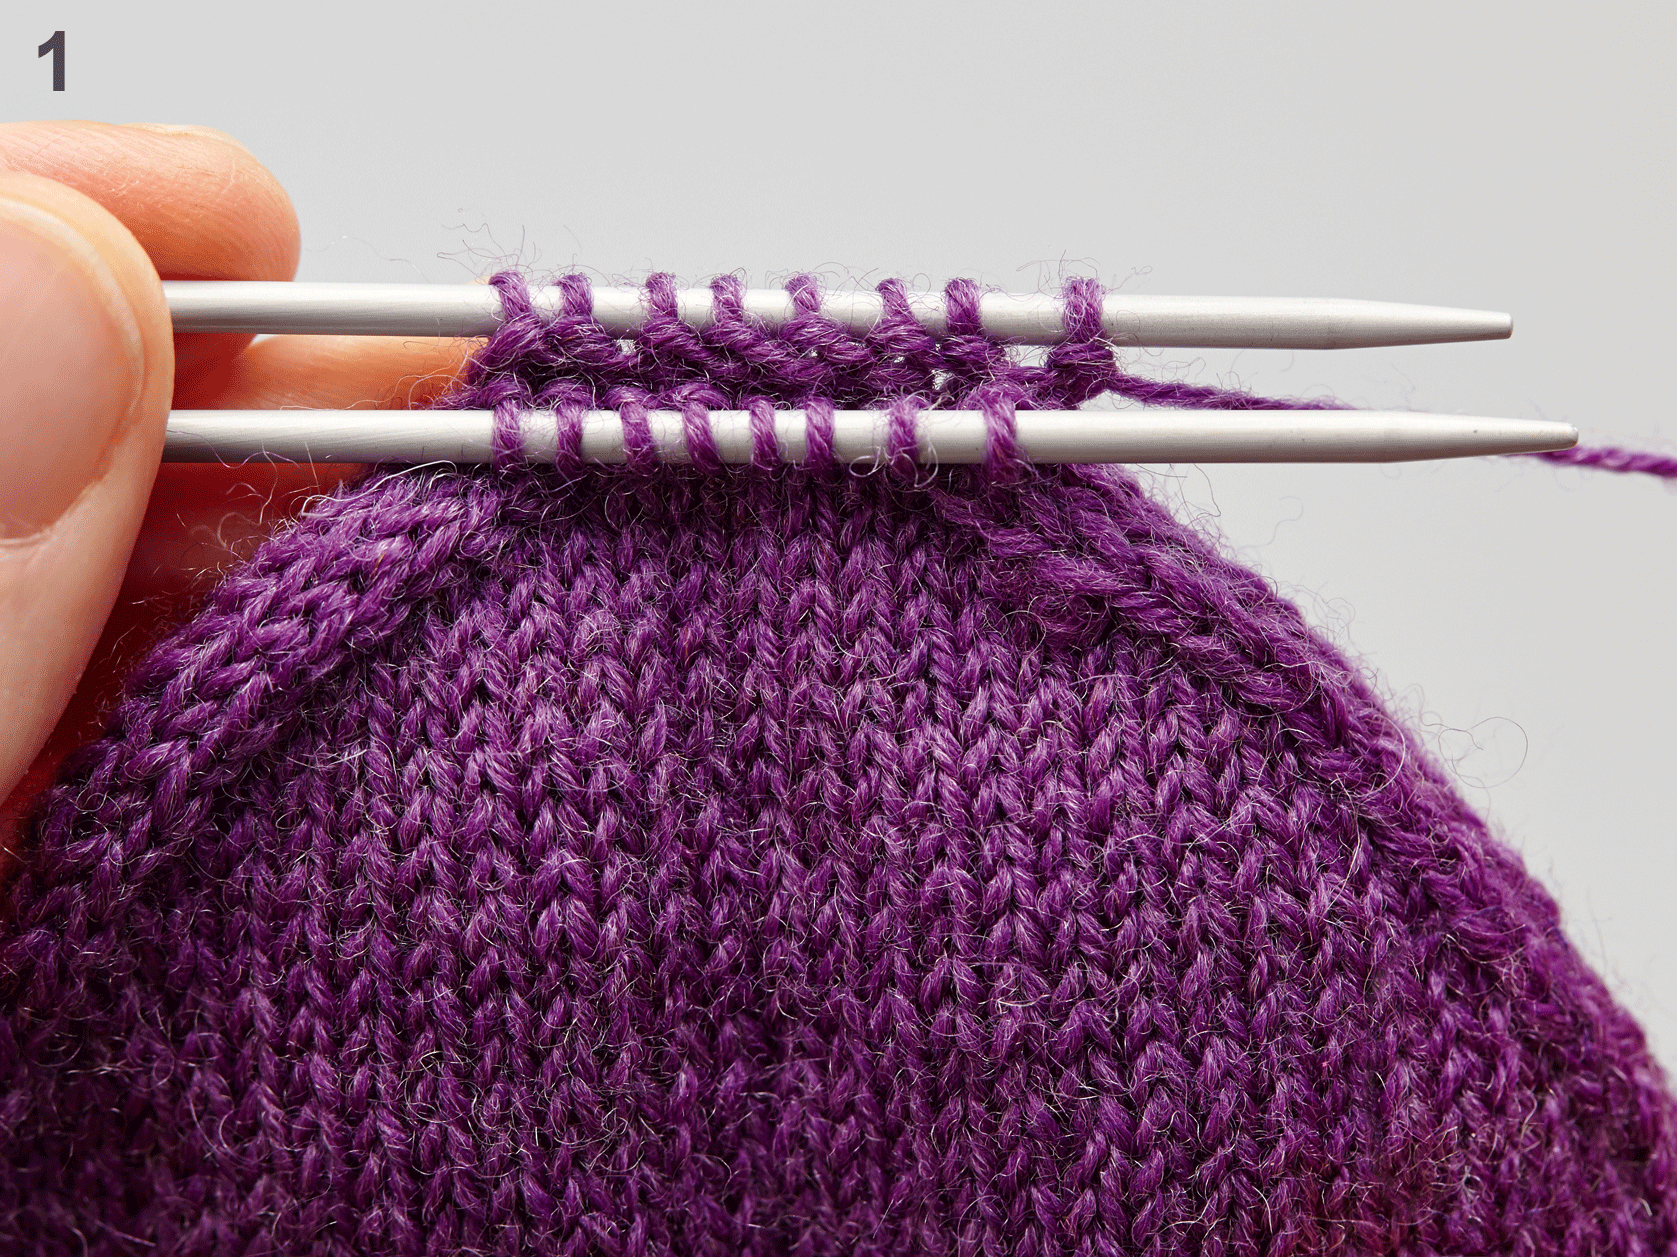
In our series of regular knitting masterclasses by expert knitters, we guide you through how to boost your knitting skills. It’s always good to brush up on our basic skills, and one technique we often use our knitting is Kitchener stitch, or grafting. In this tutorial we'll show you how to use it to join live stitches together seamlessly, and is typically used to close sock toes or to join two halves of a lace shawl.
How to graft knitting with Kitchener stitch
This essential grafting technique is so easy to forget! Remind yourself of the key steps with Jen Storey’s quick guide.
Published: February 8, 2021 at 10:25 pm
You will need:
- Knitting needles
- Yarn
- Tapestry needle
Step 1
When you are ready to graft, don’t cast off. Distribute an equal number of stitches across two needles, with wrong sides facing and your yarn to the right. The working yarn should be coming from the last stitch on the back needle. Cut the yarn, leaving a tail that’s long enough to work one row of knitting, with a little extra. Thread this onto a tapestry needle.
Step 2
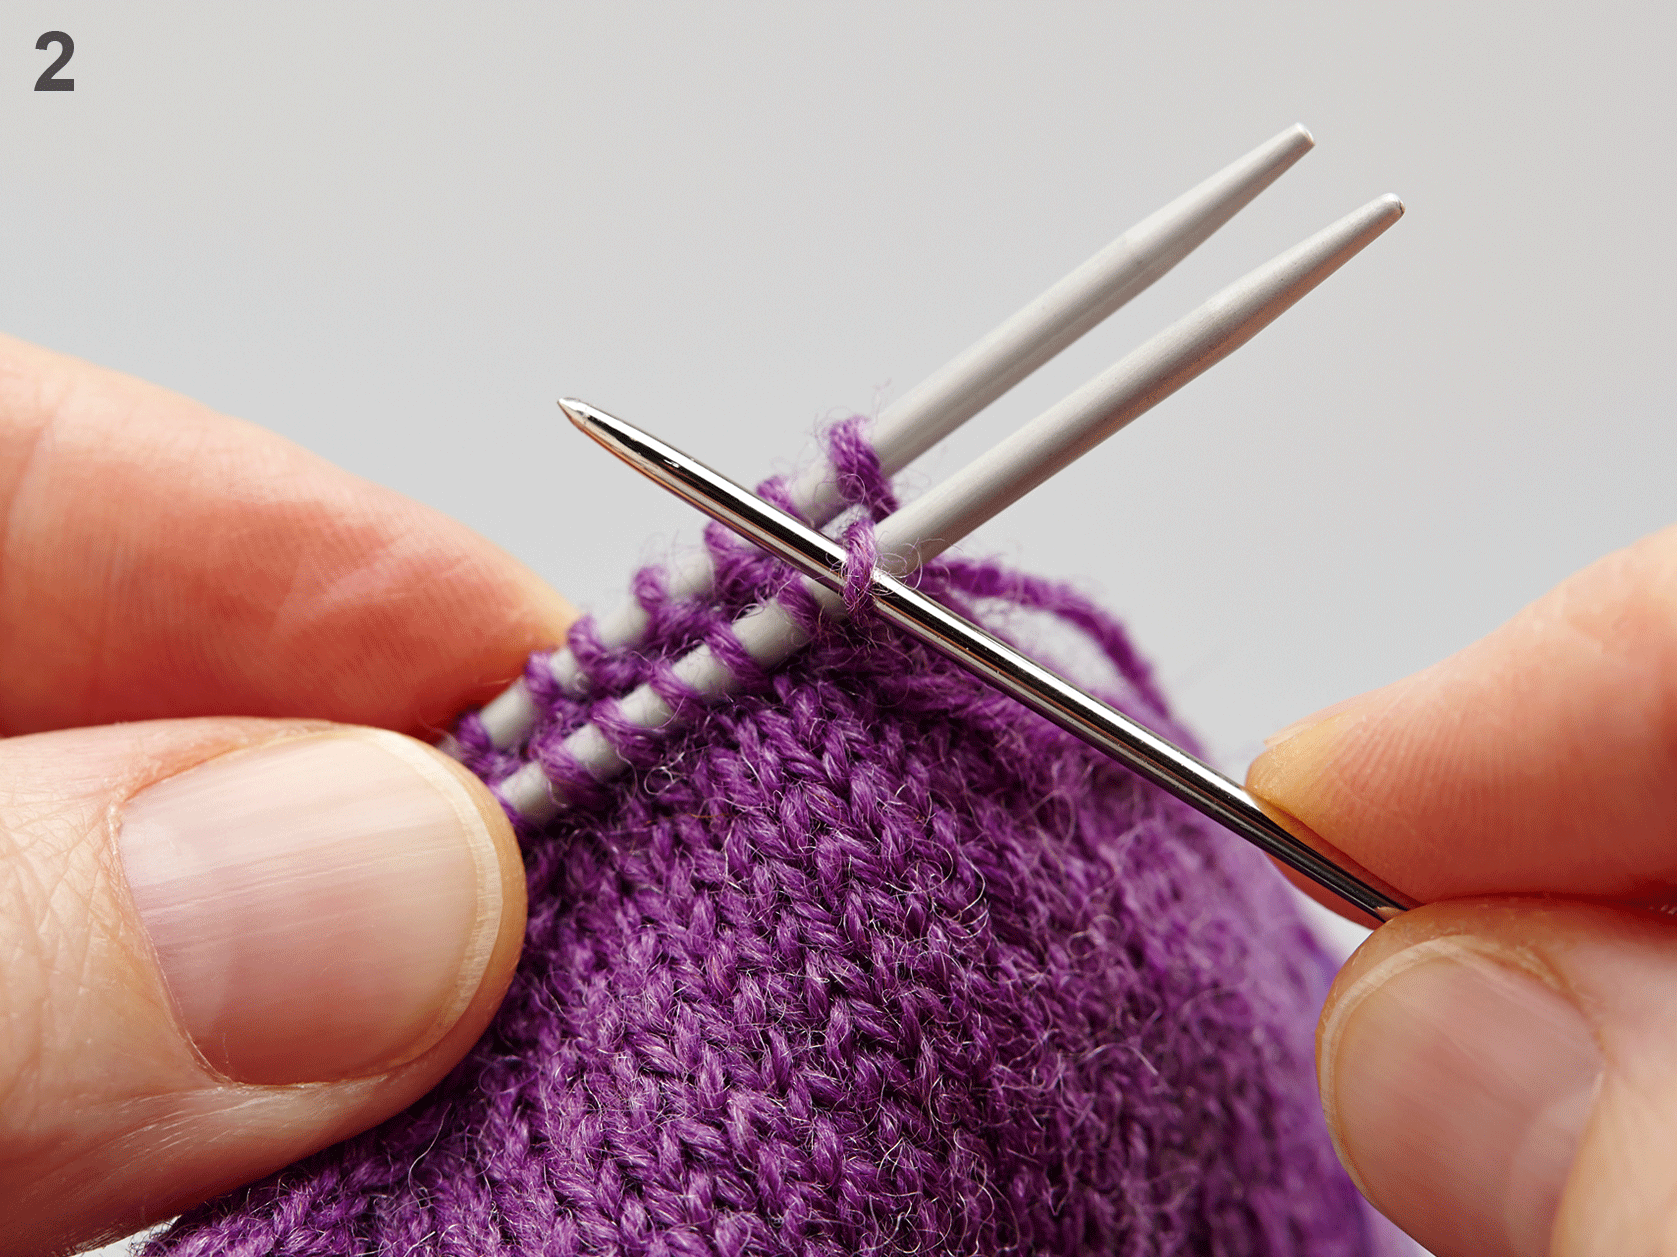
Insert your sewing needle through the first stitch on the front needle as if to purl. Draw the yarn through.
Step 3
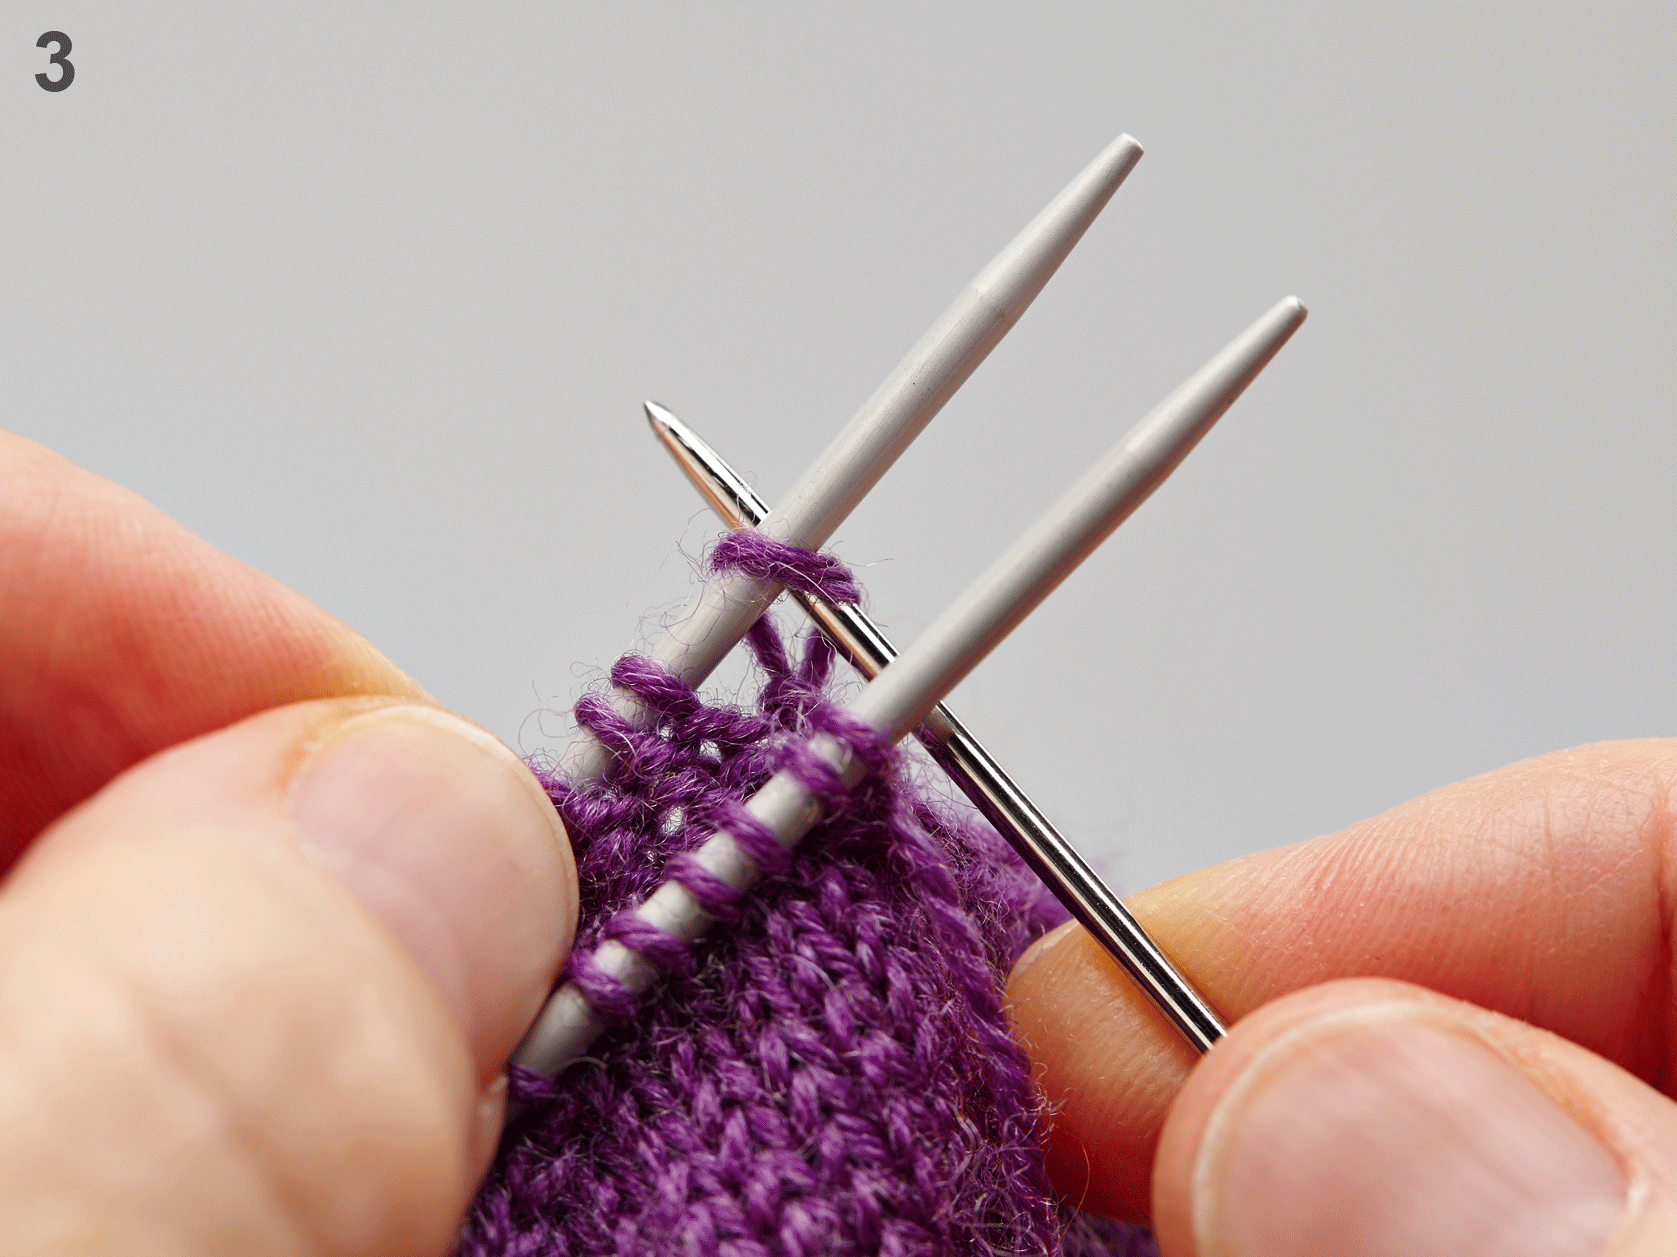
Insert your sewing needle through the first stitch on the back needle as if to knit. Draw the yarn through.
Step 4
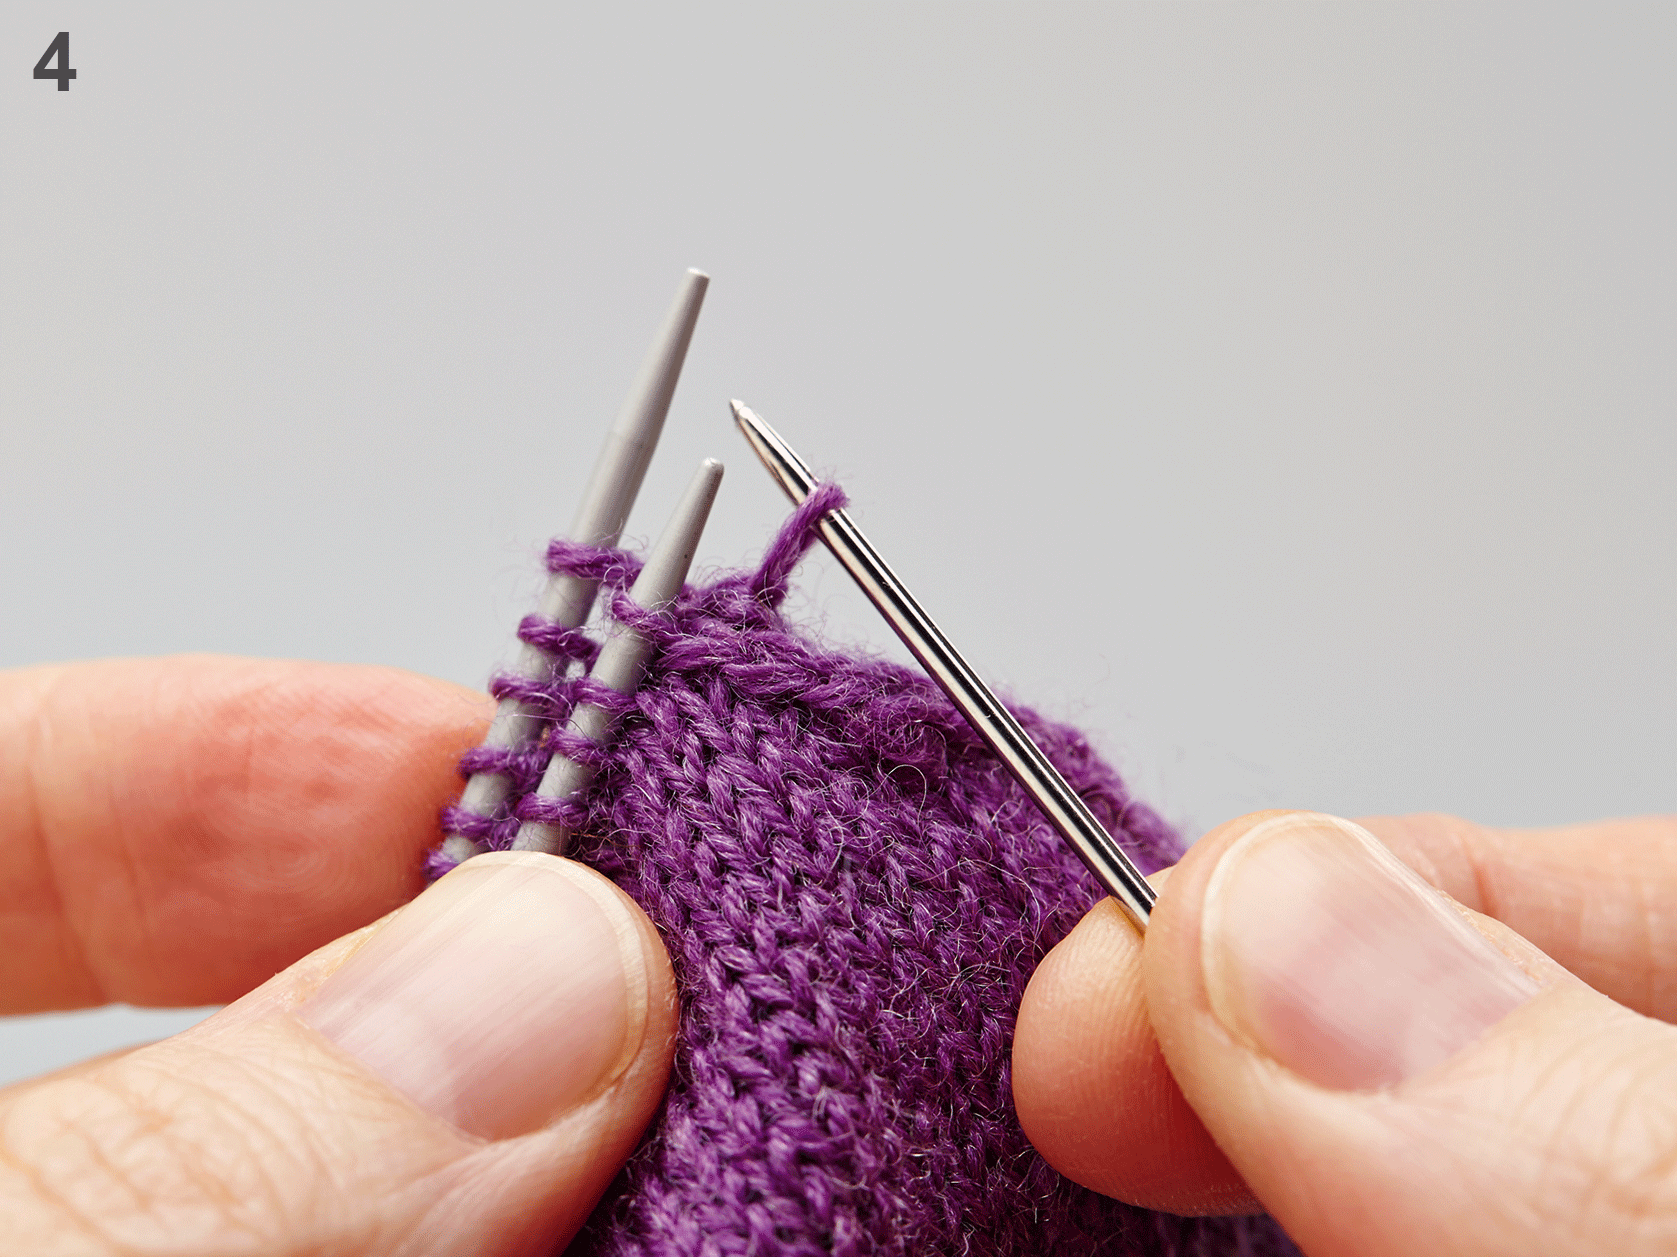
*Insert your sewing needle through the first stitch on the front needle as if to knit, drop this stitch off the needle and draw the yarn through.
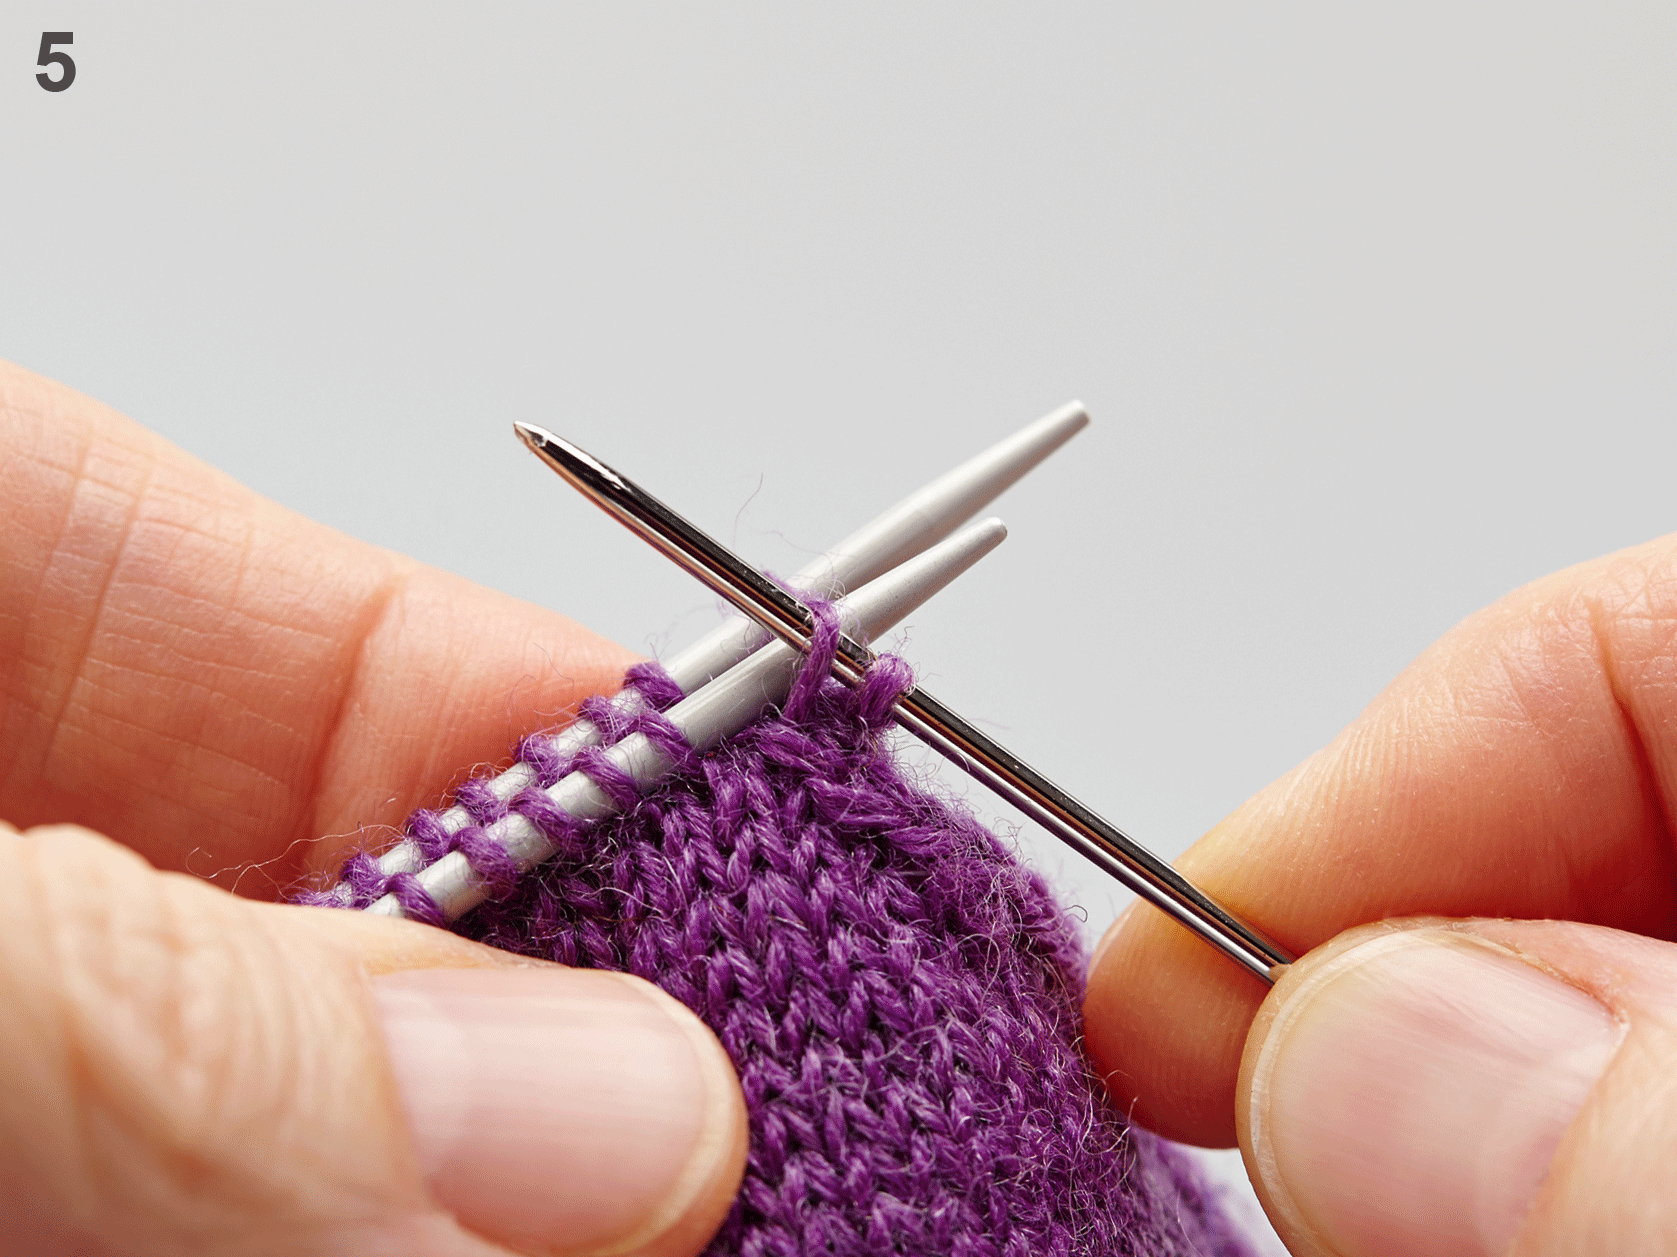
Step 5
Insert your sewing needle through the next stitch on the front needle as if to purl, leaving this stitch on the needle, and draw the yarn through.
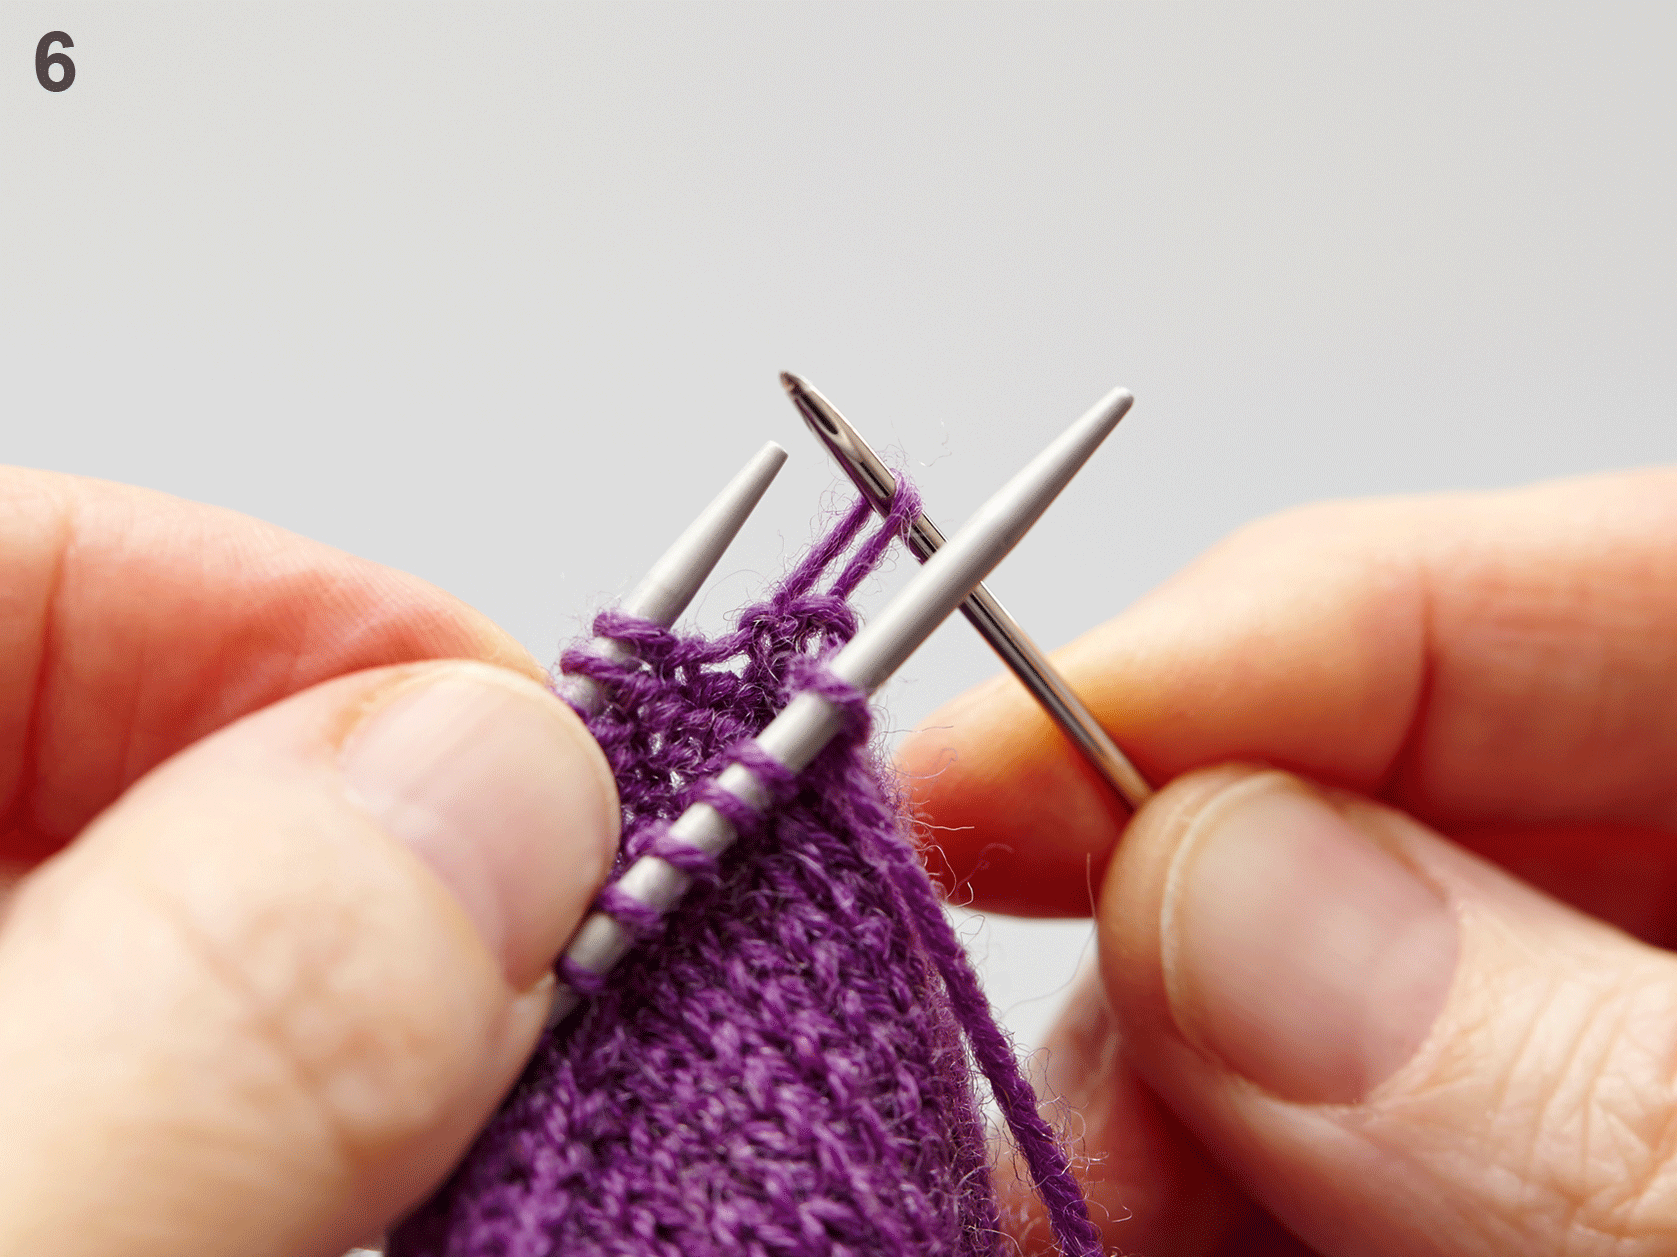
Step 6
Insert your sewing needle through the first stitch on the back needle as if to purl, drop this stitch off the needle and draw the yarn through.
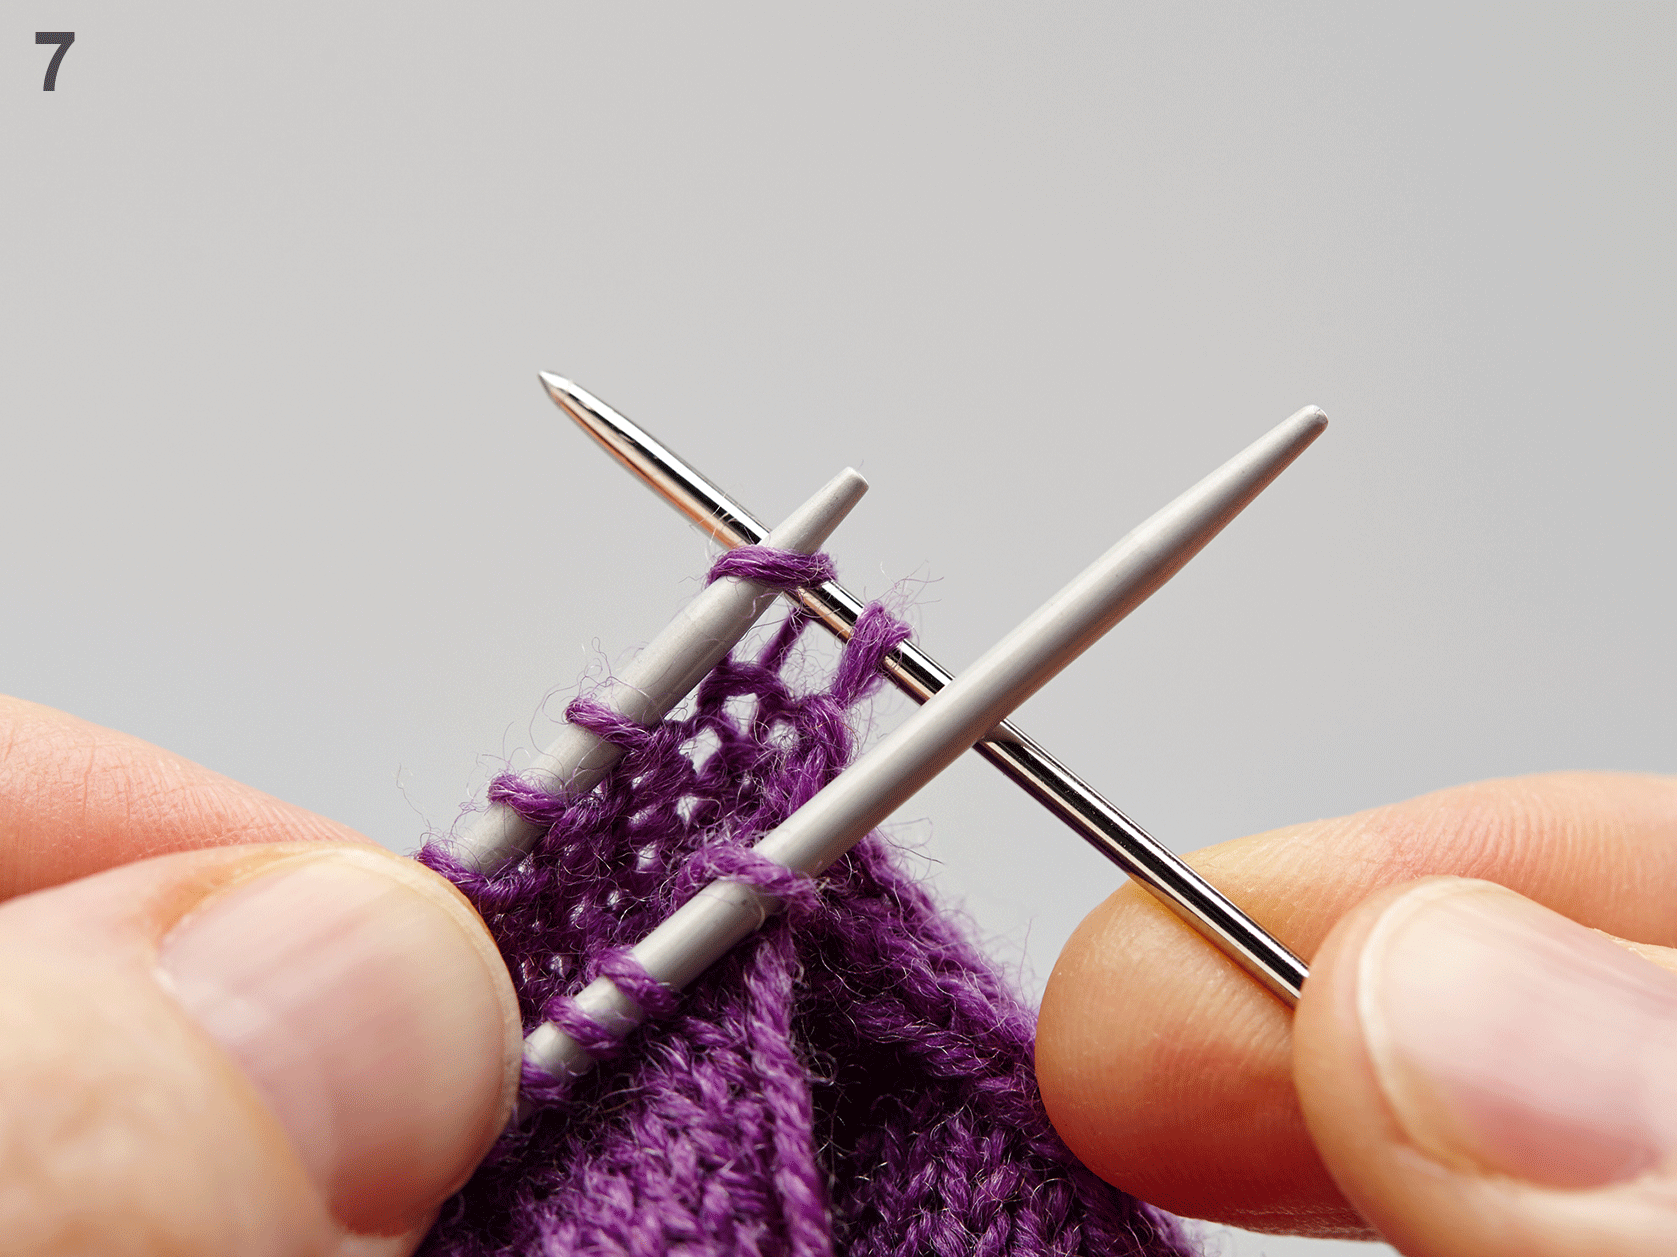
Step 7
Insert your sewing needle through the next stitch on the back needle as if to knit, leaving this stitch on the needle, and draw the yarn through.*
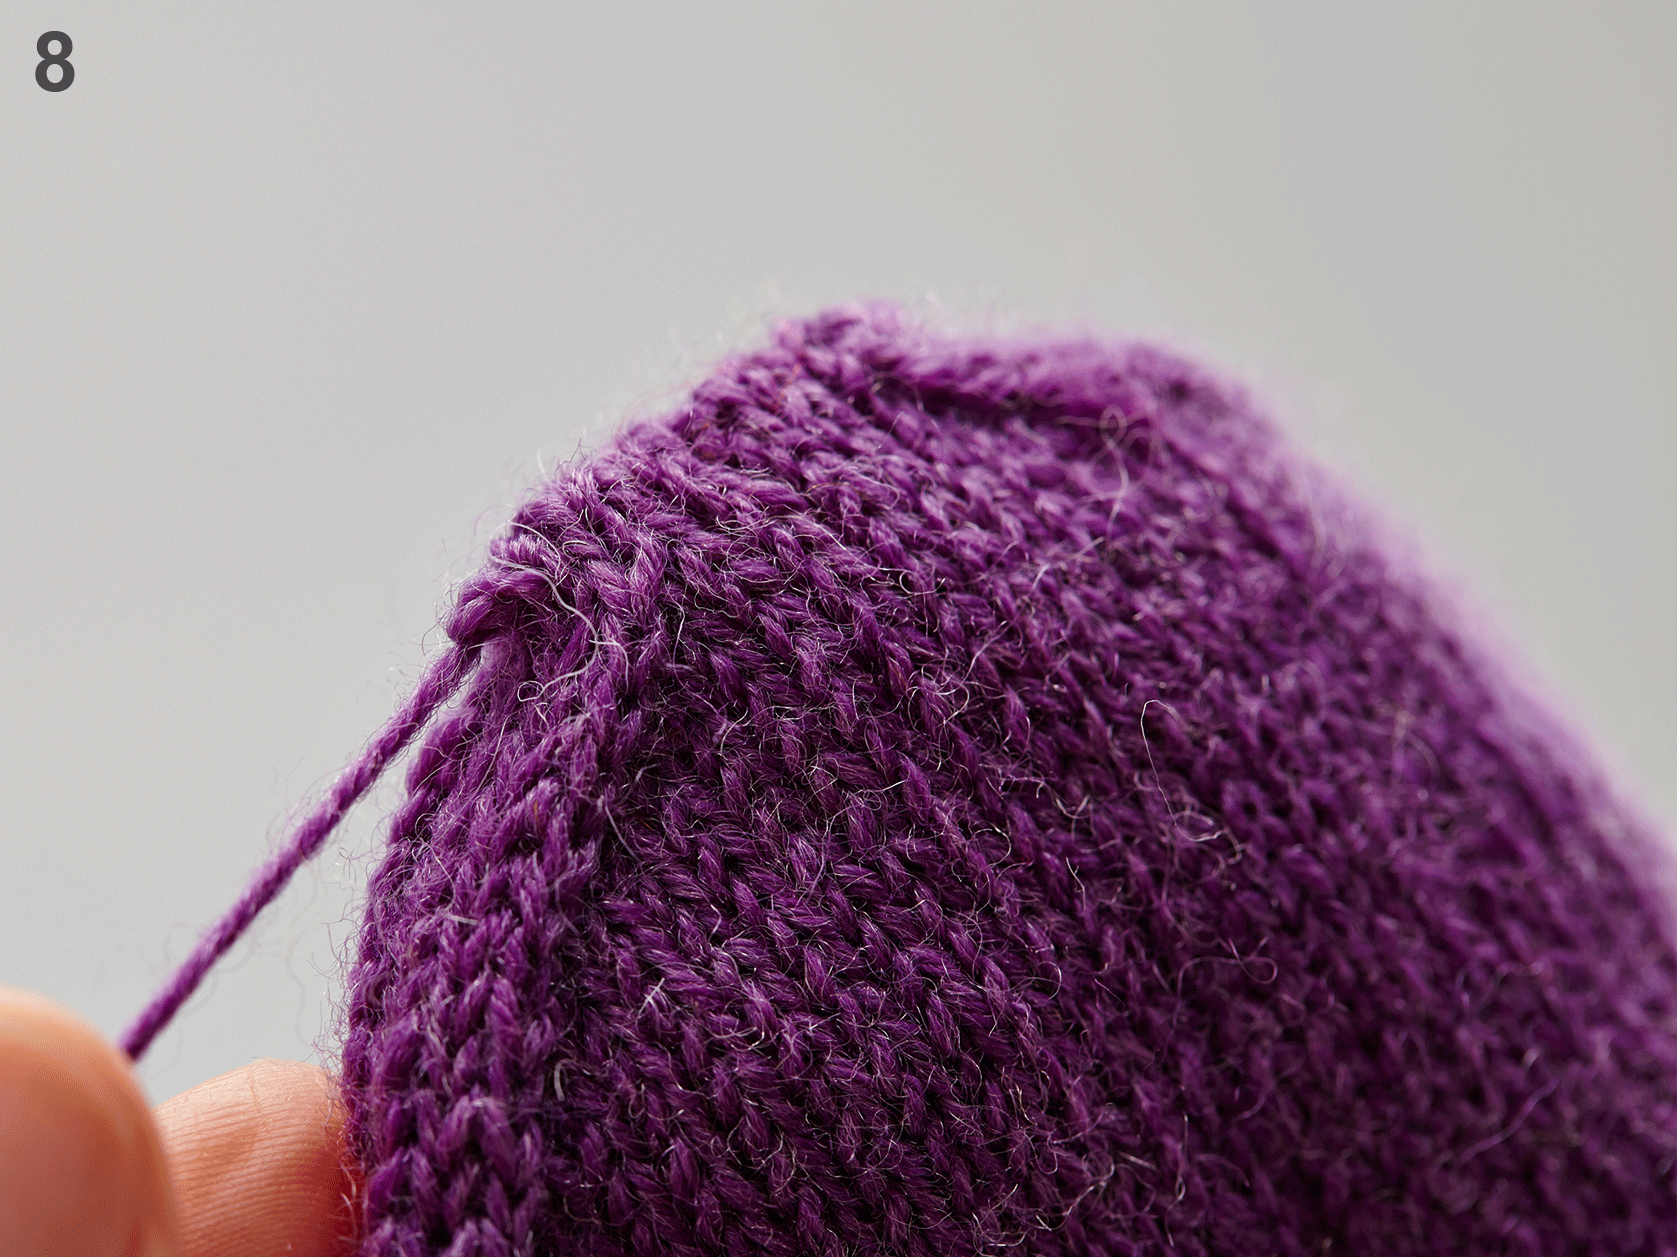
Step 8
Repeat steps 4 – 7 (from * to *) across the live stitches until they all are grafted together, keeping your tension as even as possible. On the last two stitches that are remaining, you’ll need to repeat Step 4 and then Step 6 to bring them off the needles.
While working this technique it can help to say to yourself, “knit, purl, purl knit”!
It can get a bit confusing just looking at your work, to figure out where you’ve left off in Kitchener stitch, so it’s best to not put your work down until you’ve finished one four-step repeat, then you’ll know where to start again.
