Most new knitters start by mastering garter stitch and stocking stitch, which involve working whole rows of knit or purl stitches.
The next step after that is to learn how to alternate between knit and purl stitches on the same row. This will create a rib stitch pattern, also known as ribbing, used for hems, cuffs and edges.
In this guide you can dive straight into our library of 24 rib stitches, where you'll find out how to knit lots of different, decorative types of ribbing. Or if you need to master the basic techniques first, skip to our guide on how to knit one purl one.
Here's what you'll find below:
What is a rib stitch?
The basic rib stitch is a combination of regular numbers of knit and purl stitches knitted along the same row.
The simplest rib is a 1x1 rib. You’ll usually see it written in patterns as ‘Work in a 1x1 rib’ or ‘*K1, P1; repeat from *’. Rib patterns usually (though not always) extend across the whole row.
What are rib stitches used for?
Rib stitches produce a flat, stretchy fabric that won’t roll up like stocking stitch. As a result, rib is often used at the edges of items, where it helps the fabric to lie flat and, for garments, creates a closer fit. It's perfect for making waistbands, cuffs, hems and necklines.
You can also use rib by itself as your main pattern. It will hold its shape well and means you can create figure-hugging garments without having to do too much shaping.
Rib stitches are ideal for hems, cuffs, neckbands and other edgings. They’re vital when you’re making socks, to help them stay up! They’ll also work with any yarn.
Library of rib stitches
Go beyond plain knit one purl one ribbing with our collection of rib stitch patterns for you to use in your knitting projects.
We have popular stitches including broken rib, fisherman’s rib and twisted rib, plus beautiful decorative patterns incorporating lace, cables and more.
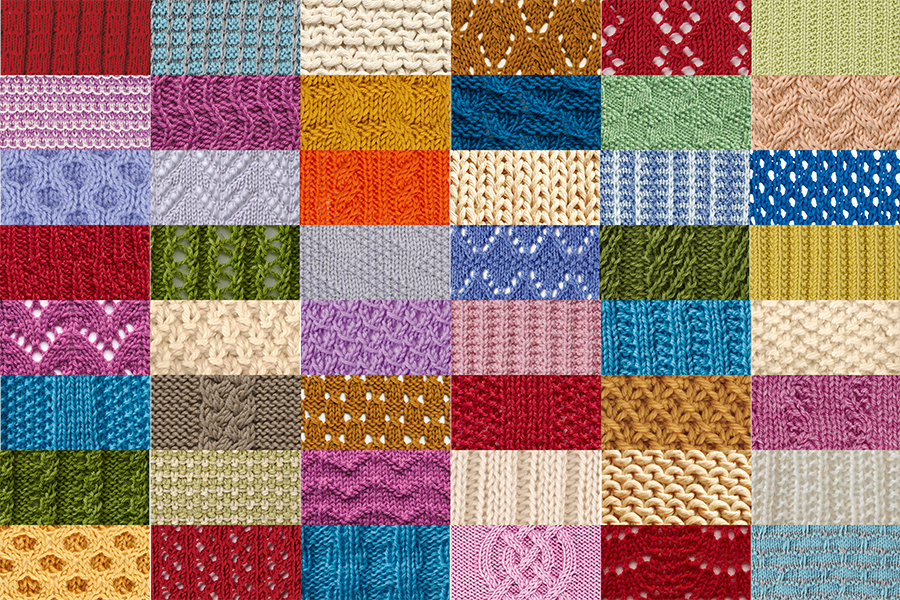
Why not knit up a variety of squares and sew them together to make a gorgeous stitch sampler throw? Use the needle size recommended on the yarn’s ball band and, following the tension guide, cast on enough stitches to make a 10cm square, or a slightly larger 15cm square. Knit every row in K1, P1 rib until you have a square, then cast off.
As you try out more stitches with more squares, your cosy throw will also become a handy stitch pattern reference guide – take a look at our lace knitting stitches, cable stitches and slip stitches for other patterns to add!

Here’s what you’ll find in our ribbing stitch library:
Bamboo rib stitch
Looking just like bamboo shoots, this easy-to-work stitch is ideal for beginners.
Cast on a multiple of 19 sts plus 6 sts. (Try 44 sts.)
Row 1 (RS) *K6, P6, K1, P6; rep from * ending K6.
Row 2 P6, *K6, P1, K6, P6; rep from * to end.
Row 3 *K6, P6, K1, P6; rep from * ending K6.
Row 4 Knit.
Rep Rows 1-4 to form pattern.
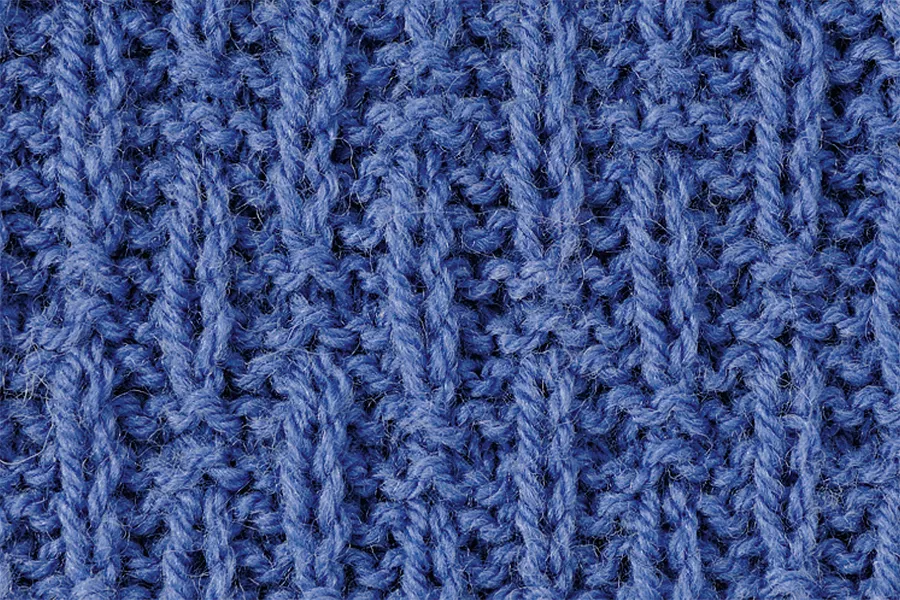
Broken rib version 1: columns
An interesting columnar texture is formed by fragmenting the rib stitches.
Cast on a multiple of 12 sts.
Rows 1 and 3 K2, (P2, K4) to last 4 sts, P2, K2.
Rows 2 and 4 P2, (K2, P4) to last 4 sts, K2, P2.
Rows 5 and 7 K1, (P4, K2) to last 5 sts, P4, K1.
Rows 6 and 8 P1, (K4, P2) to last 5 sts, K4, P1.
Broken rib version 2: mock rib
Feeling uninspired by basic rib stitches? This Broken Mock Rib, with its clever use of slipped stitches, is a fancy take on a classic! Plus it’s easy to knit – a great choice for beginners looking to try something new.
If you’re planning to use it for hems or cuffs, first check that it has the amount of stretch you want by knitting a swatch.
Note Slip sts purlwise with yarn at WS of work.
Cast on a multiple of 6 sts plus 3 sts. (Try 45 sts.)
Foundation row K1, P1, *K2, P1; rep from * to last st, K1.
Row 1 (RS) K1, sl1, *K2, sl1; rep from * to last st, K1.
Row 2 K1, P1, *K2, P1; rep from * to last st, K1.
Rows 3 & 4 As Rows 1 & 2.
Row 5 K1, sl1, *K5, sl1; rep from * to last st, K1.
Row 6 K1, P1, *K5, P1; rep from * to last st, K1.
Rows 7 & 8 As Rows 5 & 6.
Rows 9-12 Rep Rows 1 & 2 twice.
Row 13 K4, sl1, *K5, sl1; rep from * to last 4 sts, K4.
Row 14 K4, P1, *K5, P1; rep from * to last 4 sts, K4.
Rows 15 & 16 As Rows 13 & 14.
Rep Rows 1-16 to form the pattern.

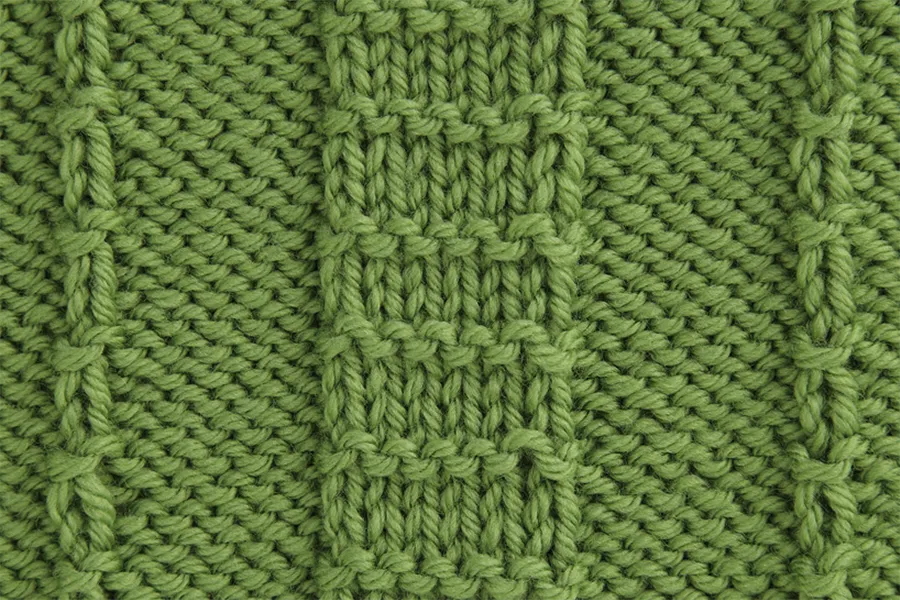
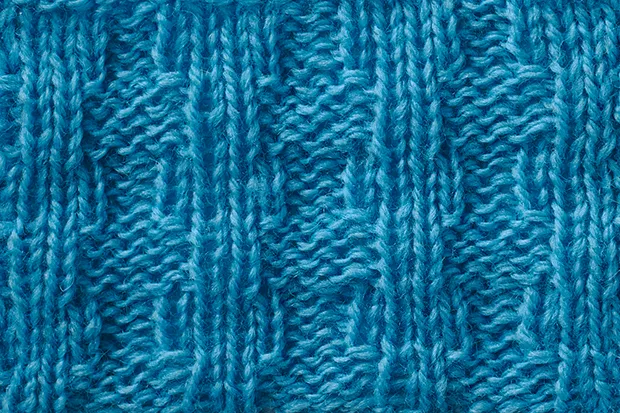
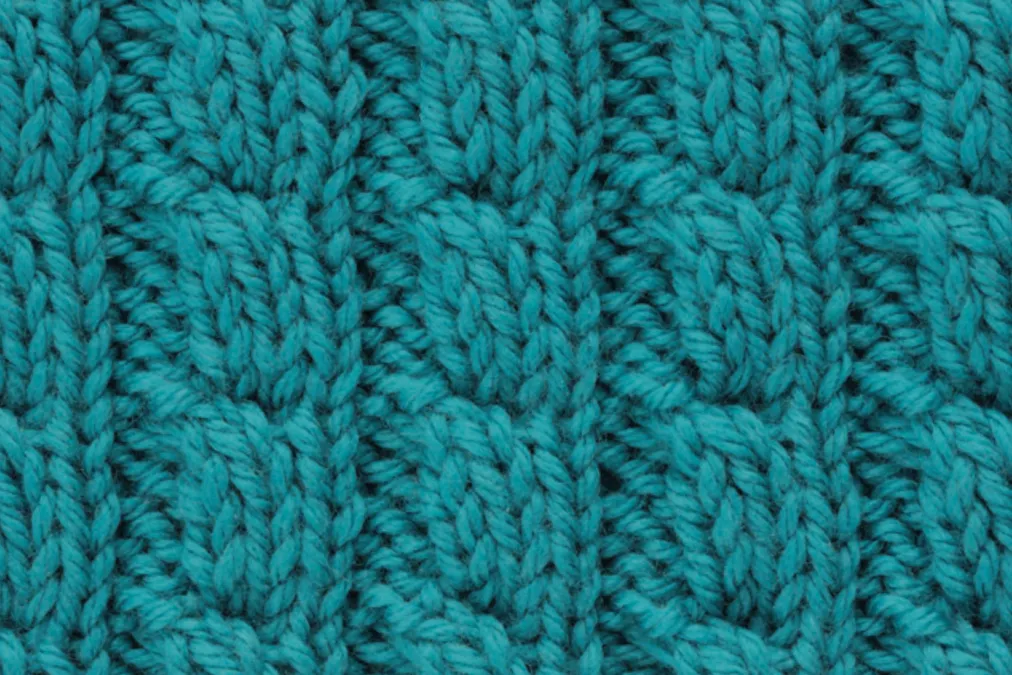
Chequered rib stitch
Add texture to dishcloths, blankets and more with this stylish rib stitch.
Cast on a multiple of 5 sts plus 1 st. (Try 31 sts.)
Row 1 (RS) K1b, *P1, K2, P1, K1b; rep from * to end.
Row 2 P1, *K1, P2, K1, P1; rep from * to end.
Row 3 K1b, *P4, K1b; rep from * to end.
Row 4 P1, *K4, P1; rep from * to end.
Rep Rows 1-4 to form pattern.
Chunky rib stitch
Super simple and beautiful, this is another great stitch for beginners.
Cast on a multiple of 5 stitches. (Try 25 sts.)
Row 1 K3, P2.
Row 2 K2, P3.
Repeat these 2 rows to desired length.

Corded rib stitch
This smart pattern gives a firm texture with little stretch.
Cast on a multiple of 4 sts 2.
Row 1 (RS) [K2, (Sl 1 pwise wyib, yo, K1, psso both sts)] to end.
Row 2 (K2, P2) to last 2 sts, K2.
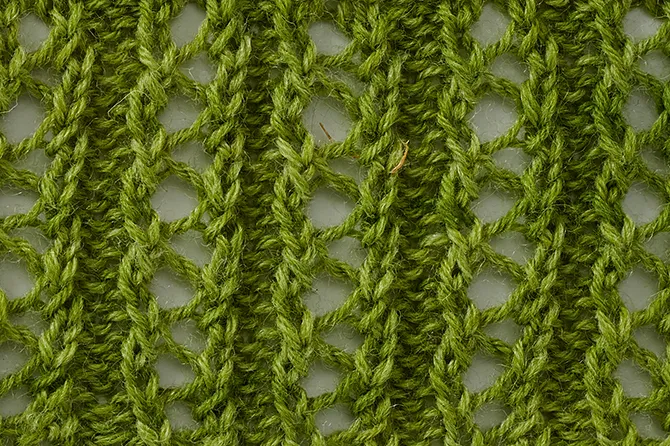
Double lace rib stitch
Columns of eyelets and lace alternate with the knit and purl columns for a pretty effect that would suit a summery garment.
Cast on a multiple of 6 sts 2
Row 1 (RS) K2, *P1, yo, K2tog tbl, P1, K2; rep from * to end.
Row 2 P2, *K1, P2; rep from * to end.
Row 3 K2, *P1, K2tog, yo, P1, K2; rep from * to end.
Row 4 P2, *K1, P2; rep from * to end.
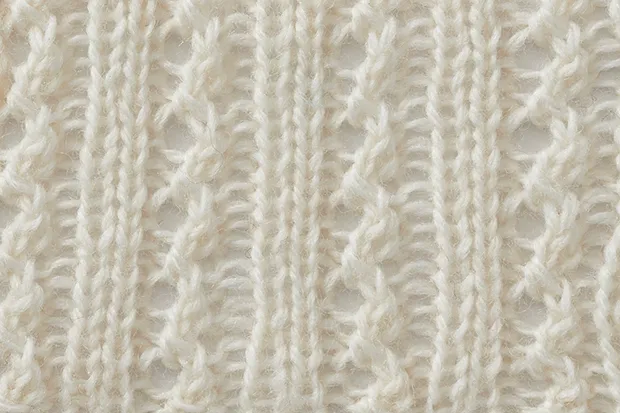
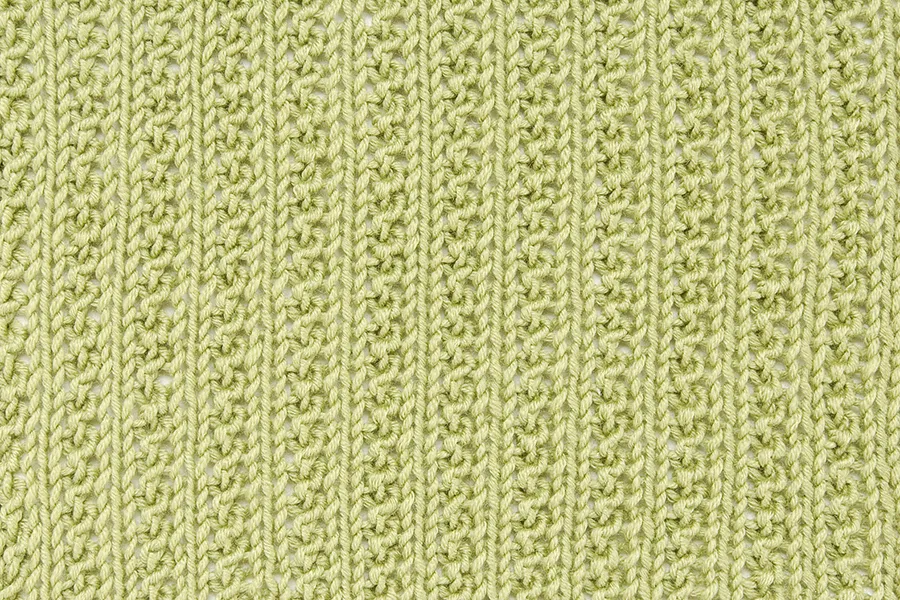
Eyelet rib stitch
Add a feminine touch to jumpers with this lacy rib stitch.
Cast on a multiple of 5 sts 2
Row 1 (RS) *P2, K1, yo, ssk; rep from * to last 2 sts, P2.
Row 2 *K2, P3; rep from * to last 2 sts, K2.
Row 3 *P2, K2tog, yo, K1; rep from * to last 2 sts, P2.
Row 4 Rep row 2.

Fancy slip stitch rib
A 2×3 rib where slip stitches alter the look of the columns of knit sts.
Cast on a multiple of 5 sts 2.
Row 1 (RS) P2, *K1, Sl 1 pwise, K1, P2; rep from * to end.
Row 2 K2, *P3, K2; rep from * to end.
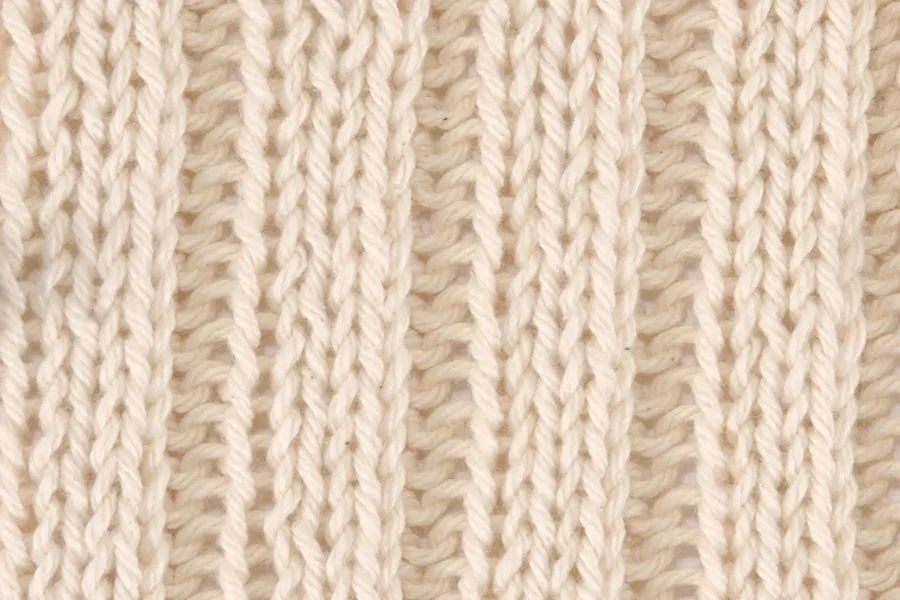
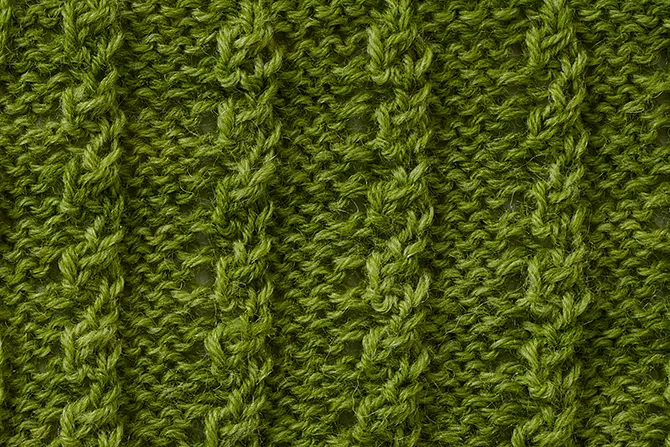
Farmer’s rib stitch
For a stitch with lots of textural detail, try farmer's rib.
Cast on a multiple of 4 sts plus 1. (Try 21 sts.)
Row 1 (RS) P1, *K3, P1; rep from * to end.
Row 2 K2, P1, *K3, P1; rep from * to last 2 sts, K2.
Repeat these 2 rows to desired length.
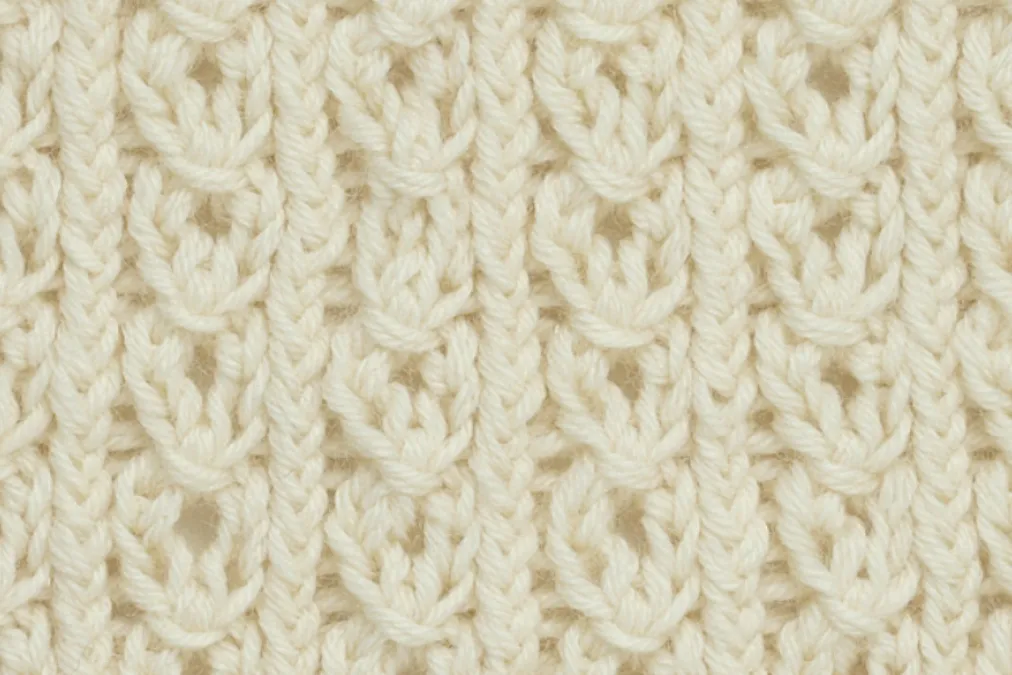
Figure of eight rib stitch
If you’re looking to add a clever and interesting bit of texture, you can’t go wrong with this Figure of Eight Rib Stitch!
This stitch pattern is so versatile it’s perfect for all kinds of projects. We think it would work particularly well on a jumper or cushion.
Cast on a multiple of 5 sts plus 3. (Try 48 sts.)
Row 1 (RS) *P1, k1tbl, P1, K2; rep from * to last 3 sts, P1, k1tbl, P1.
Row 2 K1, p1tbl, K1, *P2, K1, p1tbl, K1; rep from * to end.
Row 3 *P1, k1tbl, P1, K1, yo, K1; rep from * to last 3 sts, P1, k1tbl, P1.
Row 4 K1, p1tbl, K1, *P3, K1, p1tbl, K1; repeat from * to end.
Row 5 *P1, k1tbl, P1, K3, pass 3rd stitch on right-hand needle over first 2 stitches; rep from * to last 3 sts, P1, k1tbl, P1.
These 5 rows form the pattern.
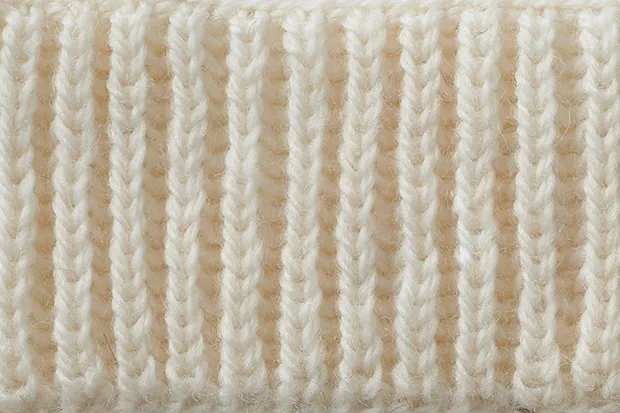
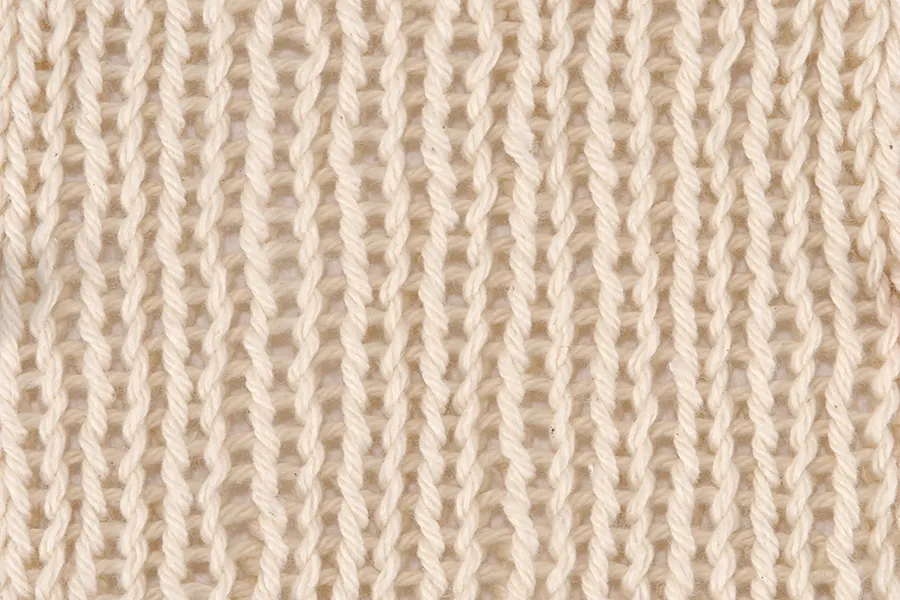
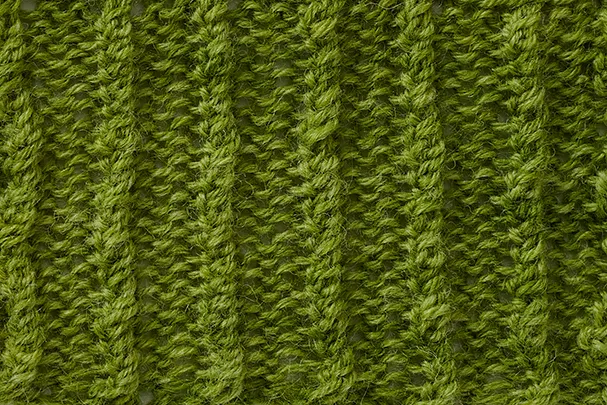
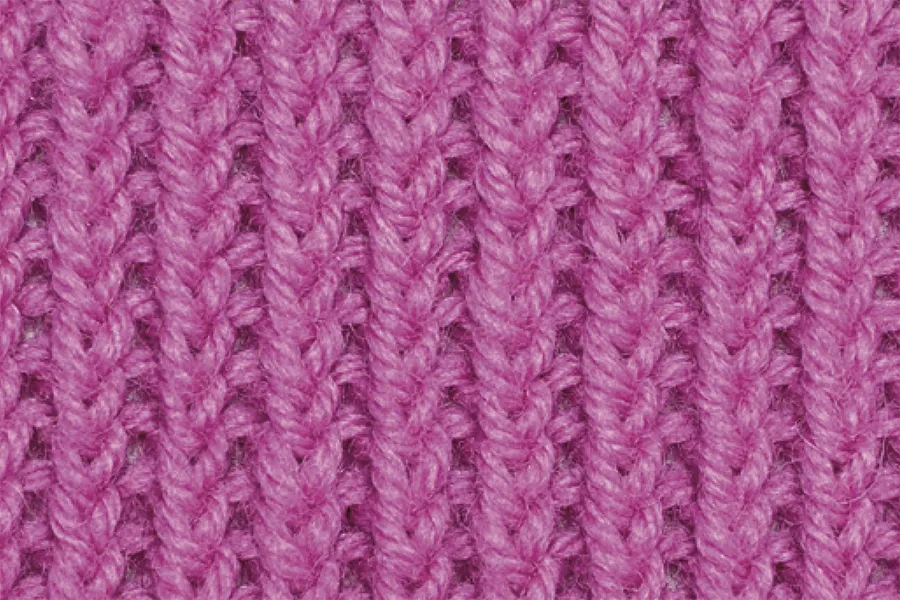
Fisherman’s rib stitch
This pattern creates a thick, squishy fabric with lots of volume, and the results resemble brioche stitch.
Special abbreviations:
K1b (knit one below) Knit into the stitch in the row below, then drop the stitch as usual.
Cast on a multiple of 2 sts 1.
Set-up row K1, *P1, K1; rep from * to end.
Row 1 P1, *K1b, P1; rep from * to end.
Row 2 K1, *P1, K1b; rep from * to end.
Repeat Rows 1 and 2 for pattern.
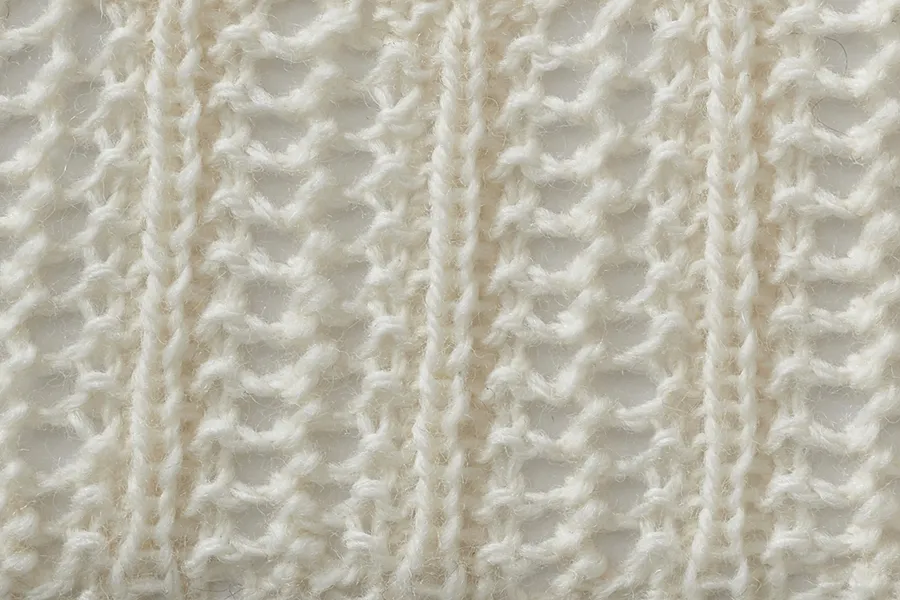
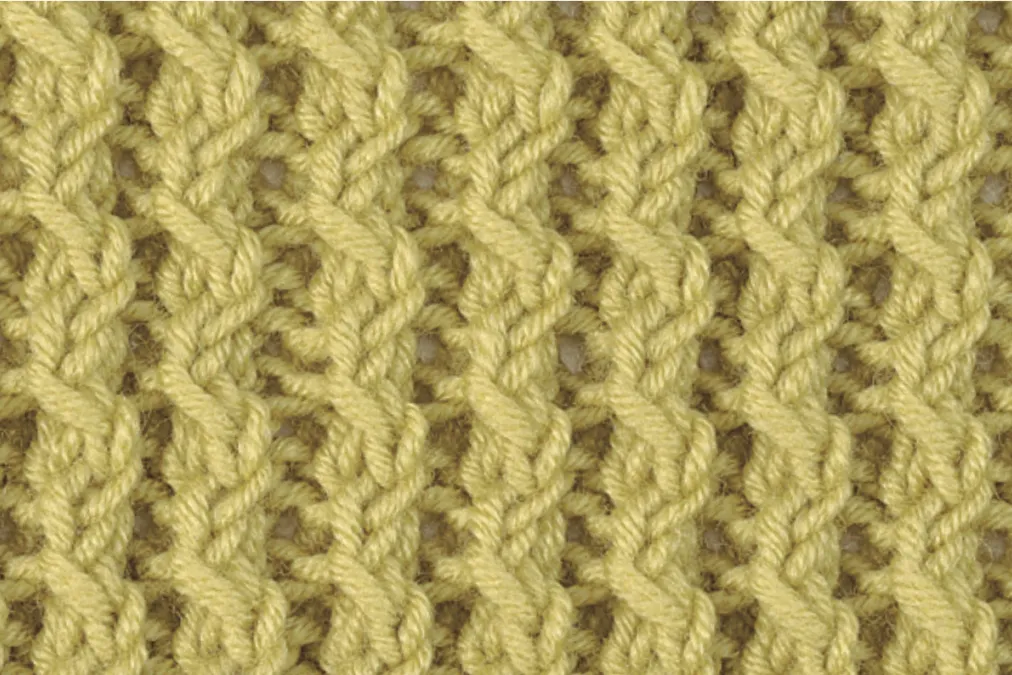
Herringbone lace rib stitch
Columns of lace make a lighter looking rib stitch.
Cast on a multiple of 7 sts.
Row 1 (RS) *K1, P1, K1, yo, p2tog, K1, P1; rep from * to last st, K1.
Row 2 P1, *K2, yo, p2tog, K2, P1; rep from * to end.
Rep rows 1 & 2 to form pattern.
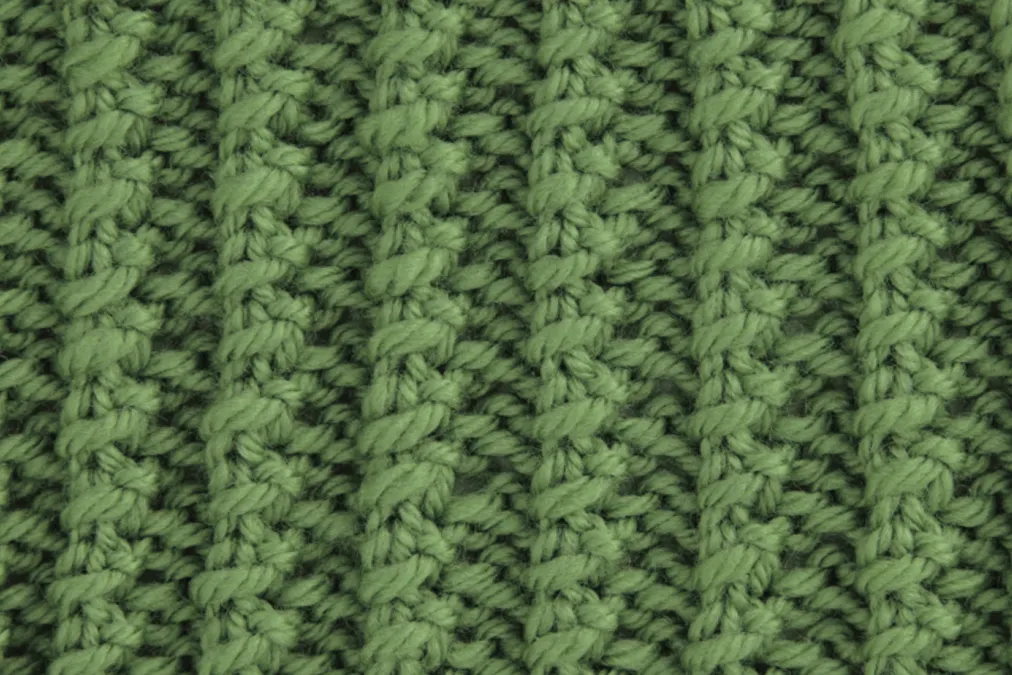
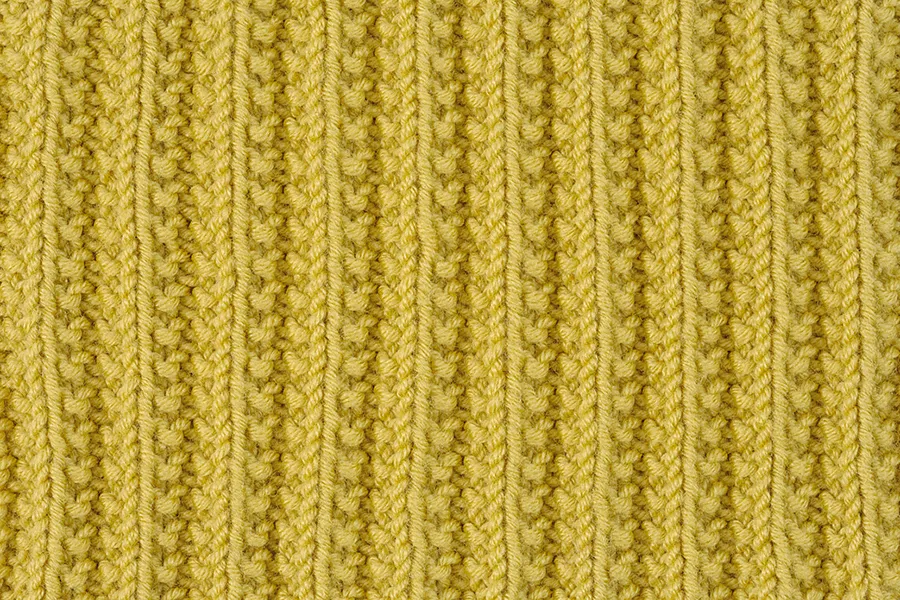
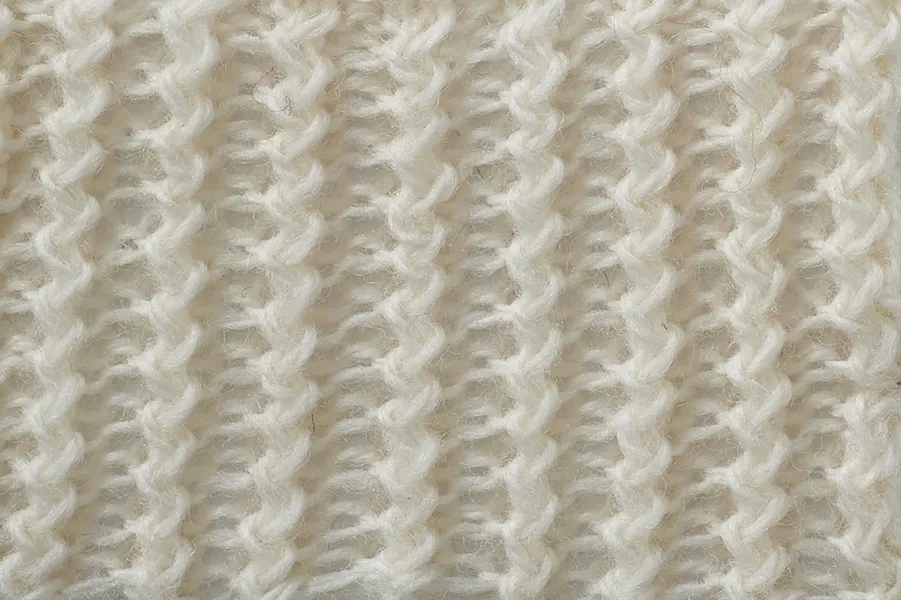
Knotted rib stitch
Rib stitches make intriguing textured stitch patterns for firm fabrics that also require a bit of stretchiness. When added to the waistline and sleeves it can take a knitted garment from looking distinctly handmade to professionally designed.
As well as being perfect for adding to garments, we also think this stitch is ideal for placemats and table covers, or anything that needs a bit of texture to keep it in place.
Cast on a multiple of 3 sts plus 2 sts. (Try 32 sts.)
Row 1 (RS) P2, *kfb, P2; rep from * to end.
Row 2 K2, *p2tog, K2; rep from * to end.
Rep rows 1 & 2 to form pattern.
Little cable rib stitch
Ribbing doesn’t have to be plain! Liven up your knits with this quick and easy cable rib.
We love a little bit of cable work: it gives such a great textural addition to any jumper or cardigan pattern. And the simple Little Cable Rib is a perfect stitch to get practising with! This stitch pattern would be ideal for a fancy cushion cover or even a blanket.
Cast on a multiple of 6 sts. (Try 42 sts.)
Row 1 (RS) *K3, P3; rep from * to end.
Row 2 *Knit the knit sts and purl the purl sts; rep from * to end.
Row 3 *K3, P3; rep from * to end.
Row 4 *Knit the knit sts and purl the purl sts; rep from * to end.
Row 5 *K1, LC, P1; rep from * to end.
Row 6 *Knit the knit sts and purl the purl sts; rep from * to end.
Rep rows 1-6 to form pattern.
Mock cable rib: version 1
A wide rib that has the appearance of cables, without the need for a cable needle.
Cast on a multiple of 5 sts 4.
Row 1 (RS) *P4, knit into front, back and front again of next st; rep from * to last 4 sts, P4.
Row 2 K4, *P3, K4; rep from * to end.
Row 3 *P4, K3tog; rep from * to last 4 sts, P4.
Row 4 K4, *P1, K4; rep from * to end.
Mock cable rib: version 2
A more delicate pattern than the mock cable stitch above.
Special abbreviations:
RT: K2tog, leaving both stitches on the left needle; K into first st again and drop both sts off the needle.
RT pwise: P into second st on needle, leaving st on needle; P into first and second sts together and drop both sts off the needle.
Cast on a multiple of 4 sts.
Set-up row *K2, P2; rep from * to end.
Row 1 *RT, P2; rep from * to end.
Row 2 *K2, RT pwise; rep from * to end.
Repeat Rows 1 and 2 for pattern.
Ric-rac rib stitch
Give basic rib a twist with this eye-catching stitch.
Cast on a multiple of 3 sts 1.
Row 1 P1, *knit into back loop of second st without slipping it off, knit into first st normally and slip off both sts, P1; rep from * to end.
Row 2 K1, *Wyif, purl the second st without slipping it off, purl the first st normally and slip off both sts, K1; rep from * to end.
Sailor’s rib stitch
Add some sophisticated texture to your knits with this Sailor’s Rib stitch. This pattern is perfect for cowls, scarves, bags, or anything you want to add some texture to.
Try swapping a plain rib with this stitch for something a little different.
Special abbreviations:
CR2B(F): cross 2 back (front) Knit into the back (front) of the second st on the left hand needle, then knit into the front of the first, slipping both sts off the needle at the same time.
C2F: cable 2 forward Sl next st onto cable needle and hold at front of work, K1 st then K st from cable needle.
Cast on a multiple of 3 sts plus 1. (Try 43 sts.)
Row 1 K1, *P2, K1; rep from * to end.
Row 2 (RS) P1, *CR2F, P1; rep from * to end.
Row 3 As row 1.
Row 4 P1, *CR2B, P1; rep from * to end.
These 4 rows form the pattern.

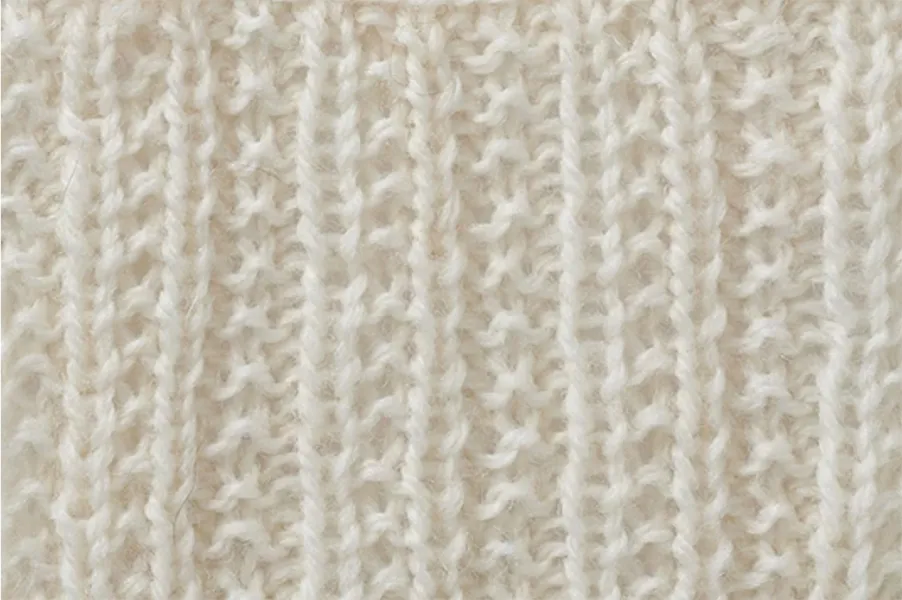
Speckled rib stitch
Easy to work, this beginner rib is a step up from your basic patterns.
Cast on a multiple of 5 sts. (Try 20 sts.)
Row 1 P2, *K3, P2; rep from * to end.
Row 2 K2, *P1, K1, P1, K2; rep from * to end.
Repeat these 2 rows to desired length.
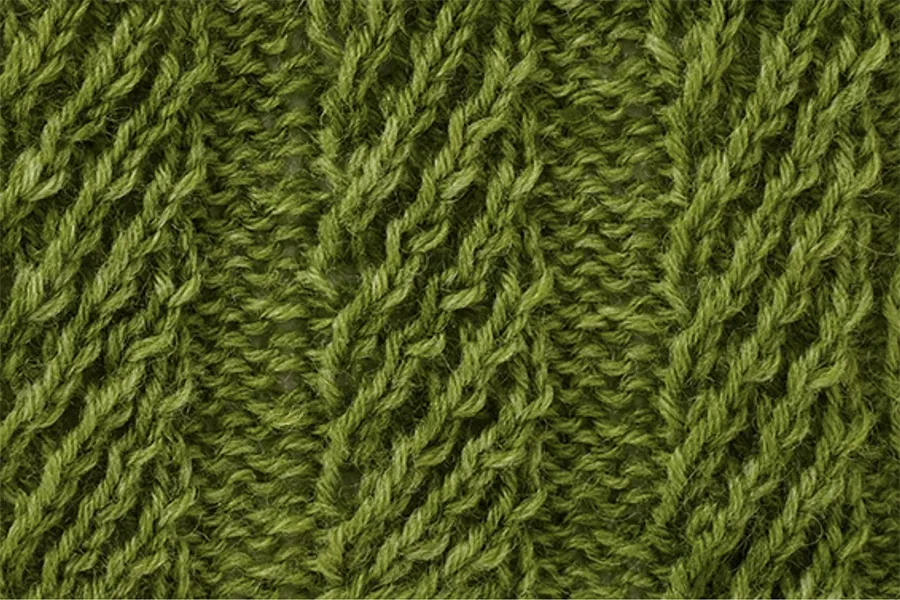
Twill rib stitch
This very elastic, attractive rib is produced by crossing through two stitches on right-side rows.
Cast on a multiple of 9 sts 3.
Row 1 *P3, (K2tog leaving st on needle, knit the first st again, then drop both sts off needle) 3 times; rep from * to last 3 sts, P3.
Rows 2 and 4 *K3, P6; rep from * to last 3 sts, K3.
Row 3 *P3, K1, (K2tog leaving st on needle, knit the first st again, then drop both sts off needle) 2 times, K1; rep from * to last 3 sts, P3.
Twin rib
Here, the columns of knit stitches are broken by purls to give extra texture; this pattern has plenty of stretch.
Cast on a multiple of 6 sts.
Row 1 (RS) *K3, P3; rep from * to end.
Row 2 *K1, P1; rep from * to end.
Twisted rib: version 1
Add some texture to your ribbing with this fancy twisted version.
Cast on a multiple of 3 sts. (Try 24 sts.)
Row 1 *K1, K the next stitch keeping it on the left-hand needle, yf, P this st and the next st tog, yb, repeat from * to end of row.
Row 2 Purl.
Repeat these 2 rows to desired length.
Twisted rib: version 2
Give a twist to your basic ribbed cuffs and edgings with this standout stitch.
Cast on a multiple of 2 sts 3. (Try 47 sts.)
Row 1 K1, *K1 tbl, P1; rep from * to last 2 sts, K1 tbl, K1.
Row 2 K1, P1 tbl, *K1, P1 tbl; rep from * to last st, K1.
Repeat these 2 rows to form pattern.
Marvellous moss stitch
Love rib stitch? We think you'll love moss stitch too! Give it a go with our beginner's guide and stitch pattern collection.
Rib stitch knitting video
If you like to see hands in motion, take a look at our how to rib stitch knitting video, which will walk you though knitting 2×2 rib (alternating between two knit stitches and two purl stitches). It's perfect for an easy, cosy scarf.
How to knit one purl one
When you knit one purl one, alternating one knit stitch and one purl stitch, you’ll create a stretchy 1x1 rib fabric that keeps its shape yet remains flexible.
To practise knitting rib stitch, cast on an even number of stitches and start with a knit stitch on every row. Work knit one stitch (K1), purl one stitch (P1) until you reach the end of the row.
You might have noticed that when you knit stitches, you keep the working yarn at the back of the fabric, and when you purl stitches, the yarn stays at the front of the fabric.
When you switch between knit and purl stitches on the same row, you need to move the working yarn into the correct position (back for knit and front for purl), ready to work the next stitch. You’ll need to move the yarn like this between every stitch.
How to identify rib stitches
As your piece of rib knitting grows, the knit and purl stitches will form defined columns.
Don’t forget, whichever row you’re on, you will need to move your yarn to the front of the work before you purl, and then take it to the back again before you do a knit stitch.
If you think you’ve gone wrong, just look down the column or ‘rib’ to make sure the knit stitch ‘v’s and the purl bumps are in the right positions. Here's what the stitches and rows look like in knit one purl one ribbing:
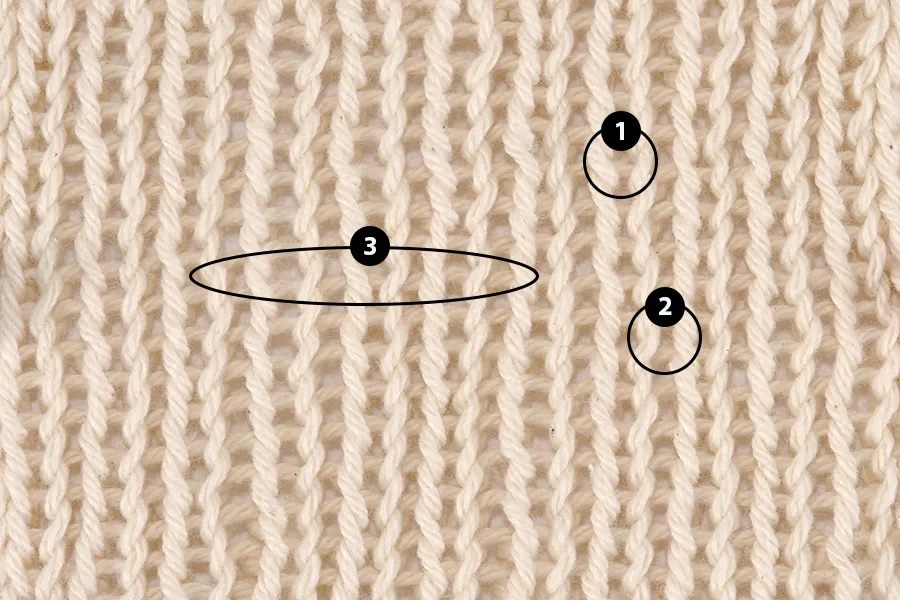
1. One knit stitch
Each knit stitch forms a V-shape that’s prominent on the rib fabric. If you’re not sure which stitch you’re working next, look at whether the stitch on the row below is a V-shape (knit) or a wavy bump (purl).
2. One purl stitch
While you’re knitting, you’ll see the purl bumps clearly. Once the fabric is off the needles, they’ll sink in and those stitches will be more prominent on the reverse.
3. One rib row
Each row of rib includes a combination of knit and purl stitches. The knit stitches will look more raised than the purl stitches. When you need to count rows of rib, just treat it like stocking stitch and count the rows of ‘V’s on one side.
Just remember, where you’ve worked a knit stitch on one side of the knitting, you will need to work a purl stitch into the other side, and vice versa.