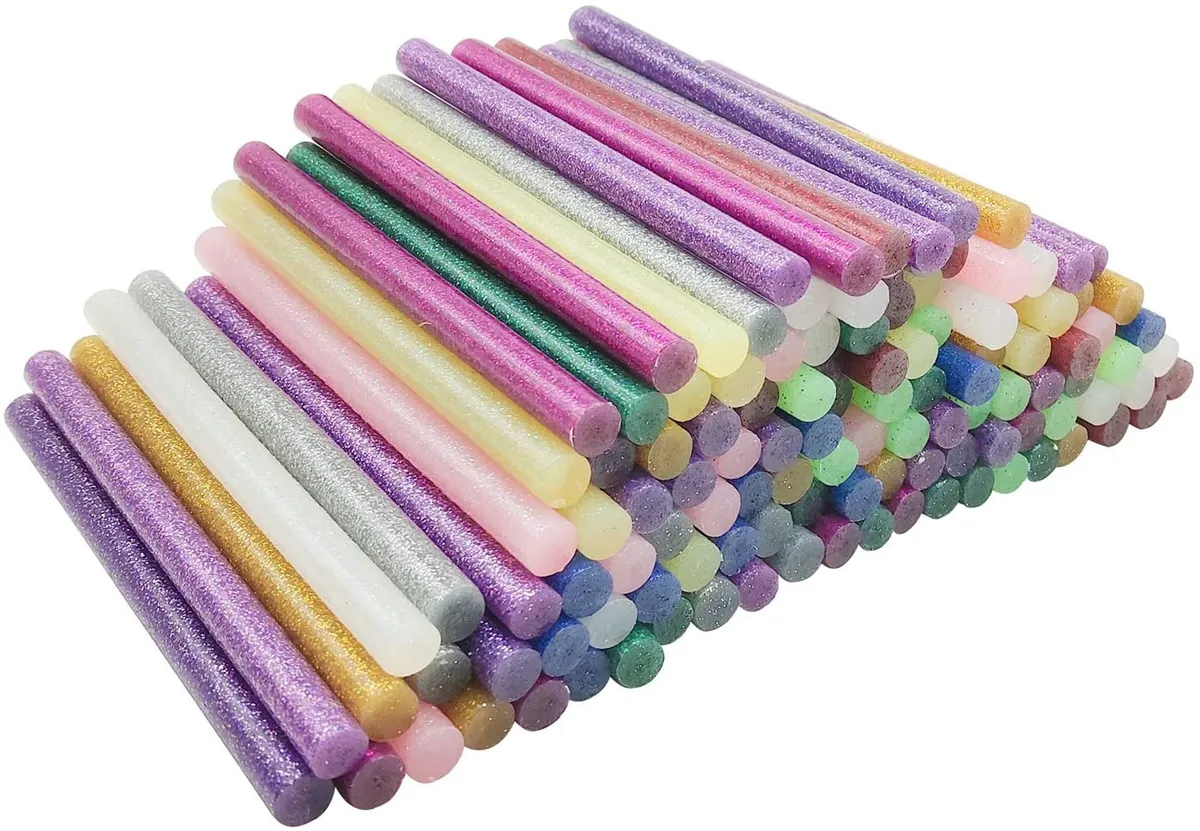
Glue guns are an easy, affordable and practical way to help you craft, and there are so many great glue gun projects to give you inspiration. The great advantage of using hot glue is that it dries quickly for a strong and clear hold. Another advantage is in the way that the glue is applied - sticks of solid glue are heated up in the barrel of the glue gun so that the glue stick melts, and hot glue is squeezed out as you press the trigger. The glue itself comes in lots of different colours, just make sure you get the right diameter to fit your glue gun.
Most glue guns feature a kickstand, so you can stand the glue gun up safely while not using it. You can pick up a cheap glue gun for around £5, but if you don't like wires, why not consider a battery operated glue gun? For a guide to buying your glue gun, check out our guide to the best glue guns for craft.
If you’re in a crafty mood, why not check out the best glue gun and best die-cutting machine. Thinking about buying a craft printer? Check out our review of the best printer for card making.
We love seeing what you make, so don’t forget to share your craft projects with us on Instagram, Facebook, or Twitter, too!
Best glue gun projects
If you're looking for the best hot glue gun crafts with step-by-step tutorials, we have rounded up some of our favourite craft projects to make with a hot glue gun and paper.
DIY glue gun crystals
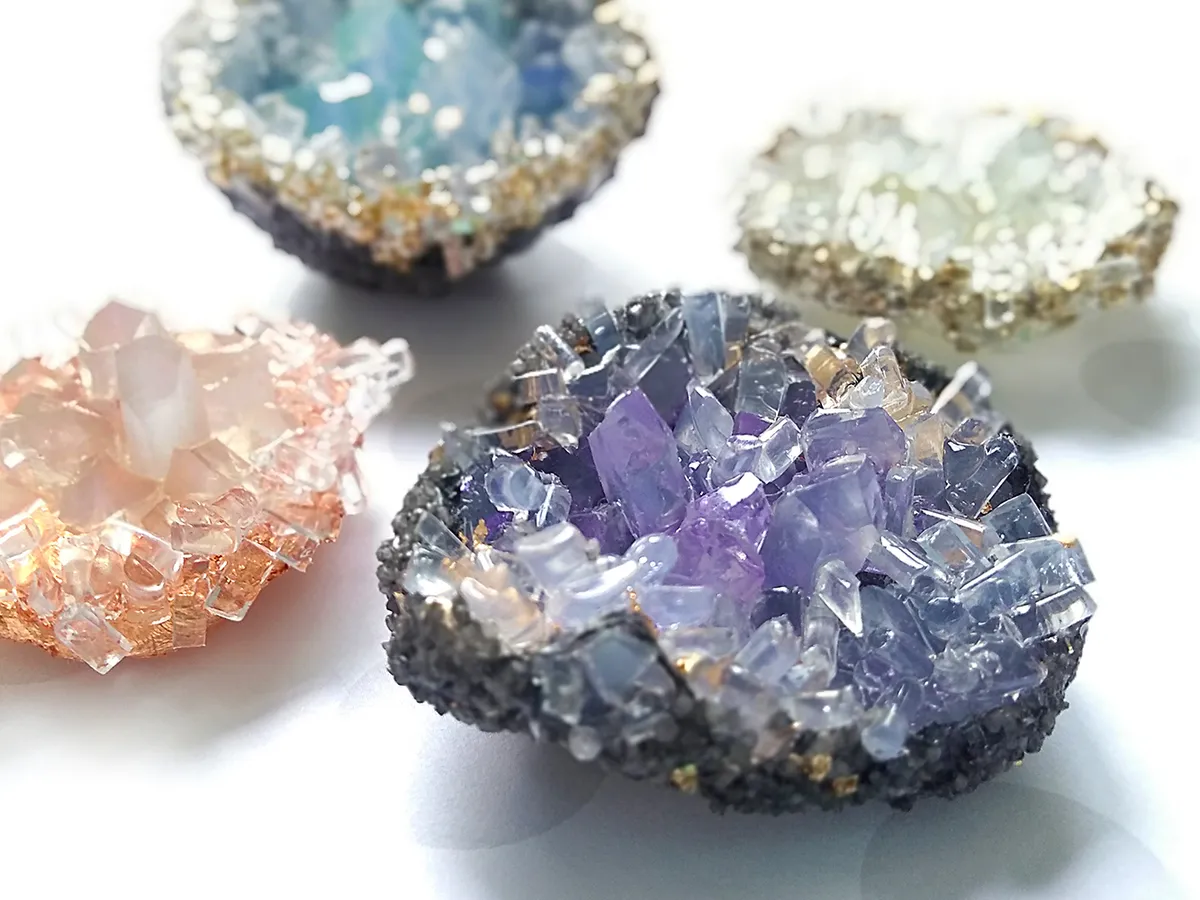
If you're looking for the wow factor, then this project is for you! Make these realistic geodes using hot glue, embellishments and colours finished with a gloss or lacquer - get the full photographic step-by-step tutorial over at The Studio.
DIY plastic bottle wreath
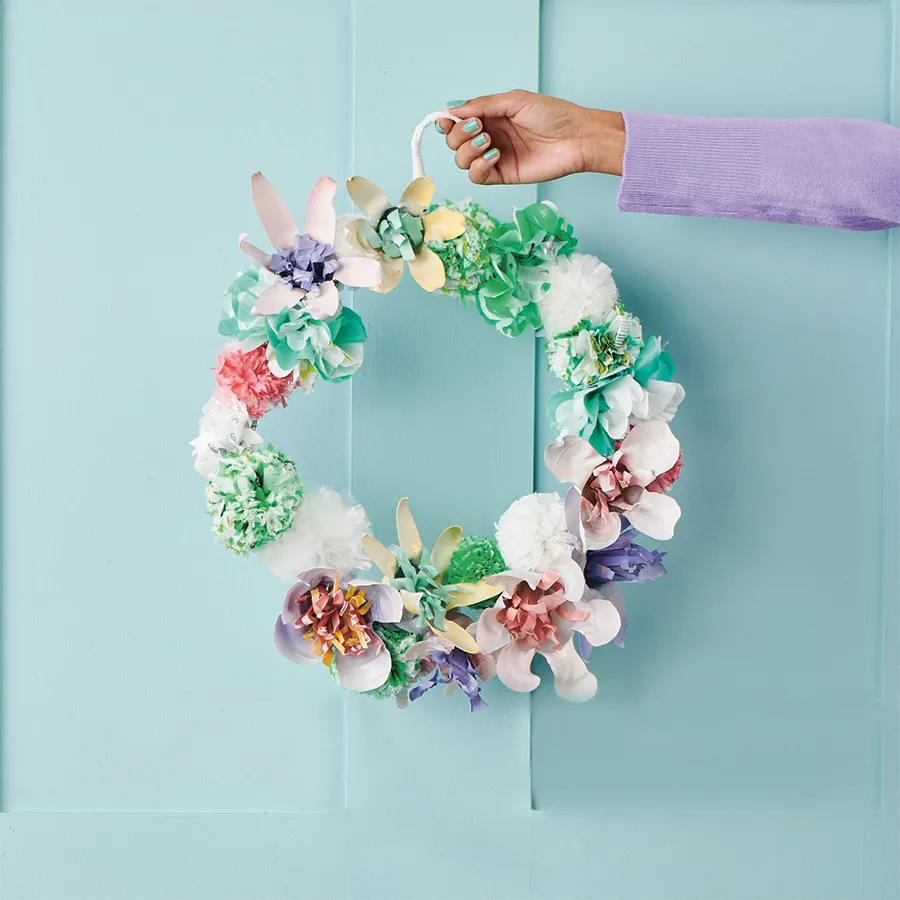
Recycle your old plastic bags into this brilliant upcycled wreath! Give your single-use plastic a creative end by following our free step-by-step plastic bottle wreath tutorial.
Glue gun project: Paper rose

Download your free templates, cut them from white (or coloured card) and grab your glue gun to make this realistic paper rose. Hot glue is ideal for this project as it dries quickly, so you can layer up the petals quickly and easily.
Glue gun "wax" seals

Did you know you can get the wax seal look by using hot glue? Why not batch-make glue gun wax-imitation seals for one of the best glue gun crafts - get the full DIY "wax" seal tutorial over at Stamptitude.
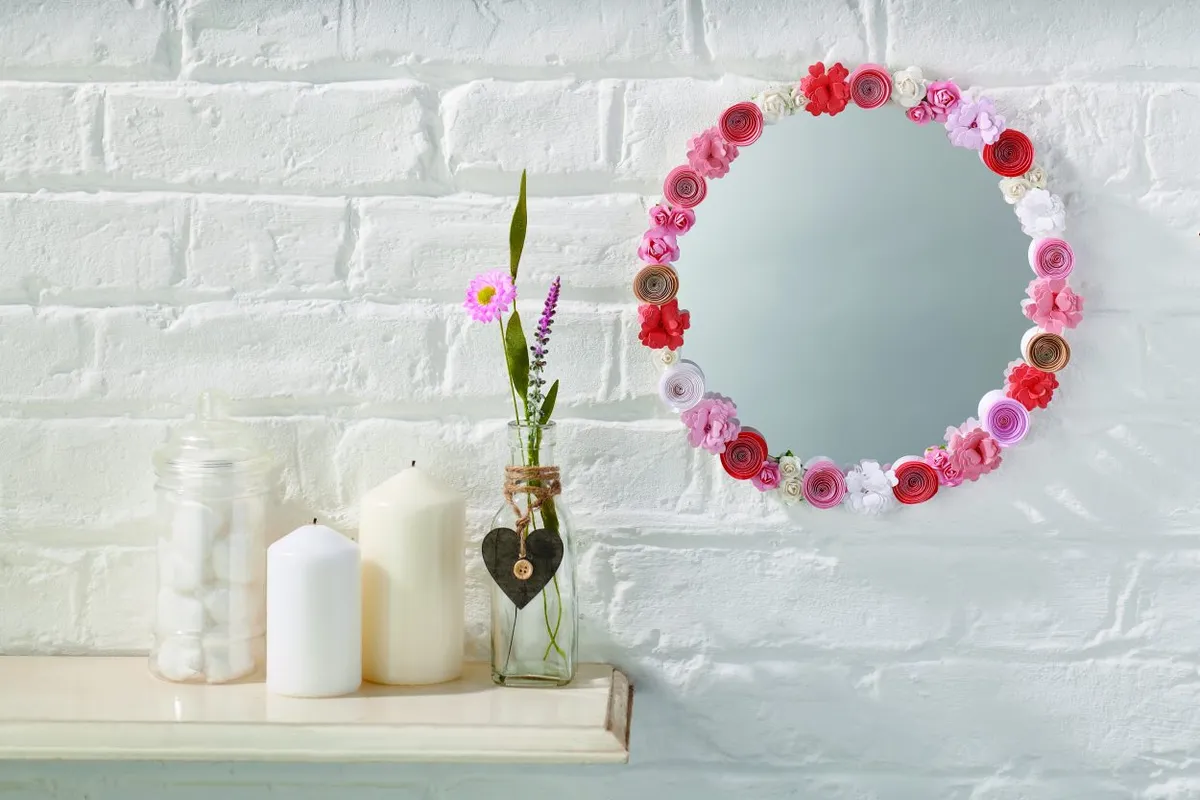
Glue gun crafts floral mirror
For a fun glue gun idea, how about giving your home or bedroom an instant update with Zoe Patching's beautiful flower mirror. You need slightly stronger glue to stick the flowers to the mirror, so this is an ideal hot glue gun craft. It's a quick and easy way to give a tired-looking mirror a new lease of life! You can either stick the flowers directly to the mirror or make a border first out of card and stick the flowers to that. In three easy steps, we'll show you a really easy way to make a paper flower with a glue gun.
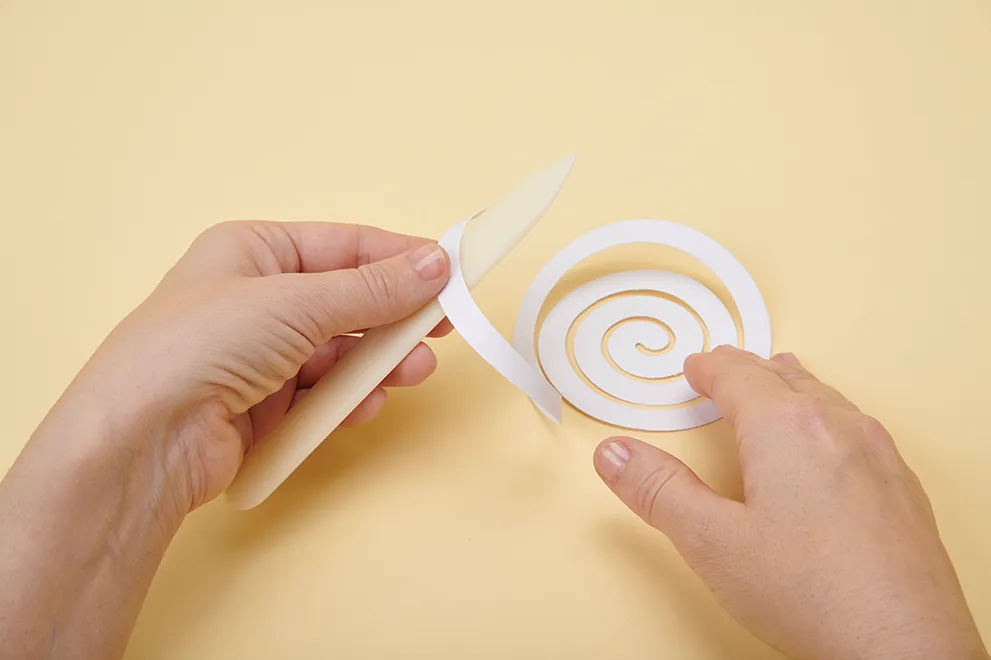
Step 1
Cut a spiral out of paper. Experiment with different patterns and colours as you'll end up with lots of different colour flowers. Starting with the outside 'tail' of the spiral, start curling the paper. You can use a bone folder if you have one, or you can curl the paper round a pen or pencil.
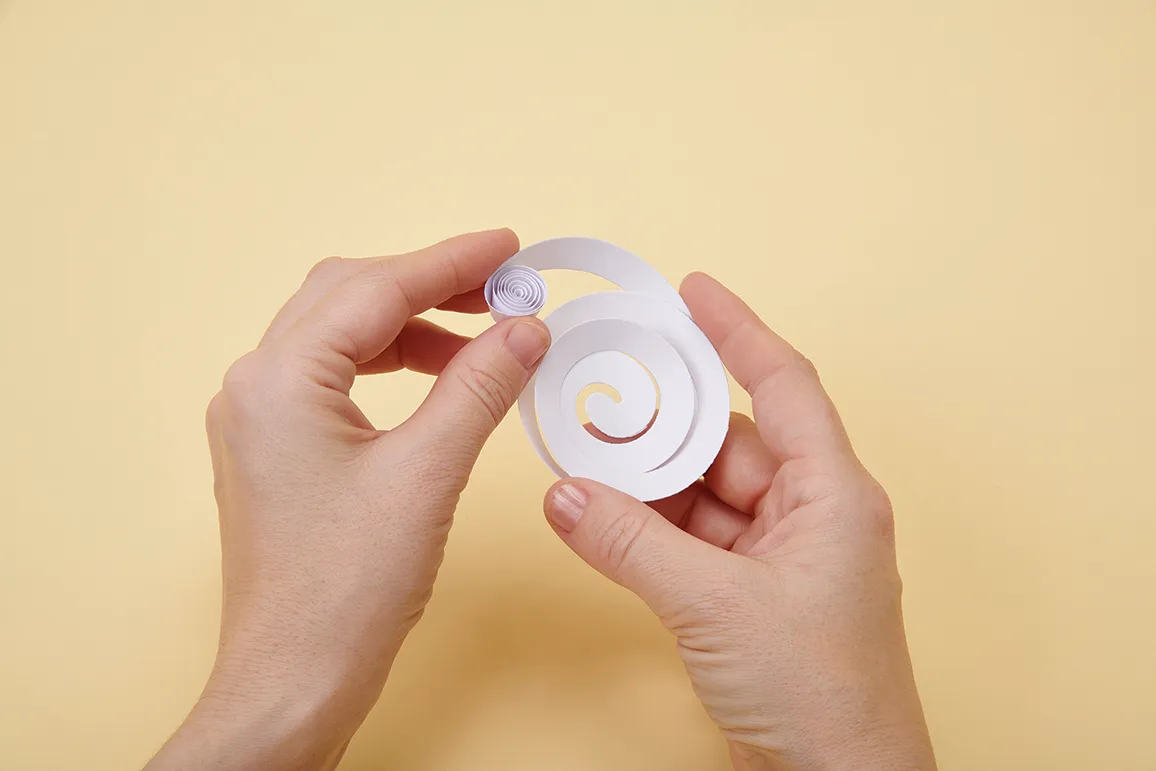
Step 2
Now that the paper is pre-curled, starting from the outer 'tail' again, coil the paper by rolling it between your fingers. Keep the coil tight and gradually work your way along the spiral until you reach the end.
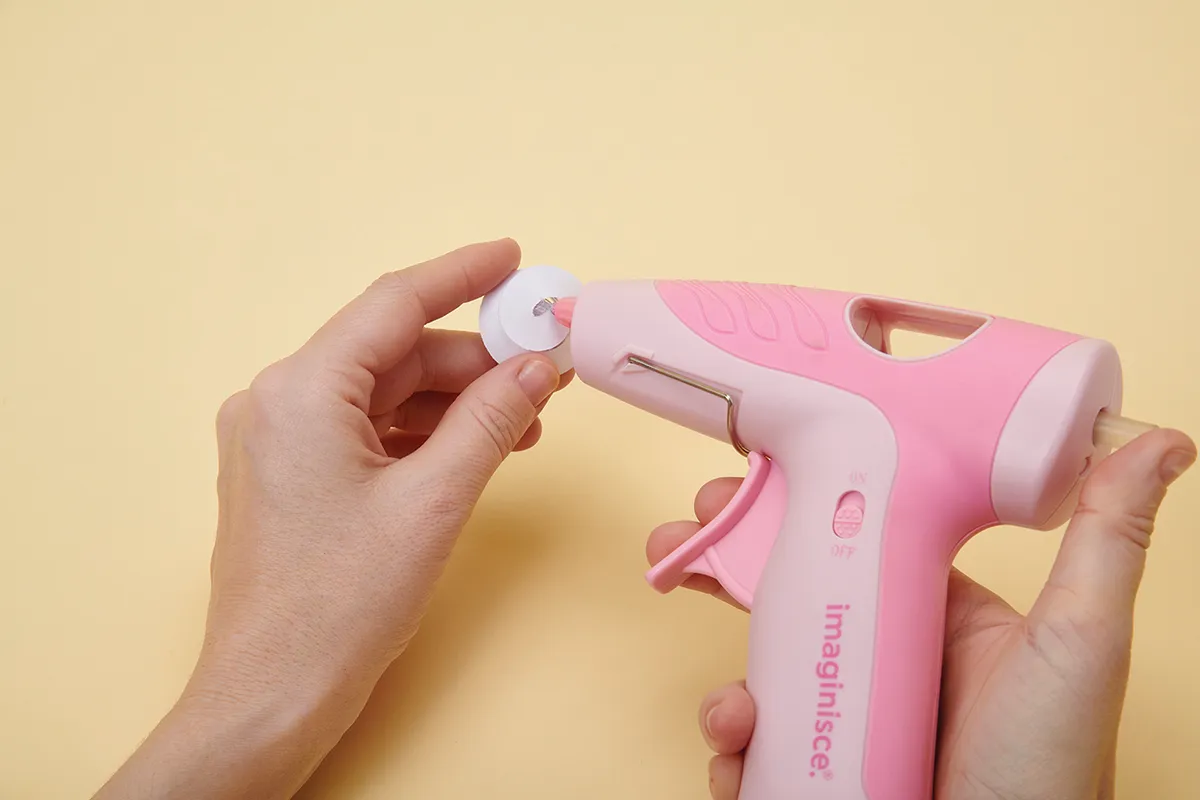
Step 3
Turn the spiral over, and add glue to the reverse of the paper spiral. Stick the flower to your cardboard frame if you're using one, or directly onto the mirror if not. This is a really fun glue gun project - just repeat to create more flowers!
Glue gun project: DIY Halloween decorations
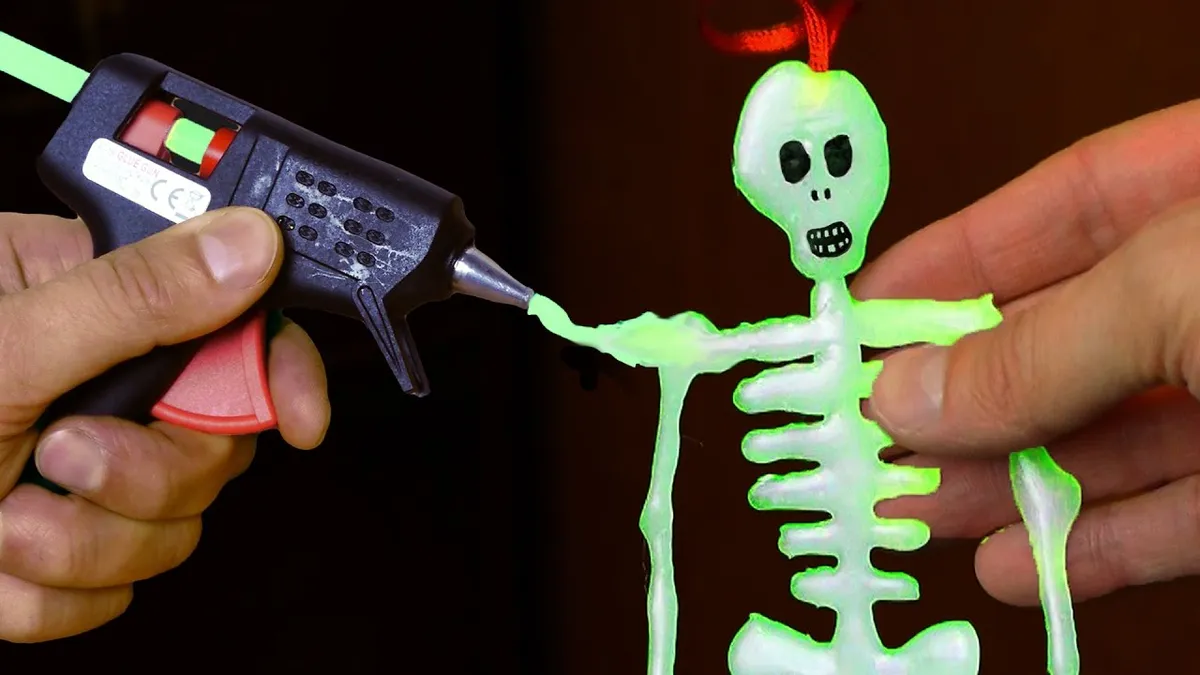
This one is fun. Get yourself some glow-in-the-dark hot glue and use it to make some DIY Halloween decorations, like this spooky skeleton, or how about a glow-in-the-dark cobweb? Get the full tutorial for this (and more) by Dave Hax.
Glue gun craft idea: DIY crystals
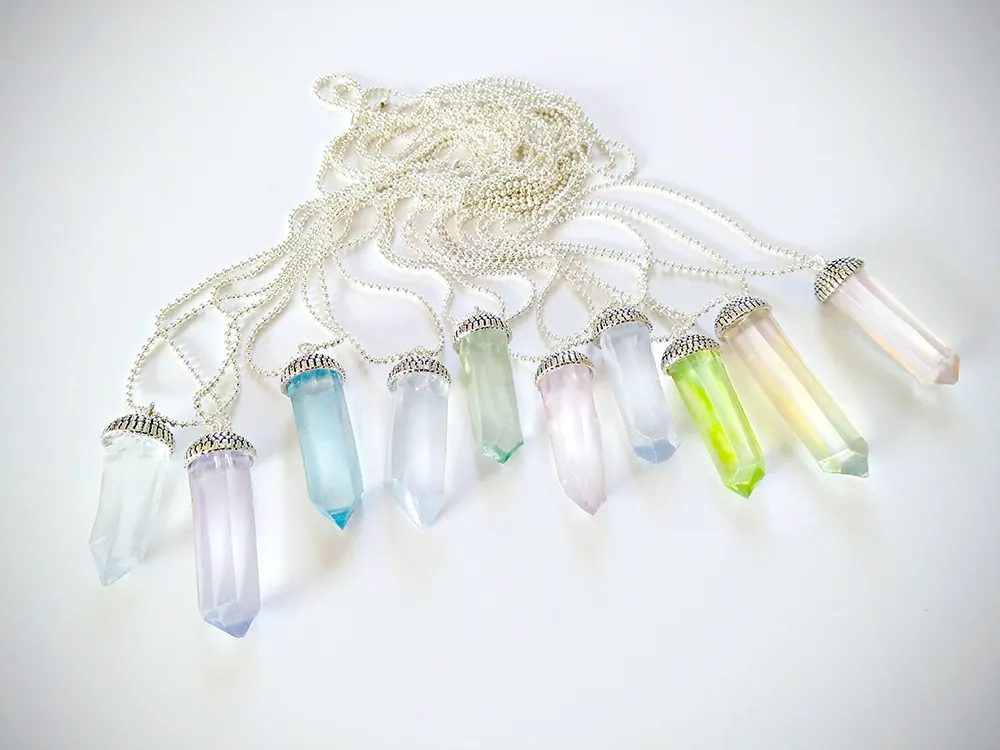
Learn how to carve raw glue sticks and make this impressive glue gun project (and save a bunch of money!) with this DIY crystal necklace from The Studio. Colour with alcohol markers before sealing and hardening with a clear polish. Beautiful!
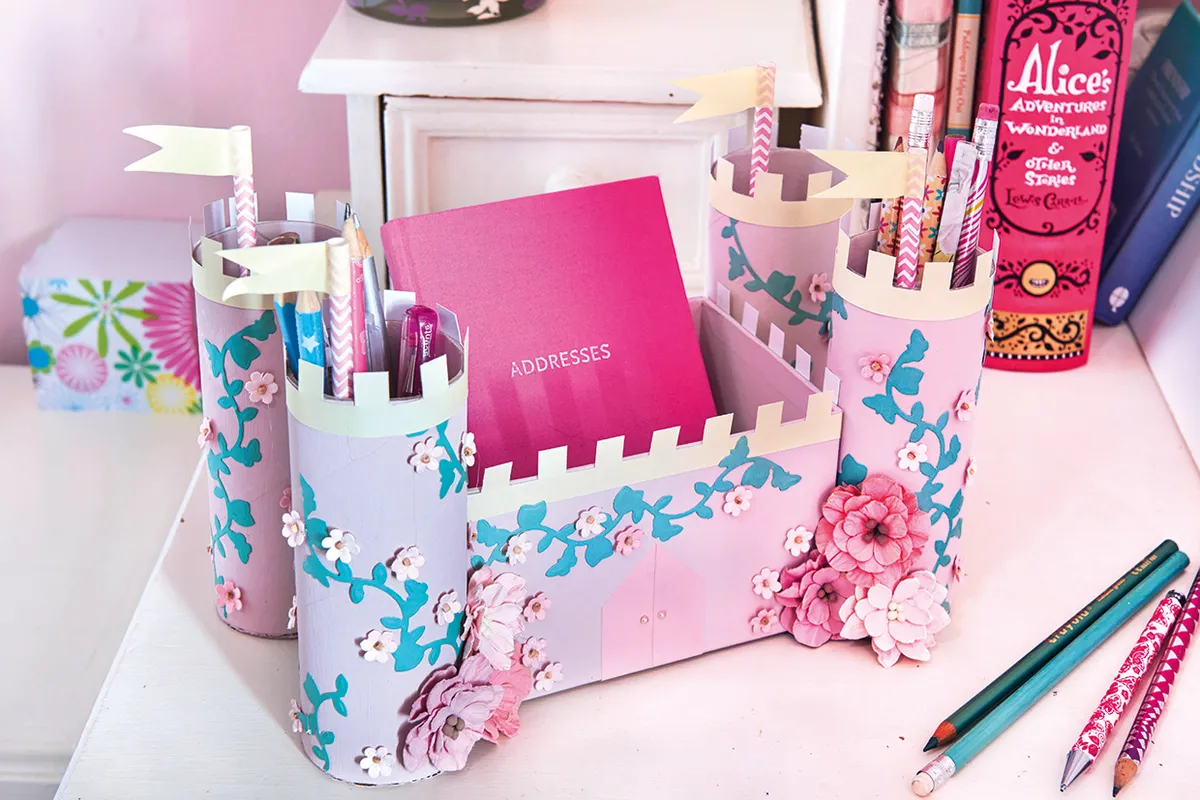
Glue gun crafts castle desk tidy
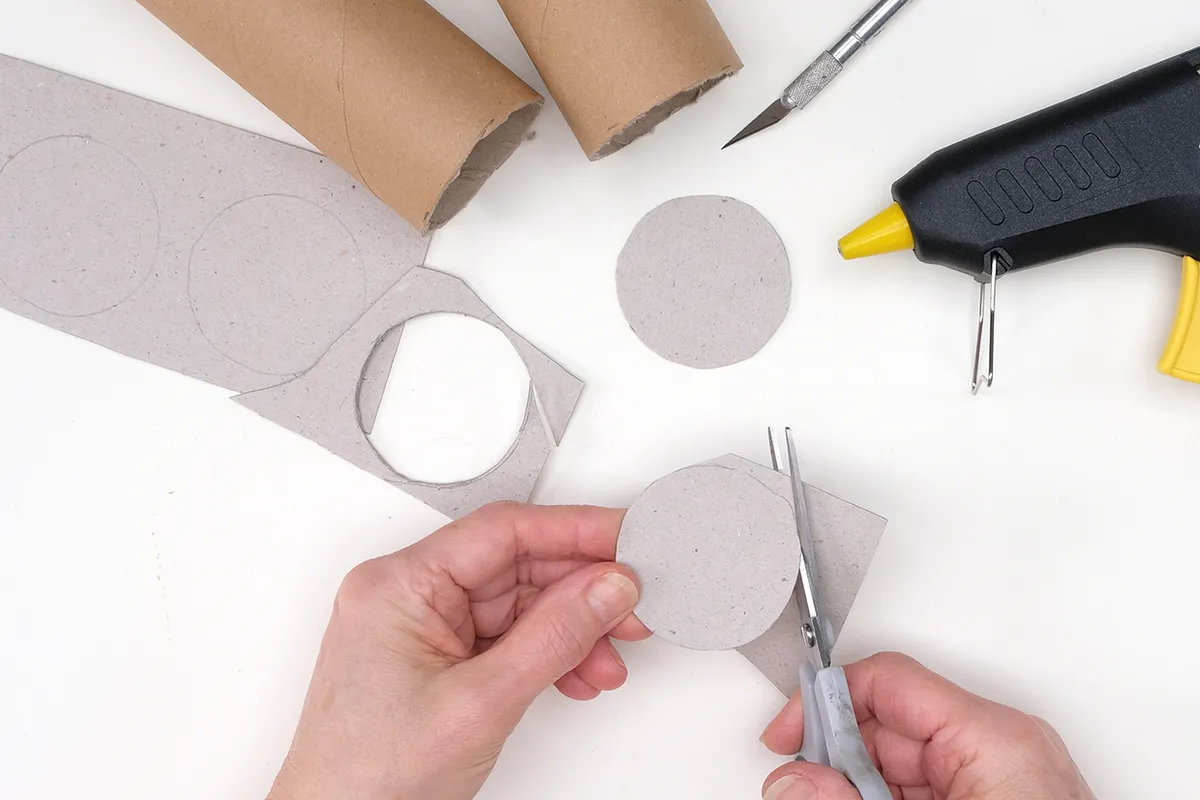
Step 1
Cut a paper tube into four 14cm lengths (the type you get as mailing tubes, or in kitchen roll or in wrapping paper), or use four toilet rolls (these are 11cm long). Using one tube, draw around the end on a sheet of cardboard four times to create four circles. Cut out the cardboard circles and glue one to the end of each tube to create a base.
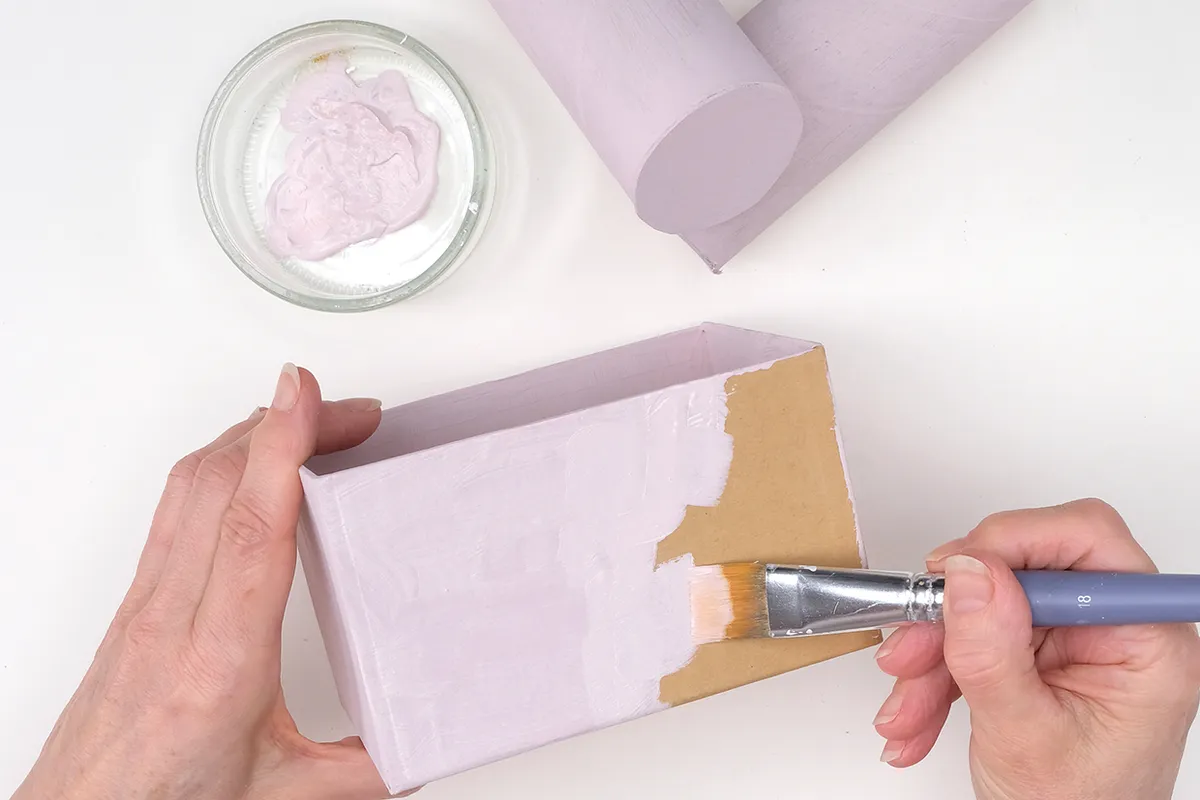
Step 2
Paint the tubes with two coats of acrylic paint, we're using pink for our castle! Find a small box and paint the inside with pink acrylic paint then leave to touch dry. Apply a second coat. Repeat on the outside and allow to dry.
Step 3
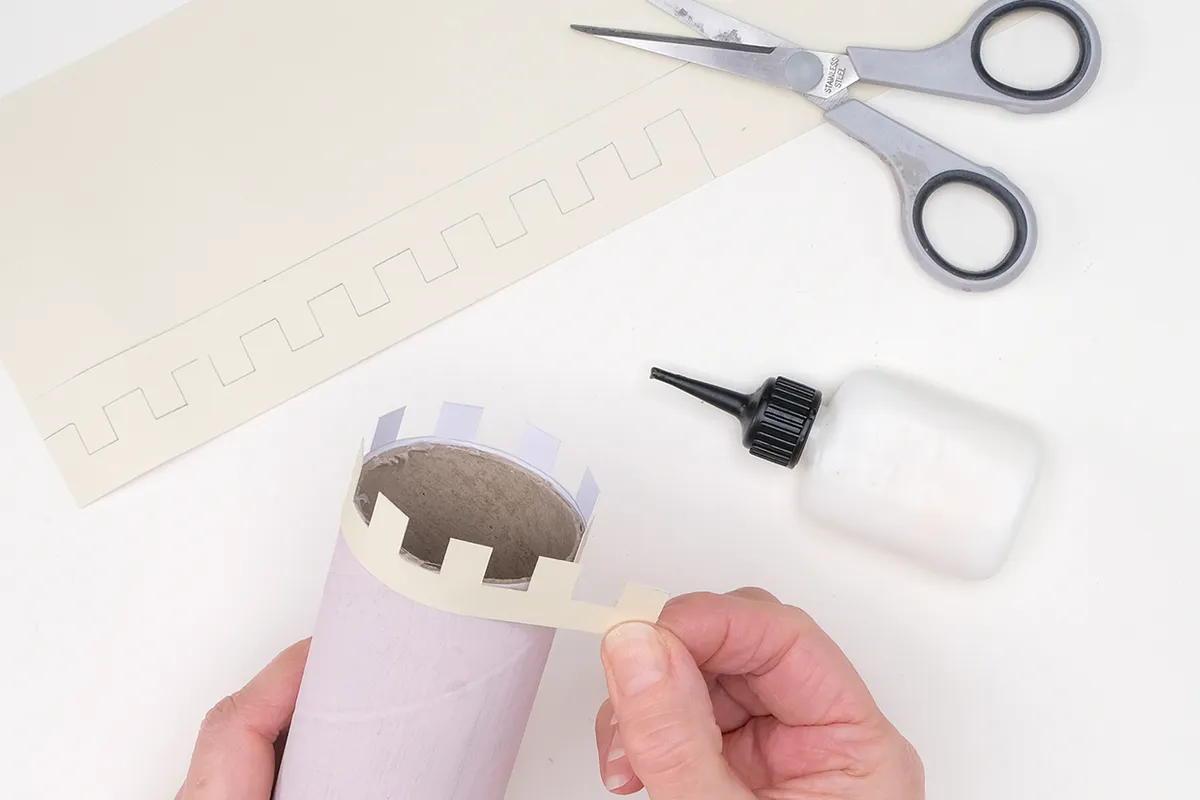
Trace the glue gun crafts castle template onto pastel yellow paper eight times and cut out the crenellated borders. Attach the borders around the tops of the tubes and along the top of each side of the box to give the castle its battlements!
Step 4
Embellish your walls with die-cut foliage flourishes if you'd like to. Measure and cut out a double door shape from pink paper. Cut in half, and attach it to the front of the castle. Add a pink pearl to each half of the door for handles.

Step 5
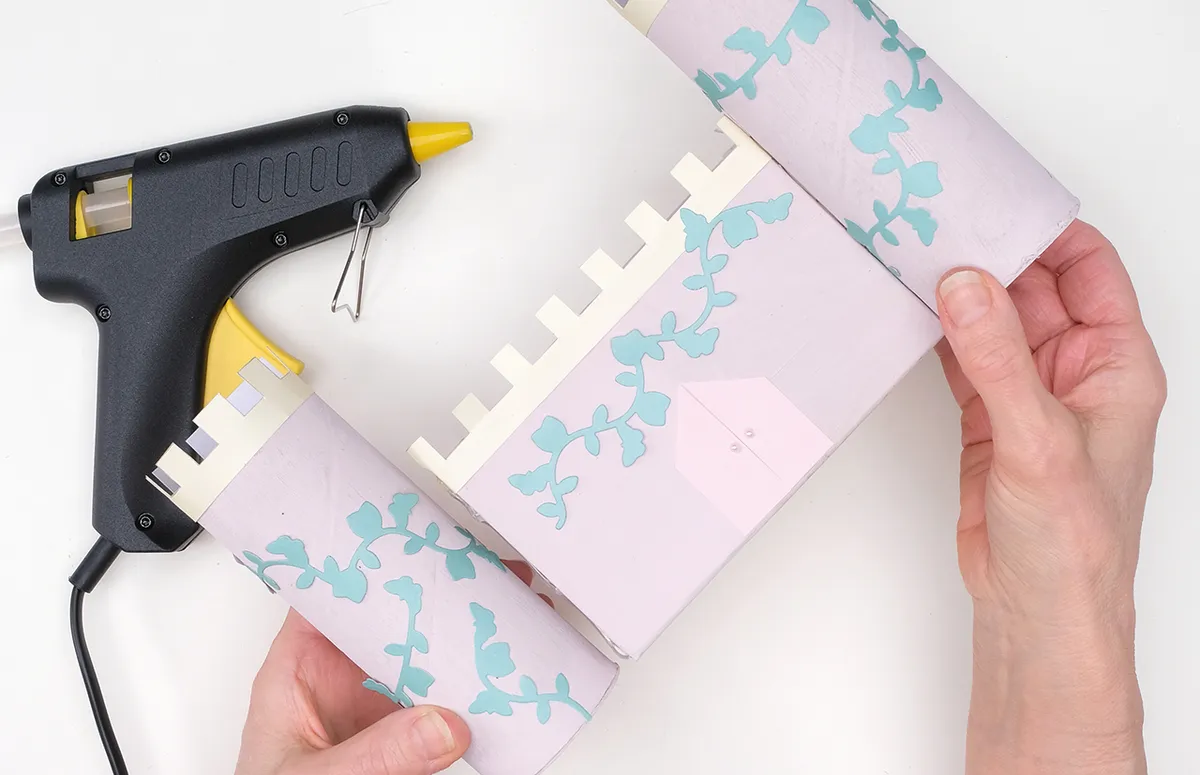
Assemble the castle by attaching a tube to each corner of the box using a hot glue gun. Press gently for a few minutes to fix in place, and leave each tube to cool before attaching the next.
Step 6
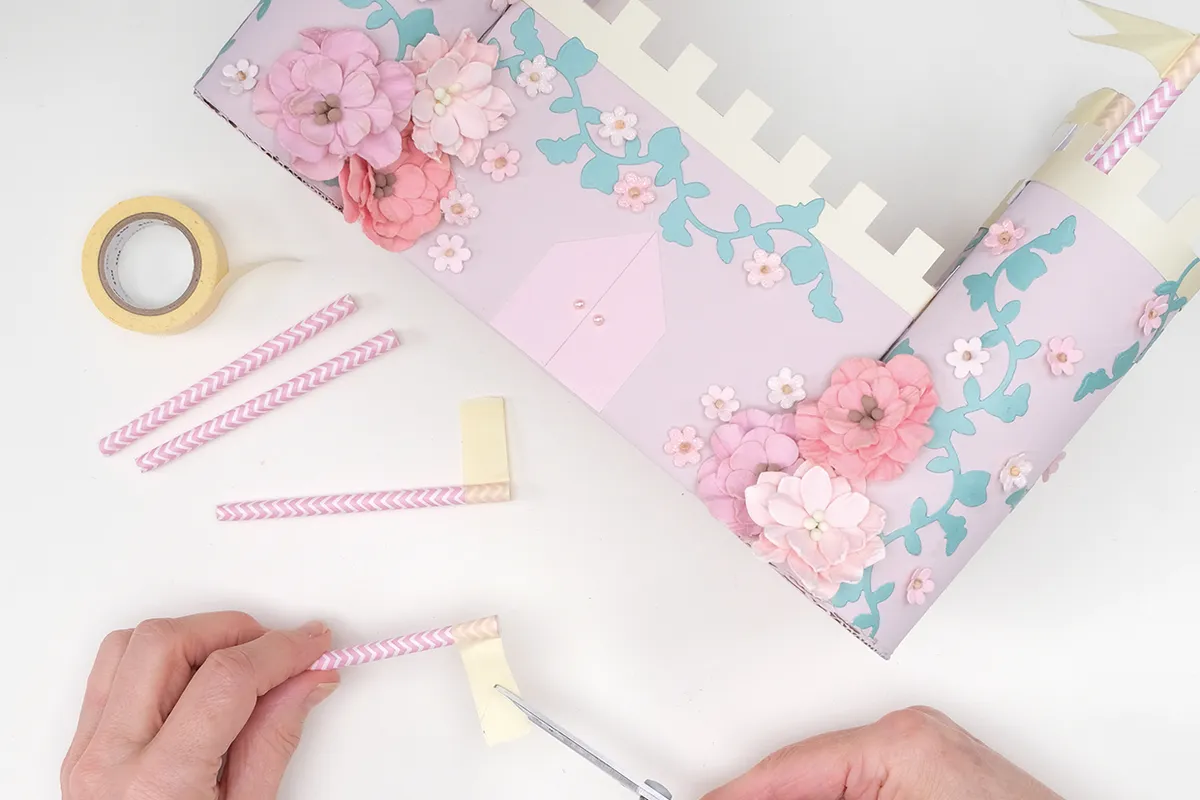
Decorate your castle with paper flowers if you want to. Cut two paper straws in half. Wrap a strip of pastel yellow washi tape around one end of each straw, then snip to create a pennant shape. Attach a flag to the top of each tower with hot glue.
Halloween decoration idea: Glue gun ghost lights
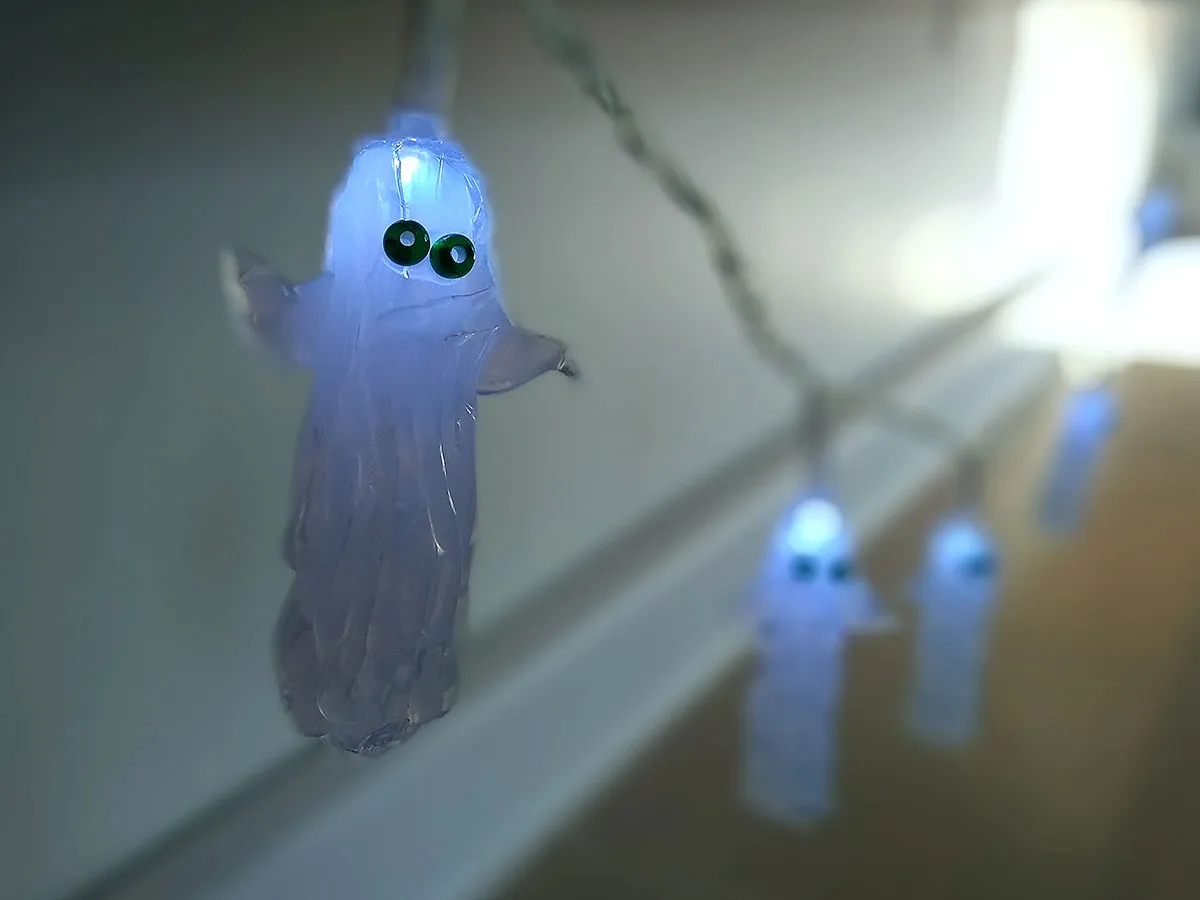
Hot glue is ideal for making these spooky ghost lights by The studio! The drippy nature of the glue creates the fab ghoulie robes, and they're relatively cheap and easy to make for your own DIY Halloween decor. Just make sure you use LED lights as they don't heat up like the traditional incandescent lights do.
Glue gun crafts treat box
This nifty glue gun idea is an upcycling treat, too - using the inserts inside toilet or kitchen rolls.

- For each box, wrap a toilet roll tube with patterned paper. Adhere using a line of hot glue to start and then wet glue for the rest.
- Flatten each end of the tube in opposite directions, fill with treats and then secure the flattened ends into position with staples.
- Wrap the ends twice, using two different coordinating washi tapes. Tie a ribbon bow around the centre of the box to finish.
Glue gun crafts easel display stand
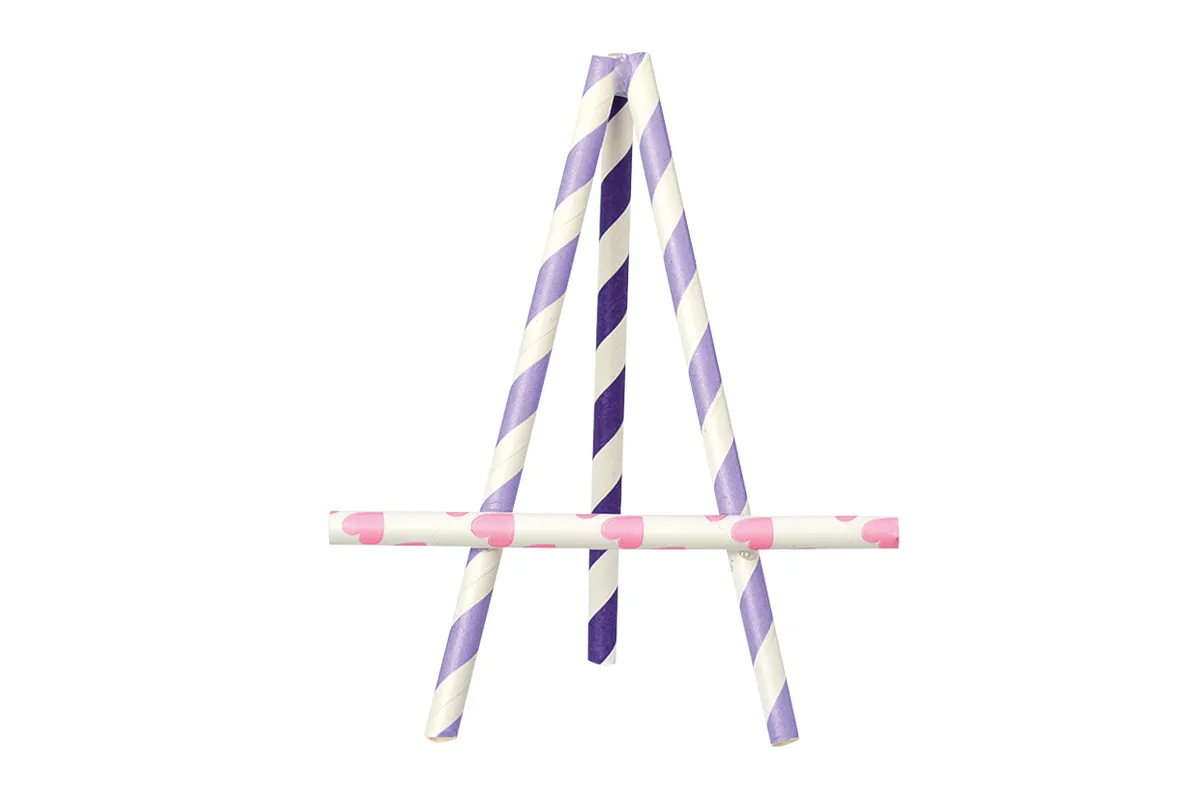
Make an easy decorative easel in minutes using just four paper straws and a hot glue gun! The hot glue dries quickly, so it’s easy to build and is a super easy glue gun craft. Use it to display for cards and photos or as a place setting on a party table.
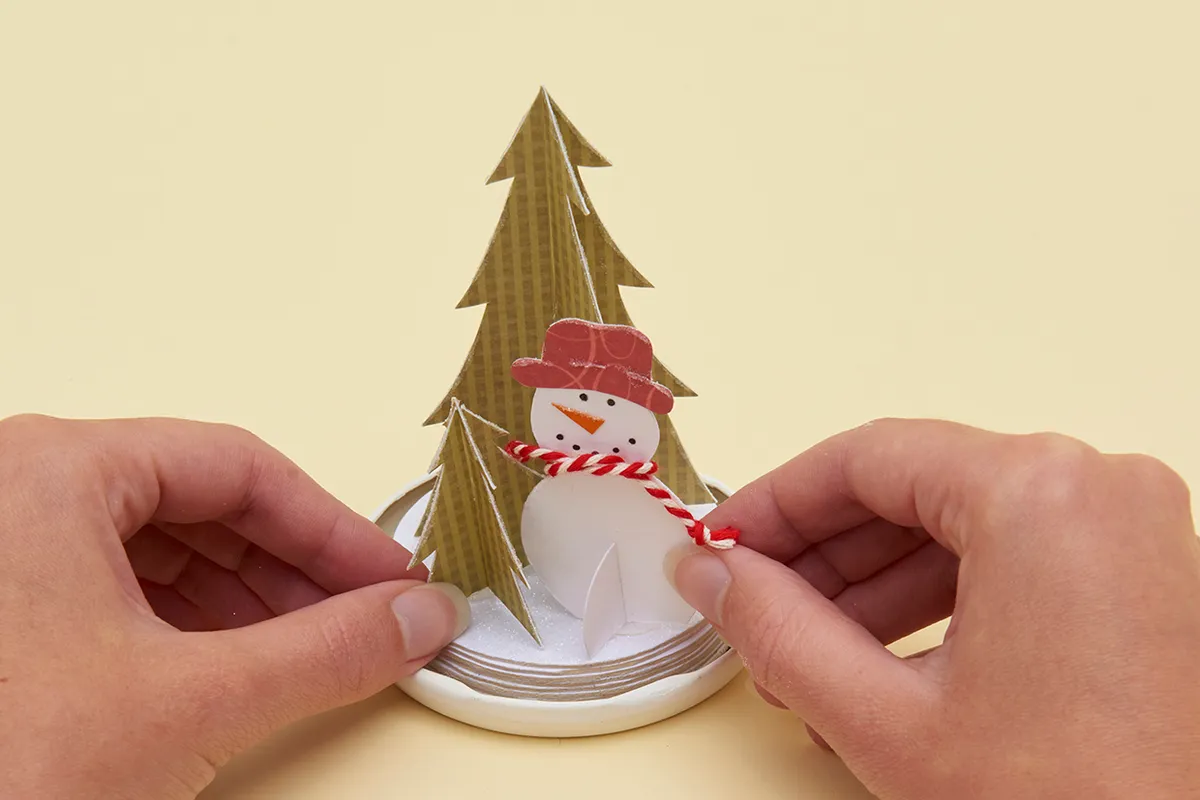
Glue gun craft idea: DIY snowglobe
Get creative and use the glue gun crafts snowglobe templates to produce your own frosty winter wonderland scenes – you could even design your own characters to replace the snowman. A little Father Christmas would be just as festive! Or why not add a toy car instead?

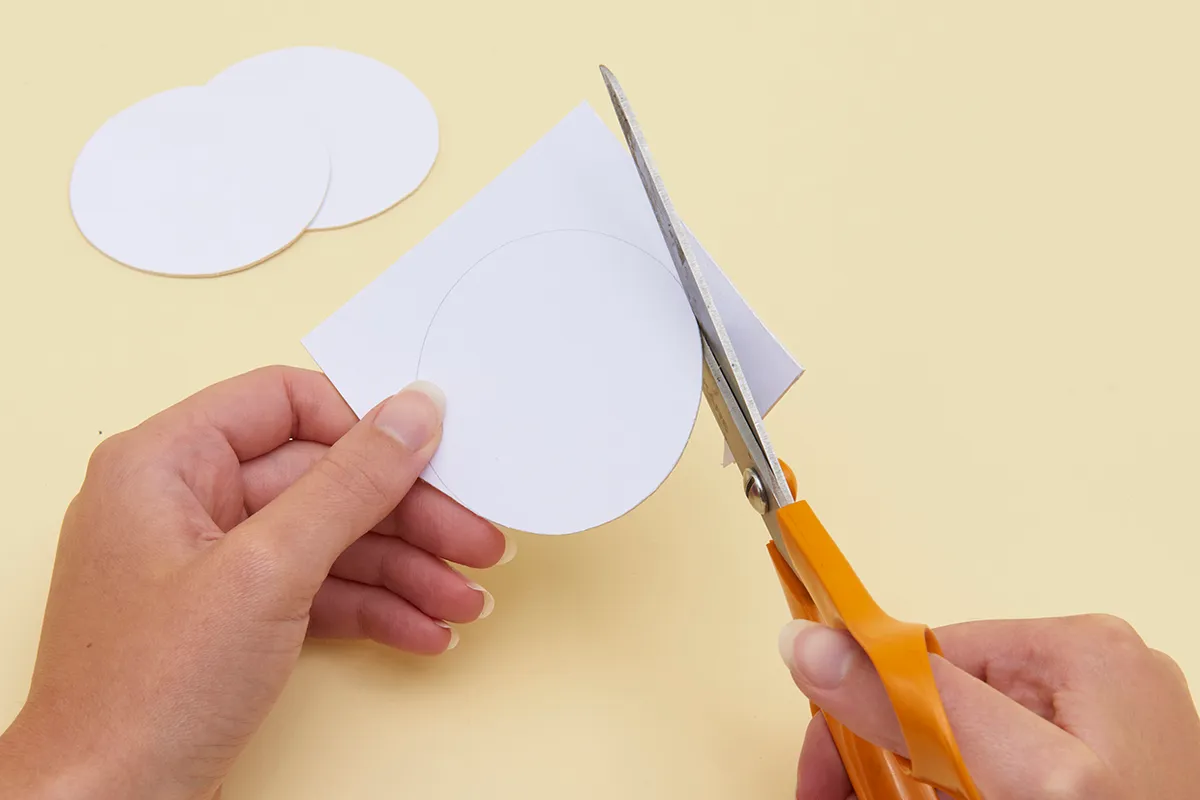
Step 1
Measure the inside of the neck of the jar, then cut out several discs from a sheet of mount card. This will make a platform for your snowy scene to stand on. Give the lid a couple of coats of paint for a neutral finish.
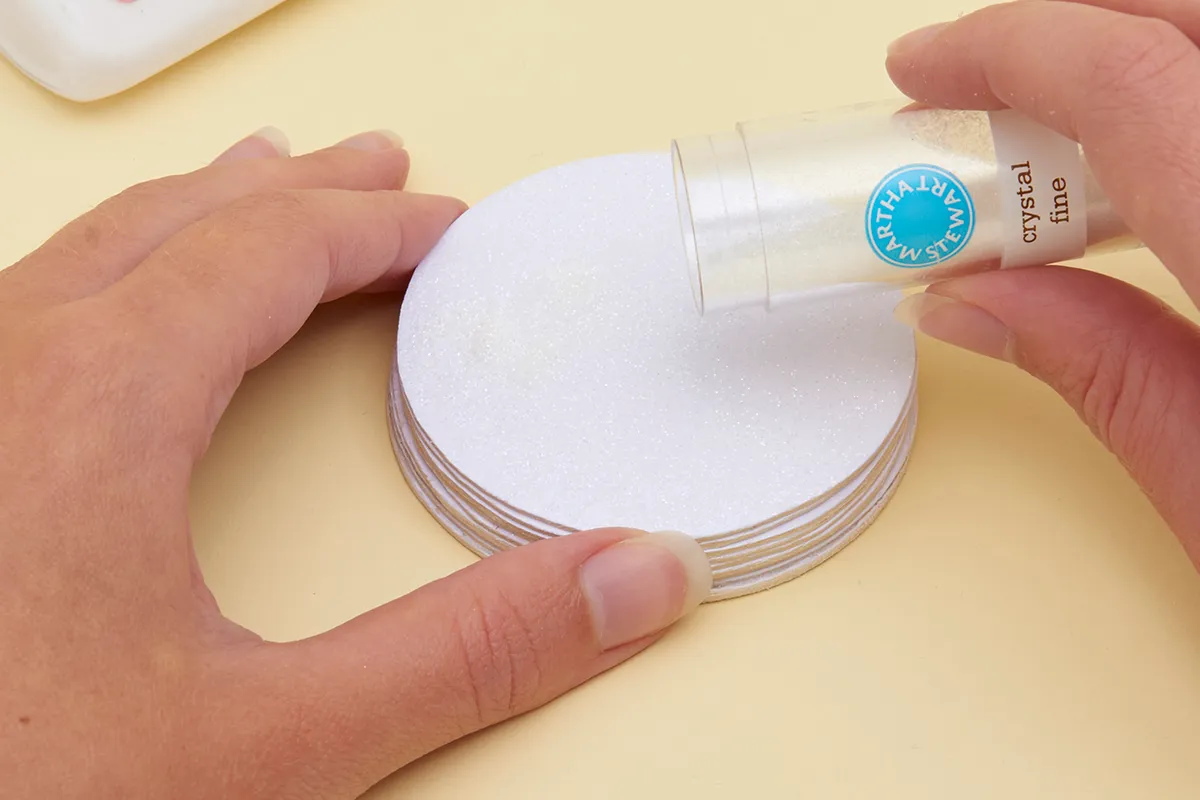
Step 2
Stick the discs together, and once dry, check they fit the neck of the jar and the lid will close over it. Use sandpaper to smooth the sides if necessary. Decorate the top disc with glue and glitter.
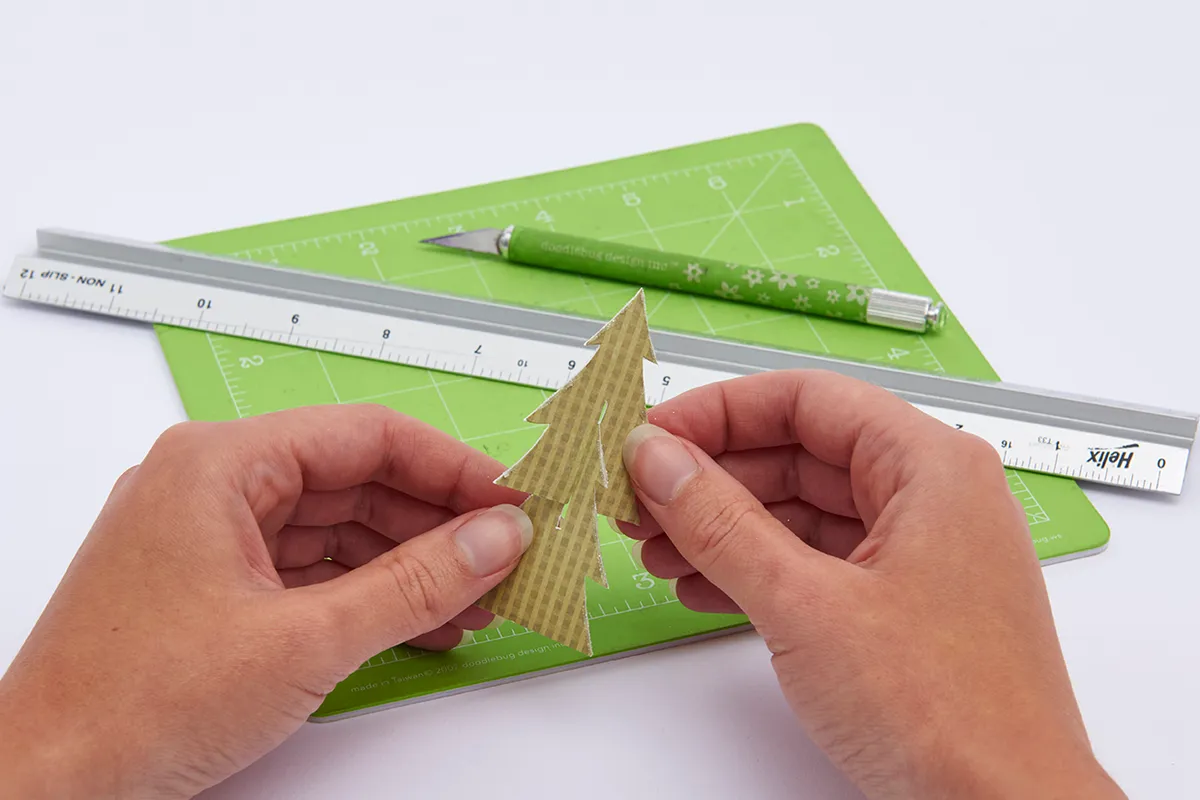
Step 3
Use the glue gun crafts snowglobe templates to make the slot-together trees and snowman. Draw in the snowman’s face and add more glitter!
Step 4
Assemble the scene and stick to the mountboard base with a glue gun. Decorate the lid before sticking the base into the lid and twisting the jar in place over the top.
Make a stencil!
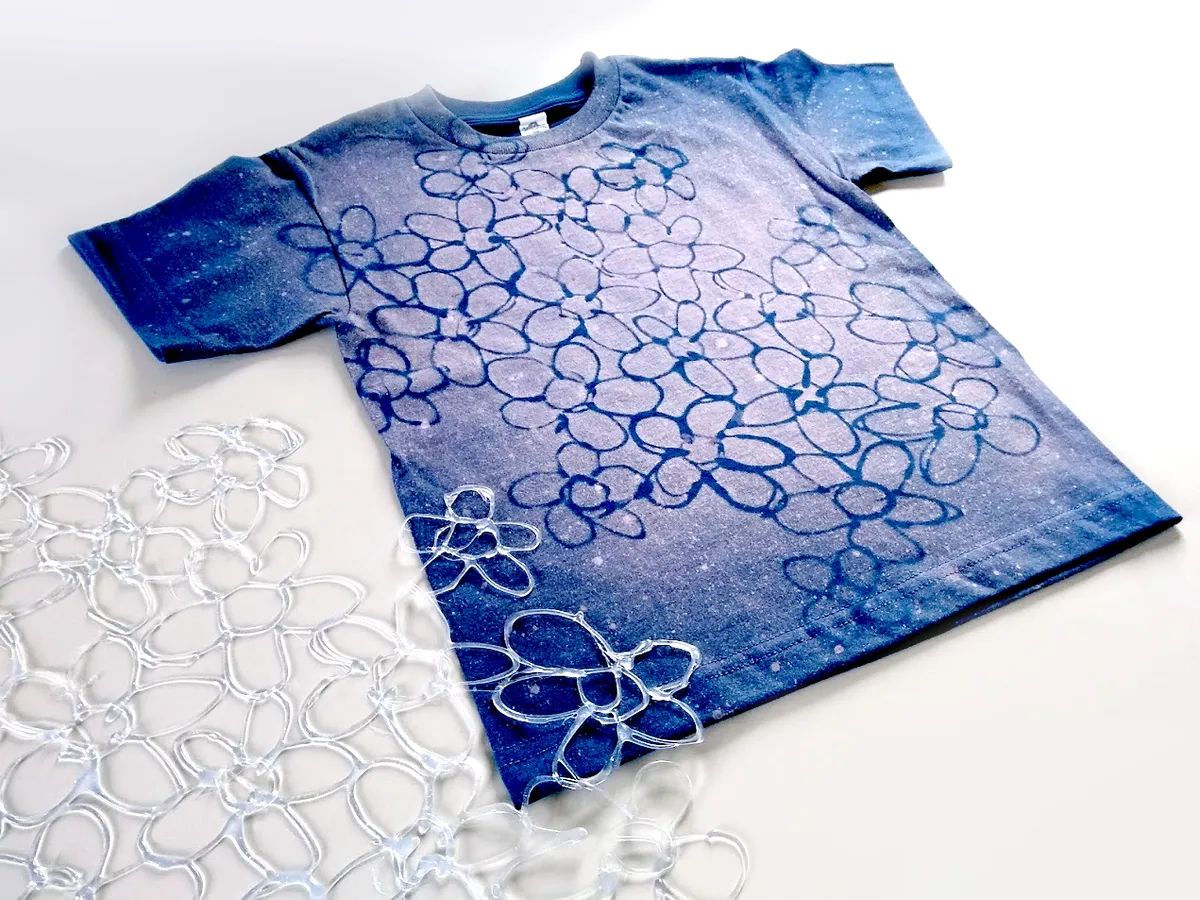
This custom T-shirt is made from hot glue and bleach, and the project itself doesn’t require a crazy amount of skill. The result is a pretty batik-style design that is very forgiving to the not-so-crafty-crafter. Get the full tutorial over at The Studio.
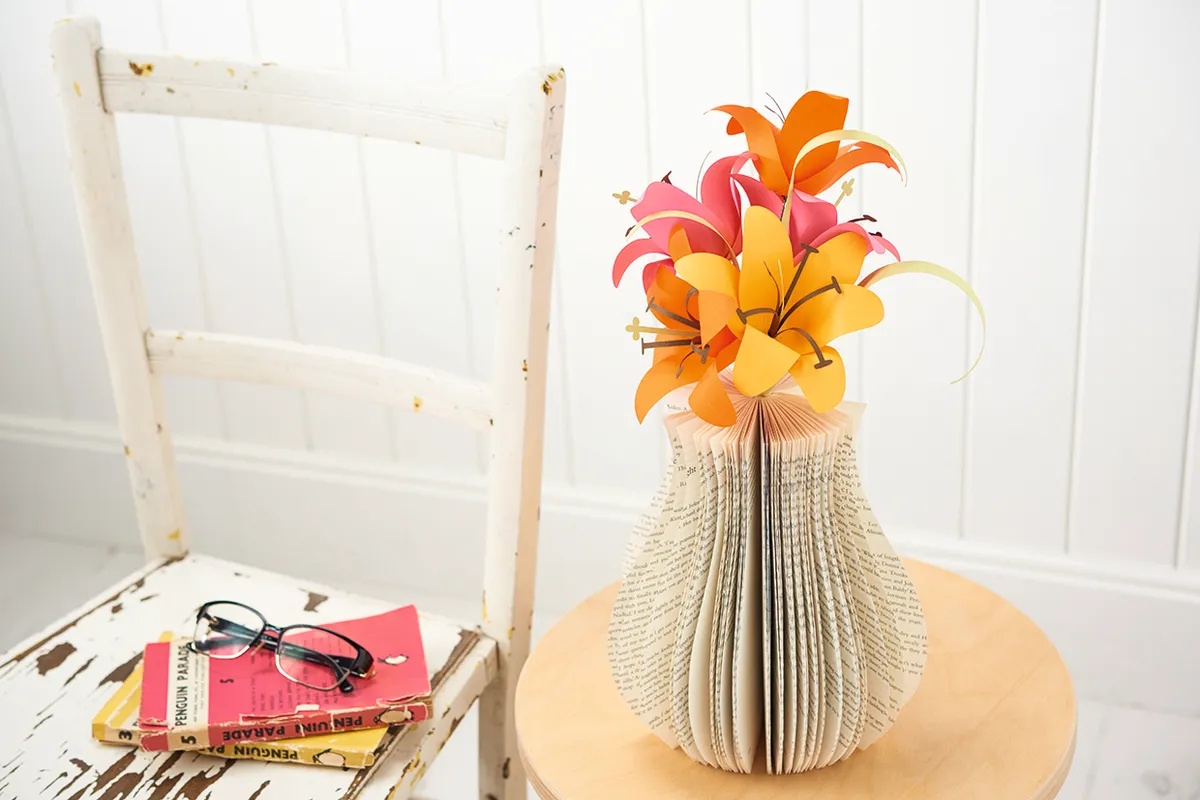
Glue gun crafts upcycled book vase
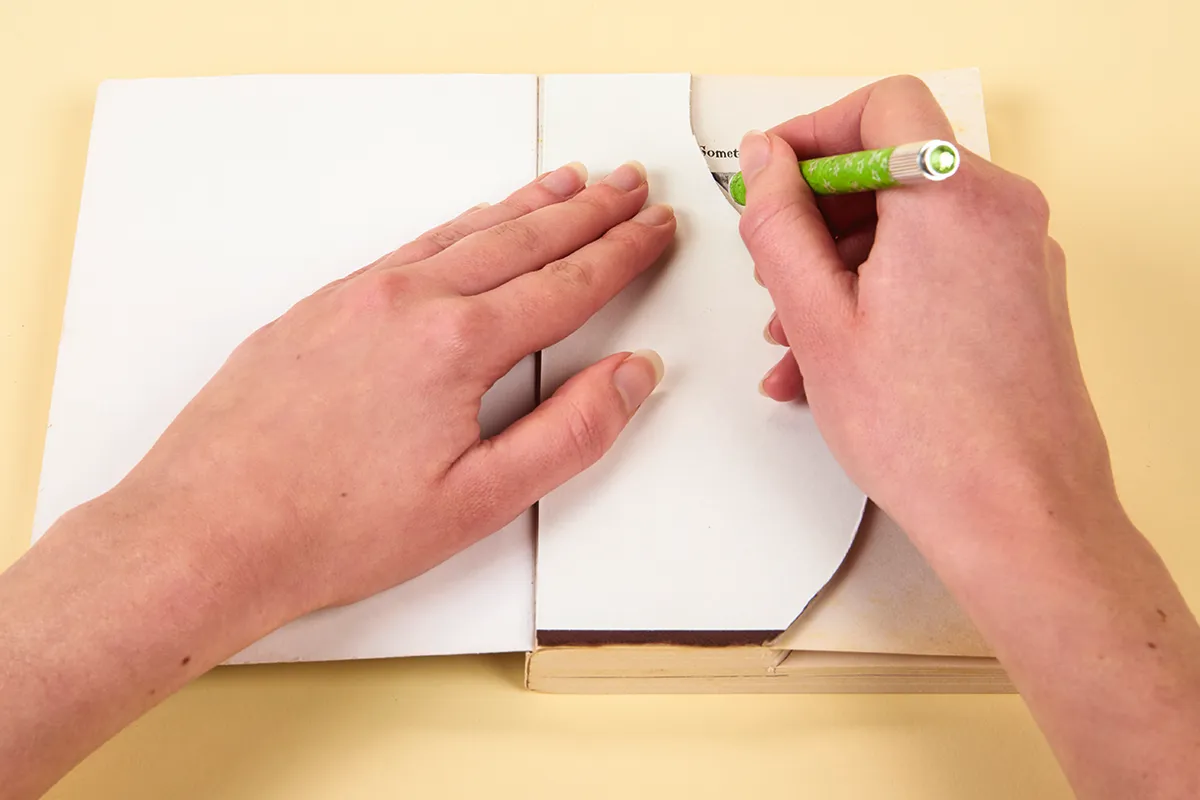
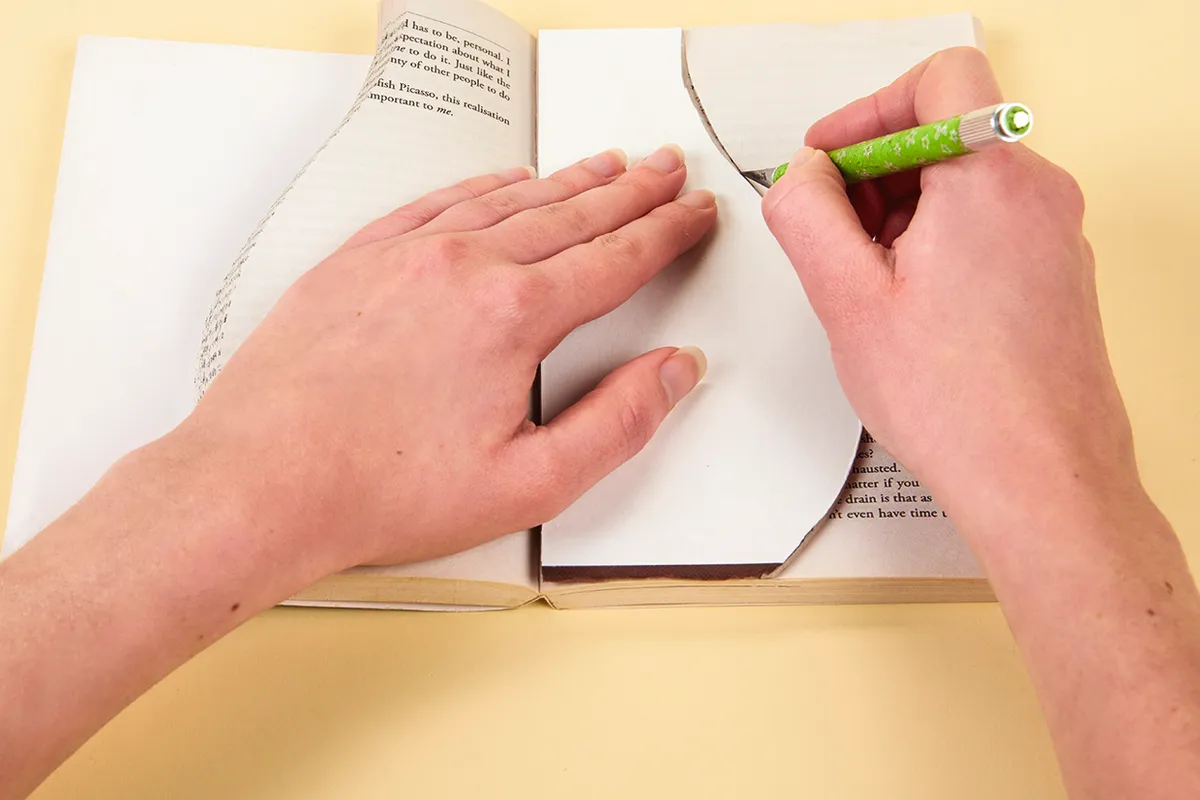
Step 1
Place your glue gun crafts book vase template on the first page of an open book and push it up against the spine. Don’t remove the cover. Cut along the edge of the template using a craft knife.
Step 2
Work your way through the book, trimming around the template. Take a second book that’s the same size as the first and repeat steps 1 and then remove the covers.
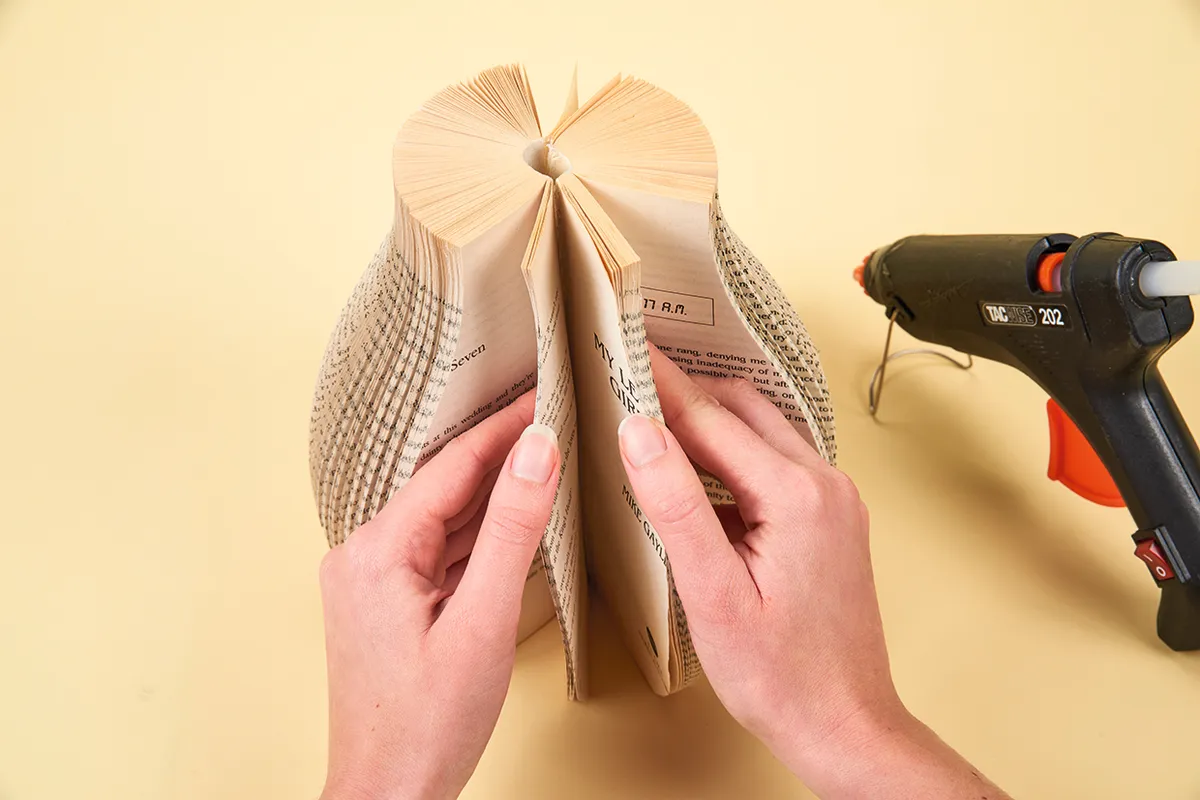
Step 3
Use a craft knife to tidy up any rough edges along the spine, then glue the two books together back to back using a glue gun (this is a good glue gun craft because the stong glue will hold the two books together securely). Fill up your vase with paper flowers! To use the vase for a living stem, insert a test tube into the hole in the middle of the vase first.
Hot glue project idea: DIY earrings
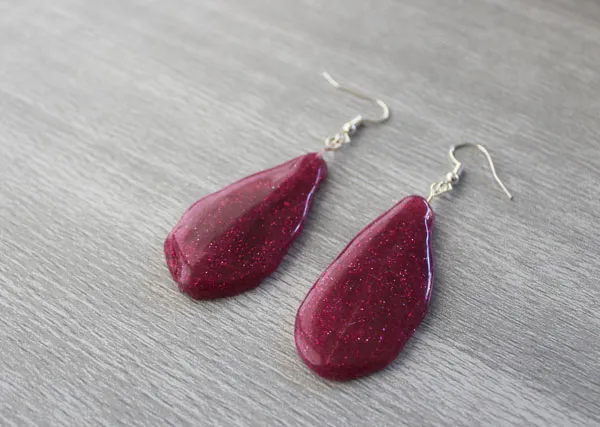
This has to be one of the best glue gun crafts - these earrings look like real stones! They're made using red glitter hot glue, shaped into a teardrop shape. Check out the full tutorial over at 30 minute crafts!
Wire wrapped crystal necklace
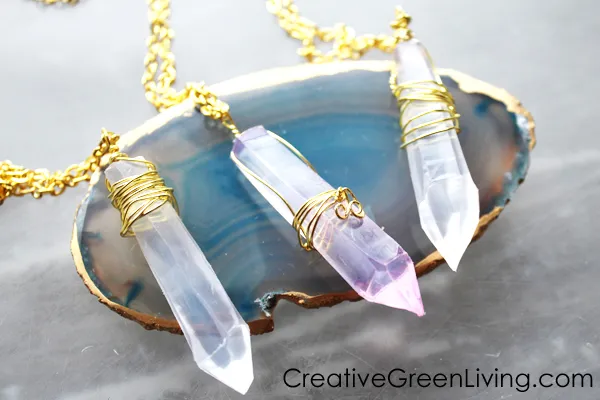
This is another project where the solid glue is the star of the show! We love these wire wrapped crystal necklace, or Star Wars Kyber necklace, from Create Green Living.
Glue gun crafts tissue paper party tassels
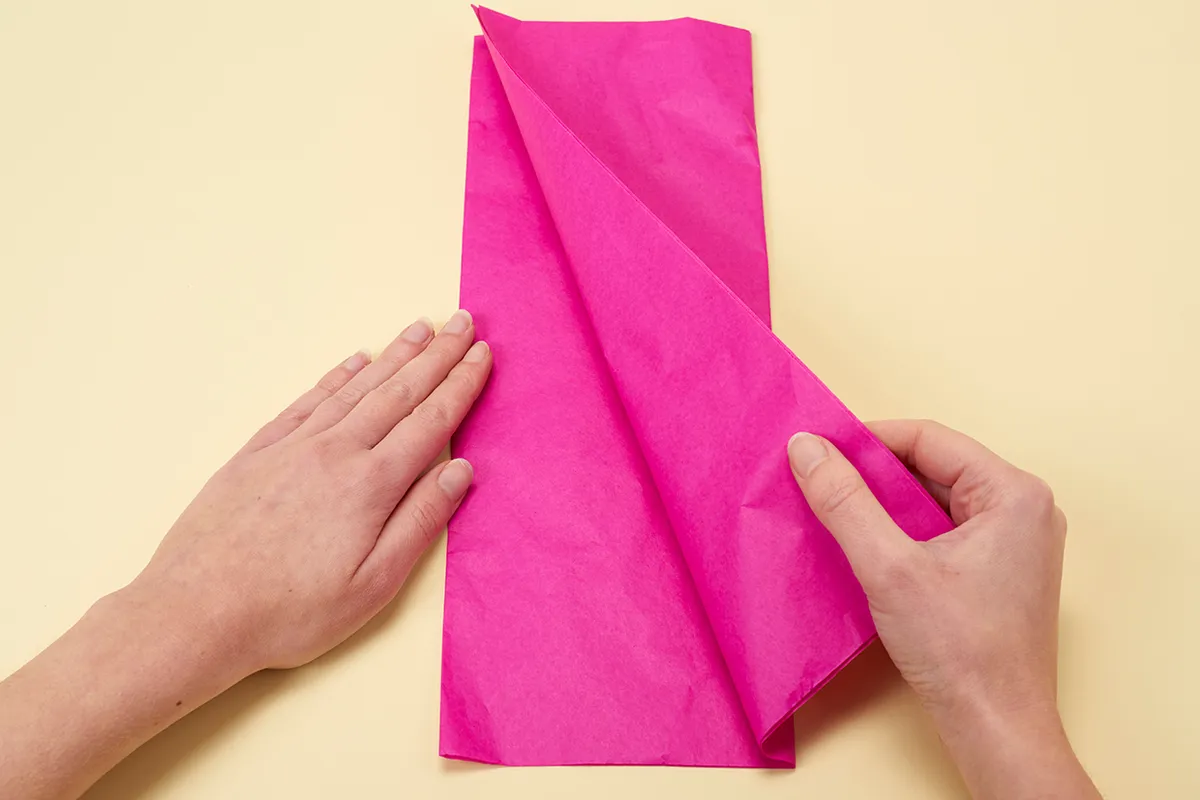
Step 1
Fold a piece of coloured tissue paper in half along the long edge as shown, then fold the paper in half again. Create a top fold by folding the tissue paper in half at the middle.
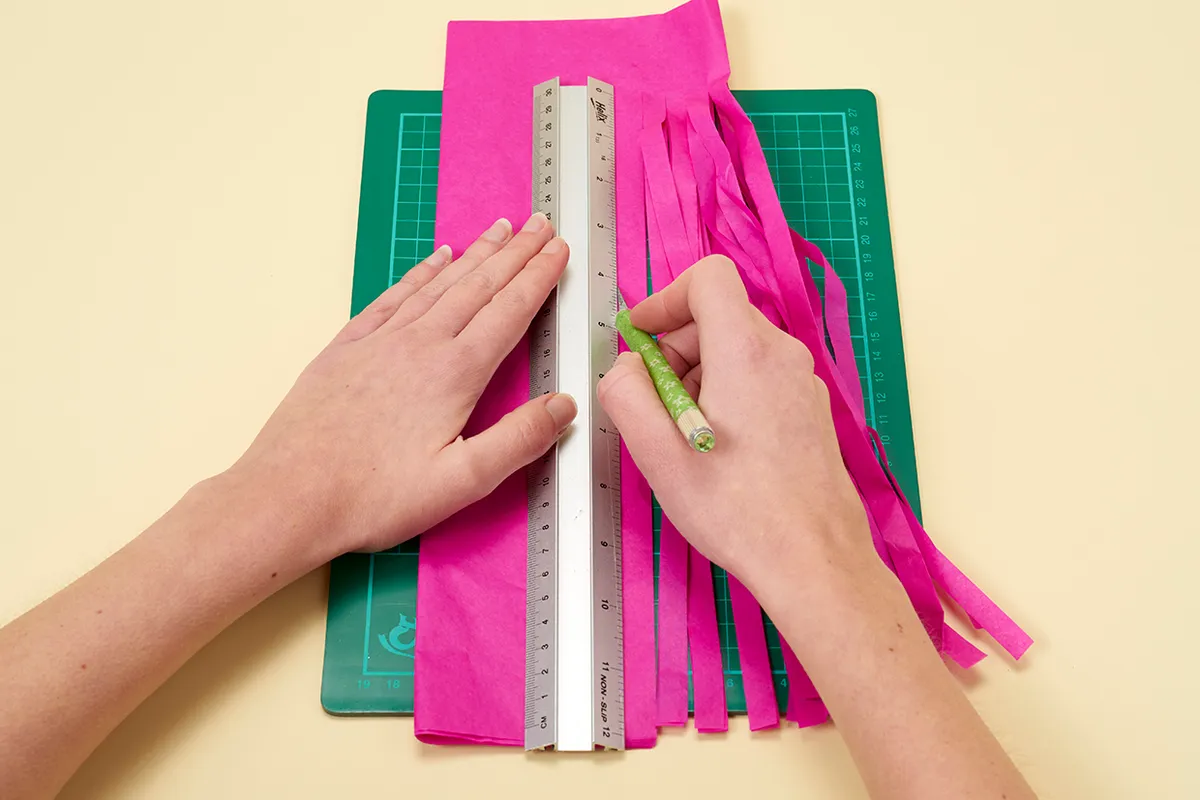
Step 2
Turn the paper so that the folded top edge is farthest from you. With a craft knife, cut the tissue into 1cm strips, leaving a 4cm border at the top. Unfold the paper and cut it in half lengthways.
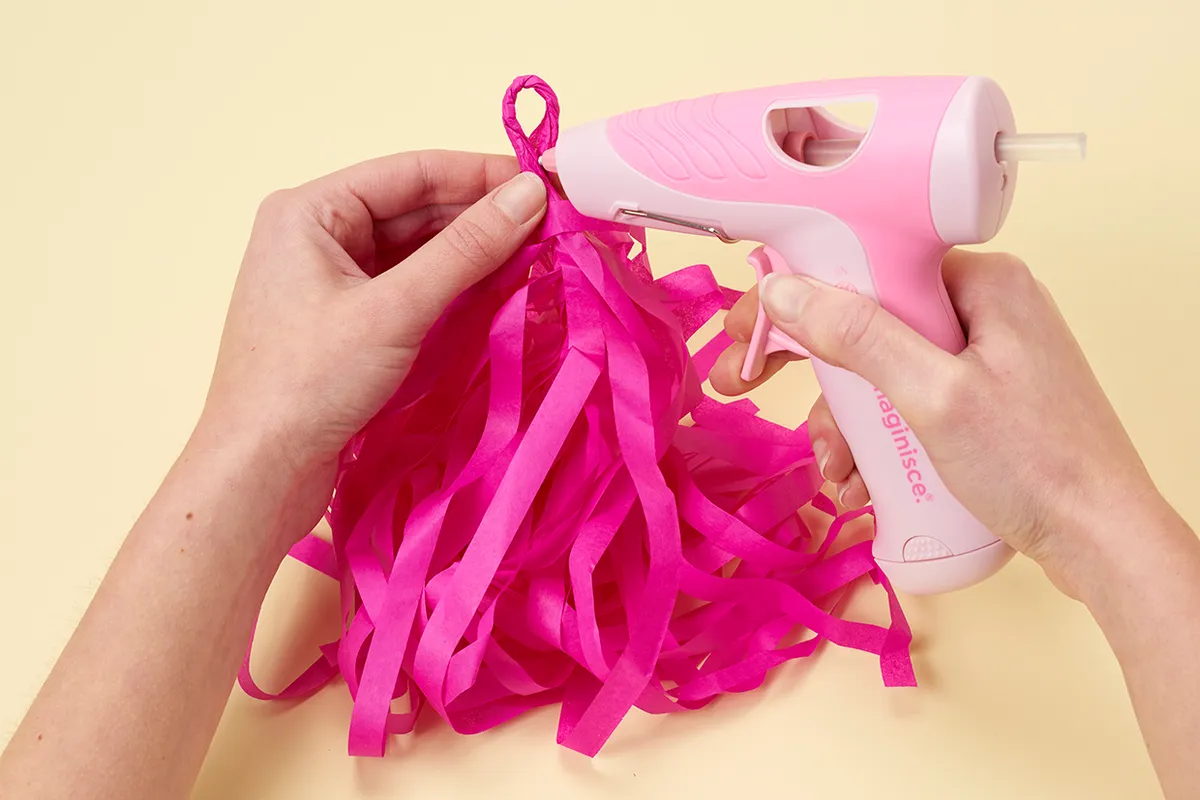
Step 3
Open out one of the tissue paper pieces and detangle the cut ends. Twist the centre of the paper to create a loop. Stick the loop together using a glue gun to secure the twisted sections.
Jellyfish lampshade
These fun ocean friends are a great glue gun project for kids, just grab some felt, tissue paper, paper and pipe cleaners to create your very own underwater menagerie!
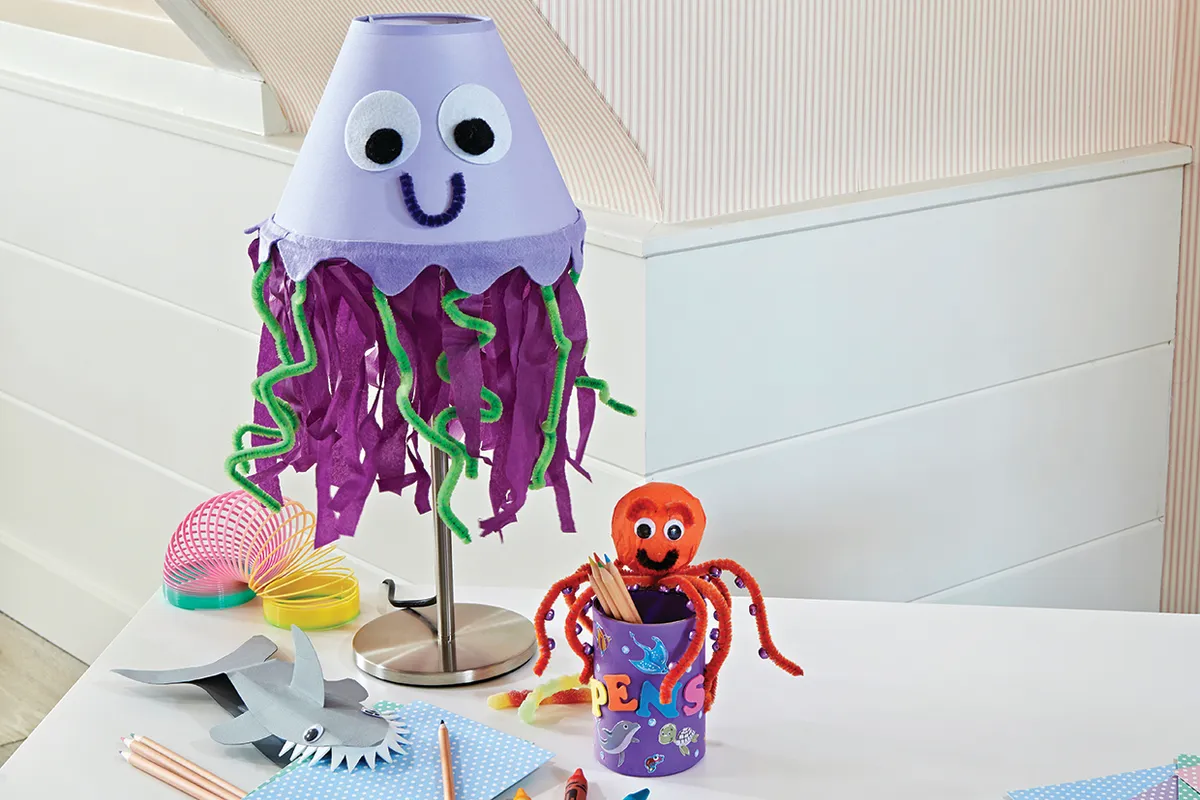
- For the eyes, cut two circles from white felt and glue to the front of your lampshade, approximately 2cm apart. Add a black pompom to the centre of each for the pupils.
- Cut a 4cm wide strip of purple felt to fit around the bottom edge of your lampshade and snip a wiggly pattern along the bottom edge. Glue into place to create a 'skirt'.
- Rip sheets of purple tissue paper into 3cm wide strips, in varying lengths and then glue individually to the bottom of the lampshade, on the inside edge to give the jellyfish its tentacles.
- Bend six pipe cleaners into wavy shapes and glue among the strips of tissue paper, towards the front of the lampshade to provide extra interest.
- Take a single purple pipe cleaner and trim it to 7.5cm. Bend into a smile (or a frown!) and then glue just below the eyes to finish.
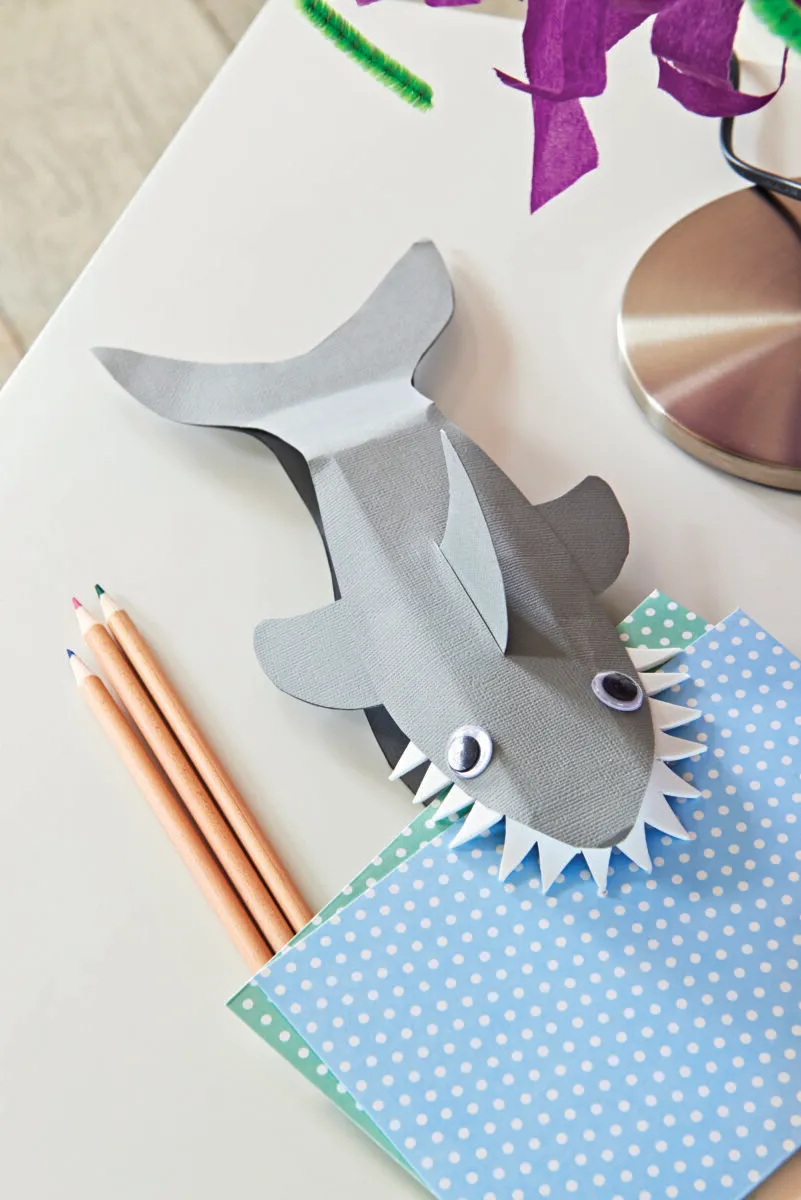
Shark memo holder
- First, download the best glue guns crafts shark memo holder templates.
- Paint a giant wooden peg grey (if you don't have any grey paint, mix white and black paint together), then leave to dry. Using the template, cut two mouthpieces from some red card. Open the peg and glue a mouthpiece to the top and the bottom.
- Cut two bodies, side fins and a top fin from some grey card using the template. Fold the top fin as indicated by the dotted line and stick together above the fold, then slip the fin through the slit in the body. Press out the folds and glue them in place. Stick the fins to the sides.
- Cut two sets of teeth from white Funky Foam using the template; glue around the top and bottom of the peg. Glue body with fins to the top of the peg and plain body to the bottom, folding the sides over slightly to add shape. Glue tails together. Add googly eyes!
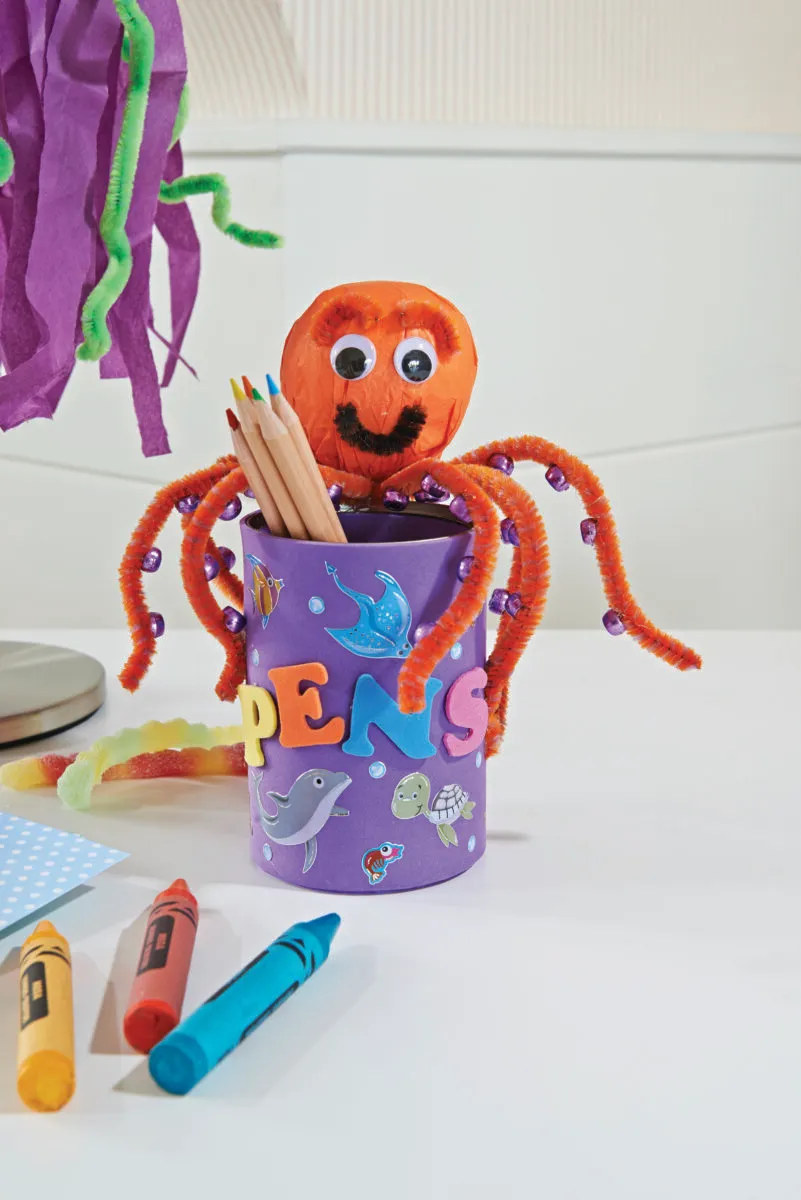
Octopus pencil holder
- Cut a sheet of orange tissue paper into four and then place each piece one on top of the other to create a stack. Wrap around a polystyrene ball, twist at the bottom and glue in place. Trim off the excess tissue.
- Lay four orange pipe cleaners in rows, pinch together at the centre and then glue to the base of the octopus head using a hot glue gun to form the legs. Add pony beads along each leg to create the suction pads on the octopus and a pair of googly eyes to the head.
- Trim a black pipe cleaner to 4cm, bend into a smile and glue onto the head. Cut two 2.5cm pieces of black pipe cleaners for the eyebrows and glue onto your octopus.
- Cover a tin can with purple Funky Foam. Hot glue the octopus's head to the back of the tin. Bend the legs into shape and glue into place. Add foam letters to personalise your tin - we have used the word 'pens', but how about doing your name? Decorate the tin with marine stickers to finish.
Fabric flower brooch
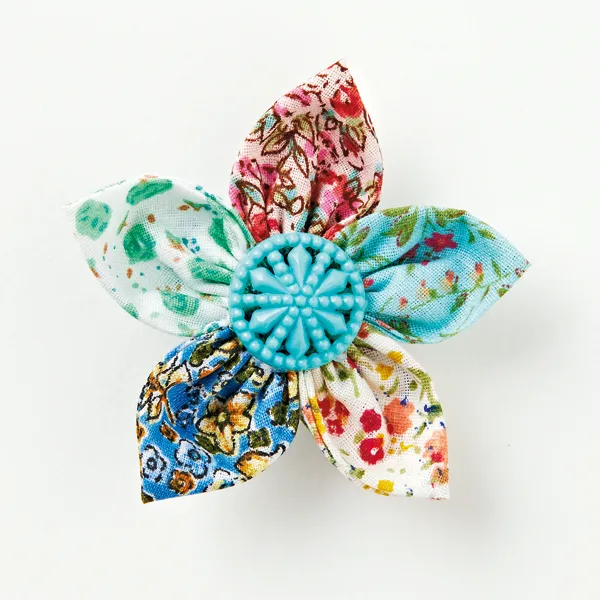
Using a glue gun is a fantastic way to turn almost anything into a brooch. The glue is strong, so it holds everything in place - like this fabric flower brooch by Gemma Nemer!
We hope you’ve enjoyed our round-up of the best glue gun crafts and glue gun projects. For more brilliant papercraft inspirations check out our crepe paper flowers or why not learn how to make paper?