As an extra treat, Samantha’s created this bonus free sewing pattern - a fabric wreath project to help you add a sprinkle of homespun charm to your home decor this year. Read on to find out how to sew a fabric wreath using your favourite prints.
Looking for more Christmas wreath inspiration? Have a go at this beautiful DIY felt Christmas wreath or try this impressive Christmas fabric – clever fabric folded wreath DIY project. If you prefer the look of a real wreath, learn how to make a Christmas wreath from scratch with our step by step tutorial.
If you want more Christmas sewing projects to get stuck into, take a look at our list of 31 of the best free Christmas sewing patterns or find last-minute inspiration with our 25 quick gifts to sew when you're short of time.
How to make an easy fabric wreath
You will need…
- Fabric A: 14in x 44in
- Fabric B: 14in x 44in
- Fabric C: 51⁄4in x 44in
- Toy stuffing
Notes
- Seam allowances are 3⁄8in, unless otherwise noted.
- RST = right sides together.
Cutting out
Step one: From Fabric A cut:
- One (1) 51⁄4in x 44in piece (wreath strip).
- One (1) 4in x 83⁄4in piece (bow body).
- One (1) 4in x 12in piece (bow tail).
- One (1) 4in x 24in piece (hanging loop).
- One (1) 31⁄8in x 23⁄8in piece (bow centre).
Step two: From Fabric B cut:
- One (1) 51⁄4in x 44in piece (wreath strip).
- One (1) 4in x 83⁄4in piece (bow body).
- One (1) 4in x 12in piece (bow tail).
- One (1) 4in x 24in piece (hanging loop).
Making the wreath tubes
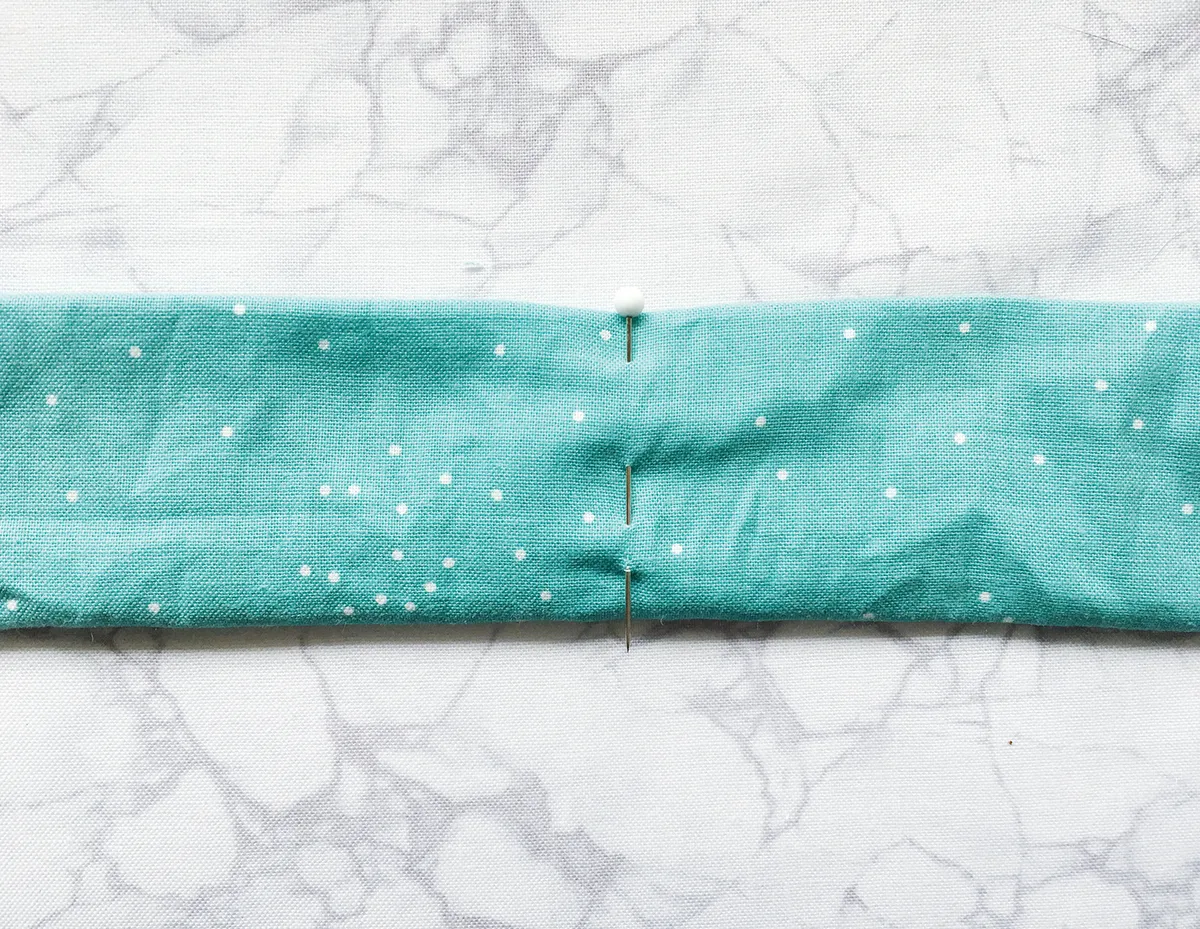
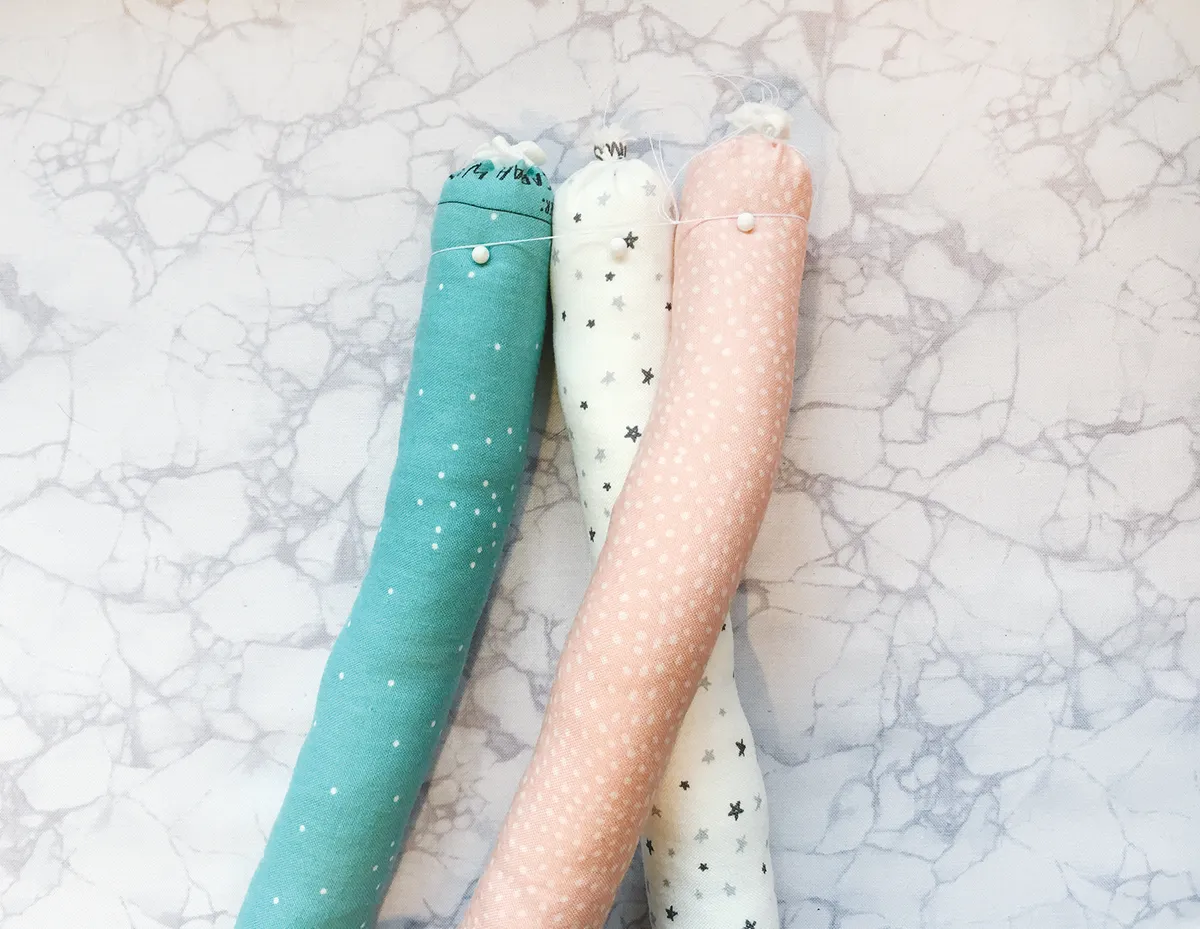
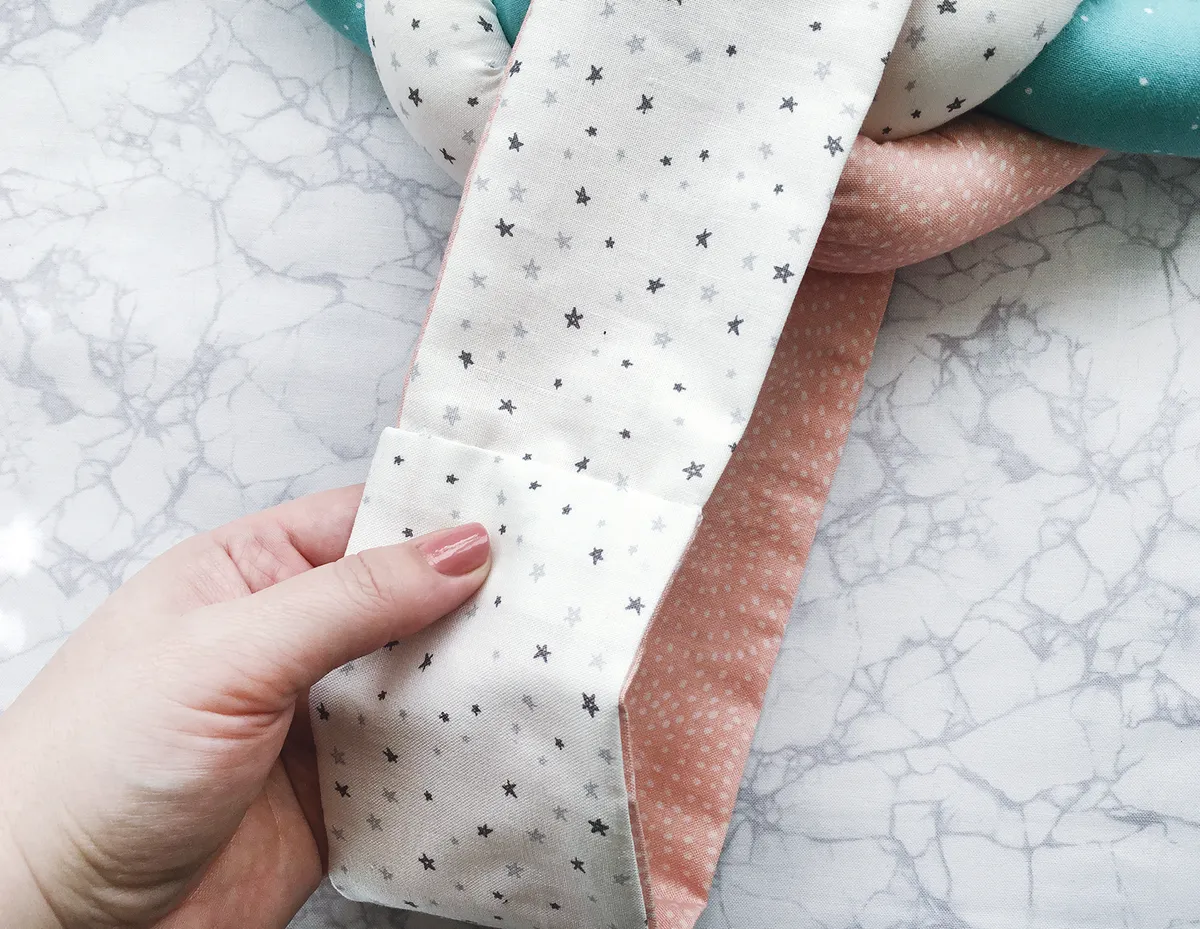
Step three: Fold one of the 51⁄4in x 44in wreath strips in half lengthways RST and sew together down the long edge. Turn right side out and press with the seam running down the centre back. Put a pin across the centre of the length of the strip as this will help to get the stuffing even later.
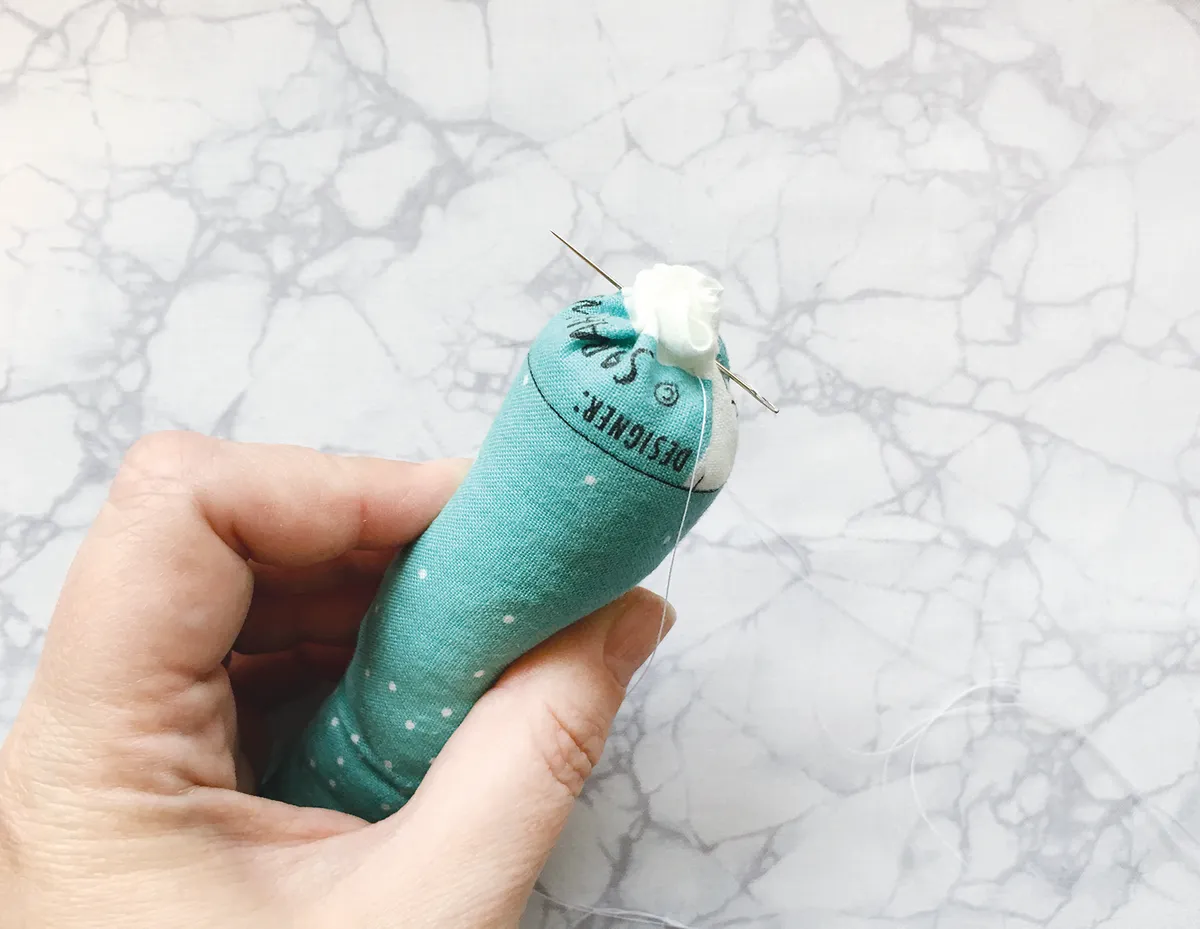
Step four: Using a long blunt stick, such as a knitting needle, start to stuff from the open end up to where you put the pin. Stuff the tube quite firmly but not full to bursting. As you go along, roll the tube like a rolling pin to even out the stuffing. When you reach the end, baste it closed and remove the pin.
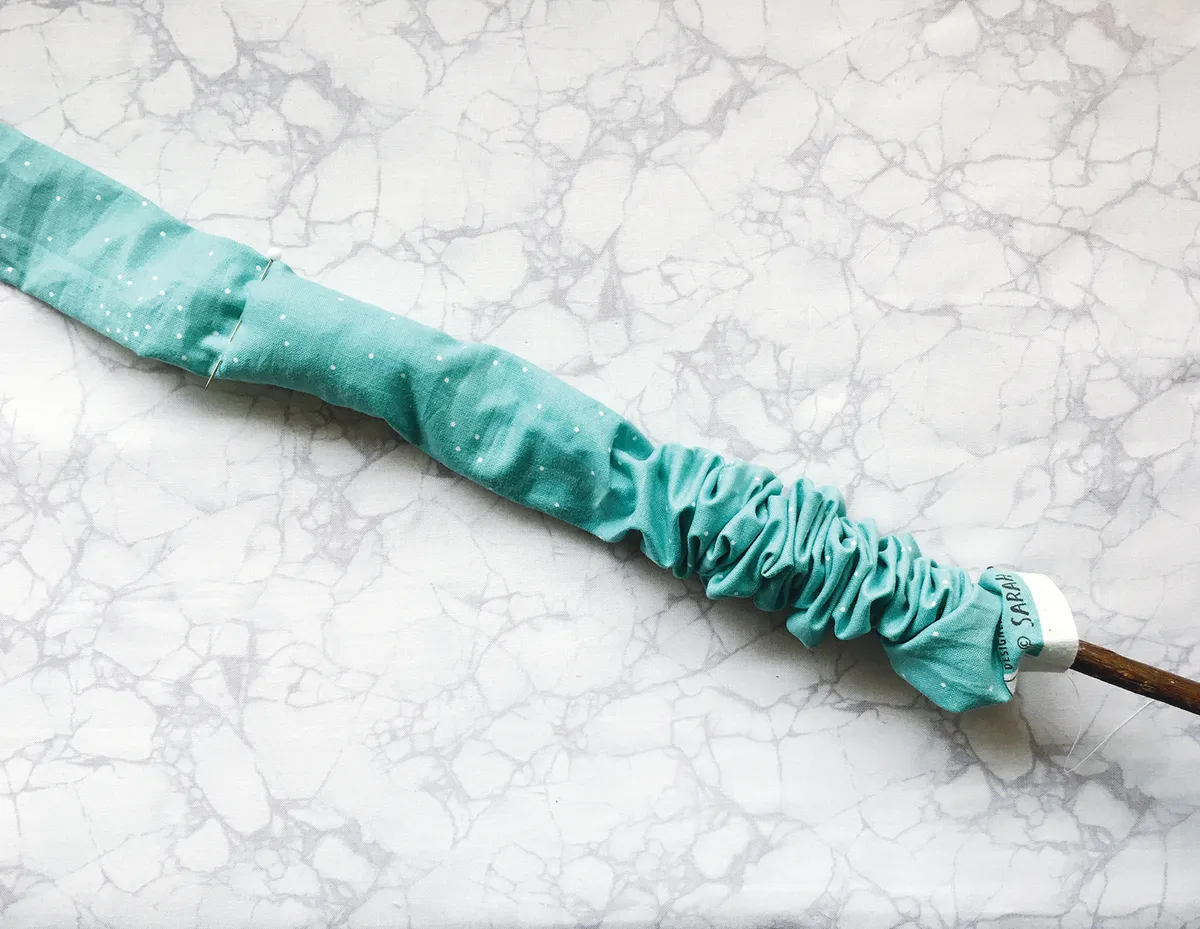
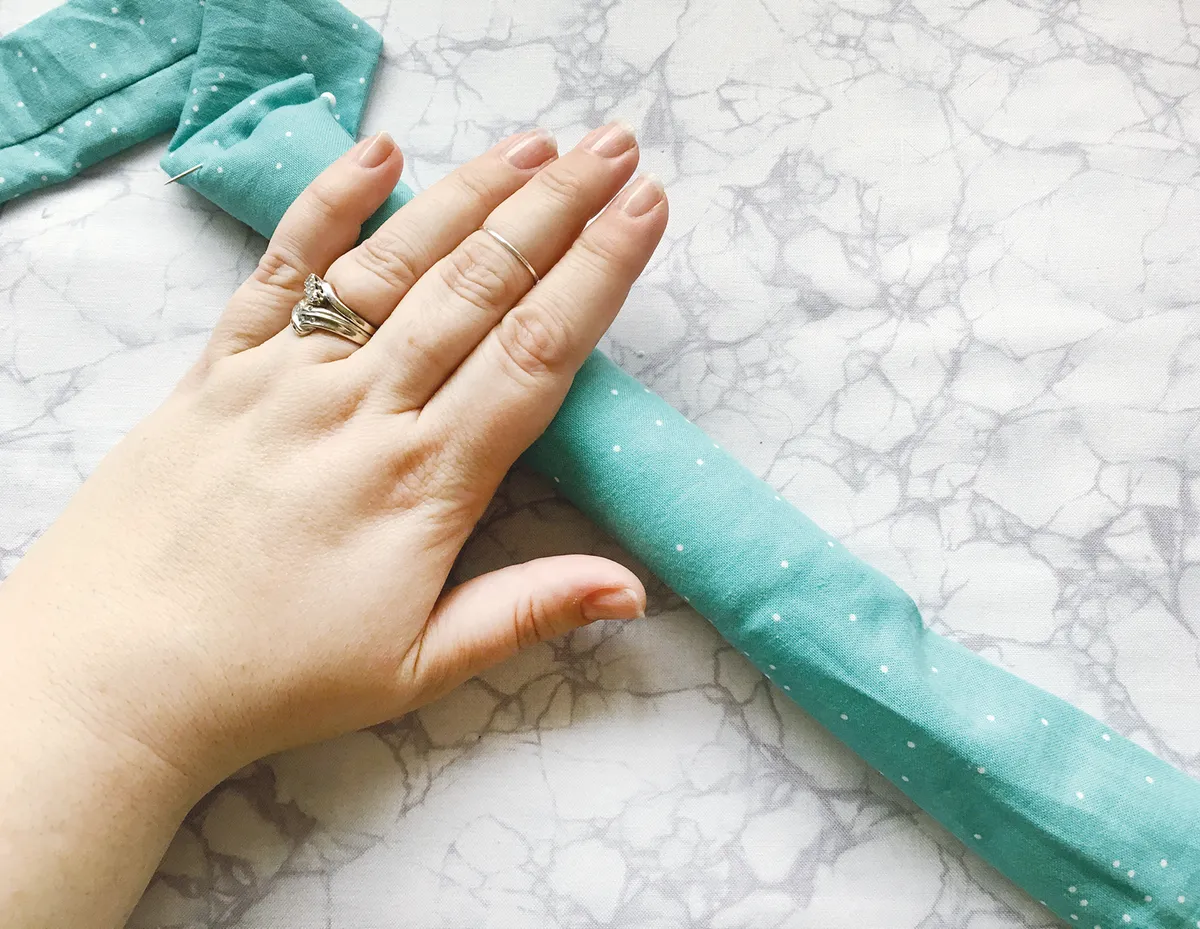
Step five: Stuff the other end of the tube in the same way and baste it closed. Repeat this with the other 51⁄4in x 44in wreath strips to make stuffed tubes.
Assembling the wreath
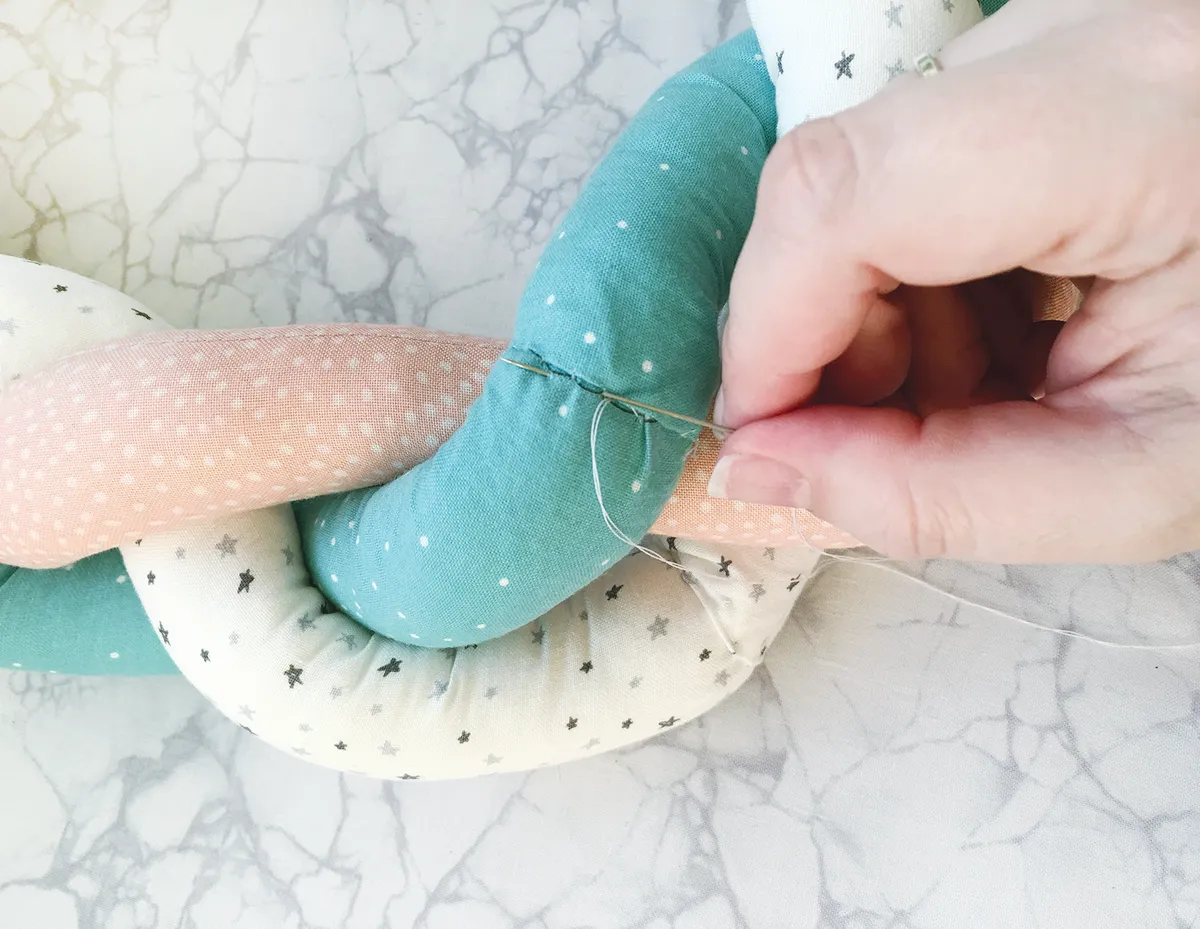
Step six: Join the ends of the tubes together with a couple of basting stitches then anchor them to something so they don’t move around while you start to plait. An ironing board works well. Plait the three sections together until you reach the end.

Step seven: Holding the end tightly, curl it around into the wreath shape and adjust it slightly so the ends meet up and join them together with a safety pin. Unpick the basting stitches at the end of one tube and fold the raw edge under.
Step eight: Unpick the basting stitches at the other end and insert this into the turned-under end and slip stitch the ends together all the way around for a neat finish. Repeat this to join the other tube ends together in the same way. Adjust the plaited tubes to even them out and make sure the wreath is a nice round shape.

Making the bow body and tail
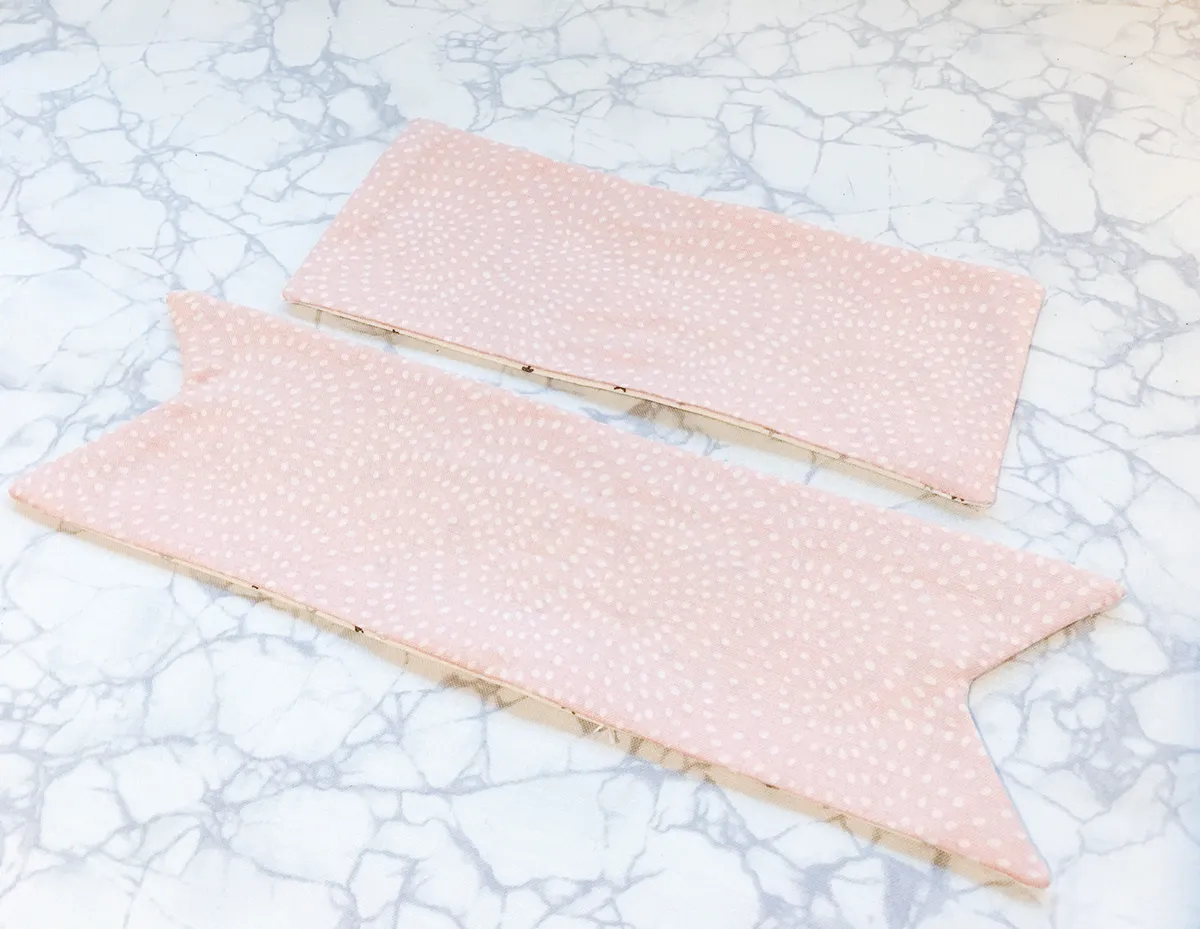
Step nine: Take one tail piece and on the wrong side of one end measure 11⁄4in along the long edge and 2in down. Draw diagonal lines from this point to the two corners. Cut along the drawn lines to create the V shape at the end. Repeat with the remaining tail piece.
Step ten: Place the two tail pieces RS facing and sew together all the way around, leaving a turning gap in the centre of one side. Clip the corners and snip into the points, then turn right side out and press. Fold the edges of the turning gap to the inside and slip stitch it securely closed.
Step eleven: Place the bow body pieces RST and sew all the way around, leaving a small turning gap in the centre of one long side. Clip the corners, turn right side out and press, then fold the edges of the turning gaps to the inside and slip stitch closed.
Assembling the bow
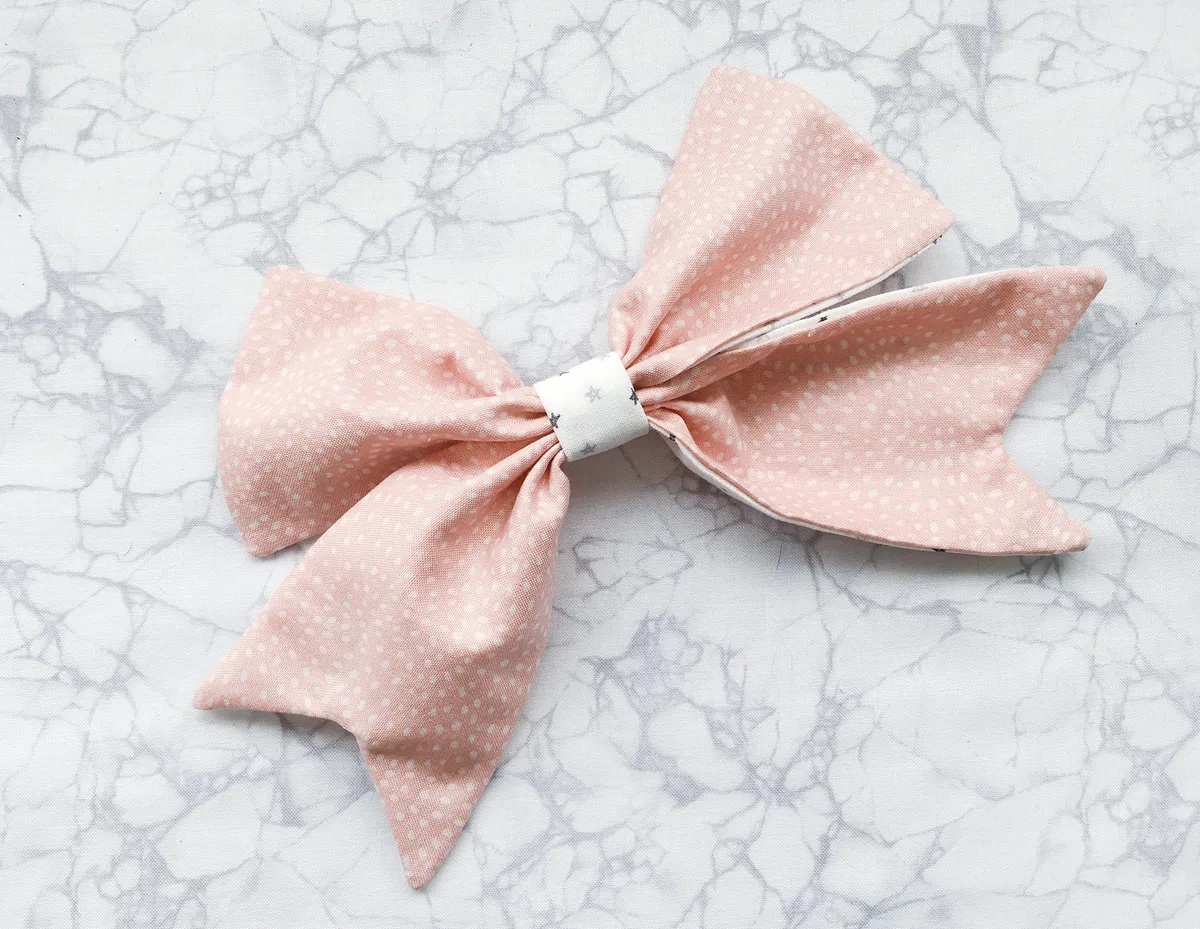
Step twelve: Fold the bow centre in half lengthways RST and stitch together down the long edge. Turn right sides out and press with the fold in the centre back then tuck the raw edges to the inside by 3⁄8in.
Step thirteen: Wrap the bow centre around the bow body and the bow tail as shown then oversew the short ends together at the back to secure and hold the bow together.
Step fourteen: Place the two hanging loop pieces RST and stitch together down the long edges. Turn right side out and fold the raw edges of one end under by 3⁄8in and press. Loop it around the wreath then slot the raw short end just inside the turned-under short end and slip stitch together to join.
Step fifteen: Pin the bow over the joined ends of the hanging loop and stitch into place at the back of the bow centre. Position the hanging loop over the joins in the wreath tubes to hide them and with the bow placed on top of the wreath. Work a few small stitches through the loop and wreath to hold it in place.