All products were chosen independently by our editorial team. This review contains affiliate links and we may receive a commission for purchases made. Please read our affiliates FAQ page to find out more.

How to stitch a felt rabbit

Learn how to stitch a felt rabbit so that you can have a new felt friend in time for Easter.

Try 6 issues of your choice of craft magazine from just £9.99

Published: February 11, 2021 at 9:00 am

Well, we know who’s been rummaging in the vegetable patch now! This naughty felt rabbit makes a great Easter pal for cheeky little scamps who just can’t resist raiding the kitchen – who knows what kind of mischief they’ll get up to? It’s the ultimate easy Easter craft which will have you hopping into the weekend. Follow our step-by-step tutorial for how to stitch a felt rabbit and craft your own nice little fella.

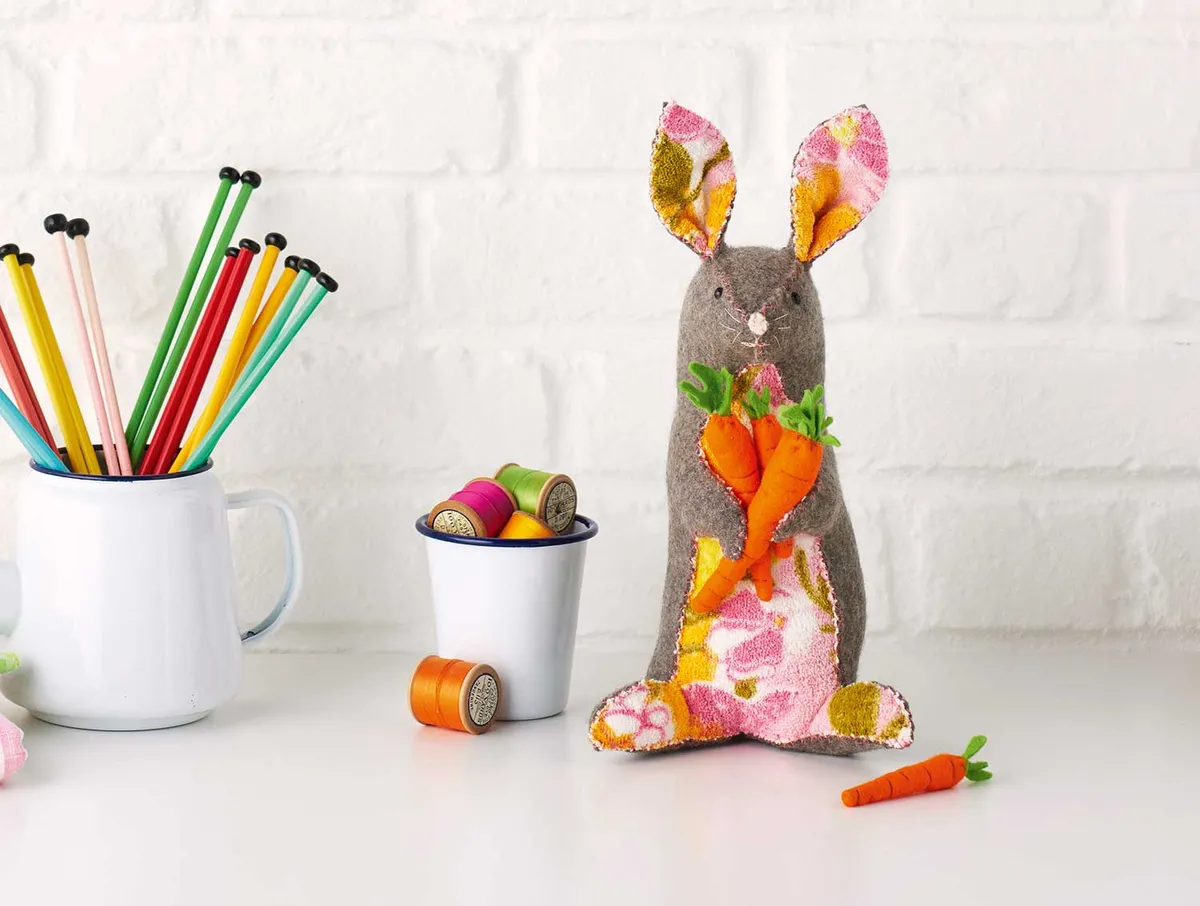
Kids will find a new partner-in-crime in the form of Helen Dickson’s cheeky Easter rabbit plushie. The bunny is hand-stitched, and his seams are joined using cross stitch in two strands of thread. The best way to do this is to place the wrong sides together and join in one direction using half cross stitch. Then return in the opposite direction to finish your stitch. This gives the seams extra strength as well as creating a decorative finish. After all, he needs some sturdiness to see him through all that late-night allotment looting.

How to hand sew a felt rabbit

You’ll need:

If you're new to sewing and embroidery then make sure you head to our beginners guide to sewing and our embroidery for beginners guide which include all the stitches you need.

Felt rabbit pattern

You will need:

  • Felt
  • Thread
  • Scissors

Making the felt rabbit

Step 1

How to stitch a felt rabbit step 1

Cut out all your fabric pieces using the templates. Start by joining the two main body pieces from point J to K using a bright pink thread. Then join the inner body along the bottom edge, working from K outwards to the end of each paw and back.

Step 2

How to stitch a felt rabbit step 2
How to stitch a felt rabbit step 2a

Join the muzzle from B to C on the template and then finish joining the inner body. You’ll need to ease the outer fabric around the inner – this will give plump limbs.

Step 3

How to stitch a felt rabbit step 3

Place the outer and inner ear pieces right sides (RS) together and stitch around the edges.

Step 4

How to stitch a felt rabbit step 4

Insert the head gusset, matching at C. Fold each ear in half vertically and insert at E as you stitch. Join from the head gusset down back to F.

Step 5

How to stitch a felt rabbit step 5

Lightly stuff your head and determine the eyes’ position. We used black glass-headed pins and then marked the spot with an air erasable fabric pen. Take care with this stage as the positioning of the eyes will affect your rabbit’s final expression. When you’re happy with the positioning, mark the spots, remove the stuffing and insert the safety eyes.

Step 6

Stuff your felt rabbit. Push small pieces of stuffing into his limbs and muzzle first. You may find using a ‘stuffing stick,’ such as a knitting needle or chopstick, useful. Mould his body with your hands as you stuff – keep using small pieces of stuffing to avoid lumpiness and keep turning him as you go to ensure you’re happy with the effect you’re achieving.

Step 7

Make sure you stuff him firmly as the stuffing will compress over time and you don’t want your felt rabbit to become limp and floppy. Slipstitch the gap closed once you’re happy with the result.

Step 8

Cut a small rounded heart shape from your pale pink felt and stitch into place for the nose using your pale pink thread. Add his mouth using two strands of thread. The whiskers are long stitches in one strand of pale pink thread.

Step 9

Stitch a white pom pom to the back of the bunny, right at the bottom of his back seam.

Making the carrots

Step 1

Cut an elongated pizza slice shape from your orange felt using the diagram (not to scale) as a guide. The carrot the rabbit is holding should measure approximately 15cm (6″) long from the point to the centre of the curve. It doesn’t need to be very accurate – real carrots are lumpy and bumpy!

Step 2

Join the seam using two strands of orange thread, then stuff your carrot – not too firmly this time.

Step 3

Cut out the leaves from your green felt using the diagram as a guide – again, these don’t have to be perfect.

Step 4

Run a gathering thread around the top of your carrot in orange thread. Pull up the gathers, but not too tightly yet – leave a small space at the top so you can insert the leaves.

Step 5

Roll up your leaf strip tightly and insert into the space you left at the top of the carrot. Now pull the gathers up tightly and stitch your leaves into place. With two strands of darker orange floss work stitches across your carrot at intervals, pulling fairly tightly to give your carrot shape. Stitch into position on the rabbit’s paws, curling them around the carrot. He’s now ready to join in playtime.

How to stitch a felt rabbit final How to stitch a felt rabbit back view

Your felt bunny is complete! Give him as a gift this Easter or hide him among the eggs. Make sure you share our felt rabbit pattern with your pals too. If you’re looking for a new Easter project then head over to our chicken embroidery design and our other Easter rabbit sewing pattern!