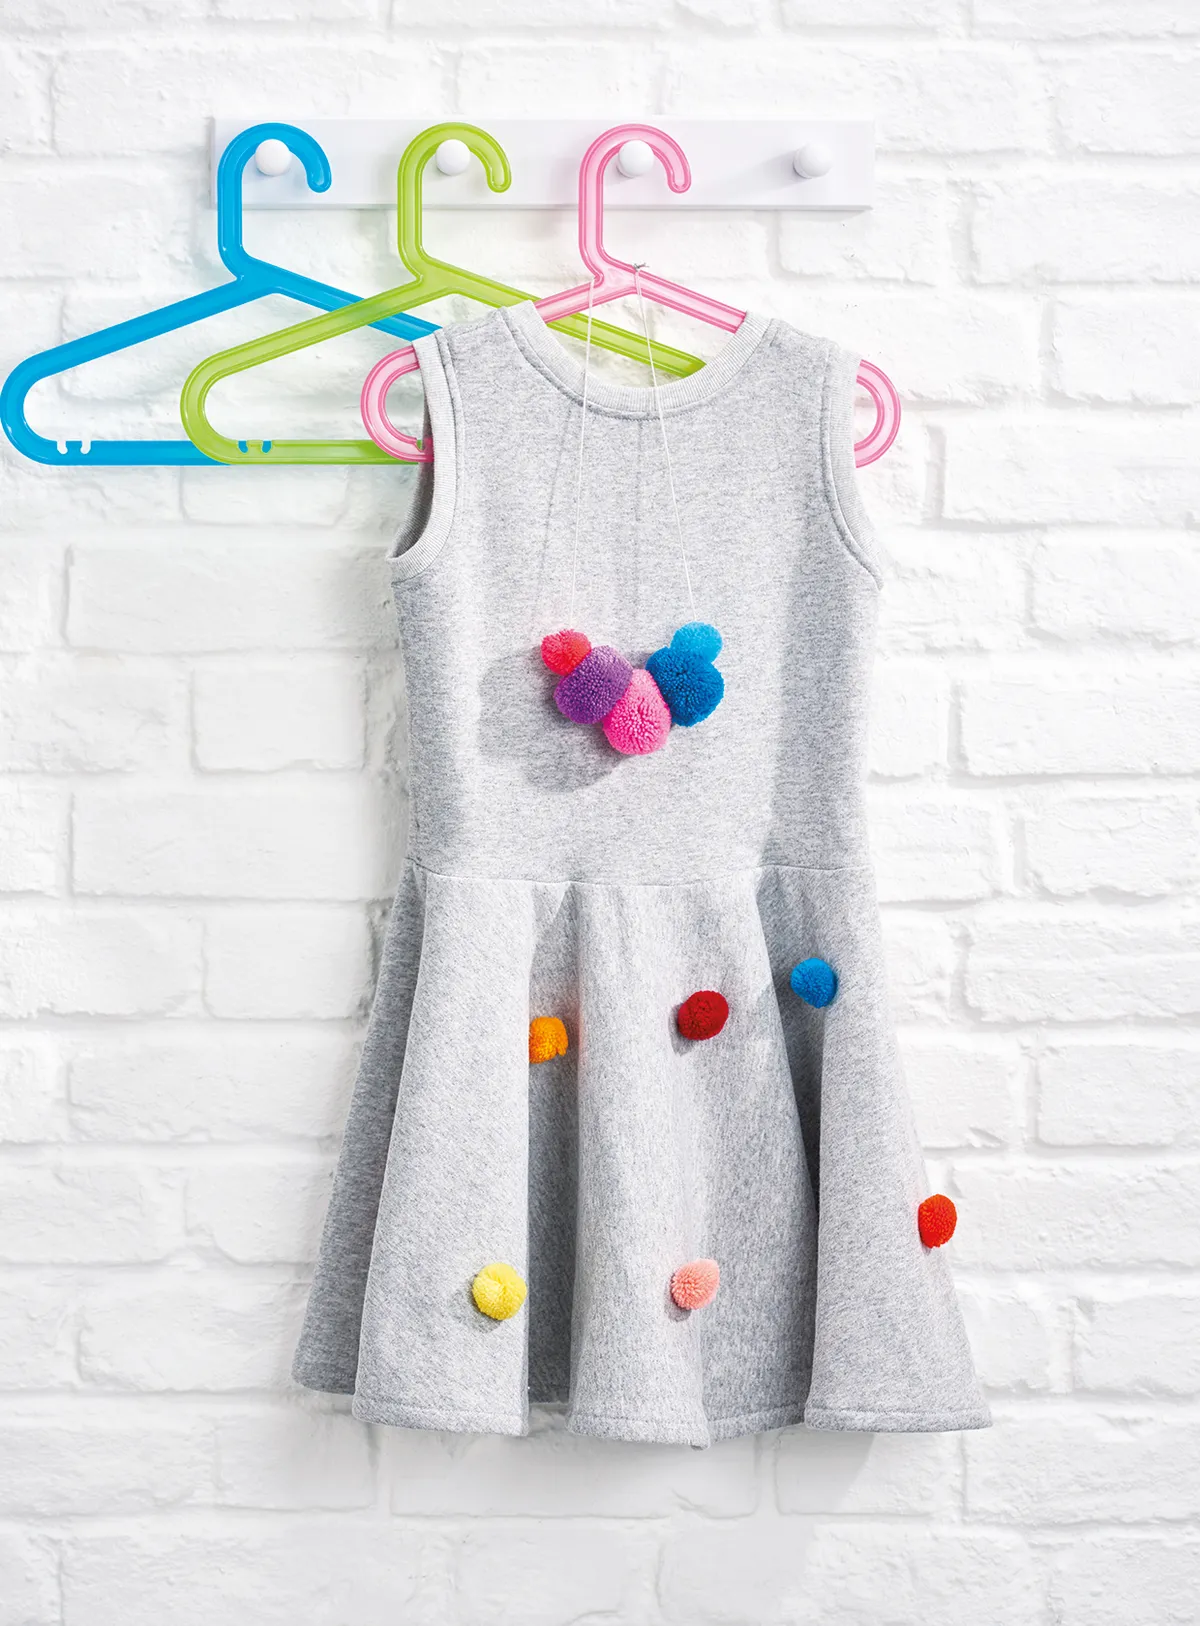
This easy-to-sew skater dress makes a perfect addition to your little girl’s wardrobe. Wear on its own in the summer, or layered with long-sleeved tops and tights – it could also be made as a separate jersey top and skirt, too. Designer and founder of Wild Things Dresses, Kirstie, says, "I’ve used a soft fleece-back sweatshirt fabric, but good weight jersey, ponte roma or fleece also work. This unlined dress is finished at the neckline and armholes with welts. I’ve decorated the dress with polka dot pom poms, which would look great with added lurex; alternatively, add felt or appliqué cotton circles, raindrops or stars. This girls dress sewing pattern is the perfect starter project if you are new to sewing jersey!”
For more easy beginner sewing projects, you might also like our guide to How to make bunting, how to make a sun hat or our favourite sewing patterns for beginners.
You will need
- Jersey or sweatshirt fabric: 1m (1¼yds)
- Contrast rib for the welts: 6x80cm (23⁄8x32in) – if rib isn’t available, self fabric can be used
- Yarn for pom poms
- 35mm (13⁄8in) pom pom maker
- Sewing machine – check out our guide to the best sewing machines for beginners
- Basic sewing kit
Girls Dress Pattern Notes
- You can make this pattern for ages 6-18mths, 18m-2yrs, 3-5yrs, 6-8yrs.
- Use a 1cm (3⁄8in) seam allowance unless otherwise stated.
- Download our girl's dress sewing pattern to get started
Cutting out
Step 1
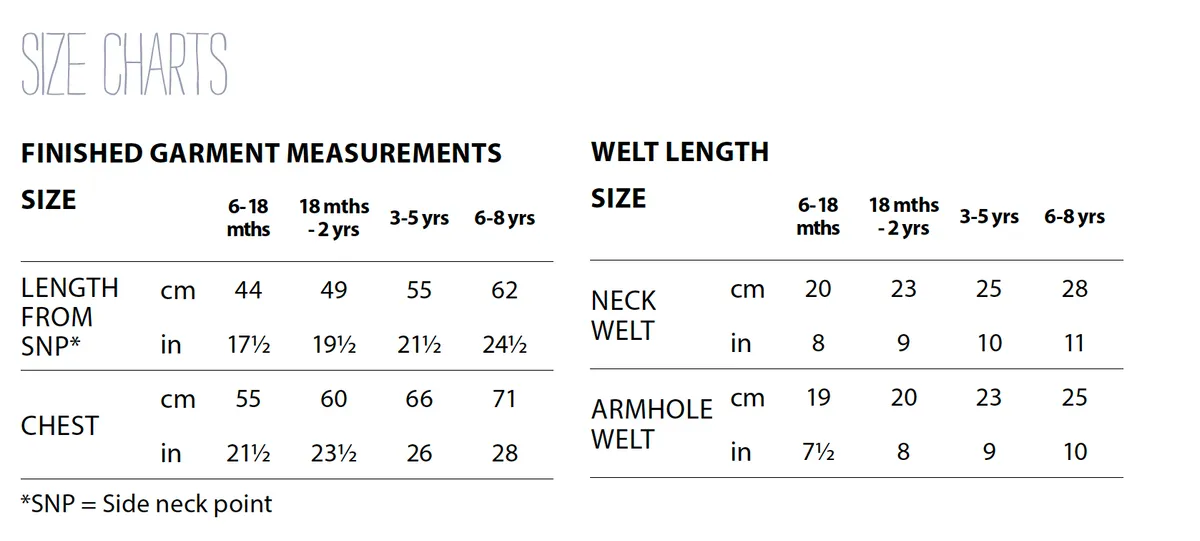
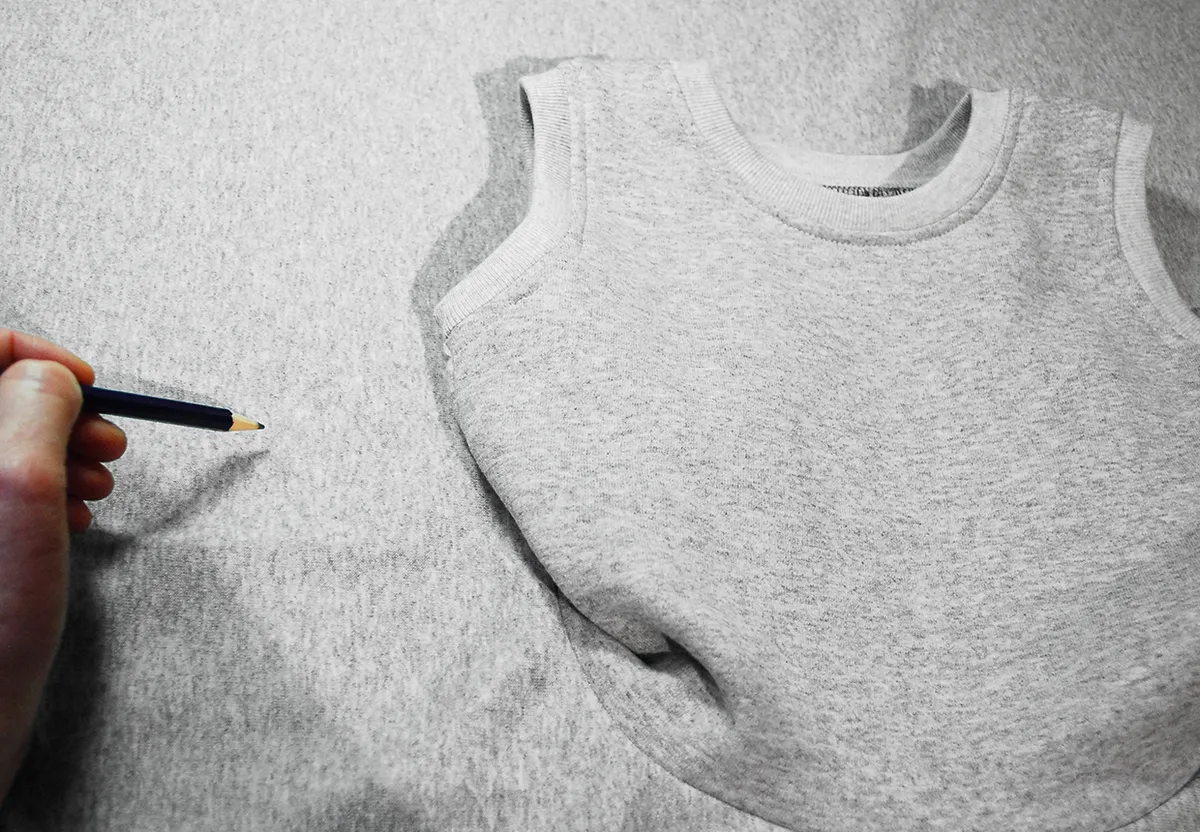
Measure a dress that already fits your child well and check this against the finished measurements chart on page 65 to choose the best pattern size for your child.
Step 2
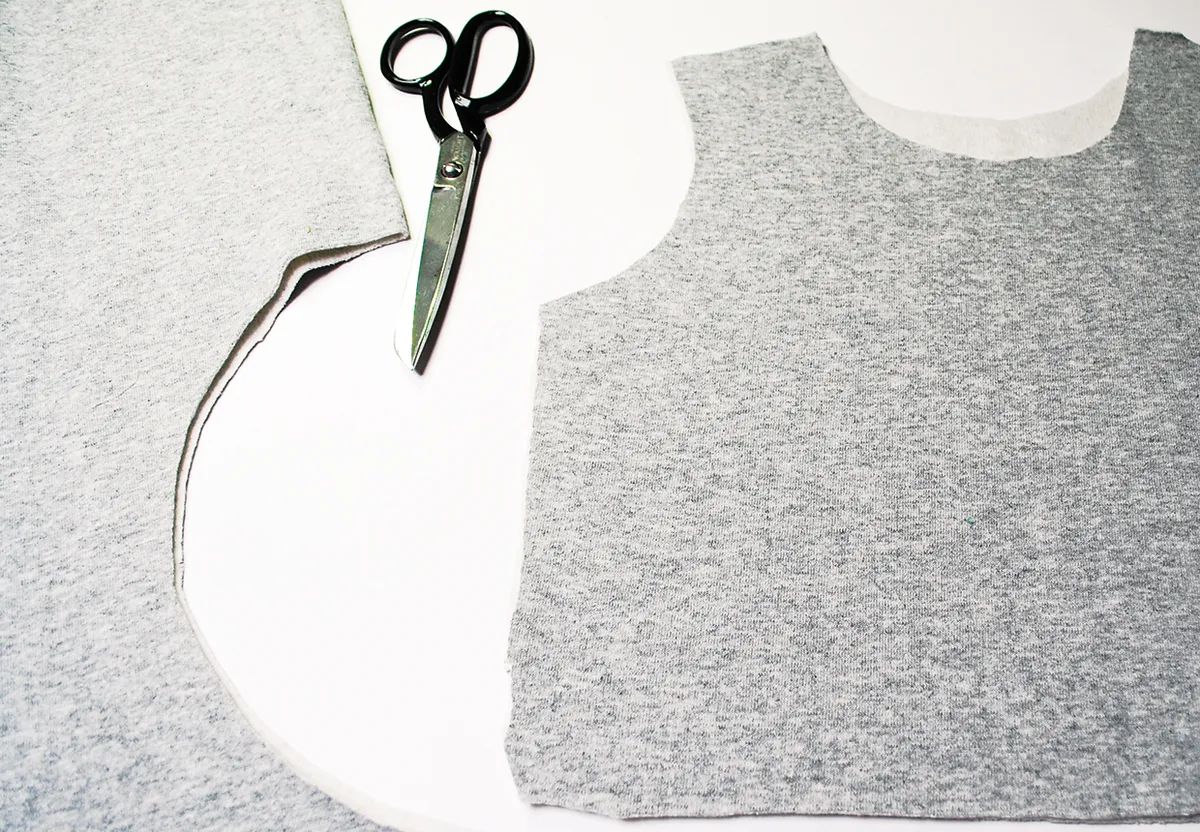
Cut out the patterns following the lines for the correct size. The bodice front and bodice back use the same pattern peice but the necklines are different. For the bodice front, trace around the pattern piece and the lower neckline. For the bodice back, trace around the pattern piece and the upper neckline.
Step 3
Press the fabric and lay it on a flat surface. The skirt pattern is one eighth of the whole skirt so you’ll need to draw around it then move it to match up the straight edge and then draw around it again to make the whole skirt. If you are using a circular knit jersey, you should be able to cut a seamless full circle skirt. If this is not possible, make a side seam and sew in two halves. Mark around the pattern using tailor’s chalk, adding 1.5cm (5⁄8in) to the top edge for seam allowances and for the side seams if you need to join it. Add 1cm (3⁄8in) to the bottom edge for the hem.
Step 4
Repeat this to draw around and cut out the bodice front and back, adding a 1.5cm (5⁄8in) seam allowance before you cut it out. Both pieces are cut on the fold, matching the fabric fold to the foldline on the pattern.
Step 5
For the welts, cut two armhole welts, and one neck welt to the lengths shown in the chart above. Cut each one 6cm (23⁄8in) wide – this includes seam allowances.
Tips for sewing with jersey fabric
When sewing with jersey, you will need to use a stitch that allows for some degree of stretch. Most domestic machines will have a suitable stretch stitch, so refer to the sewing machine manual for details of how to do this on yours.
A zigzag stitch is best, however you may also use a straight stitch, applying stretch to the fabric itself as you sew. Stitch the seams, then finish the raw edges using a machine zigzag stitch or an overlocker machine which sews and finishes in one. Practice first on scraps of your chosen fabric and make sure you are using sewing needles suitable for jersey.
Stitching the bodice
Step 6
Pin the bodice front and bodice back right sides (RS) together.

Step 7
Stitch the shoulder seams together. Step three Stitch the side seams together.

Step 8
Turn RS out and press.
Making the welts
Step 9
Place the short ends of the neck welt RS facing and stitch together to create a loop.
Step 10
Turn RS out and press in half lengthways. Repeat this with the two armhole welt pieces.
Attaching the welts
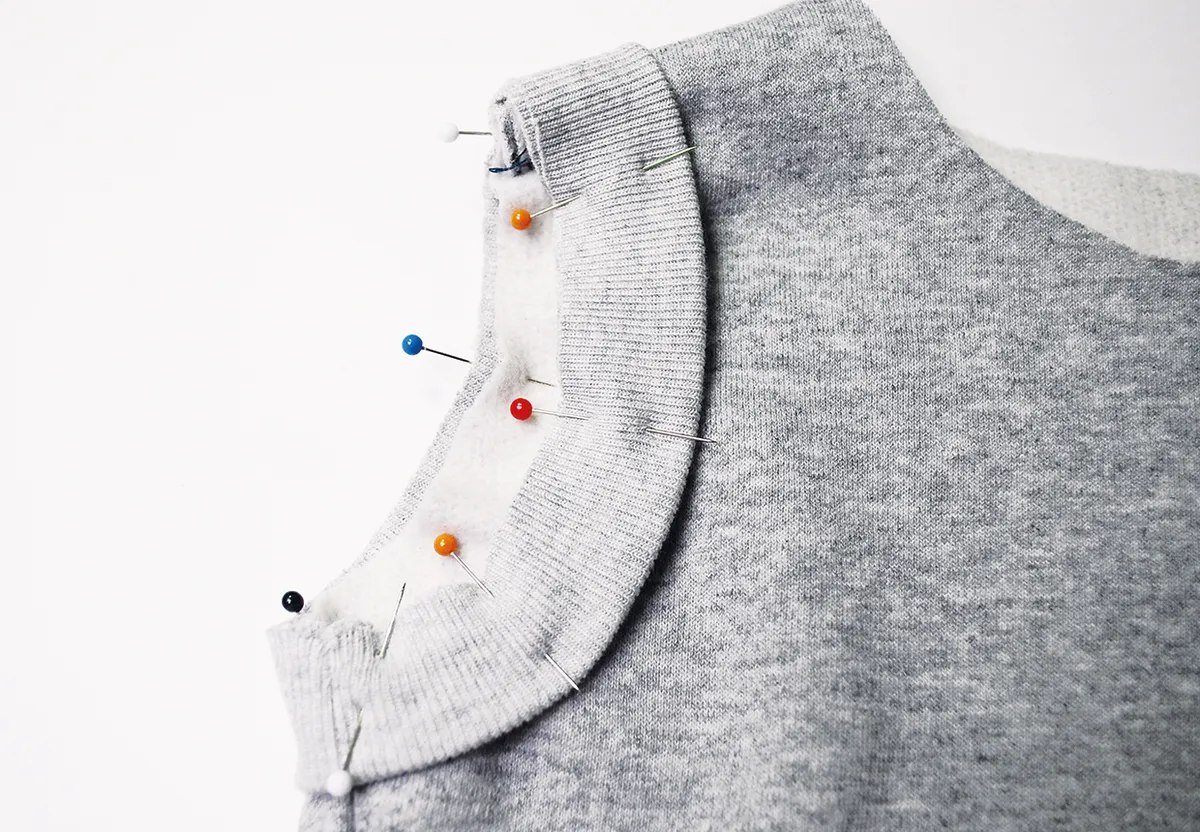
Step 11
Pin the welts to the neck opening and armholes RS together, matching the underarm seams and easing the rib to provide a small evenly distributed amount of stretch.
Step 12
Stitch into place.
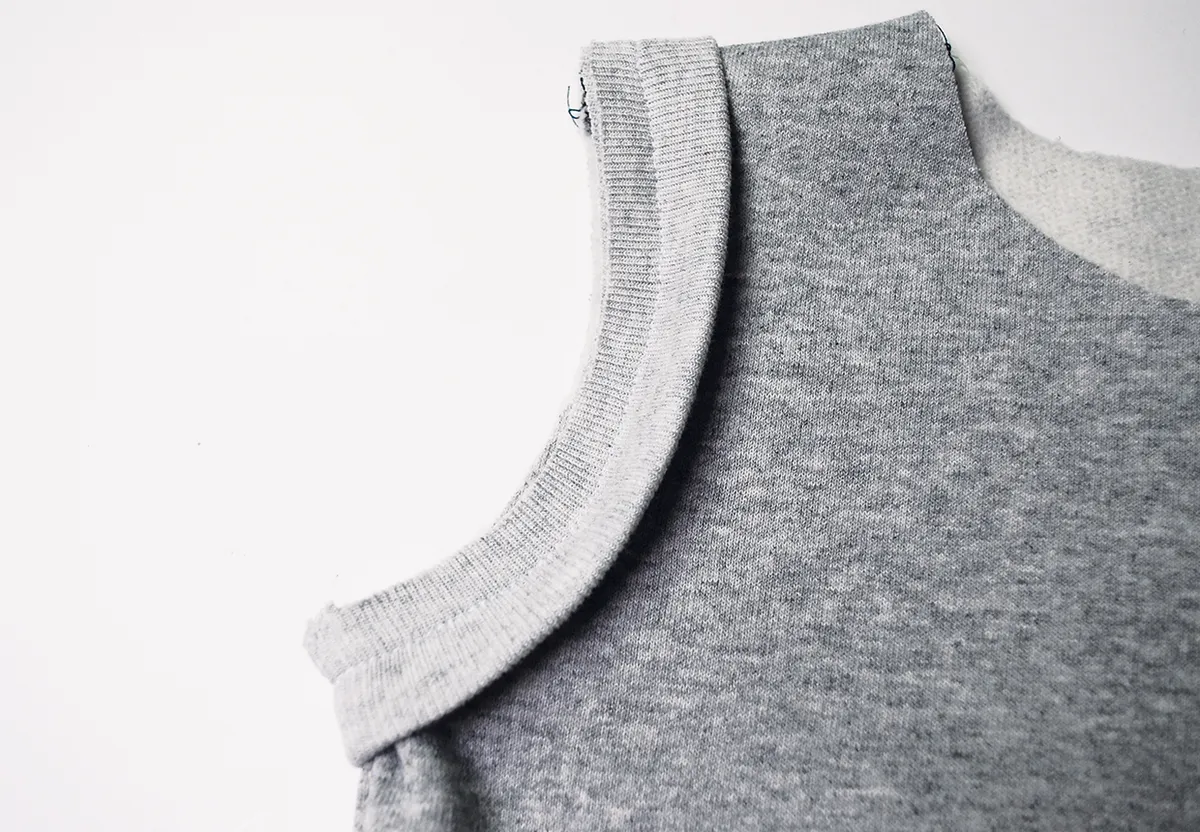
Step 13
Turn the bodice RS out and press again so that the welts lie flat.
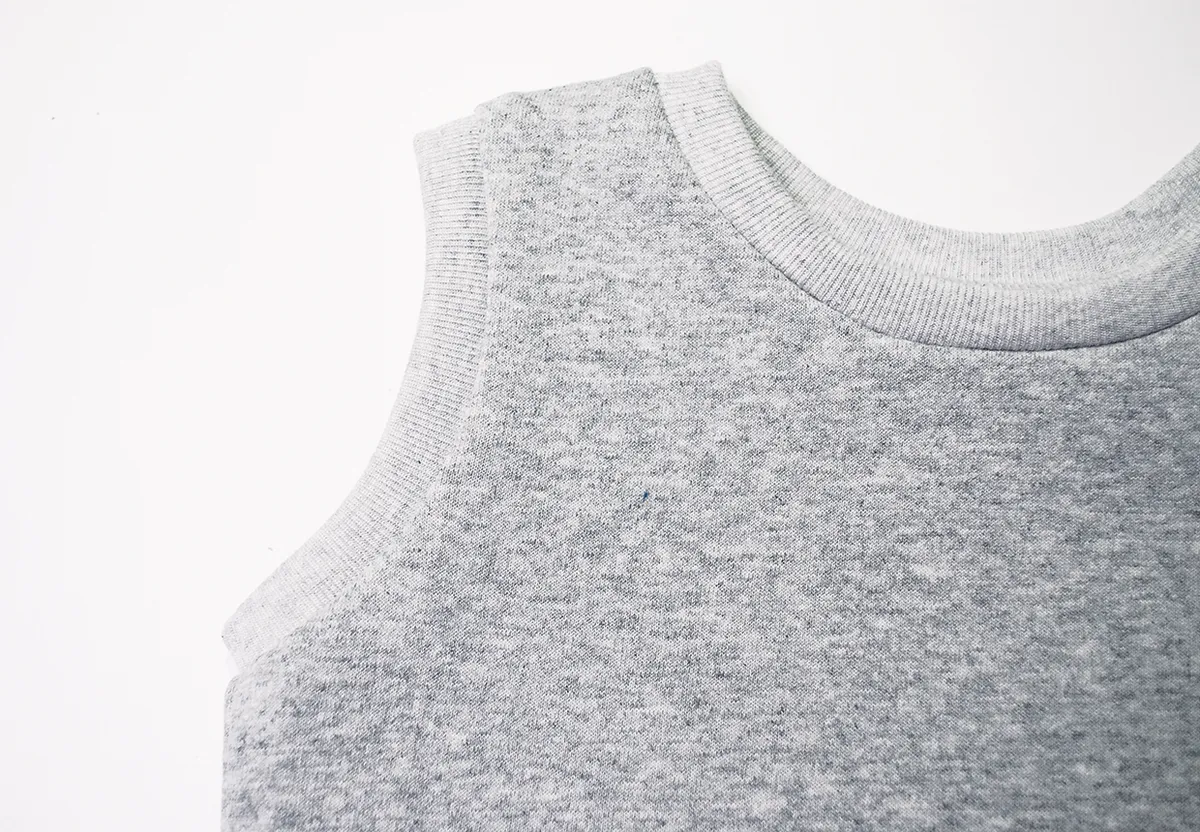
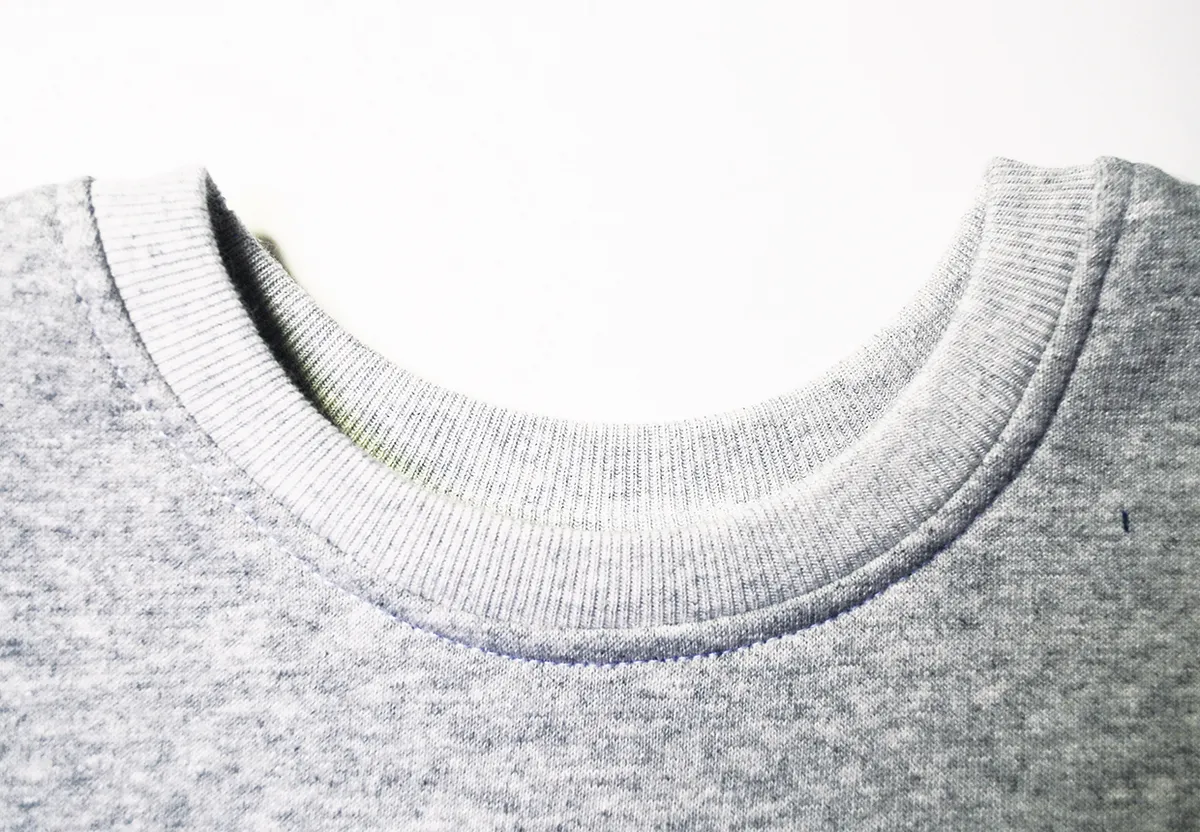
Step 14
Sew the welts into place through all layers, with the bodice RS up, 5mm (¼in) from the edge.
Making the skirt
Step 15
If you need to use a side seam, join the skirt pieces RS together to create the whole skirt piece.
Step 16
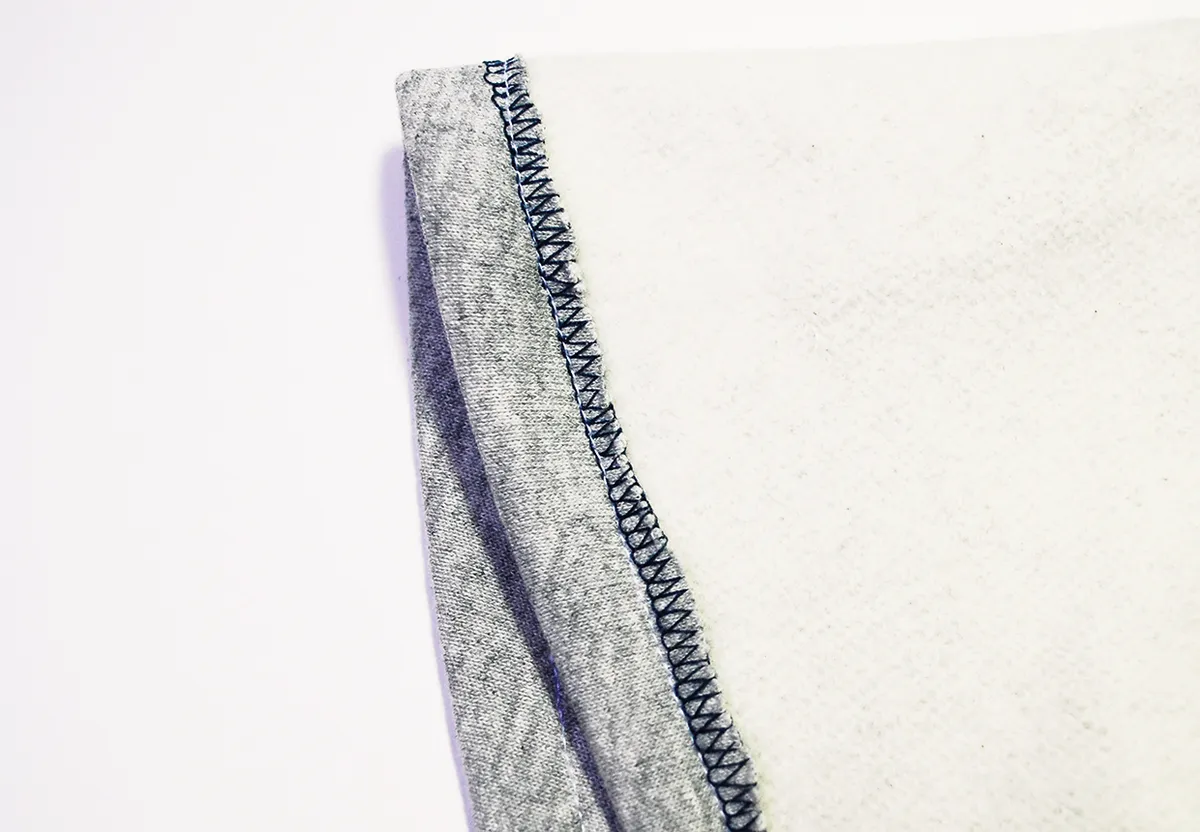
Finish the raw bottom edge of the skirt using a machine zigzag.
Step 17
Turn the finished hem under by 1cm (3⁄8in) to the WS and sew the hem into place. Press well.
Attaching the bodice
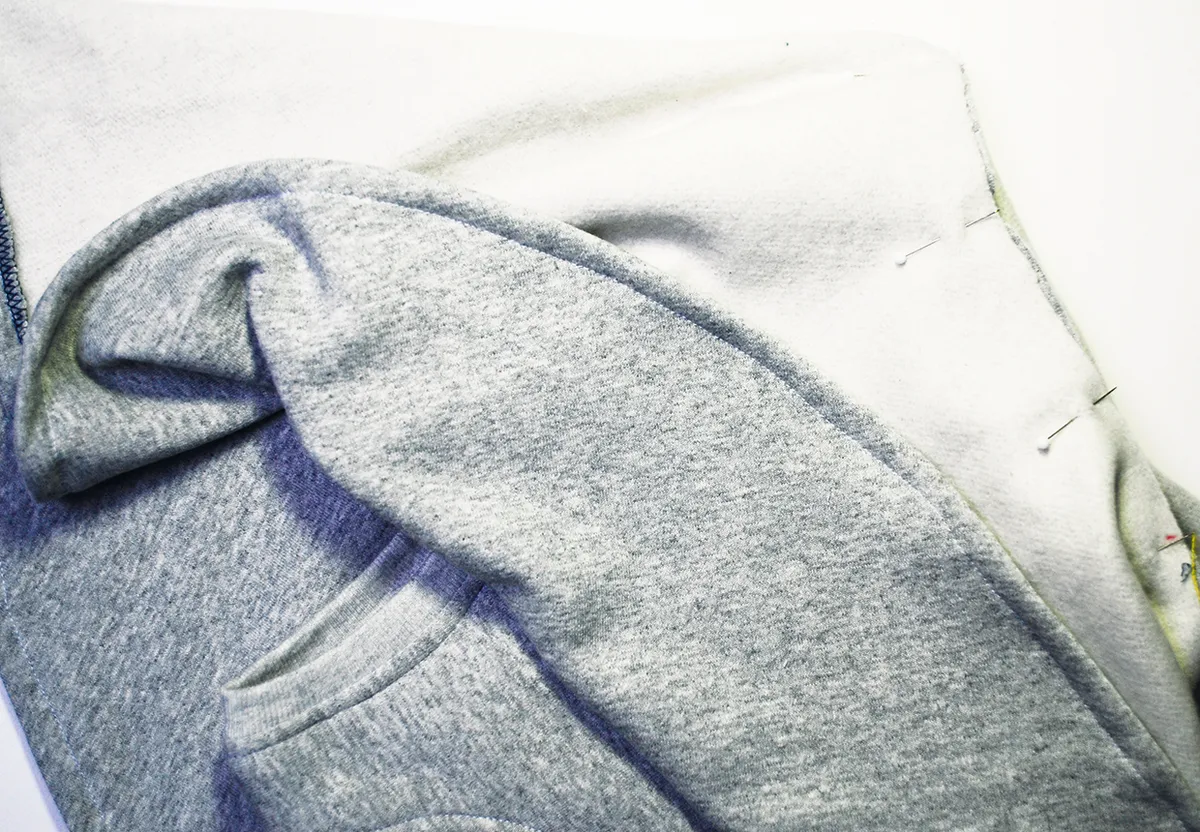
Step 18
Pin the lower edge of the bodice to the top edge of the skirt RS together, easing into place if necessary.
Step 19
Using the same stretch stitch, sew the bodice and skirt together. Press.
Adding the pom poms
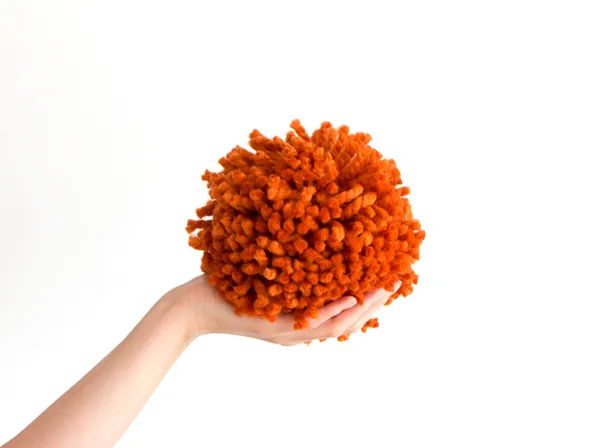
Step 20
Make about 20 pom poms following the instructions that come with the pom pom maker, in a mixture of yarn colours.
How to make pom poms
Want to learn how to make a rainbow of pom poms, with our without a pom pom maker? Happy days we've got a step-by-step guide to how to make a pom pom to show you how it's done.
Step 21
Mark evenly spaced pom pom positions on the skirt.
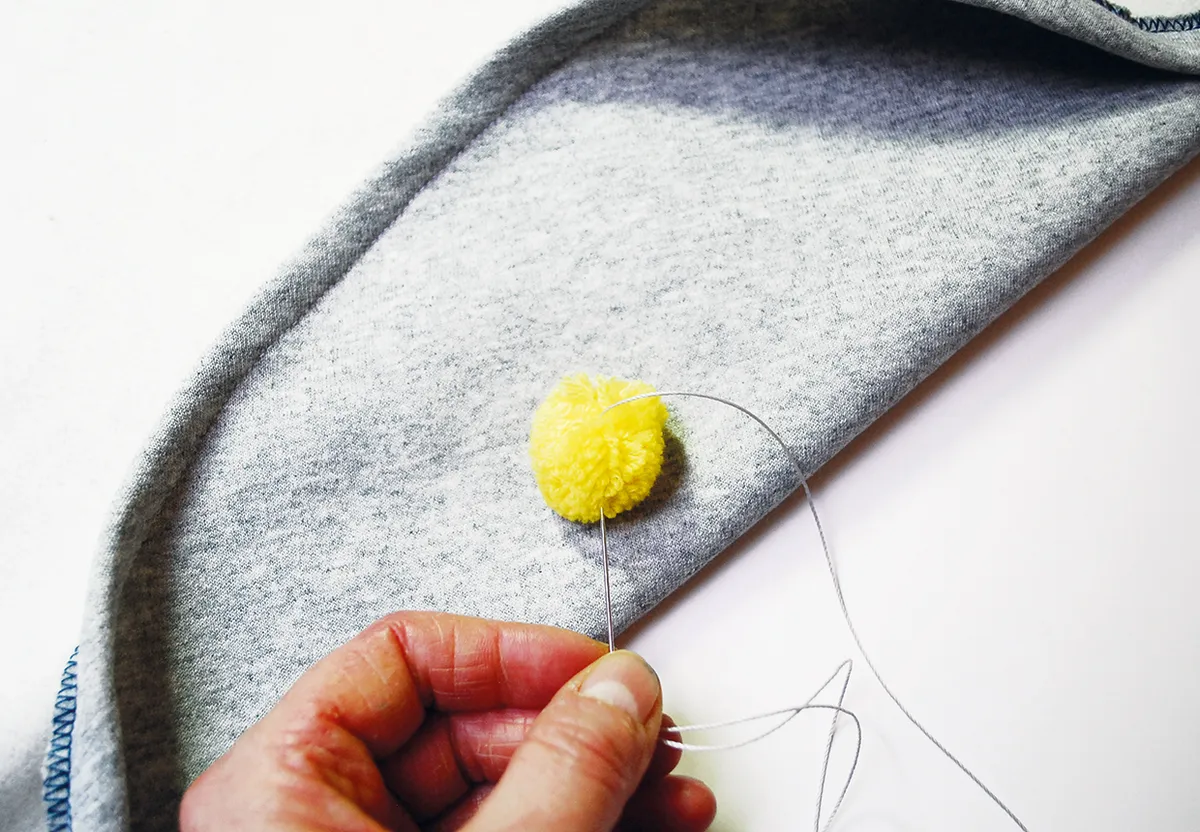
Step 22
Sew the pom poms into place using a large sewing needle and strong thread. Tie off the loose threads on the reverse.
Making a pom pom necklace
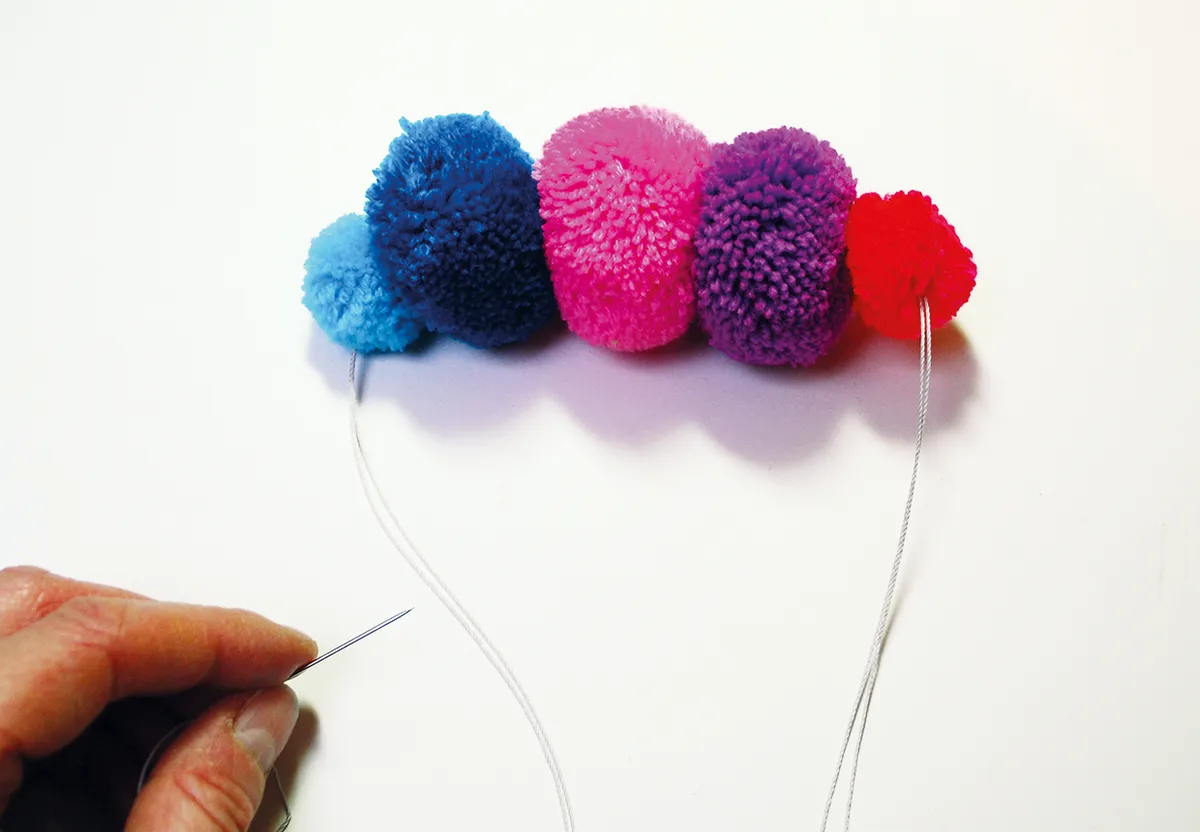
Step 23
To make a matching pom pom necklace, simply thread a few pom poms in various sizes and colours onto a thick thread or cord and tie the ends in a knot to fit comfortably around your child’s neck.