Regardless of whether you’ve been crocheting for years or have just picked up a hook for the first time, our library of crochet stitches is the ideal reference point for any crocheter.
It can help you to get the hang of the basic crochet stitches or try new crochet stitches that you’re unfamiliar with.
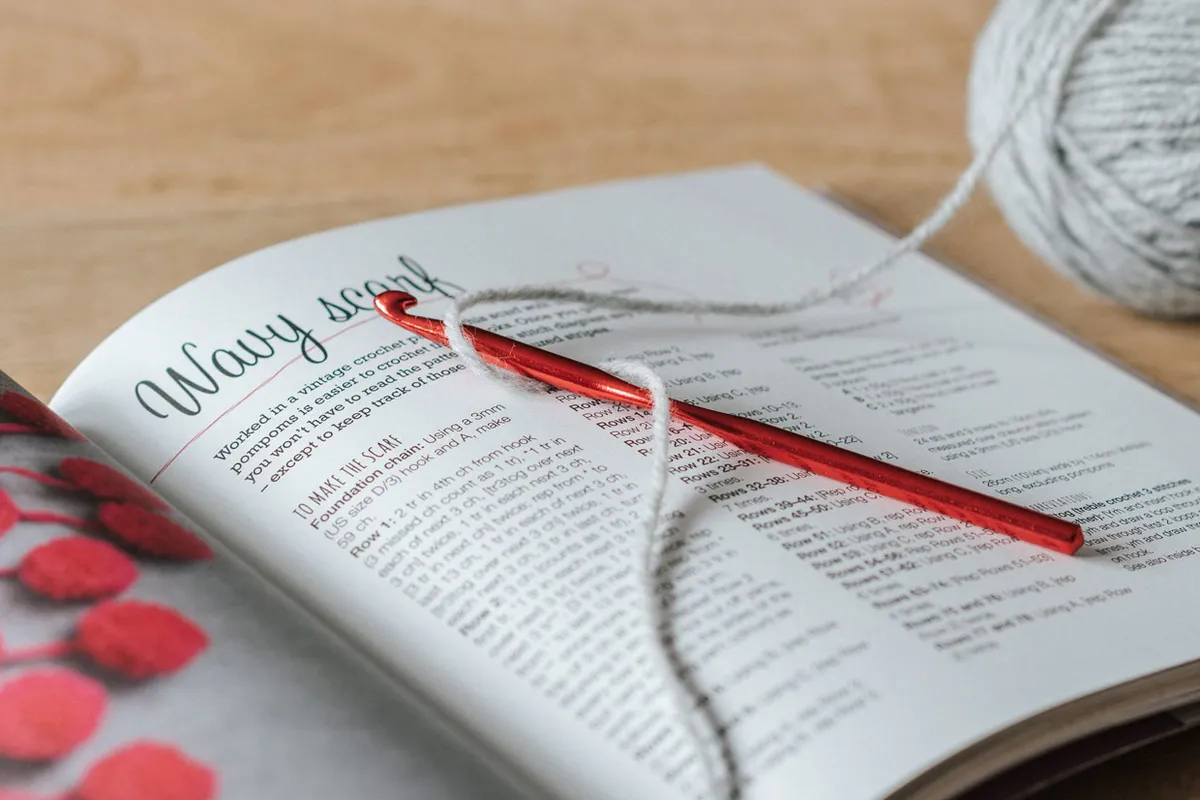
undefinedLibrary of Crochet Stitches
We’re going to start off looking at the basic crochet stitches, before moving onto the various different types of crochet stitches. If you’re looking for a specific stitch, you can use the handy links below to jump directly to the stitch you’re after.
You will find that most patterns will use abbreviations for stitches. It’s important to be aware that there are different names for stitches depending on your geographical location! We’ll include this important information in this article, but you can also find everything you need to know about abbreviations in our Crochet Abbreviations and UK/US conversion guide.
Basic crochet stitches
| Slipknot | Half treble crochet (htr) | US terms - half double crochet (hdc) |
| Chains (ch) | Treble crochet (tr) | US terms - double crochet (dc) |
| Double crochet (dc) | US terms - single crochet (sc) | Slip stitch (ss) |
| Fasten off |
Technical crochet stitches
Crochet colour techniques
Crochet stitches for texture
Advanced crochet stitches
| Solomon’s knot | Broomstick crochet |
| Crochet knit stitch | Beaded crochet |
| Tunisian crochet | Crochet with sequins |
| hairpin lace |
Basic crochet stitches
Here you’ll find the basic crochet stitches that every crocheter needs to know! As these are the most common stitches you’ll use, we’ve included a brief description of the stitch in bold too.
We use UK terminology for all of our crochet stitches here on Gathered, and in the stitch description we say ‘yarn round hook’, but you may come across this referred to as YO (yarn over) or YRH (yarn round hook).
Slipknot
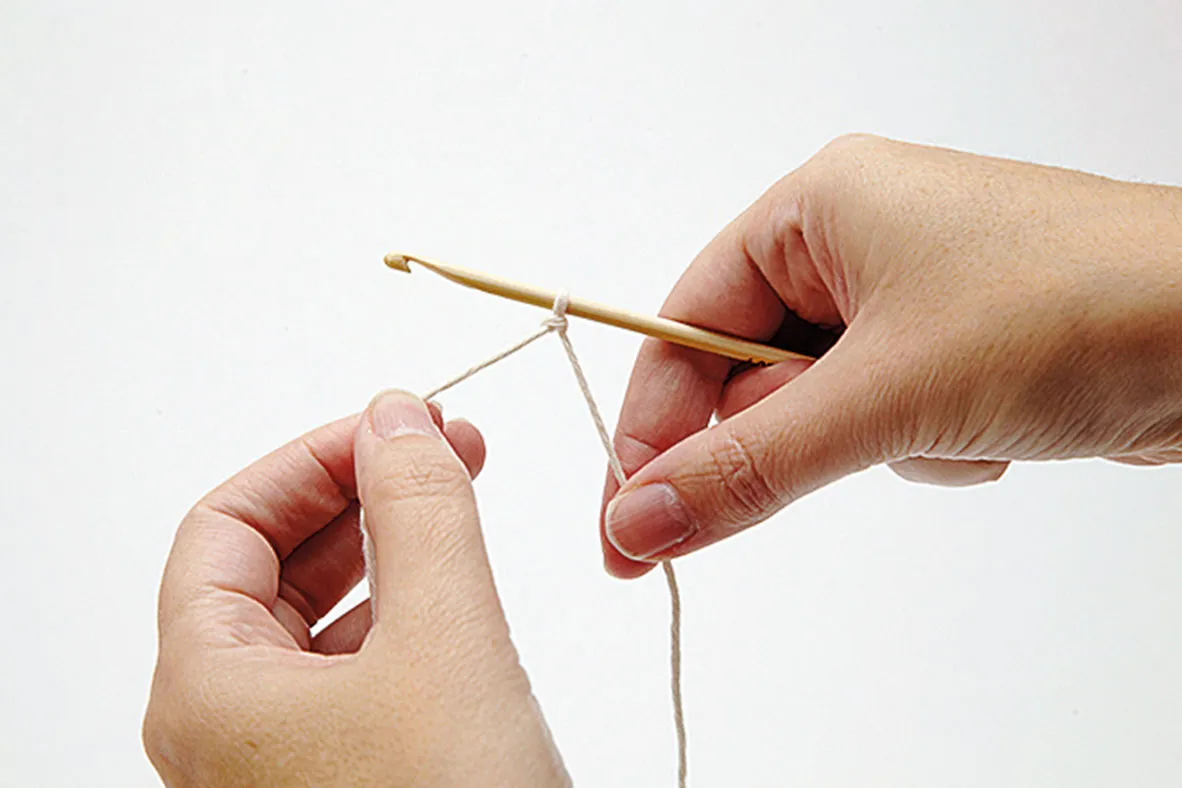
No we’re not talking about the heavy metal band - a slipknot is a basic knot used in crochet to attach your yarn to your hook.
It's the very first thing you'll have to do for every crochet project. As a slipknot is the standard way of attaching your yarn to your hook, you will never see it written in a pattern.
- You can find our How to make a slipknot tutorial here.
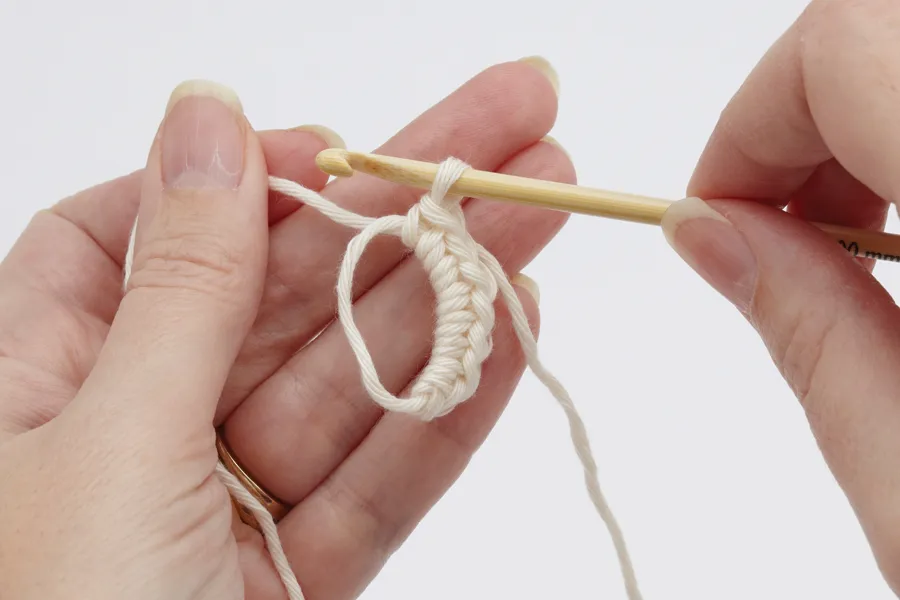
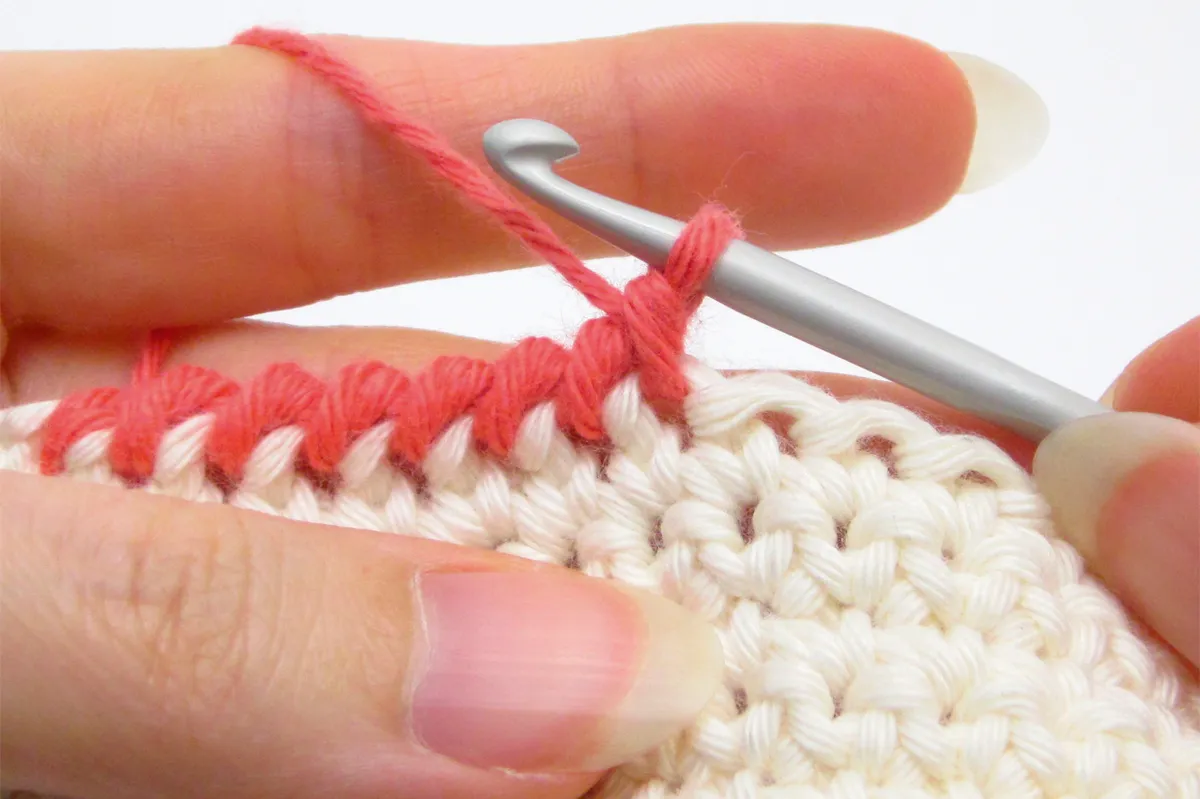
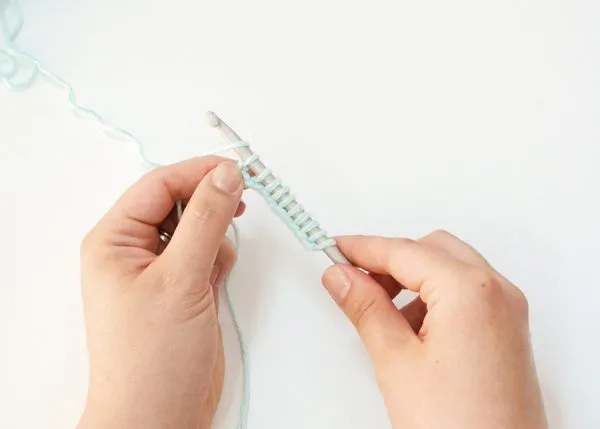
Chains (ch)
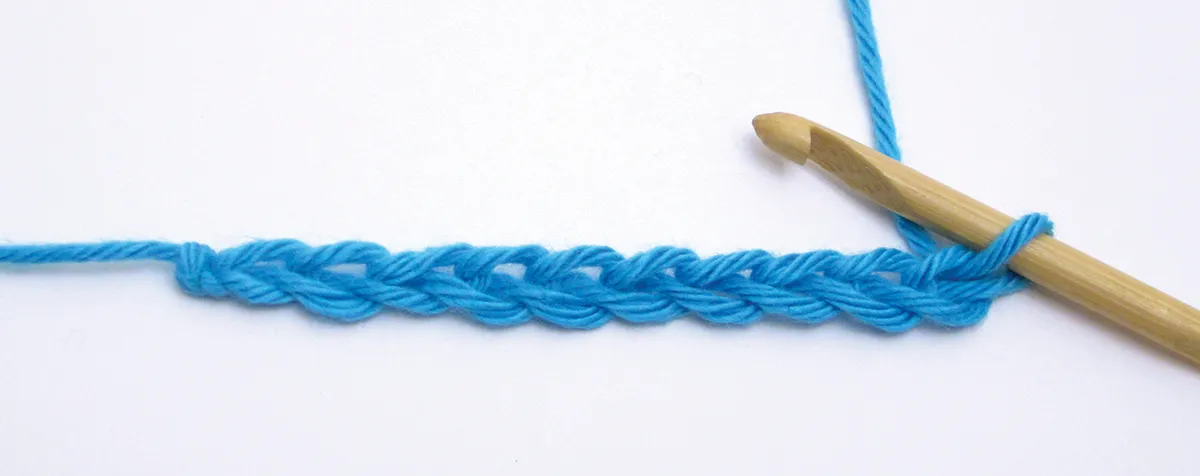
How to - Yarn round hook, pull loop through loop on hook
Chains are the foundation of any crochet project - so much so that the first chains of your project are called the 'foundation chain'. Your foundation chains set the width of a piece of crochet.
Here’s what you need to know about Chains
You use chains at the start of each row to set your height - the amount of chains you will make is dependent on the height of the stitches you will use on that row. Chains at the start of a row are called 'turning chains'.
Chains are also used in some designs to create spaces between stitches, most prominently in lace designs and filet crochet.
- Get started with our How to chain stitch and count your stitches tutorial.
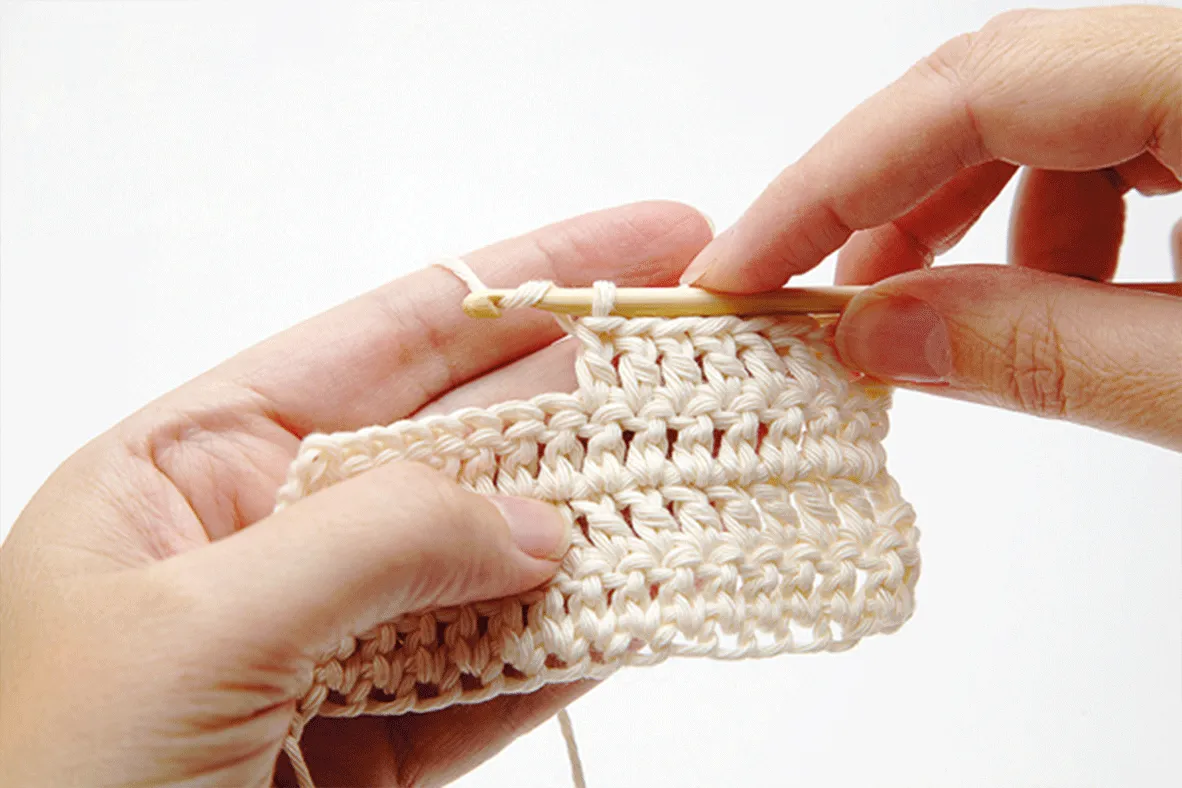
Double Crochet (dc) - U.S. Single Crochet (sc)
How to - Insert hook into stitch, yarn round hook, pull loop through stitch, yarn round hook, pull loop through two loops.
Double crochet is a solid stitch and normally the first stitch that people learn. It creates a neat and even fabric with minimal holes and is used in many different projects – from amigurumi toys to accessories to garments.
In US terminology this stitch is referred to as a single crochet, which is a giveaway if you're ever trying to figure out if a pattern is in UK or US terms. UK terminology doesn't have a single crochet stitch, so if you see SC written anywhere you know you're working with a US pattern.
- Take a look at our How to make a double crochet stitch tutorial.
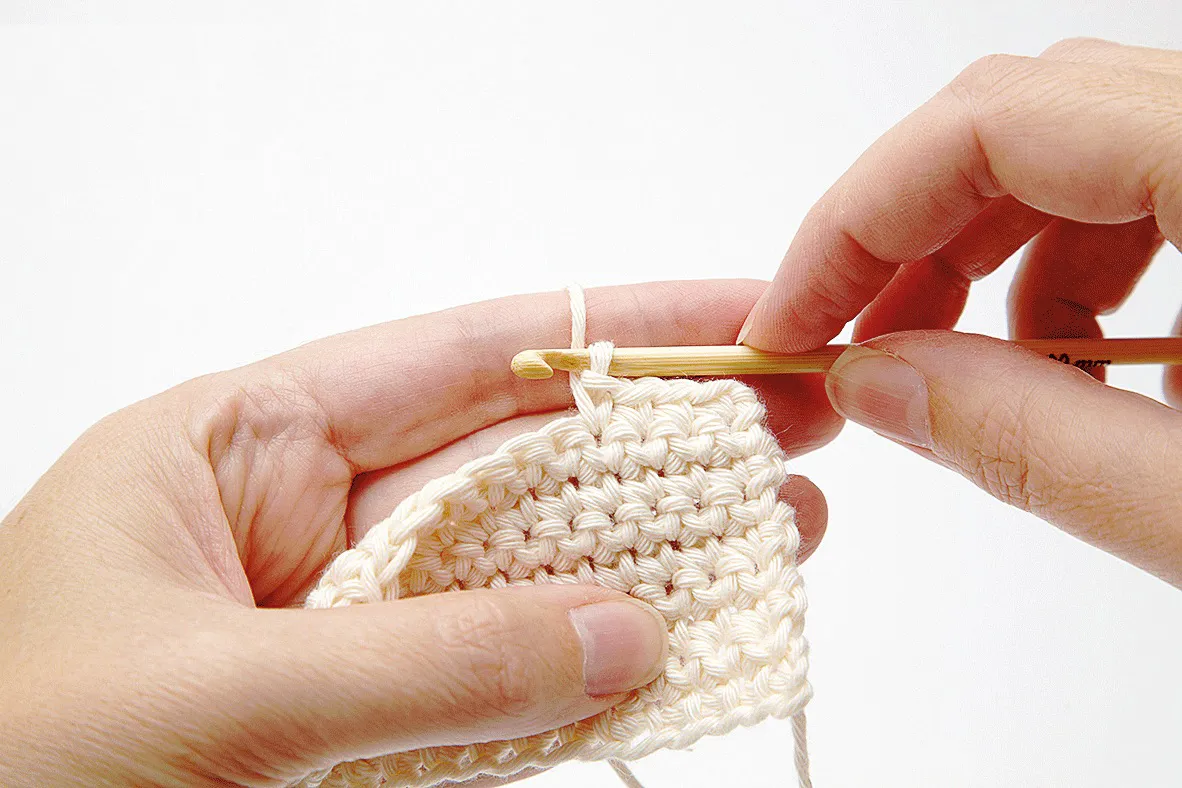
Half treble crochet (htr) - U.S. Half double crochet (hdc)
How to - Yarn round hook, insert hook into stitch, yarn round hook, pull loop through stitch, yarn round hook, pull loop through three loops.
Half treble crochet stitches are somewhat of an in-between stitch; taller than a double crochet stitch, shorter than a treble crochet stitch! As such, they provide a stitch that has the solid uniformity of a double crochet stitch but are a bit more flexible like treble crochet stitches.
They’re most commonly used in garments and accessories, and while they can be a little confusing for beginners, these sweet little stitches have a unique charm all of their own.
- Check out our Half treble crochet tutorial.
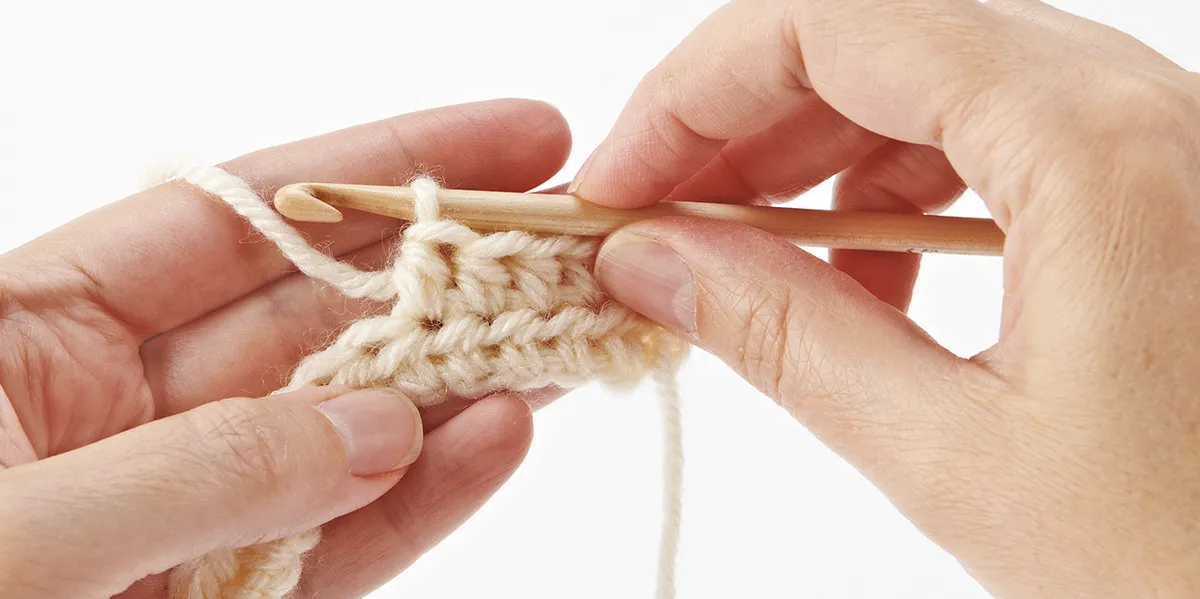
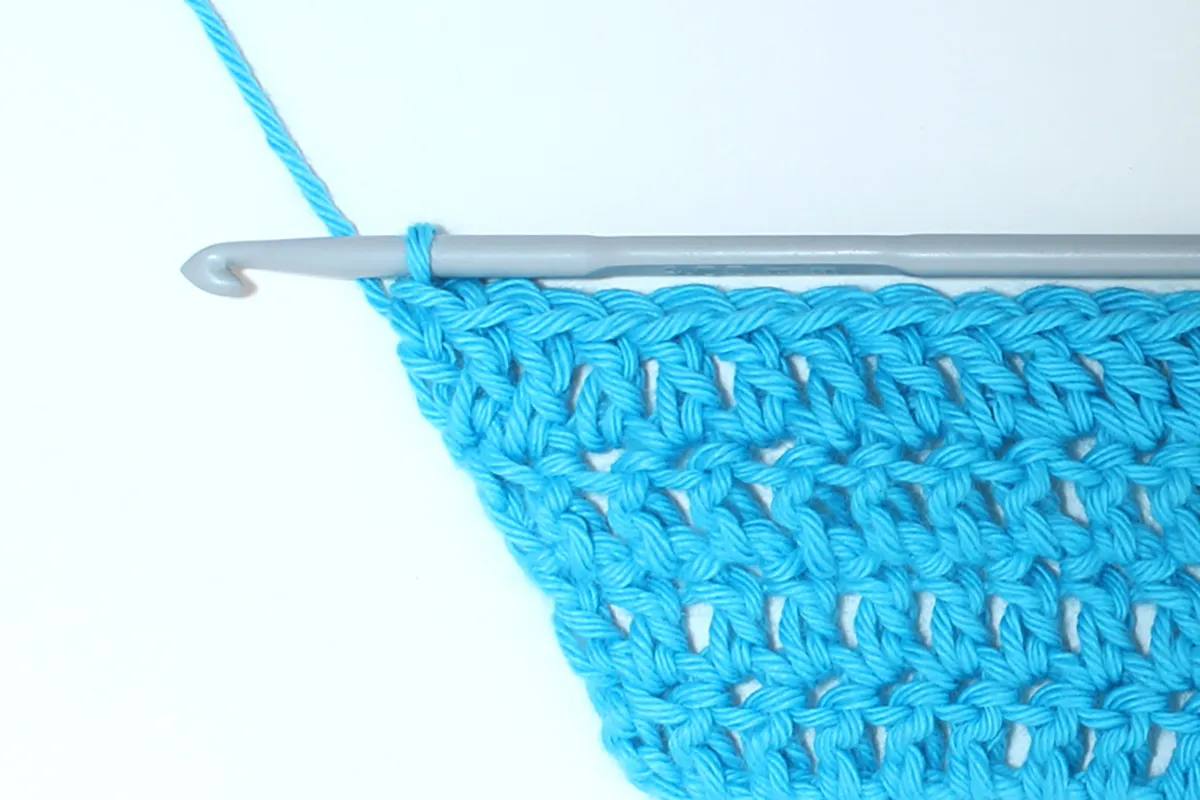
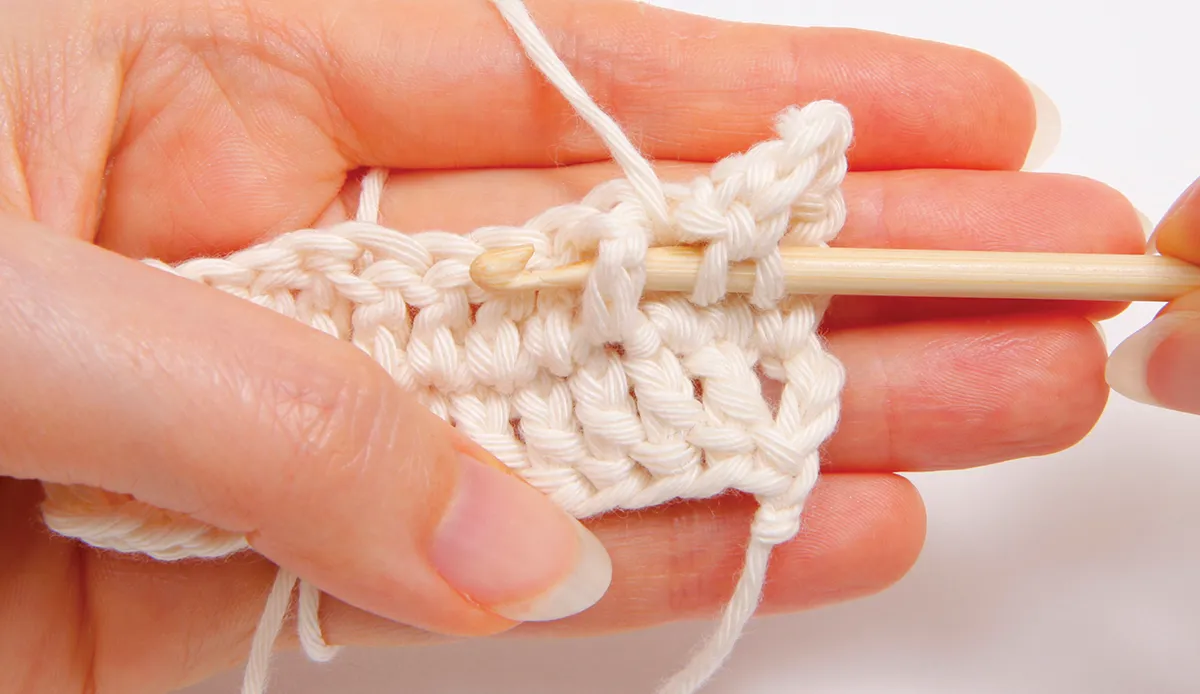
Treble Crochet (tr) - U.S. Double Crochet (dc)
How to - Yarn round hook, insert hook into stitch, yarn round hook, pull loop through stitch, yarn round hook, pull loop through two loops, yarn round hook, pull loop through two loops.
Treble crochet stitches are longer stitches that aren't as solid as double crochet stitches, making them ideal for items like scarves and garments as they create a more breathable and free-flowing fabric.
To make things confusing, in UK terminology this is called a treble crochet stitch, however, in US terms it is called a double crochet stitch. This can often confuse novices (and more experienced crocheters too) but once you get the hang of it you'll quickly be able to tell the difference.
A giveaway is if you have a turning chain of 3 chains, then it's almost certainly going to be a UK Treble Crochet Stitch.
- You can find our guide on How to treble crochet here.
Slip Stitch (ss)

How to - Insert hook into stitch, yarn round hook, pull loop through stitch AND loop on hook.
Slip stitches are a bit like a slip knot in stitch form. They are most commonly used for joining rounds of crochet or for manoeuvring to a position in your crochet without using full stitches.
Slip stitches can also used as a decorative effect on edgings of projects or as a technique for joining two pieces of crochet together.
- Learn how with our How to make a slip stitch tutorial!
Fasten off
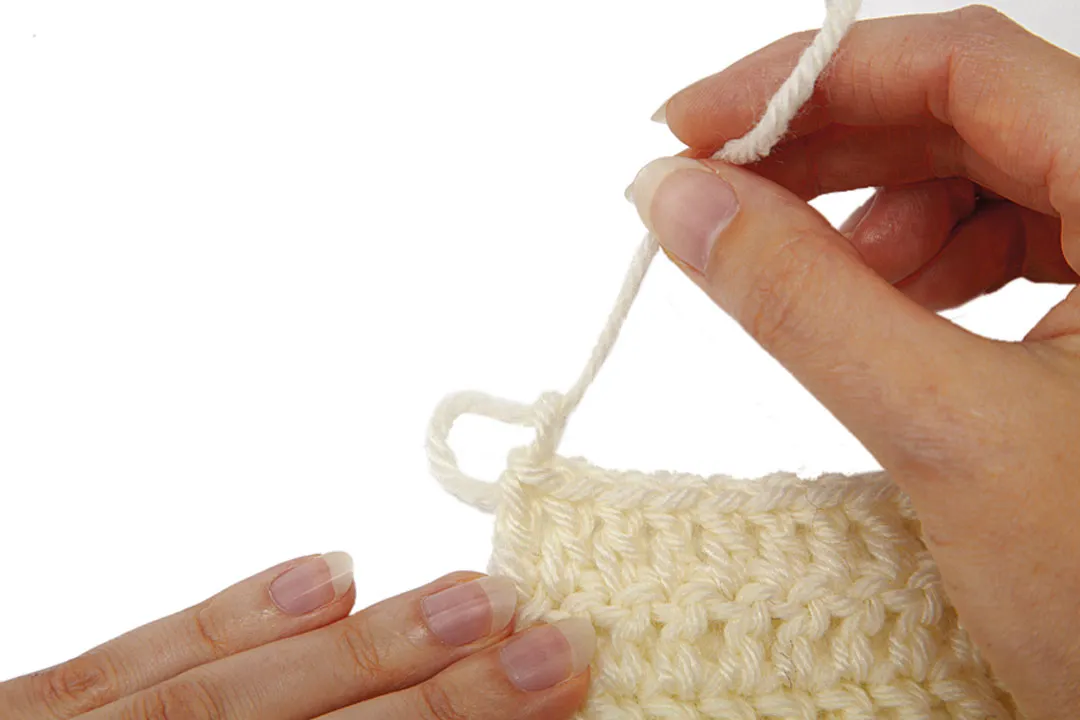
How to - Remove hook from working loop, cut yarn, pull yarn tail through the loop and tighten.
Ok so it’s not really a stitch, but it is a technique that everyone needs to know in order to finish a project. Fastening off essentially puts a simple knot in at the end of your work so that it can’t easily come undone.
Some people prefer to cut the yarn first, and then use their hook to pull the remaining yarn through the loop.
- Find out How to fasten off and neatly weave in your ends with our tutorial.
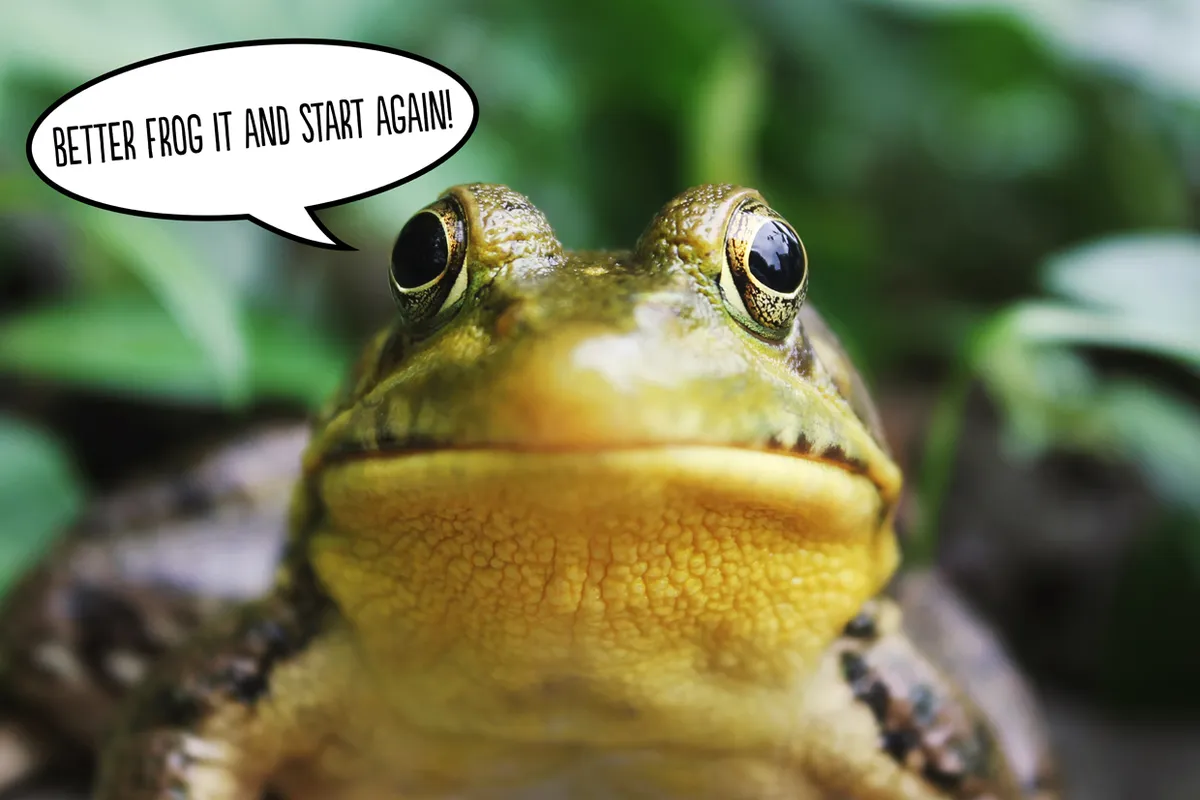
Know your crochet slang!
What’s a WIP? Are people really eating cakes made out of yarn? And what does a frog have to do with crochet? Find out all the answers to these important questions with our glossary of crochet terms.
Other types of crochet stitches
Once you’ve learnt the basic crochet stitches, most other types of crochet stitches are advancements or combinations of these, or techniques used in combination with basic stitches.
Technical crochet stitches
The following stitch techniques all use variations of the basic crochet stitches in different ways to achieve specific results or shapes.
Magic loop
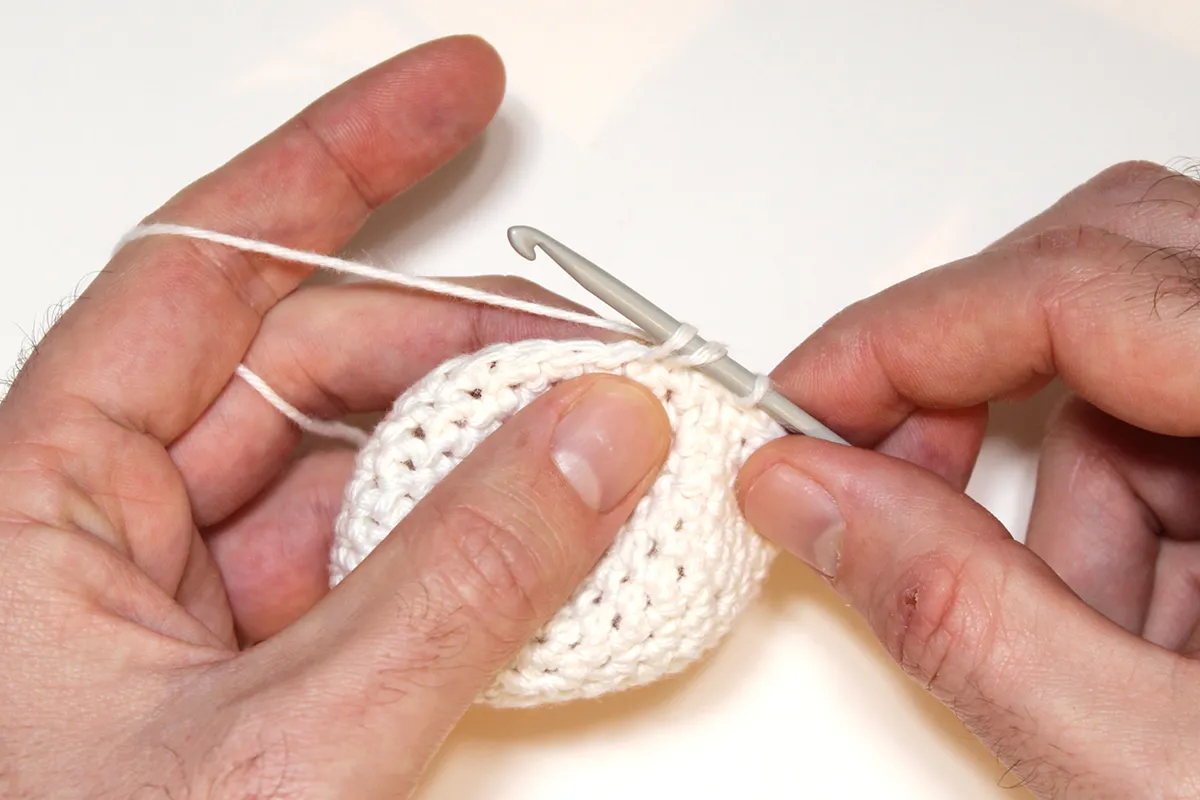
Sometimes also called 'Magic Ring', 'Magic Circle', 'Drawstring Loop' or 'Adjustable loop'. This is a starting technique often used with Amigurumi or other circular projects. It allows you to create your first round of stitches and then tighten the loop so there is no visible hole in the centre of your round.
Conventionally when doing crochet in the round you would start with a slipknot, make a number of chains and then join with a slip stitch to form a ring which you can then work your first round of stitches into.
However, a magic loop can be thought of as a fancy alternative to a slipknot which automatically makes the ring for you, so you can just start working your first round of stitches straight into your ring.
- Try learning How to make a magic loop with this video tutorial and guide from Gathered!
Crochet increase stitches
Many crochet projects will require you to use crochet increase stitches – in fact you may have already done them without realising! Increase stitches are created by working multiple stitches into the same stitch.
You won’t normally see the word increase written in a pattern, but rather increases will be indicated by an instruction such as ‘2dc in next stitch’.
Commonly increases are made by working two stitches into the same place, but of course, the number of stitches can vary as well as the type of stitch, so an increase could also be ‘work 3tr into next stitch’.
Increase stitches generally need to be worked at the end of rows to keep your work flat, or worked in even increments in the round to create semi-sphere shapes.
- Check out our How to make a crochet increase tutorial for more info.
Crochet decrease stitches
Decrease stitches convert two or more stitches into one, and much like an increase stitch it is rare (although not unknown) to actually see the word decrease in a pattern.
Decrease stitches have their own special way of being described, with the most common being dc2tog - standing for double crochet two stitches together into one.
As with increases, the stitch type and number of stitches can vary in decreases, so similarly you could potentially see a decrease of ‘tr3tog’ - meaning treble crochet three stitches together into one.
- Take a look at our How to make a crochet decrease tutorial.
Invisible decrease stitch (inv dec)
A normal decrease stitch is absolutely fine for most projects, but if you want your stitches to look super-neat (especially with amigurumi) then you can always use the invisible decrease stitch instead.
It’s a clever little stitch that is worked into specific loops of your stitches, and produces a single stitch that has the appearance of a regular double crochet stitch.
- Find out How to crochet the invisible decrease stitch with Gathered.
Front loop stitches and back loop stitches (FL or BL/FLO or BLO)

When creating most types of crochet stitches, you normally insert your hook into the two loops at the top of a stitch. However, these two loops can be worked into individually to achieve interesting effects - the front loop being the closest loop facing you, and the back loop being the loop furthest away from you.
This can be used to make textured stitch effects, to create horizontal angles in your crochet fabric, or even to create a place where additional rows can be worked into the unworked loops at a later point.
- Learn all about How to crochet in the front and back loops.
Double treble crochet and taller stitches
Once you know how to crochet the basic stitches, you already have the main techniques needed to create a whole range of stitches - even if you don’t know it yet! You may have learnt how to create half treble and treble crochet stitches, but that’s just the start, you can create taller crochet stitches in a very similar way.
It’s all about how many times you wrap the yarn round hook, which also dictates how many loops you need to pull through.
For example, a double treble crochet stitch requires you to wrap your yarn around your hook twice before inserting your hook into the stitch. This adds more loops onto your hook, meaning you’ll have one extra step of ‘yarn round hook, pull through two loops’ at the end compared to your conventional treble crochet stitch.
But that’s just one extra stitch, you can go on from there to create triple trebles, double triple trebles and even taller stitches!
- Find out everything you need to know in our How to double treble crochet stitch and beyond tutorial.
Extended and half crochet stitches
As well as making taller stitches, you can also make more subtle alterations to your stitch heights using extended and half crochet stitches.
Extended stitches are relatively rare, but when they are used it’s often to apply a more even shaping or stitch gradient to a piece of crochet fabric.
Essentially, there’s an extra step in the usual stitch process, where before you ‘yarn round hook, pull through 2 loops’, you just pull through one first, effectively adding a single chain into your stitch.
Similarly, half stitches can also be used to create in between stitch sizes, and you’re probably already familiar with this technique if you know how to make half trebles.
It can get a bit confusing as you enter the world of taller stitches, but half trebles follow a basic principle of the last part of the stitch will be made with a ‘yarn round hook, pull through remaining 3 loops’.
- Go pro and learn all about Extended and half crochet stitches.
Filet crochet
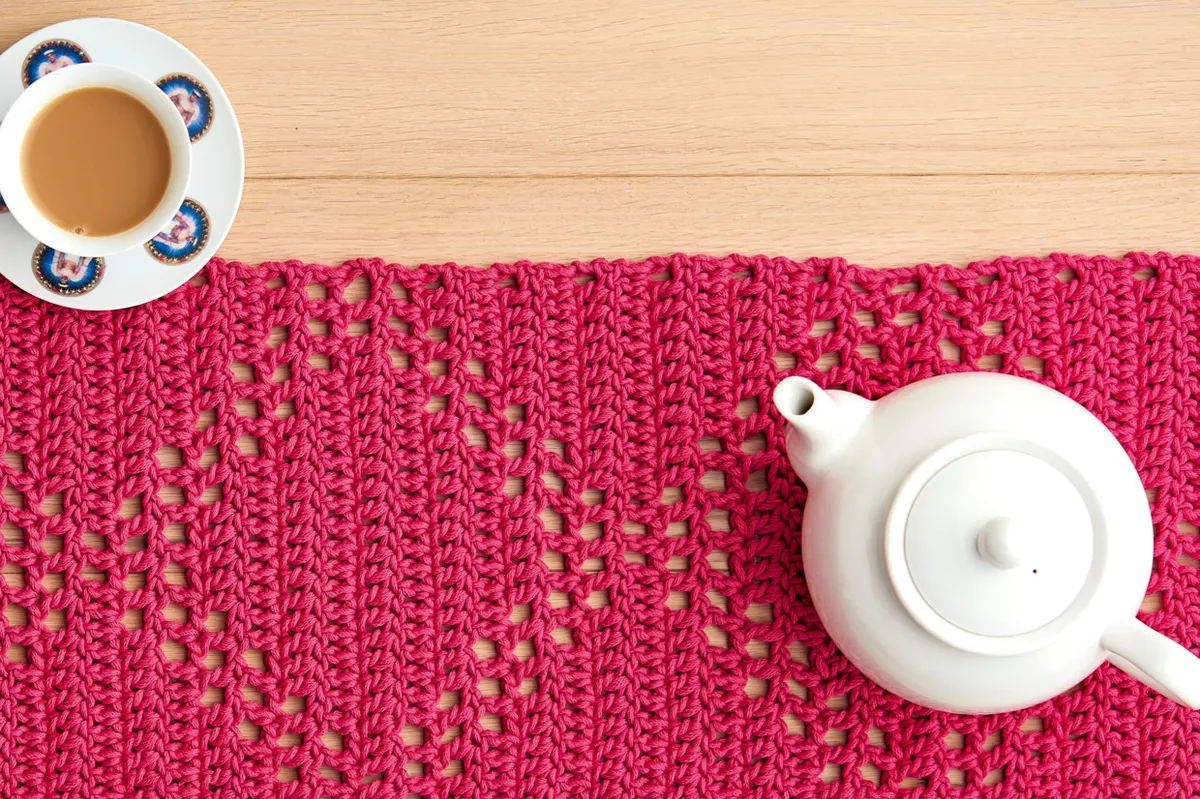
Filet crochet is a really fun and enjoyable crochet technique that is surprisingly simple, but has so many capabilities. It’s made up of two basic stitches - chains and treble crochet stitches, but it’s the way that they’re arranged that makes this a really special type of crochet stitch.
It produces a lace mesh fabric that is perfect for creating a range of geometric designs. You create filled-in ‘blocks’ using treble crochet stitches (normally 3 or 4), and negative spaces are achieved by making chains of the same amount of your treble blocks.
By alternating your filled-in and negative blocks, you can create grid-like patterns, great for lettering or pixel-inspired designs.
- Try learning How to filet crochet today!
Crab stitch (reverse crochet)
This one is a stitch for those who like to get really technical, and as such can be quite tricky for a lot of crocheters to get their head around.
Essentially, crab stitch or reverse double crochet (reverse single crochet to our friends in the US) is a way of going back along a row without turning your work - just like it sounds, it’s doing a double crochet in reverse!
It’s not a widely used stitch and is often used as a decorative edging stitch or for use in very specific scenarios. For example, you may have a project that started in the round, but then needs to switch to rows. As your rounds all went in one direction without turning, if you switch to working in rows your crochet fabric will look different as you turn and work the right and wrong side rows. However, using crab stitch means you can always keep your fabric with the right side facing.
It takes a little while to master but is a really useful stitch to have in your repertoire.
- Give it a go with our How to crochet crab stitch tutorial.
Crochet stitch techniques for colour
Next we’ll look at crochet stitches that are used to create colourful designs.
Once you’ve learnt your basic crochet stitches you’ll probably already have familiarised yourself with how to join yarn and change colours to create basic stripes, but there’s some more really amazing ways to create unique colourful designs using crochet!
How to do colourwork crochet

Knowing how to change colour in crochet is just the beginning, and once you’re ready to move beyond basic stripes there are lots of options to choose from.
Different techniques are used depending on your desired effect or fabric:
Fair Isle crochet leaves the unused yarn colour ‘floating’ at the back on the wrong side of your fabric.
Tapestry crochet locks and hides the unused colour underneath stitches so the design can be viewed from both sides.
Intarsia crochet uses multiple colours or create blocks of shading and you wind off a separate ball of yarn for each individual colour section
- Learn all about the different techniques in our How to do crochet colourwork guide.
How to do Mosaic crochet
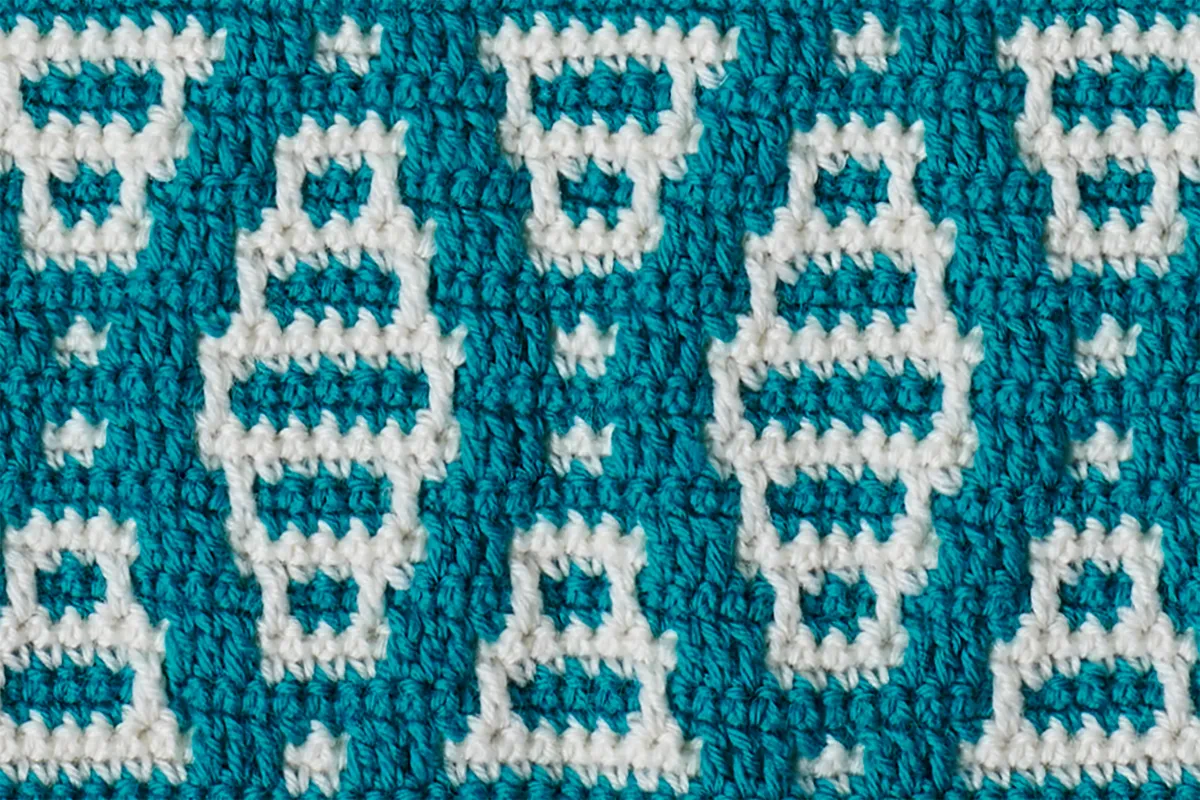
Mosaic crochet is a colourwork technique that has become really popular in recent years. It’s a way of creating two-tone colourwork designs that are really precise and geometrical.
The key to mosaic crochet is that you work each row in just one colour with specific stitches creating the design, rather than needing to change colours midway through a row.
There are two main methods of mosaic crochet - overlay and inset, but they both achieve their colourwork effect with the same principle. Essentially, a row of one colour is worked, and then when the next row is worked in a different colour longer stitches are used to cover parts of the previous colour.
That’s a very simplified explanation, but the best way to understand it is to give it a try!
- Check out our full How to do Mosaic crochet tutorial and videos.
How to do corner to corner crochet (C2C)
Another colourwork technique that has seen a real surge in popularity in recent years is corner to corner crochet, also known as C2C. It’s another method that is great for creating colour-block grid designs but also has its own unique way of being constructed.
Each individual block of colour is made up of a turning chain and three trebles (although this can differ slightly between designs). However, rather than conventionally working row after row horizontally, the blocks are created in diagonal rows, literally going from corner to corner.
This not only makes it an enthralling project but also takes some of the hassle out of colourwork, as you only need to keep track of each block of colour rather than counting specific stitches.
Why not try making a small project today? We think you’ll love it!
- Learn How to do corner 2 corner crochet with our full guide.
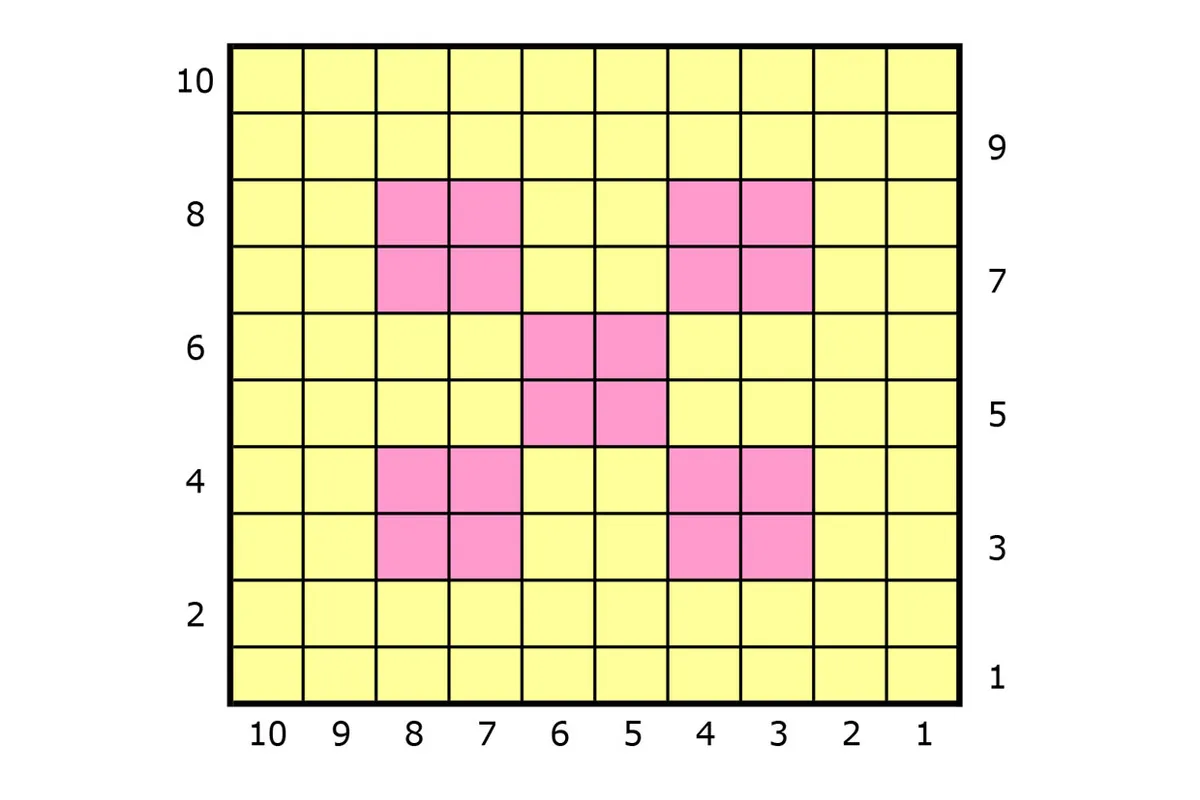
What is a crochet chart
There are a few different types of crochet charts and if you’re following a pattern that involves colourwork it will likely come one that tells you where to change colours. Find out more in our guide on how to read crochet charts.
Crochet stitches for texture
Sometimes you just want to feel that cosy crochet, which is why we love adding fabulous textured stitches into our hooky fabrics!
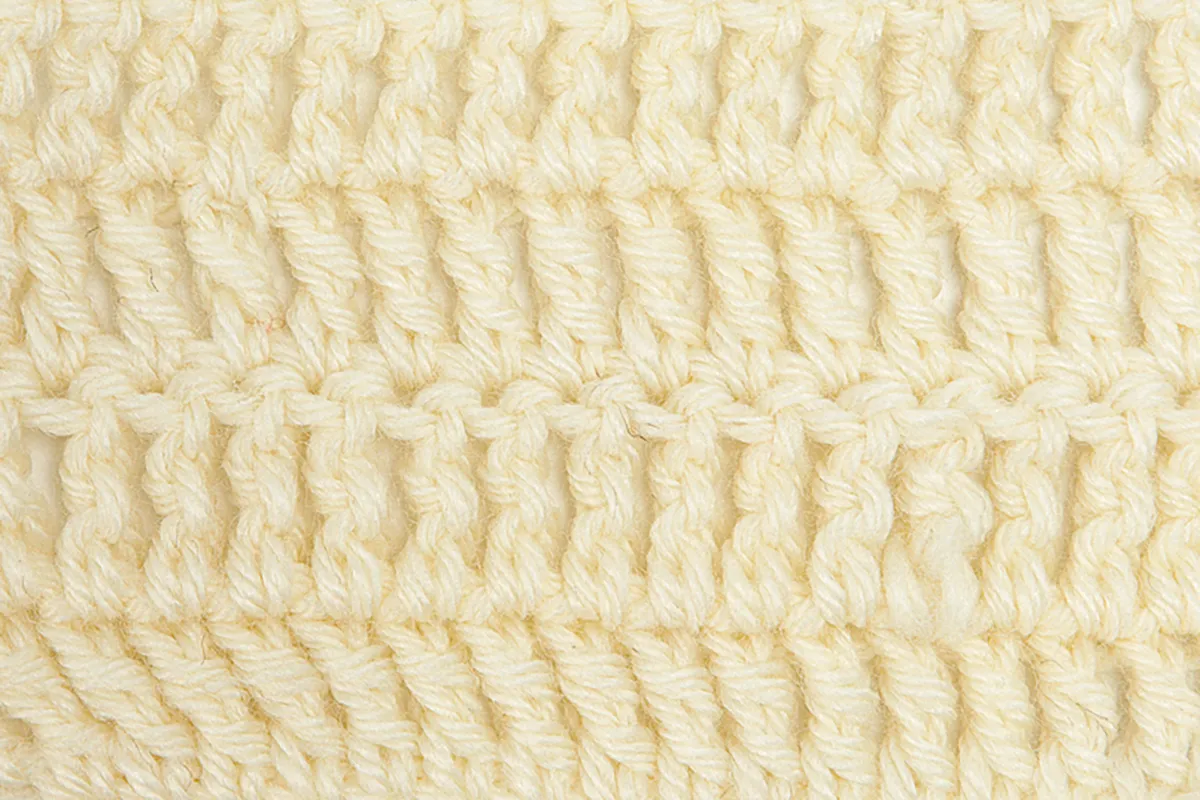
Crochet post stitches
Post stitches are used to create raised textures on your crochet fabric using the basic stitches. It’s the key technique behind crochet cables and basket weave stitch, as well as making ribbing sections for garments or accessories.
Rather than inserting your hook into the top of a stitch, with post stitches, you instead insert your hook around the post of the stitch, or in other words, around the ‘leg’ of the stitch. As such it’s a technique that is most usually used with taller stitches such as trebles which more easily allow you to insert your hook in the gaps on either side of the stitch.
The way you insert your hook around the post also makes a difference too, determining which side of your fabric the stitch is raised on. Inserting your hook around a stitch with the right side of the work facing you will create a front post stitch, and conversely inserting your hook from the wrong side will make a back post stitch.
This can get a bit confusing when you turn your work, but when you start following a pattern it will normally become clear - for example, many ribbing sections are simply made by alternatively working front post and back post crochet stitches one after the other.
- Want to know more? Check out our complete guide on How to crochet post stitches.
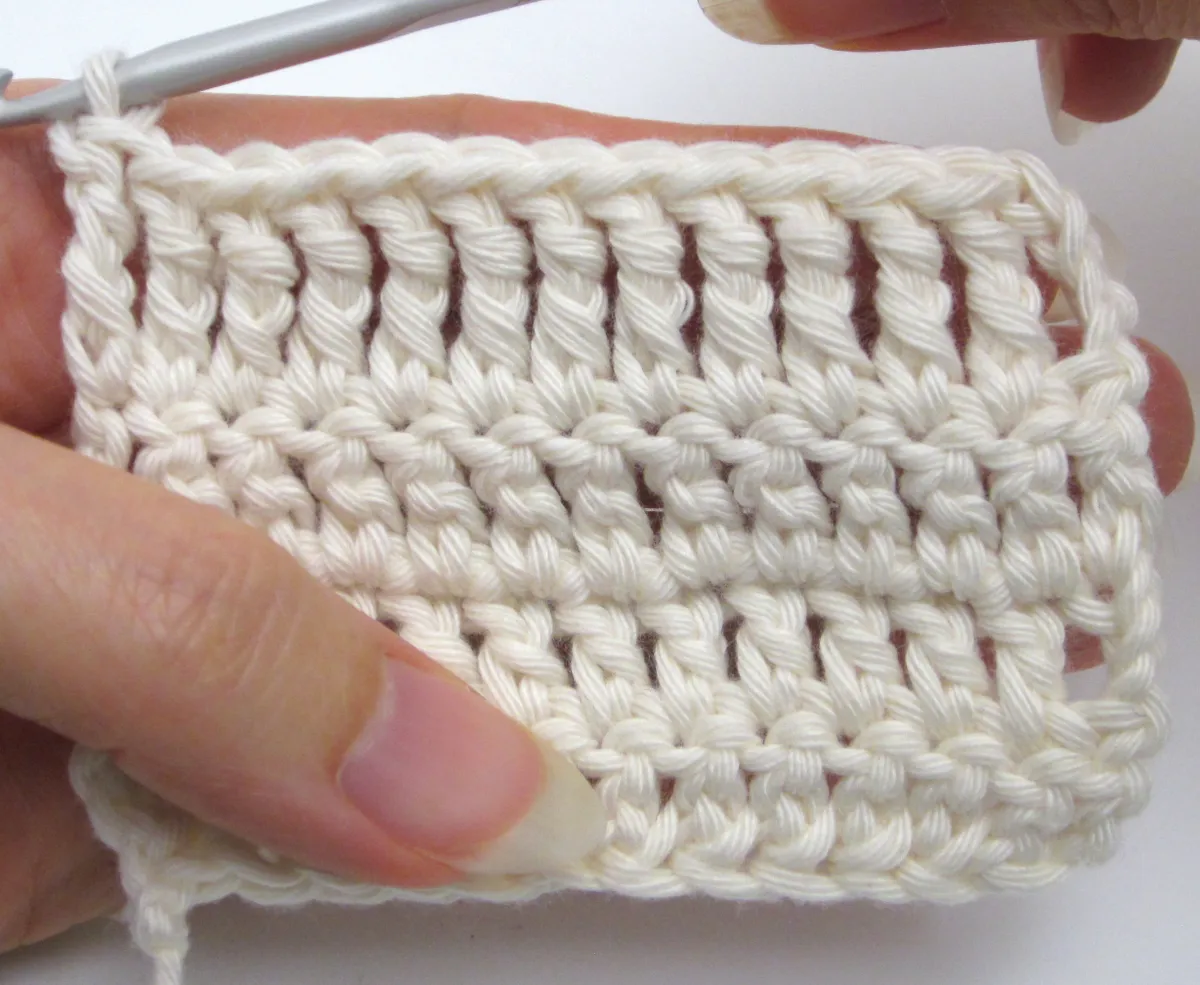
How to crochet basketweave stitch
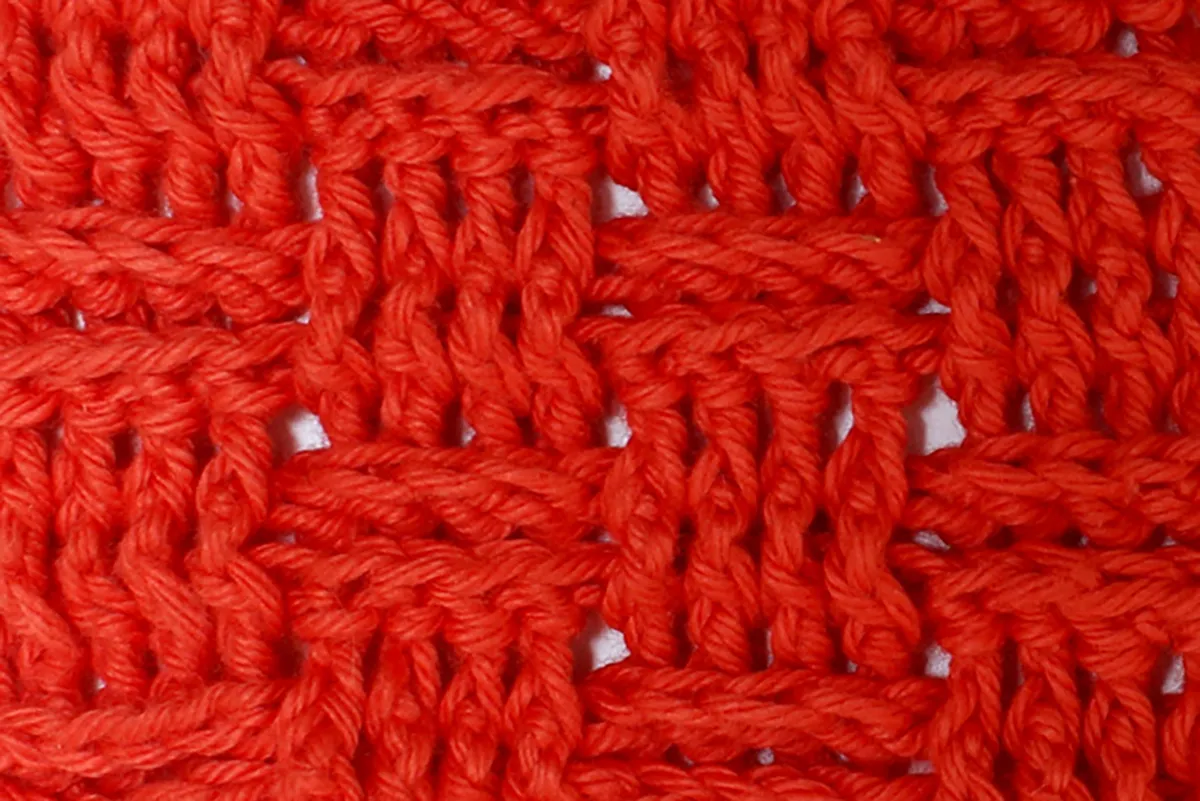
Once you’ve learnt how to make post stitches, the perfect way to take them for a test run is with the awesome basketweave stitch. It’s a brilliant stitch for creating a woven chequered effect, that has a nice textural feel and can be used to add a bit of extra interest to a plain crochet fabric.
Essentially, it’s a repeat of an even number of front post stitches, followed by an even number of back post stitches. This is repeated for a number of rows, before being switched the other way around (back post stitches followed by front post stitches).
It can be a little confusing because the nature of turning the work means a front post stitch on the right side becomes a back post stitch on the wrong side. But once you’ve done a couple of rows, there’ll be a moment when it all clicks!
- Give it a go and learn How to crochet basket weave stitch.
How to crochet puff stitch
Puff stitches are fantastic for adding a bit of texture to your crochet fabric, and have the added bonus that they feel lovely and plump from either side of your work.
They’re basically a number of incomplete crochet stitches, usually trebles, that are all brought together into one at the end of the puff stitch.
- Find out How to crochet puff stitch with Gathered.
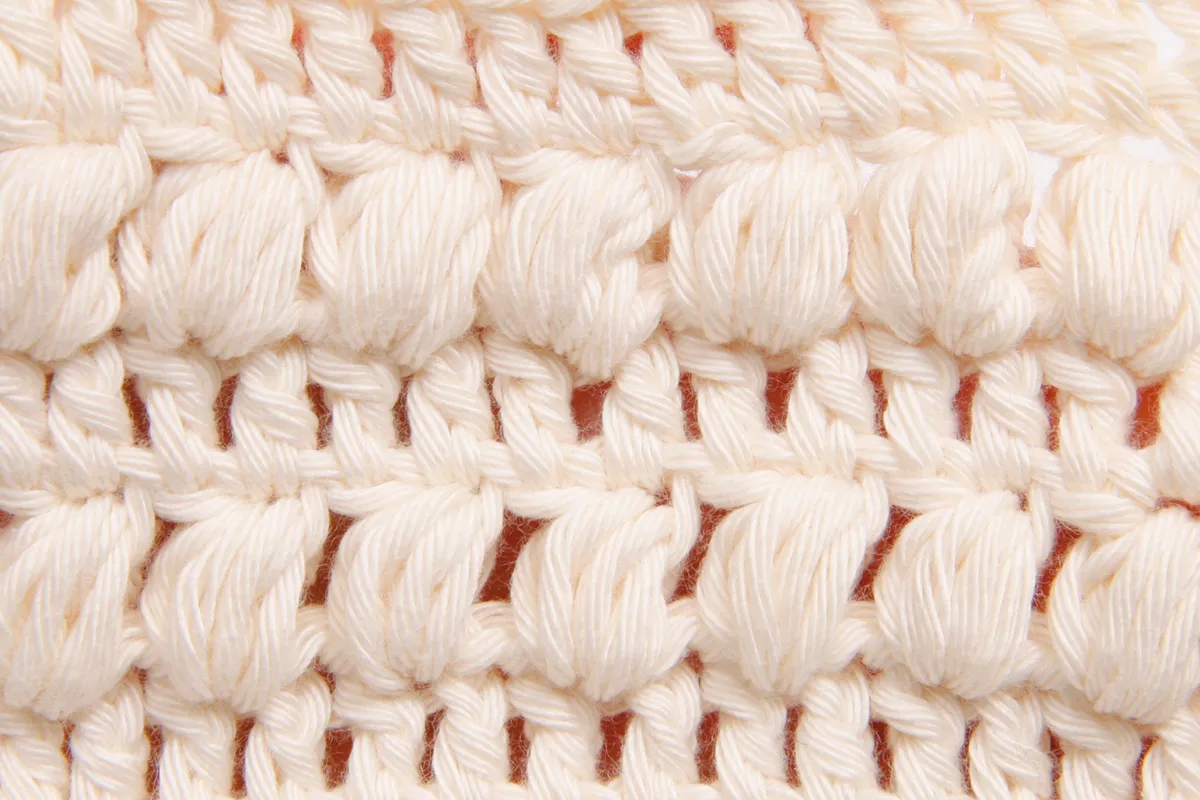
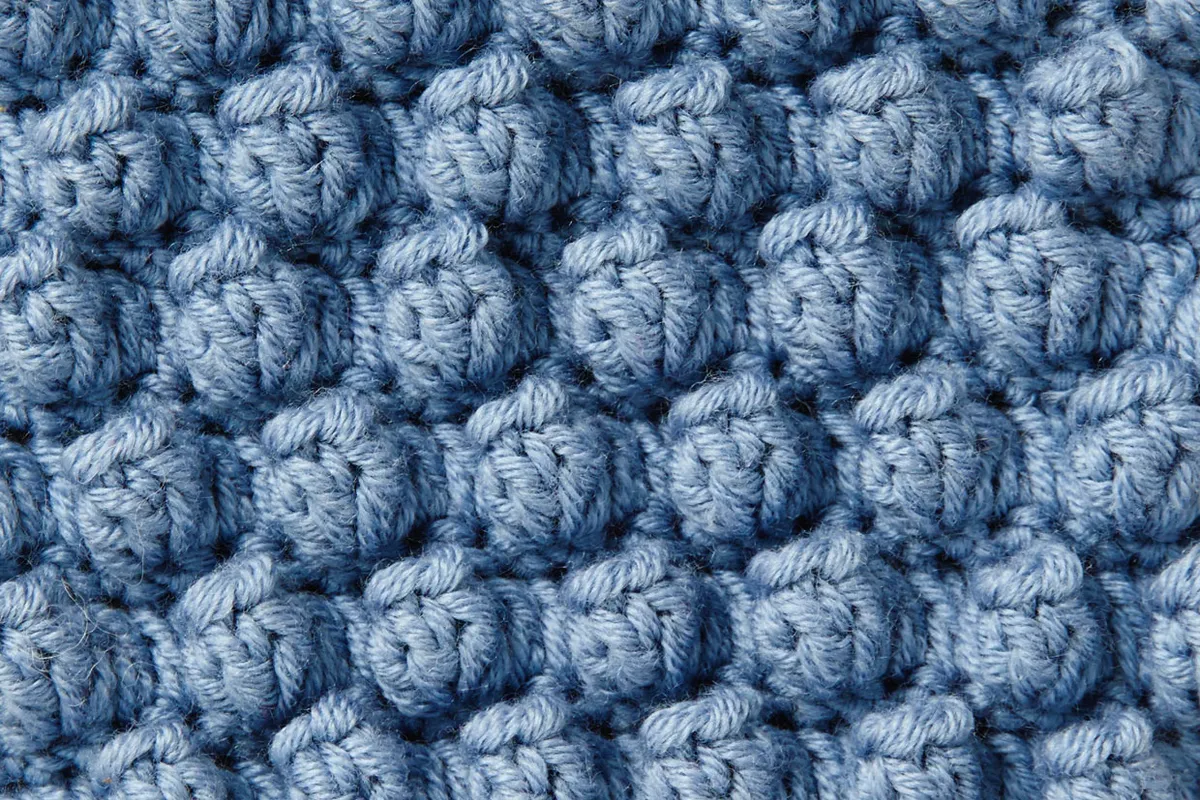
How to crochet bobble stitch
If you’re after a textured stitch that is more pronounced, then bobbles are the stitch for you! They’re made in a similar way to puff stitches, where you create a number of incomplete treble crochet stitches before bringing them all together into one.
Bobbles are normally made up of more stitches than puff stitches (often five or more stitches) so are more protruded meaning they’re best used on a fabric that has a distinctive right side.
They work particularly well on double crochet fabrics, as because the double crochet stitches are shorter they help to give the bobble a squished and more solid appearance.
- Learn How to crochet bobble stitch today.
How to crochet popcorn stitch
Fancy going really big and bold with your textured stitches? The popcorn stitch is the one for you, as it's big, chunky and really stands out. Again they’re a very protruded stitch that is usually made up of multiple trebles, although with a distinct difference from bobble and puff stitches.
To create a popcorn stitch:
- Complete the number of treble stitches that are required for your popcorn.
- Remove your hook from your working loop, and reinsert it into the first of your popcorn treble stitches.
- Pull the working loop through the first stitch. This essentially curls your popcorn trebles in on themselves creating a nice chunky roll of stitches.
- Give it a go with our How to crochet popcorn stitch tutorial.
How to crochet crocodile stitch
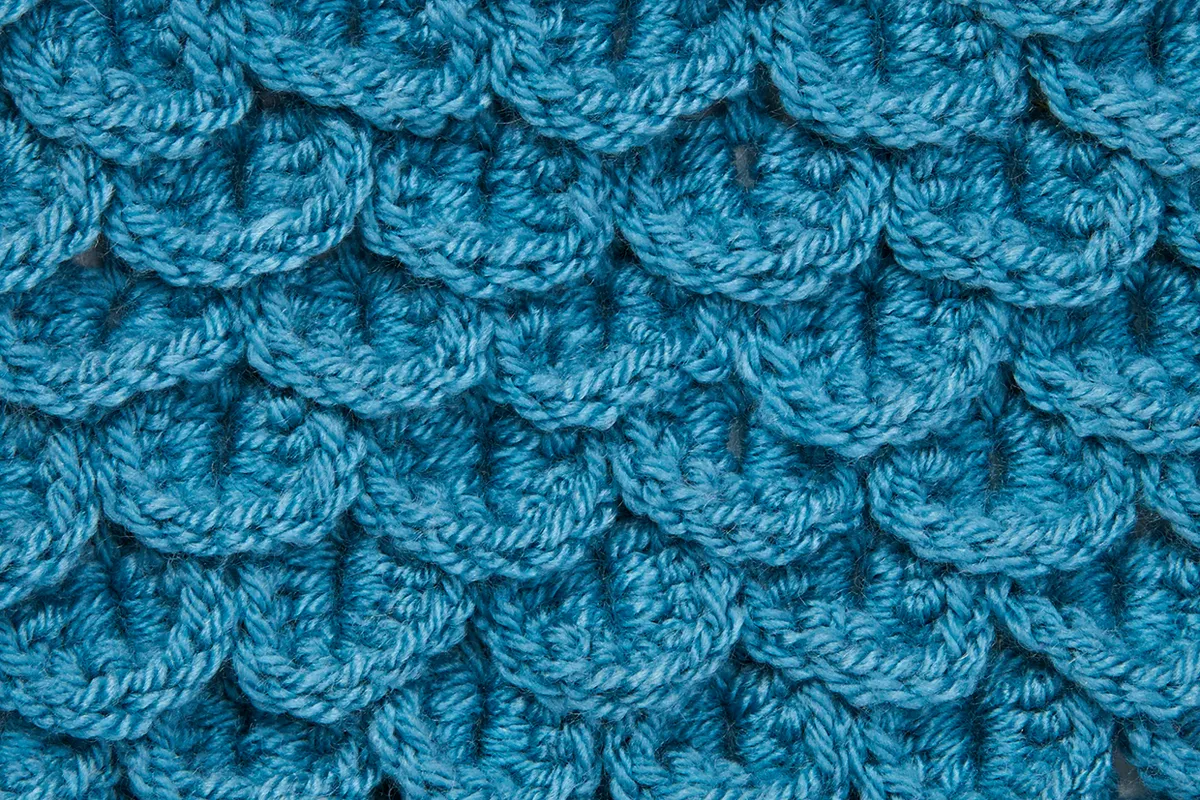
When it comes to adding some really special texture to your crochet projects, you can’t get much more special than the amazing crocodile stitch!
It’s a perfect example of the many types of stitch that are created out of a combination of basic crochet stitches, but one that creates a unique layered fabric quite unlike any other stitch.
It’s definitely one for the confident crocheters as it’s quite tricky and takes a while to master, but if you fancy a bit of a challenge it’s a lot of fun to try!
- Try our step-by-step How to crochet crocodile stitch tutorial.
Advanced crochet stitches
We’ve now covered the most common crochet stitches and techniques that you will likely come across on your crochet journey, and any pattern that requires stitches that we haven’t listed will almost certainly give you instructions within the notes section.
However, there are a few more specialist stitches we think you might enjoy too!
How to crochet Solomon’s knot
There are a wide variety of stitches that are used to create crochet lace, with the vast majority of them being combinations of chains and basic stitches to create intricate open patterns.
Solomon's knot is a stitch that creates an open airy mesh style fabric and is great for showcasing hand-dyed or variegated yarns. It looks very complicated but is in fact remarkably simple once you know how.
It’s all about extending your working loop by pulling it up to a specific length and then locking it in place with a stitch that is very similar to a double crochet stitch.
- Find out How to crochet solomons knot.
How to crochet knit stitch
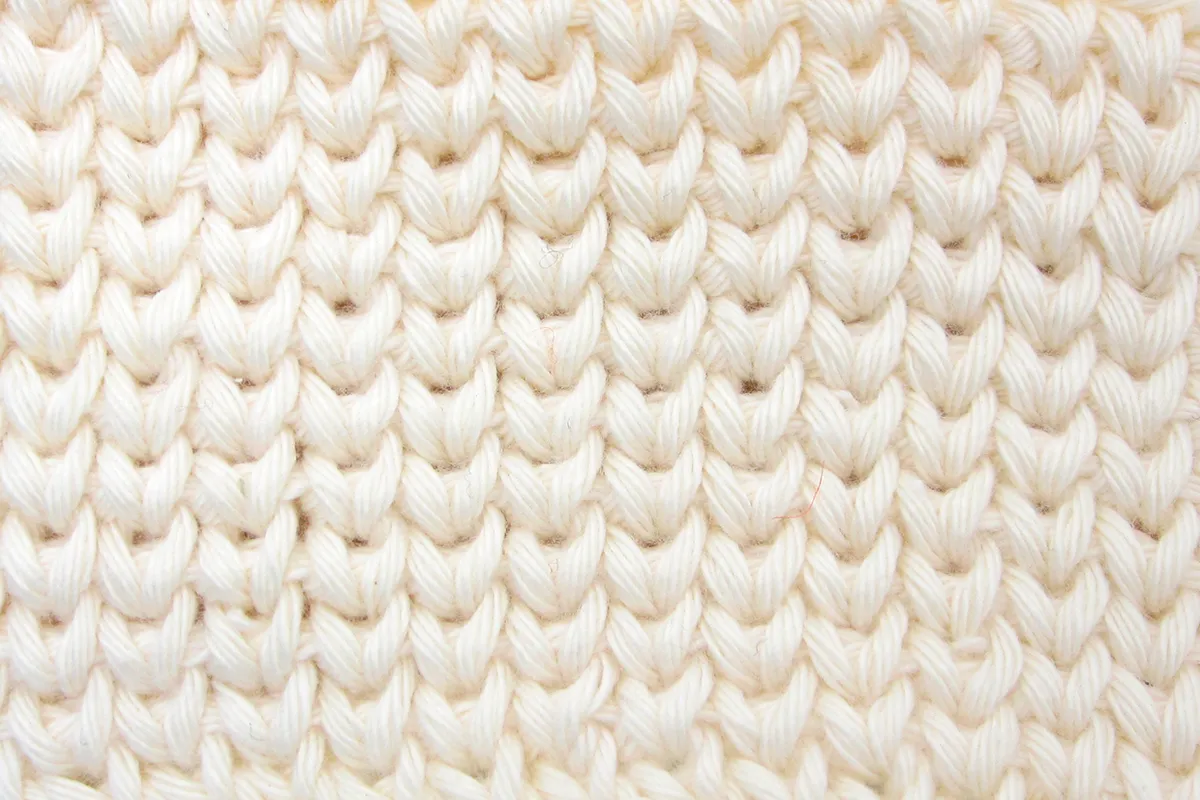
Love to crochet but never learnt to knit? Don’t worry, you don’t have to start from scratch, as there is a crochet stitch that mimics knitted fabrics!
The knit stitch, which is sometimes also called the waistcoat stitch, creates a fabric that looks incredibly similar to the interlocking V fabric that is produced by knitting – only an expert could spot the difference.
There are a few different variants of the knit stitch, some with specific limitations, but it’s a great stitch for adding a whole new dimension to your crochet fabrics.
- Forget those knitting needles and try our How to crochet knit stitch tutorial.
How to do Tunisian crochet
Another way to create knit-like fabrics is to try Tunisian crochet. It’s a whole other level in crochet and has a plethora of unique stitches and techniques all of its own.
The main difference is that it requires a slightly different hook, although you can learn stitches and make very small projects with a regular hook.
A Tunisian hook is much longer than a traditional crochet hook and more like the length of a knitting needle. This is because, like knitting, in Tunisian crochet, all of your stitch loops stay on your hook until the end of the row, and then you remove them back off your hook as you return on the next row.
The result is a closed and neat fabric, with the basic stitch having an almost geometric block-style stitch effect. In our opinion every crocheter should try Tunisian crochet at least once, so why not give it a go today?
- Learn all about How to do Tunisian crochet.
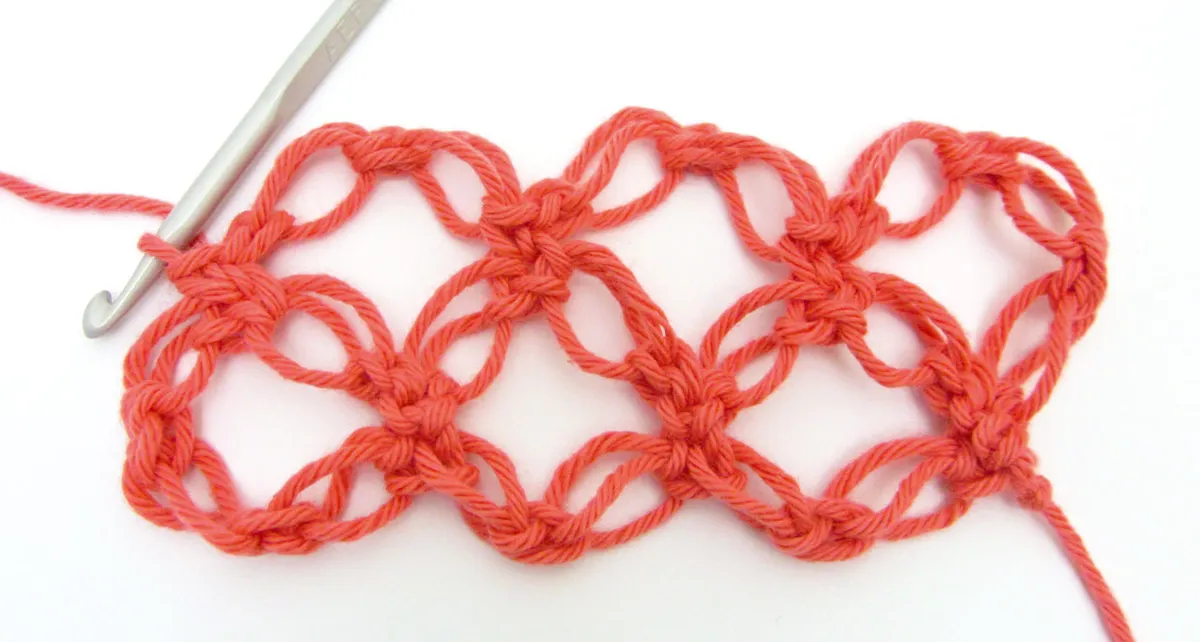
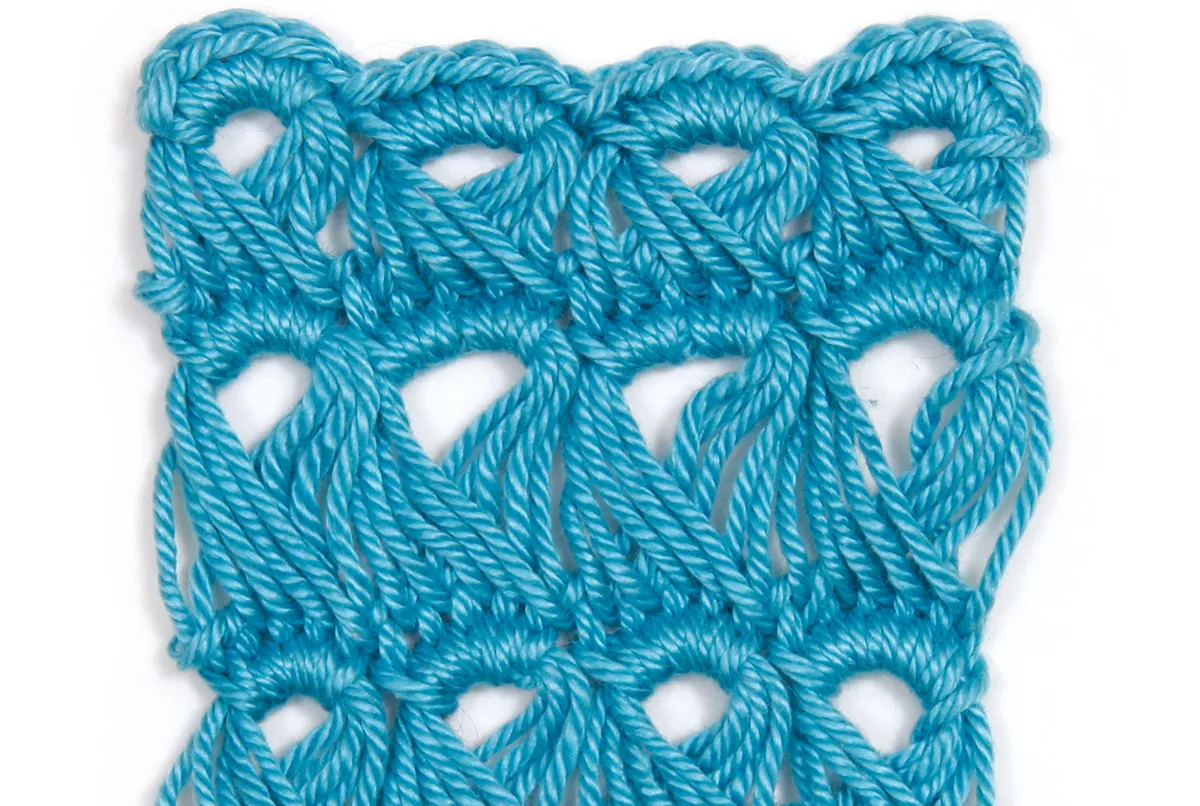
How to crochet hairpin lace
Traditional lace weaving has become an incredibly specialist art form, and if you’ve ever seen how those intricate lace fabrics of olden days were made you’d swear it’s witchcraft! But you don’t have to be an expert or have a stash of secret knowledge to make your own intricate lace - crochet is perfect for it!
One way of making lace with crochet is the hairpin lace technique. This does require a specialist tool but they’re very affordable or could easily be made yourself.
You crochet a series of loops over two prongs, before removing from the prongs and then crocheting the loops together to make a lace panel.
The result is a panel with solid stitches down the middle and mirrored lace loops on either side - great for using as bracelets or adding on to the edges of other crochet makes!
- Find out more in our How to crochet hairpin lace tutorial.
How to do broomstick crochet
Another technique for creating stunning lace designs is broomstick crochet. It’s a method that requires an additional tool, in this case, something that is roughly the same thickness as a broomstick handle (a big knitting needle or wooden ruler will do the job just fine).
Your ‘broomstick’ tool is used so that you can pull up lengths of yarn to exactly the same height and hold them on the tool. You’ll then make a row of stitches on top of these loops to lock them in place, with various techniques and patterns to arrange these loops in decorative styles.
It’s a technique for the more advanced crocheter, but one that’s definitely worth exploring… Although it’s probably best not to attempt your first try on a full-size broomstick handle!
- Take a look at our How to do broomstick crochet tutorial.
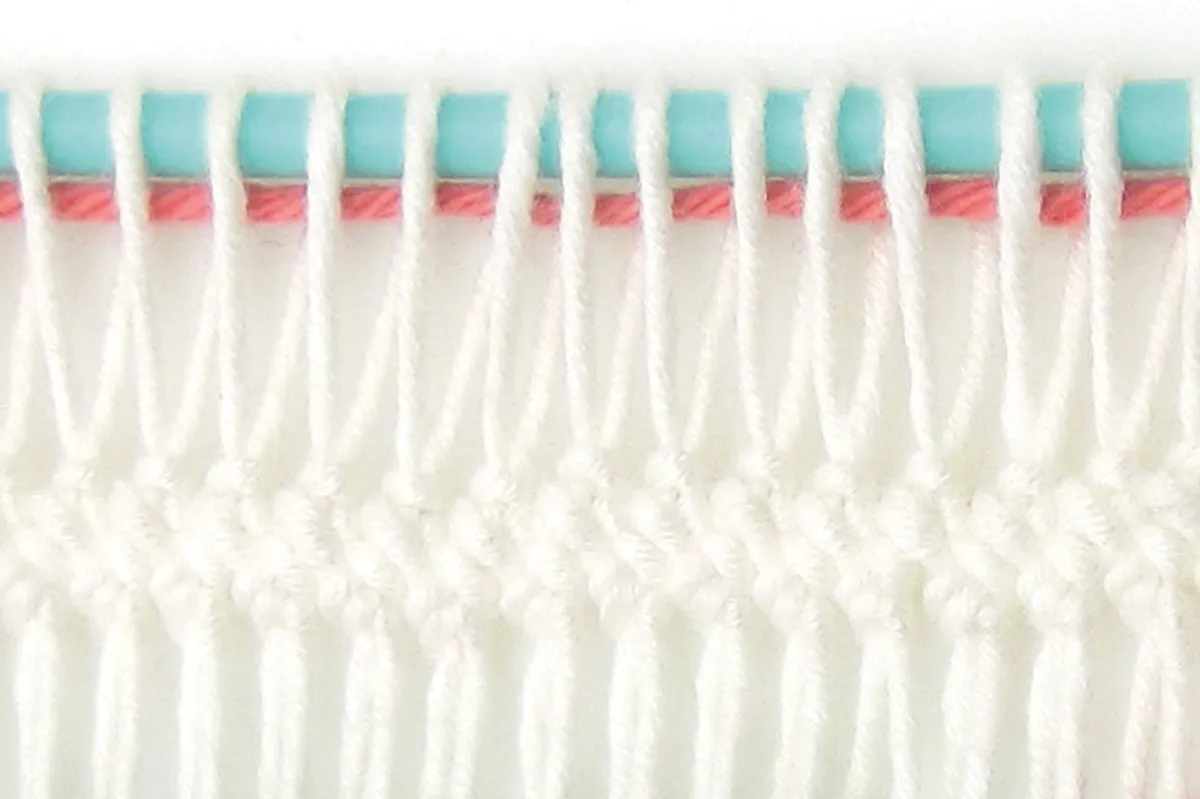
How to do beaded crochet
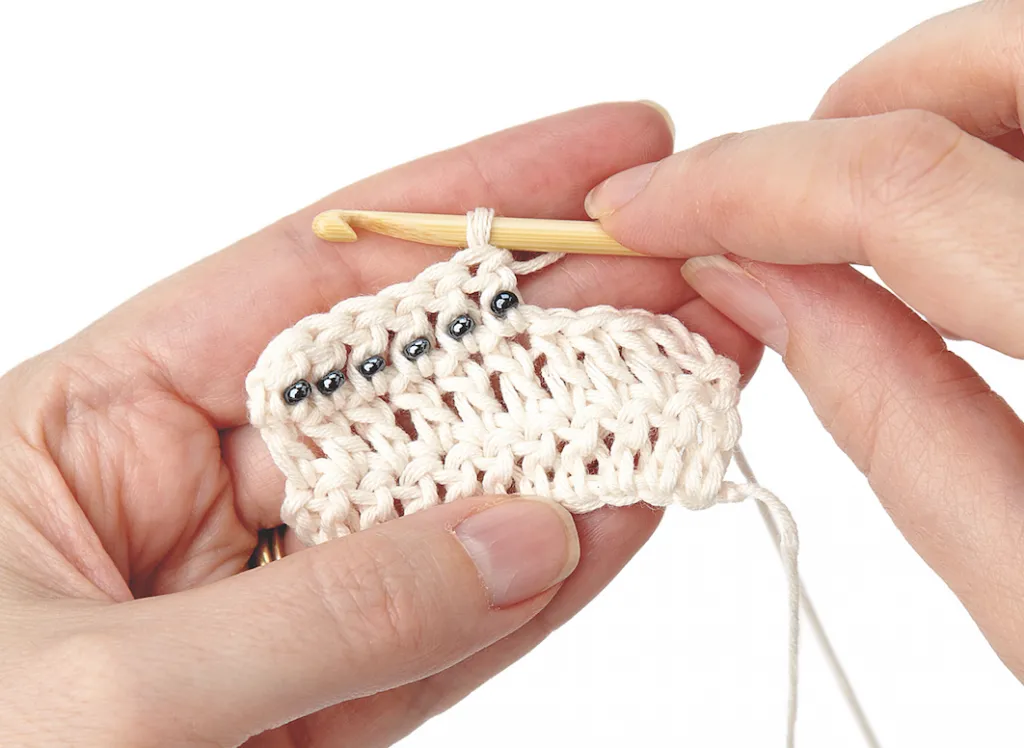
Want to add a little extra fun to a plain piece of crochet? Adding beads to your crochet fabrics is surprisingly easy and makes a brilliant addition to accessories such as bags or even garments.
It’s all about the preparation with beaded crochet, as you need to thread your beads onto your yarn beforehand (so it’s always better to add more than you think you need, just to be safe). Then you can just go ahead and crochet, pushing a bead up to be worked in with your stitch at very specific points.
- Give it a try today with our How to do beaded crochet tutorial.
How to crochet with sequins
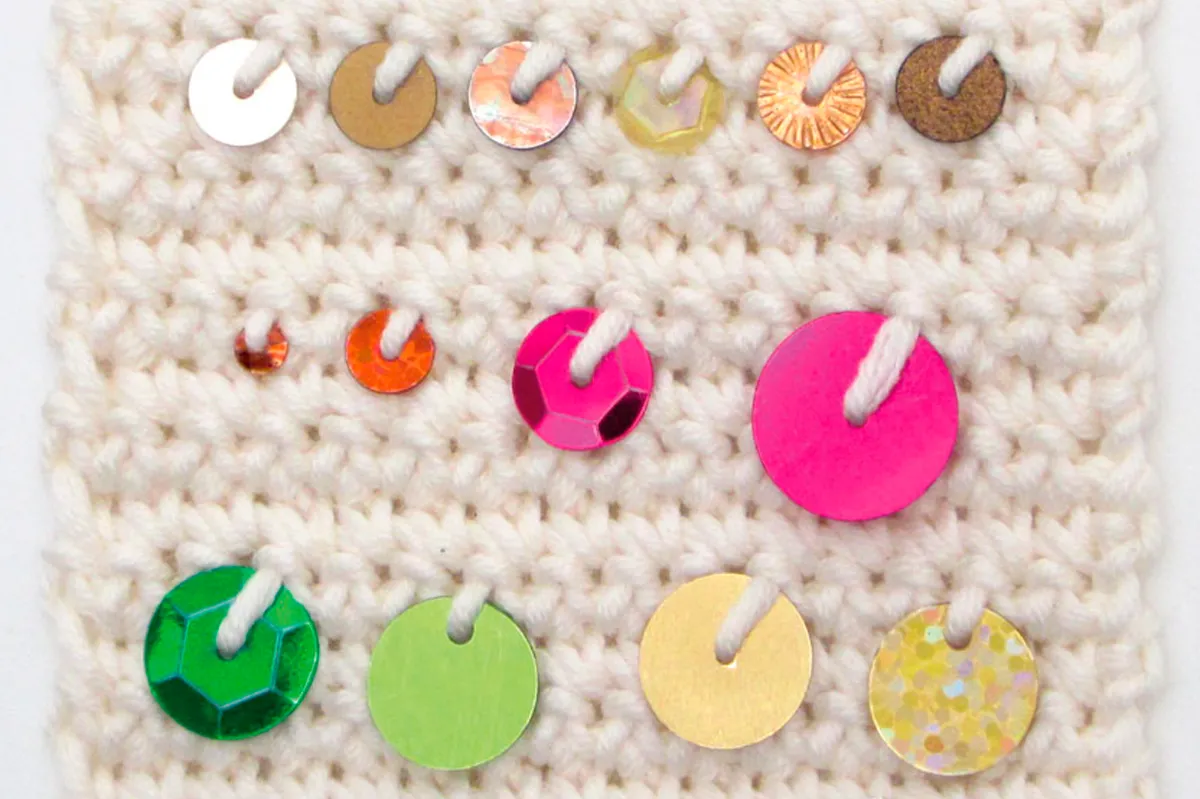
If you like the idea of crocheting with beads but want something with a bit more sparkle, you can also crochet with sequins too!
It’s very similar to beaded crochet, where you thread your sequins onto your yarn before starting your crochet. Then all you have to do is decide how often to work them into your stitches, but if you ask us, the more sequins the better!
- Check out our How to crochet with sequins tutorial and add some sparkle!
Common crochet questions
We’ve all got to start somewhere and sometimes things just don’t feel quite right when learning new stitches. If you’re struggling to get your crochet looking perfect, check out our list of crochet troubleshooting tips.
Are there more types of crochet stitches?
In this library of crochet stitches we’ve covered the most common stitches that you’re likely to come across, however, there are many more stitches and stitch combinations out there, with plenty of variations and even a variety of names too!
By far the most important thing you can do when starting a crochet pattern is to read the notes section carefully, as any pattern that uses anything other than the basic stitches should give you instructions on how to do these.
Read your crochet patterns thoroughly
Even if you’re a stitch expert and have learnt every stitch in our library, it’s still vitally important to read a crochet pattern properly before starting. Check out our guide on how to read a crochet pattern and prepare to get hooking with Gathered.