Step 1
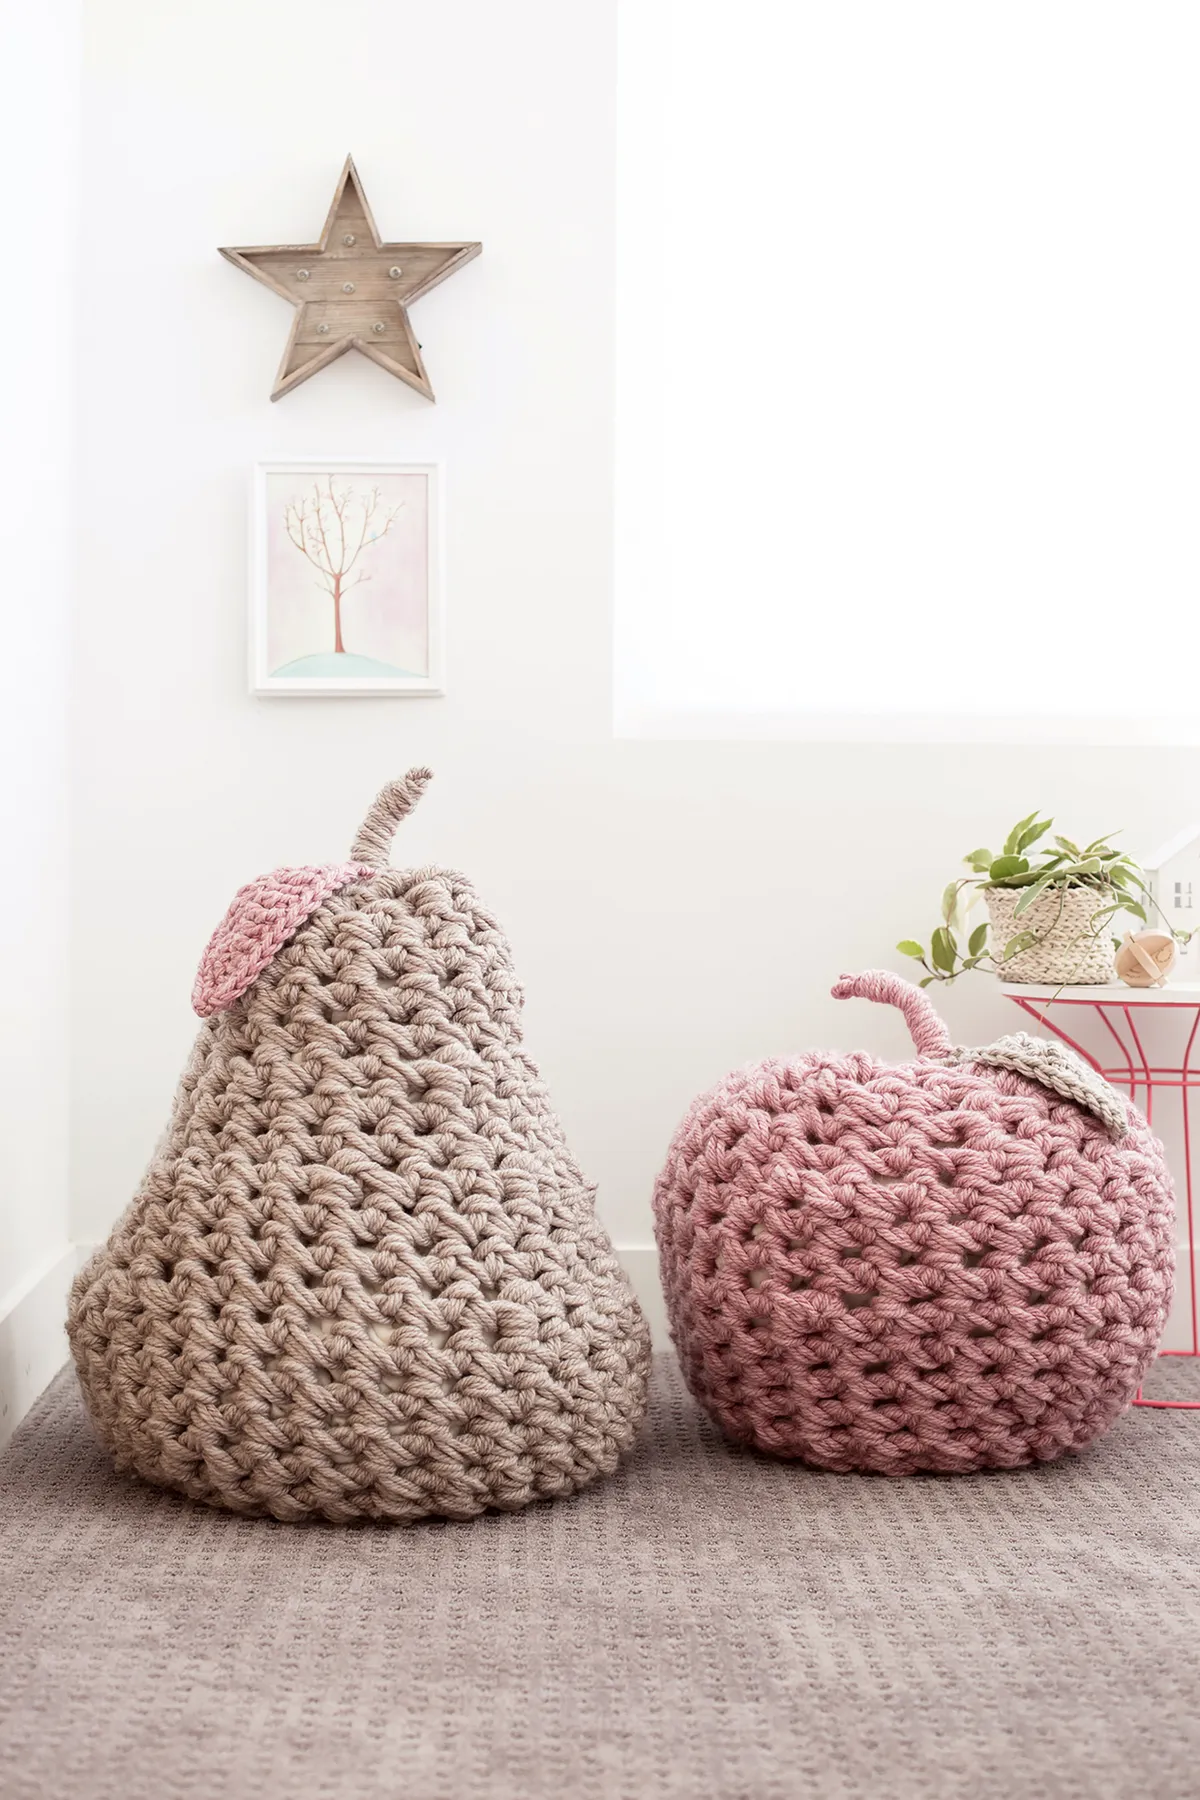
Your pear crochet pouffe pattern

Using with 3 strands of Oatmeal wool held together, chain (ch) 3 and join into a ring with a slip stitch (ss)
Round 1 8 double crochet (dc) in ring [8 sts]
Round 2 2dc in each stitch (st) around [16 sts]
Round 3 (2dc in next st, dc in each of the next 3 sts) four times [20 sts]
Round 4 (2dc in next st, dc in each of the next 4 sts) four times [24 sts]
Round 5 Dc in each st around [24 sts]
Round 6 (2dc in next st, dc in each of the next 5 sts) four times [28 sts]
Round 7 Dc in each st around [28 sts]
Round 8 (2dc in next st, dc in each of the next 6 sts) four times [32 sts]
Rounds 9-12 Dc in each st around [32 sts]
Round 13 (Dc2tog, dc in each of the next 6 sts) four times [28 sts]
Rounds 14-15 Dc in each st around [28 sts]
Round 16 (Double crochet 2 (dc2tog), dc in each of the next 2 sts) seven times [21 sts]
Rounds 17-18 Dc in each st around [21 sts]
Round 19 Dc in next st, (dc2tog, dc in each of the next 3 sts) four times [17 sts]
Rounds 20-22 Dc2tog, dc in each remaining st around [16 sts]
Stuff the pear with the wadding, then continue the last two rounds.
Round 23 [Dc2tog, dc in each of the next 2 sts] four times [12 sts]
Round 24 Dc2tog six times [6 sts]
Step 2
Finishing your pear pouffe!
Cut the yarn, leaving a 1.8m (70⅞") length. Fasten off by bringing the yarn end through the loop, then pull tight and weave through the top 6 sts to close the hole.
For the stalk, attach the wire to the top of the fruit shape, next to the yarn end.
Twist the end of the wire around the yarn and wire, then tuck the wire end under and hide in the yarn.
Ch5 using both wire and yarn, then ch1 with yarn only. Twist the wire into the final chain and tuck in.
Beginning at the end of the chains, and leaving a small loop sticking out, wrap the yarn around the wire/yarn chains, down towards the fruit.
Knot at the base to secure the yarn, then tie the yarn ends back to the fruit. Cut and weave in the ends.
Step 3
Your apple crochet pouffe pattern

Using with 3 strands of Currant wool held together, ch3 and join into a ring with a ss
Round 1 8dc into ring [8 sts]
Round 2 2dc in each st around [16 sts]
Round 3 (2dc in next st, dc in each of the next 3 sts) four times [20 sts]
Rounds 4-5 Dc in each st around [20 sts]
Round 6 (2dc in next st, dc in each of the next 4 sts) four times [24 sts]
Round 7 Dc in each st around [24 sts]
Round 8 (2dc in next st, dc in each of the next 5 sts) four times [28 sts]
Rounds 9-13 Dc in each st around [28 sts]
Round 14 (dc2tog, dc in each of the next 5 sts) four times [24 sts]
Round 15 (dc2tog, dc in each of the next 2 sts) six times [18 sts]
Round 16 (dc2tog, dc in each of the next 4 sts) three times [15 sts]
Step 4
To stuff, insert a cushion pad at the bottom of your apple. Wrap the second pad in wadding, then insert, stuff the sides and fill in the top. Twist a piece of wadding to make a circular doughnut shape, place around the outside of the top so the apple dips in the centre, then continue.
Step 5
Round 17 [Dc2tog, dc in next st] five times [10 sts]
Round 18 Dc2tog five times [5 sts]
Step 6
Finish in the same way as the pear.
Step 7
How to crochet a leaf for your pouffes
Crochet using one strand of contrasting yarn and a 12mm crochet hook.
Leaving a 20cm (7⅞") tail, ch14.
Step 8
Row 1 Working in second ch from hook and each ch along, dc in next st, htr in next st, treble (tr) in next 2 sts, double treble crochet in next 4 sts, tr in next st, dc in next st, ss in next st. [11 sts and 2 unused ch which will form the stem]
Now, ss into the back of the chain in the same place as your last ss to cross over to the other side.

You will now repeat the same stitches as row 1 but in the opposite direction on the other side of the starting chain.

Row 1 (opposite side) Dc in next st, tr in next st, dtr in next 4 sts, tr in next 2 sts, htr in next st, dc in next st [11 sts]
Make 2dc in tip of leaf, then dc around leaf, going behind stem at base of leaf

Ch1 at tip of leaf, cut end, pull end through last loop and tuck into the back of the leaf, creating a point.
Step 9
Finishing off your crochet fruit leaves
Weave in the end with your fingers or a yarn needle to finish.
Use the tail end to tie the leaf to the top of the fruit.