Ready to up your knitting game and progress from knitting patterns to making your own? Woolly Wormhead is here to show you how. Woolly is a 'hat architect' with an instinctive flair for unusual constructions and a passion for innovation, whose patterns are trusted and celebrated by knitters all over the world. For more of Woolly Wormhead's designs and tutorials, click here.
Part 1: Hat shape, structure and fit shape, structure and fit
The reason I start at the crown when I begin a new hat design is to ensure that the overall structure will work, and that the design will have continuity throughout. To be able to understand structure, shape and fit, we need to think about the different parts of a hat and the numbers that determine them.

About ease
Ease is really important when it comes to fit, and we can’t talk about hat shape without mentioning it!
To keep a knitted hat on our heads, it needs to be smaller than our head - make your hat the same size, and it’ll likely fall off. This is what’s known as negative ease – when a garment or accessory is smaller than the body part it will fit.
For a hat, I would usually recommend somewhere between 5cm to 7.5cm (2in to 3in), or around 12.5%. But it depends. A beanie with 10cm (4in) of negative ease or more is going to look very sporty, whereas a slouchy hat with 5cm (2in) of negative ease or less is going to appear very casual. Overall intent of style plays a role, as does comfort. Accommodating hair plays a big part too; those with short hair and/or simple styles may be more comfortable with a closer-fitting hat, whereas a looser hat often preserves hair styles better (i.e. avoid ‘hat-hair’). Purpose, is another important factor – keeping out wind chill, and endurance in rougher climates, demand more negative ease.

The crown in relation to shape
We’ve learnt that different decrease ratios will affect the crown, and the crown is one of the key parts of the hat that determines the style. For instance, a slow decrease ratio of less than 3 sts decreased per round (on average) will give us something pointy, like a pixie hat. The fewer stitches decreased on average, the steeper the slope gets and the pointier the hat.
The same is true when we decrease more rapidly. Decrease on average 4 sts per round and you’ll get a flat circle that sits perfectly on top of a close-fitting hat like a beanie. Increase the ratio slightly, and you’ll move through berets and then into gathered crowns, with the latter working on anything above an average of 8 sts decreased on average, and which would work perfectly for a slouchy hat.
Once we know the shape of crown that we’d like, and the ratio of decreases to create that, we treat that as our structural multiple, and if we’re working bottom up we would work backwards. If we don’t know yet how we’d like the hat to finish, then we’ll work with a number that allows different options (a multiple of 12 gives us all the possibilities, with a 24 being the ultimate magic number!)

Working backwards - considering the brim in relation to the crown
The brim will have a solid relationship with the crown, and it’s this area where we first consider fit. The brim of a knitted hat is the most important part as far as gauge and ease is concerned, as it’s the part that keeps the hat on the head!
If we’re working towards a beanie style hat, a half-dome or watch cap style, then the brim will work on the same multiples as the crown. With this style of hat we are simply creating a tube with a circle on top, with no other shaping besides that of the crown.
If we’re working towards a beret style, then the crown multiple is relevant for the start of the body - for the increase round immediately after the brim - and so to determine the brim multiple we need to take our working backwards one step further. In my previous article I mentioned that the common increase formula for a beret from the brim into the body is K2, M1 (where M1 is a lifted bar increase), i.e. an increase of 50% from the brim into the body – berets always seem to follow this rule. To work backwards from the crown, we want to reduce the crown multiple by 33% to get the same ratio. So for instance, if our crown works on a multiple of 6, the brim will work on a multiple of 4. This is where it gets awkward with some numbers, and we might need to go back and reconsider our crown structure, as not all numbers will happily lose 33%! There are of course ways around this, and we can invent a multitude of formulas to make it work, but to fully understand the concept we want to try and keep the numbers Straightforward.
If we’re working towards a slouchy style, something that has a little room in the body but not as much room as a beret, and something less hugging than a beanie, then the same applies – the crown multiple is relevant for the body, immediately following the increase round after the brim.
This time, though, we won’t need to increase as many stitches after the brim, and I would normally increase somewhere between 20% up to 33%, depending on how loose I’d like the fit and shape of the hat to be. Again, we would work backwards but we have room to adjust the figures to our needs here – a crown multiple of 8 could equate to a brim multiple of 6, for instance. That’s a 33% increase from brim to body/crown. A slouchy hat is much more flexible in numbers, and is a lot easier to design and knit because of this. Or a multiple of 9 at the crown could be a multiple of 7 at the brim (and that combination makes for a pretty interesting hat structure…).

Part 2: Hat shape, structure and fit
Now let's bring it all together in the body and take a look at different types of hat structures. We'll cover the body of your hat, and conclude with the main differences between beanies, berets and slouchy hats.
Bringing it all together in the body
Having determined our brim and crown structures, we can start to think about the body shape. Although the crown determines the overall structure, the body still plays an important part in determining style. Yes, the crown will determine whether we have a pointy, flat or gathered finish, and will determine the mathematical structure of the whole hat, but the body determines whether we will have slouch or length or height.
Slouch is determined by two things – length, width, or both. We either increase after the brim (hence a beret automatically looks slouchy, as we increase 50%), work a longer length than normal before starting the crown decreases (extra-long beanies are a good example of this) or we do a little of both (the slouchy hats currently in fashion generally follow this rule). By knitting for longer, you’re creating more fabric, just as you would be in your increased stitches, only in a different place. How and when you create that extra fabric determines your style.
Conclusion
The main differences between beanies, berets and slouchy hats are determined by the different parts of the hat, as described.
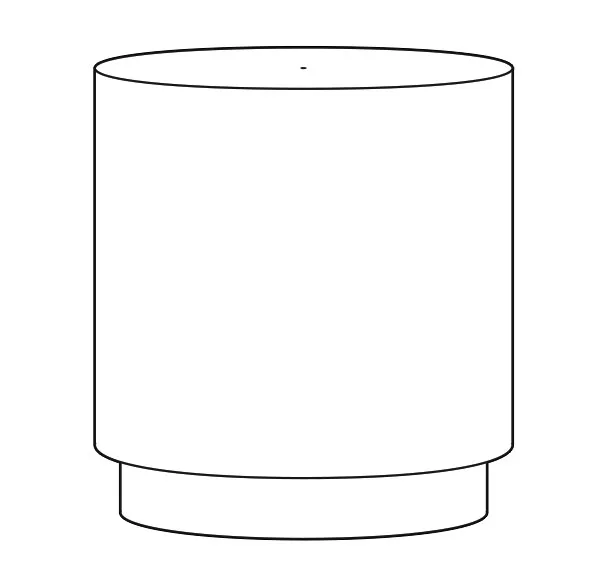
A beanie will flow smoothly and simply from the brim into the body, which then flows into the crown. All parts of the hat work on the same mathematical structure, and a good design will make the most of this. The brim and the body together form the cylinder of the hat, and the circle atop is the crown. The length of the cylinder generally works out to be about two thirds of the overall length, although row gauge will affect this. The brim and body of a beanie will both have negative ease.
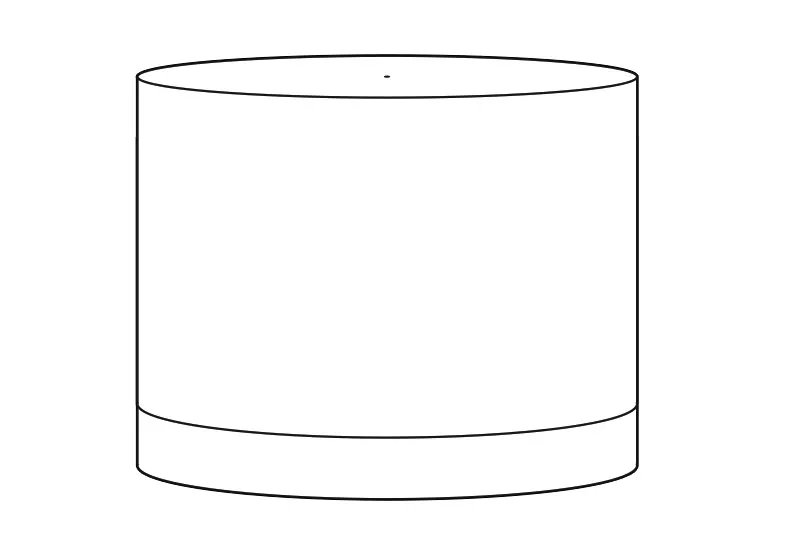
A beret shares some structure with a beanie – although it is two cylinders of different diameters (the brim and the body) the total length of the those together will be the same as a beanie. What makes a difference is the much larger circle at the crown, due to the 50% extra stitches. This adds extra length to the hat, and the additional stitches add the room. The brim of a beret has negative ease and the body has positive ease.
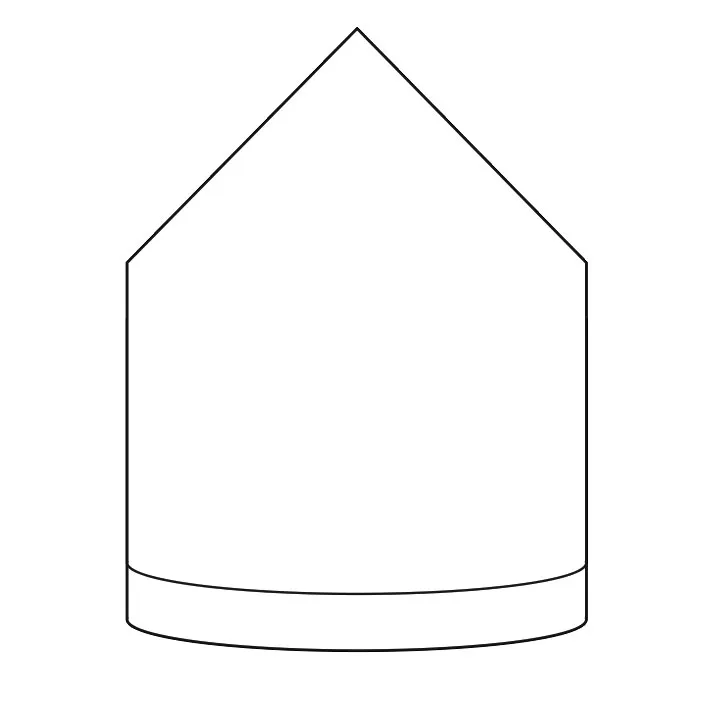
A pixie hat, too (like the Buzzba design below), shares a similar structure with a beanie, with the key difference being the crown. Invariably the brim and body form the cylinder (although they can of course be different stylistically, and use different stitch patterns) but instead of a circle at the top of the cylinder, we have a cone. Personally, I tend to make the length of the hat before starting the crown shaping (the cylinder) shorter than that of a beanie, so that the point on the hat is softer, and it will also be less likely to flop over. The brim and body of a pixie will both have negative ease.

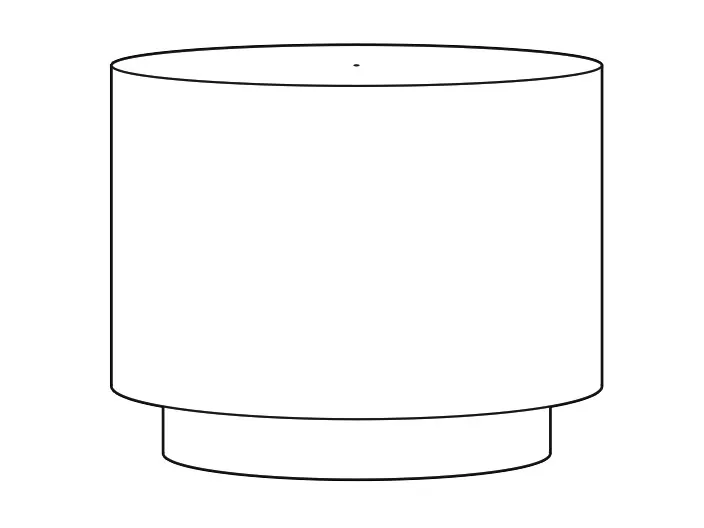
A slouchy hat can be any of the above, or none of them. It can be two cylinders or one, it can have a flat crown (a circle) or a gathered crown or even a pixie hat – I have designed and published more than one pattern for a slouchy pixie hat! The brim of a slouchy hat has negative ease and the body has positive ease, but not as much as a beret. It’s not really surprising that slouchy hats have become so popular; they’re easy to wear, but they’re also easier to design as the maths is more flexible and forgiving, and they allow for much more experimentation. They don’t fit the traditional rules of knitted hats.