How to make a pop-up stepper card

Learn how to make this funky pop-up stepper card with our easy step-by-step tutorial!

Try 6 issues of any craft magazine from just £9.99

Published: April 23, 2021 at 6:44 am

Special occasions call for special cards, and pop-up cards definitely fit the bill. Pop-up cards featuring handcrafted greetings card make for much more interesting and dimensional cards. They take a little more work, but they are absolutely worth the effort, especially when you see the joy they bring recipients. And you’ll find that the more you make, the easier they become, too.

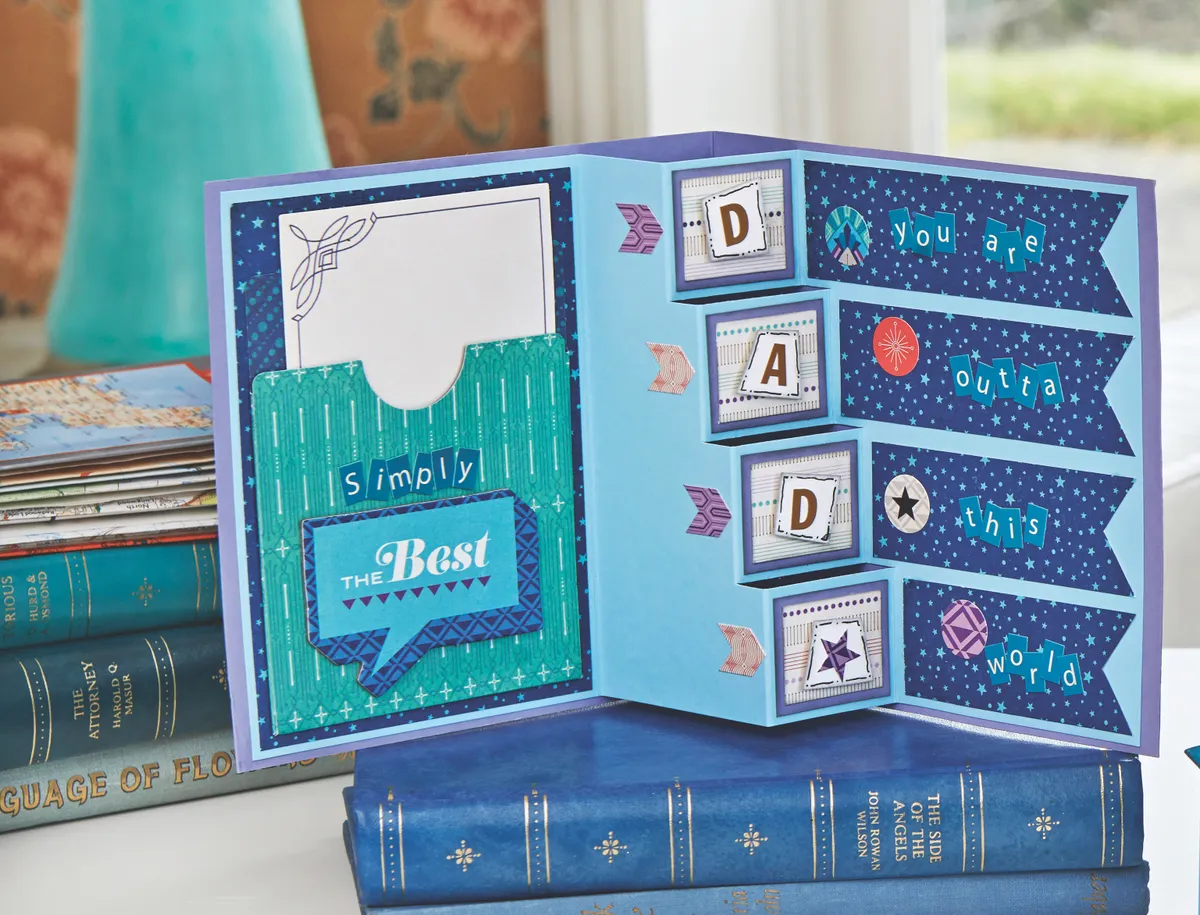
Our designer Tracey Grundy has decorated her cards with papers and elements from Basic Grey’s stunning Aurora range to create a stylish set of cards for men, but you can easily adapt your paper choices to suit the recipient. Simply choose your recipient, make your base and then decorate with your choice of papers and embellishments for a greetings card with wow factor! Tracey has designed this one to be a Dad's birthday card.

Want some free patterned paper to boost your stash? Take a look at our ever-growing collection of free patterned papers, there are lots to choose from and there are lots of different themes – we love these free car printables or these free nautical printables! If you’re looking to take your paper crafting up a notch, why not check out the best glue gun and best die-cutting machine. Thinking about buying a craft printer? Check out our review of the best printer for card making.

We love seeing what you make, so don’t forget to share your card making projects with us on Instagram, Facebook or Twitter, too!

Make this pop-up stepper card

Pop-up stepper card

You will need:

  • Card (plain)
  • Patterned paper
  • Score board
  • Bone folder

Step 1

Cut a 280 x 140mm piece of blue card. Place vertically and mark on lines every 35mm. On the right-hand line cut down from 130mm to 180mm. Move across 35mm and cut from 140mm to 190mm. Move across 35mm and cut from 150mm to 200mm.

Pop-up stepper card

Step 2

Place in landscape position and score down at 100mm from the left side, then down from the top of the card to cut lines at 130mm and 170mm, between cut lines at 140mm and 180mm, 150mm and 190mm, 160mm and 200mm. Mountain and valley fold as shown to create your basic pop-up card shape!

Pop-up stepper card

Step 3

Glue outer panels to the inside of a 145mm square purple base as shown. Attach patterned paper to the left side, we’re using navy. Cut four pennants from navy paper and attach to the right side. Layer panels of patterned paper onto blue card and then stick to each step.

Pop-up stepper card

Step 4

Now it’s time to decorate the front of your card! We’ve layered a 132mm square of grey star paper onto black constellation paper and attached to the front. Decorate with tags and letter stickers if you wish. Why not add a mini pocket to left inside panel? You could embellish with stickers, die-cuts and journal cards, or, how about slipping in a gift card to Dad’s favourite shop?

Pop-up stepper card