How to make a paper ring: Cute cat design

Make your own paper ring in just a few simple steps! Our ring is shaped like a cute cat and you can even add a little face.

Try our magazines – get 6 issues from just £9.99!

Published: March 1, 2023 at 8:32 am

Whip up one of these sweet little origami rings in no time with our easy tutorial! They make cute little gifts to give to friends and family. Learning how to fold them is a cool trick to show off whenever you have a piece of paper available!

Cute idea: Impress your other half or friends by folding the receipts from your favourite restaurants as cute keepsakes! You could keep them in a jar to remember all the fun dates you’ve had!

Not only are these fun for us big kids, but they are the ideal way to keep little kids entertained. They are quick and easy to make, and they’ll love playing dress up or making them for friends!

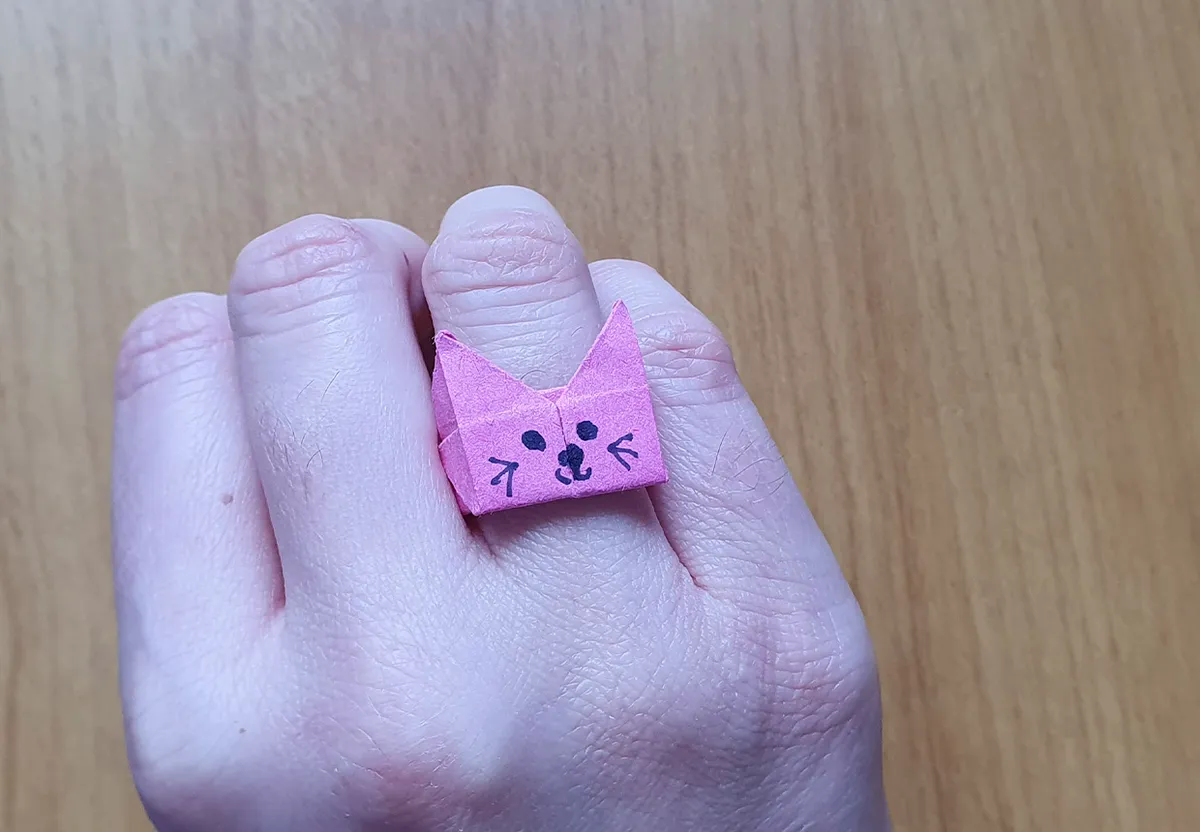
The origami ring is so simple to fold too, we are going to take you through the process with written instructions and photos to follow along with. The end result is a cute paper ring with a cat’s face on it!

It requires just a single piece of square paper. The length of the paper should roughly fit around your finger. I am using 7.5 x 7.5cm origami paper for mine, but you can always do a bit of experimenting with sizes.

I would advise practising with scrap paper first, and when you have the technique down, use your favourite papers. This paper folding craft works particularly well with shiny, metallic and patterned papers.

You will need:

  • 7.5cm x 7.5cm origami paper
  • Pen

Step 1

Folding your origami ring

Take your sheet of 7.5×7.5cm paper (or size that fits your finger) and fold in half and then in half again.

Press down the folds firmly.

origami-ring-step-3

Step 2

Unfold the paper back to where you started. Fold the outer two edges in to meet the middle fold.

Origami ring – step 2

Step 3

Unfold the paper back to where you started. Take one side and fold it up to the first line. Rotate the paper and repeat for the opposite side.

Origami ring – step 3

Step 4

Unfold back to where you started. Fold up one side to create another fold. Flip over your paper.

origami-ring-step-7

Step 5

Fold the two upper corners into the centre of the paper, it will look a bit like a paper aeroplane.

Origami ring – step 5


Step 6

Flip over the paper and fold your triangle down on the second line, so it meets the centre of the paper.

Origami ring – step 6

Step 7

Create the cat’s ears

Flip the paper back over. Push your finger under the flap of the paper and fold on both sides to create a kind of bow shape.

Fold the ears into points.

Origami ring – step 7 pt 1
Part 1

Origami ring – step 1
Part 2

Origami ring – step 7 pt 3
Part 3

Step 8

Fold up the bottom of the paper into an equal fold, and continue folding. You will be able to follow the folds you made earlier.

Keep folding until you see a heart shape.

Origami ring – step 8
Part 1

Origami ring – step 8
Part 2

Step 9

Fold the bottom of the heart point upwards underneath the ring strap.

Origami ring – step 9

Step 10

Flip it over and draw an adorable cat face!

Origami ring – step 10

Step 11

Wrap the ring around your finger to turn it into a circle.

Fold one side of the strap in half lengthways and tuck it into the other.

Wear your paper rings with pride!

Origami ring - step 11
origami-ring-step-20

Little origami with a big impact!

Sometimes the smallest projects are the most enjoyable. Once you’ve learnt the origami paper ring, you can adapt it into different shapes and sizes to give to friends and family!

Looking to keep the kids interested in origami?

You’re in luck, we got lots of kids origami projects for them to try. There’s even an easy video to follow along with if they are more of a visual learner!