You will need
- Red fabric: ¾ yd
- Green fabric: ¾ yd
- Yellow fabric: ¾ yd
- Purple fabric: ¾ yd
- Navy fabric: ¾ yd
- Orange fabric: ¾ yd
- Pink fabric: ¾ yd
- Aqua fabric: ¾ yd
- Brown fabric: ¾ yd
- Print fabric (black and white): 1yd
- Binding fabric: ½yd
- Backing fabric: 4 ½yd
- Batting: 2 ¼yd
To get started, Free triangle template and read on for our step-by-step guide to how to make a wonderfully wonky diamonds quilt.
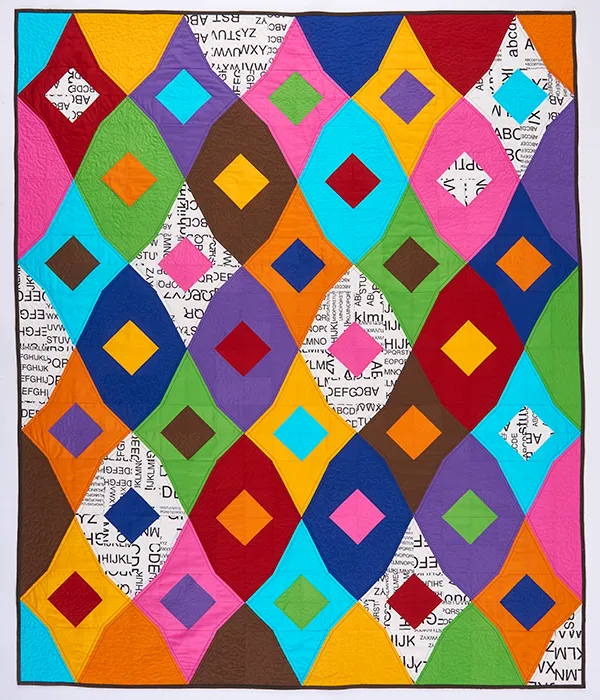
Finished size
60in x 72in approx
Notes
Seam allowance is ¼in, unless otherwise noted.
HST = Half-square Triangle HRT = Half-rectangle Triangle
Fabrics used
Solid fabrics are Cranberry, Kiwi, Yellow Pepper, Grape, Indigo, Satsuma, Petal, Caribbean and Chocolate from the Lecien Solids collection. Print fabric is from the First of Infinity collection, also by Lecien.
- From the red fabric cut: • Three (3) 4in x WOF strips. Subcut into twenty-four (24) 4in squares. • One (1) 6½in x WOF strip. Use the template to subcut into thirteen (13) rectangle triangles. • One (1) 3½in x WOF strip. Subcut into eight (8) 3½in squares and two (2) 3½in x 6½in rectangles.
- From the green fabric cut: • Three (3) 4in x WOF strips. Subcut into twenty-two (22) 4in squares. • One (1) 6½in x WOF strip. Use the template to subcut into seventeen (17) rectangle triangles. • One (1) 3½in x WOF strip. Subcut into four (4) 3 ½in squares and four (4) 3½in x 6½in rectangles.
- From the yellow fabric cut: • Three (3) 4in x WOF strips. Subcut into twenty-three (23) 4in squares. • One (1) 6½in x WOF strip. Use the template to subcut into sixteen (16) rectangle triangles. • One (1) 3½in x WOF strip. Subcut into four (4) 3½in x 6 ½in rectangles.
- From the brown fabric cut: • Two (2) 4in x WOF strips. Subcut into eighteen (18) 4in squares. • One (1) 6½in x WOF strip. Use the template to subcut into twelve (12) rectangle triangles. • One (1) 3½in x WOF strip. Subcut into four (4) 3½in squares and four (4) 3½in x 6½in rectangles.
- From the purple fabric cut: • Two (2) 4in x WOF strips. Subcut into twenty (20) 4in squares. • One (1) 6½in x WOF strip. Use the template to subcut into fourteen (14) rectangle triangles. • One (1) 3½in x WOF strip. Subcut into eight (8) 3½in squares and two (2) 3½in x 6½in rectangles.
- From the aqua fabric cut: • Three (3) 4in x WOF strips. Subcut into twenty-eight (28) 4in squares. • One (1) 6½in x WOF strip. Use the template to subcut into nineteen (19) rectangle triangles. • One (1) 3½in x WOF strip. Subcut into four (4) 3½in squares and two (2) 3½in x 6½in rectangles.
- From the navy fabric cut: • Three (3) 4in x WOF strips. Subcut into twenty-one (21) 4in squares. • One (1) 6½in x WOF strip. Use the template to subcut into fourteen (14) rectangle triangles. • One (1) 3½in x WOF strip. Subcut into eight (8) 3½in squares and two (2) 3½in x 6½in rectangles.
- From the pink fabric cut: • Three (3) 4in x WOF strips. Subcut into twenty-three (23) 4in squares. • One (1) 6½in x WOF strip. Use the template to subcut into seventeen (17) rectangle triangles. • One (1) 3½in x WOF strip. Subcut into four (4) 3½in squares and four (4) 3½in x 6½in rectangles.
- From the orange fabric cut: • Three (3) 4in x WOF strips. Subcut into twenty-four (24) 4in squares. • One (1) 6½in x WOF strip. Use the template to subcut into fourteen (14) rectangle triangles. • One (1) 3½in x WOF strip. Subcut into three (3) 3½in x 6½in rectangles.
- From the print fabric cut: • Four (4) 4in x WOF strips. Subcut into thirty-one (31) 4in squares. • Two (2) 6½in x WOF strips. Use the template to subcut into twenty-five (25) rectangle triangles. • One (1) 3 ½in x WOF strip. Subcut into eight (8) 3½in squares and five (5) 3½in x 6½in rectangles.
- From the binding fabric cut seven (7) 2½in x WOF strips.
Top tip:
With your solids, it doesn’t matter which way up you cut them, but if your print fabric is directional then you will need to take care to cut it correctly. The easiest way to do this is to keep your WOF strip folded in half, meaning that you cut two triangles with each cut
Assembling the quilt
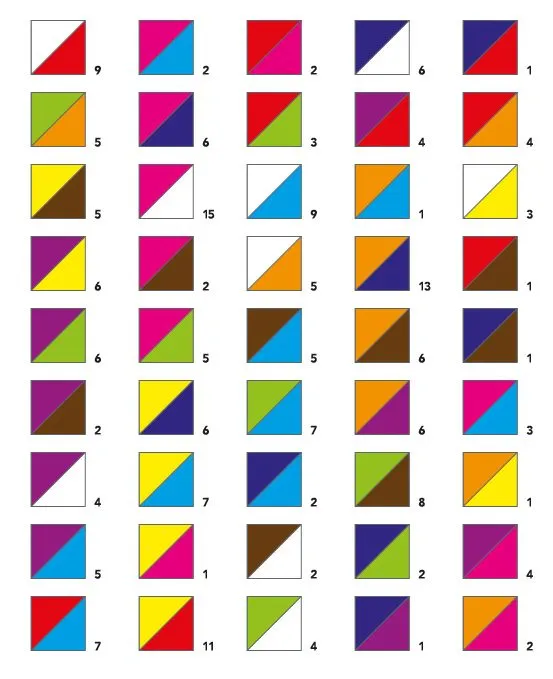
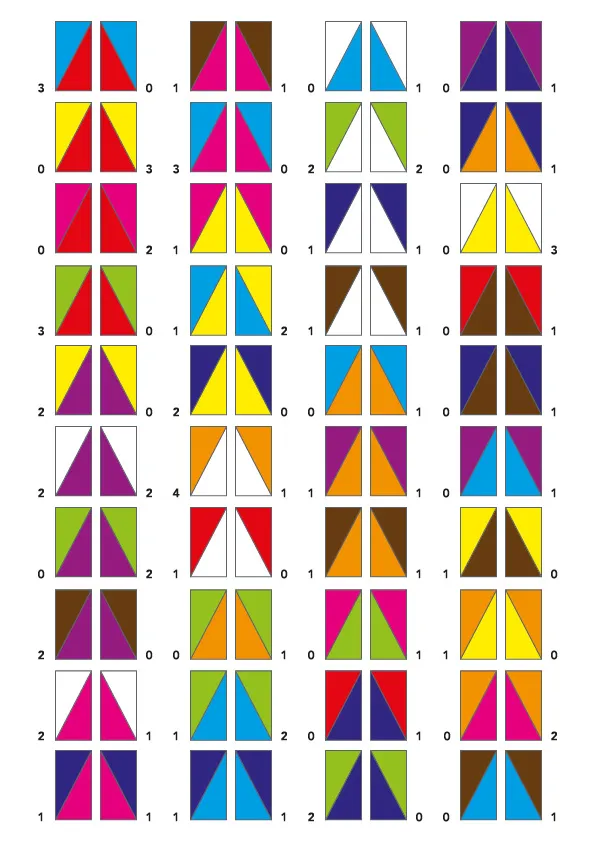
Step 1 Pair your 4in squares together into colour combos as shown to prepare your HSTs. The amount of HSTs you’ll need of each colour combo is shown – each pair of squares will make two HSTs, so you will have some leftover where there are odd numbers.
Step 2 To make the HSTs, take a pair of squares and place one on top of the other, RST. Mark a diagonal line on the wrong side of the top square.
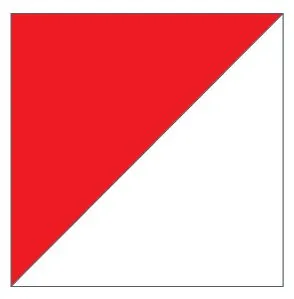
Step 3 Stitch ¼in either side of the marked line and then cut apart along the marked line.

Step 4 Open out the units and press. Keeping the 45-degree line of your ruler aligned with the diagonal seam, trim to 3½in square. You will now have two HSTs like this one.
Step 5 Repeat with the rest of the 4in squares to make the total number of HSTs.
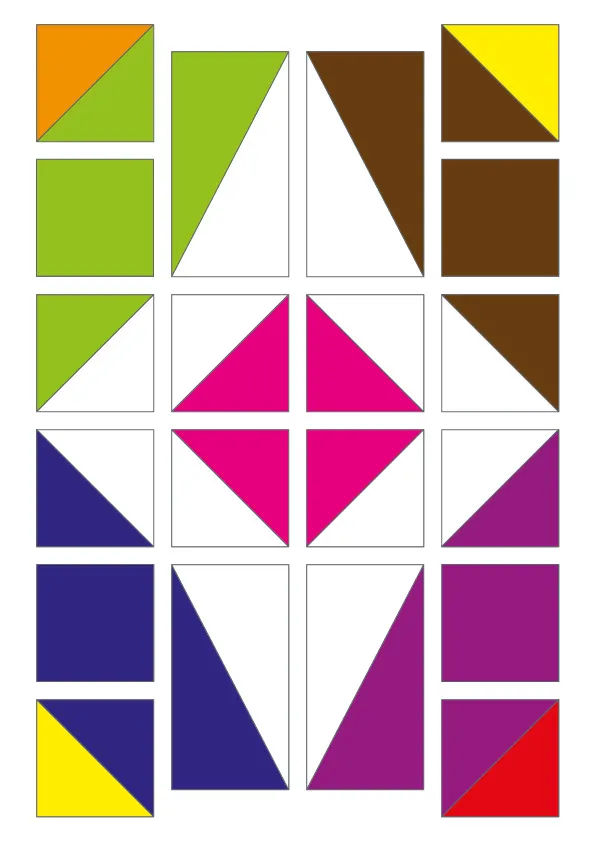
Step 6 Pair your rectangle triangles together into colour combos as shown to prepare your HRTs, making sure that they will be orientated correctly with the seam running the right way when they’re sewn together.
Step 7 Sew each pair of triangles together to make the total number of HRTs.
Step 8 Assemble the HSTs and HRTs into blocks as shown, referring to the photo for colour placement.
Step 9 Sew the units together in rows, then sew the blocks together into rows. Finally, sew the rows together to complete the quilt top.
Quilting and finishing
Step 10 Press the quilt top well. Make a quilt sandwich by placing the backing fabric right side down, the batting on top and then the quilt top centrally and right side up. Baste the layers together.
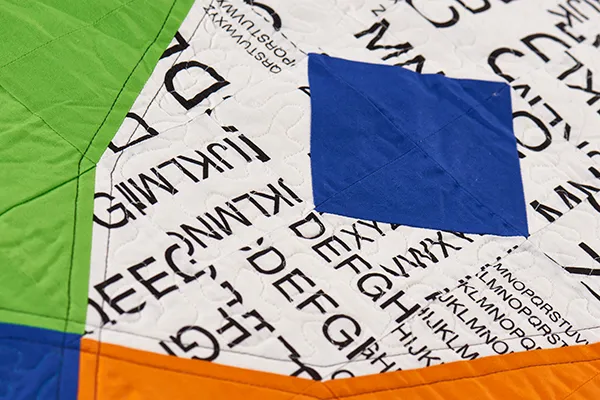
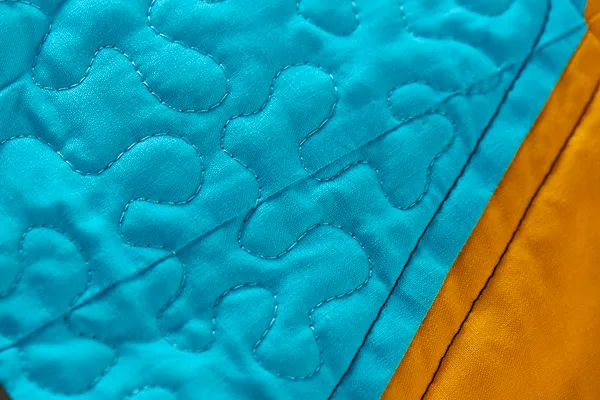
Step 11 Quilt as desired. Susan quilted around each diagonal shape and used a free-motion stippling design on some solid sections.
Step 12 Sew the binding strips together end-to-end using diagonal seams. Press the seams open and trim away the dog ears. Fold in half lengthwise, WST, and press.
Step 13 Sew the binding to the right side of the quilt, folding a mitre at each corner, then fold the binding over to the back to the quilt and hand stitch in place to finish.