Cutting out
Step 1
From the main fabric cut:
- Outer: 32x42cm (125⁄8 x 161⁄2in).
- Tabs: cut two pieces 9x7cm (35⁄8 x 23⁄4in).
Step 2
From the contrast fabric cut:
- Lining: 32x42cm (125⁄8 x 161⁄2in).
- Binding trim: four pieces 4x12cm (15⁄8 x 43⁄4in).
Step 3
From the iron-on interfacing cut:
- Main bag: 32x42cm (125⁄8 x 161⁄2in).
- Tabs: two pieces 9x7cm (35⁄8 x 23⁄4in).
Making the bag outer
Step 1
Press your interfacing onto the wrong side (WS) of the main fabric outer and two tabs.
Step 2
Place the zip with teeth facing down on the right side (RS) of the short outer edge.
Step 3
Place the lining piece RS down on top to create a sandwich. Pin them together then sew into place using a zip foot.
Step 4
Wrap your fabrics to the other side and sew on the zip in the same way.
Step 5
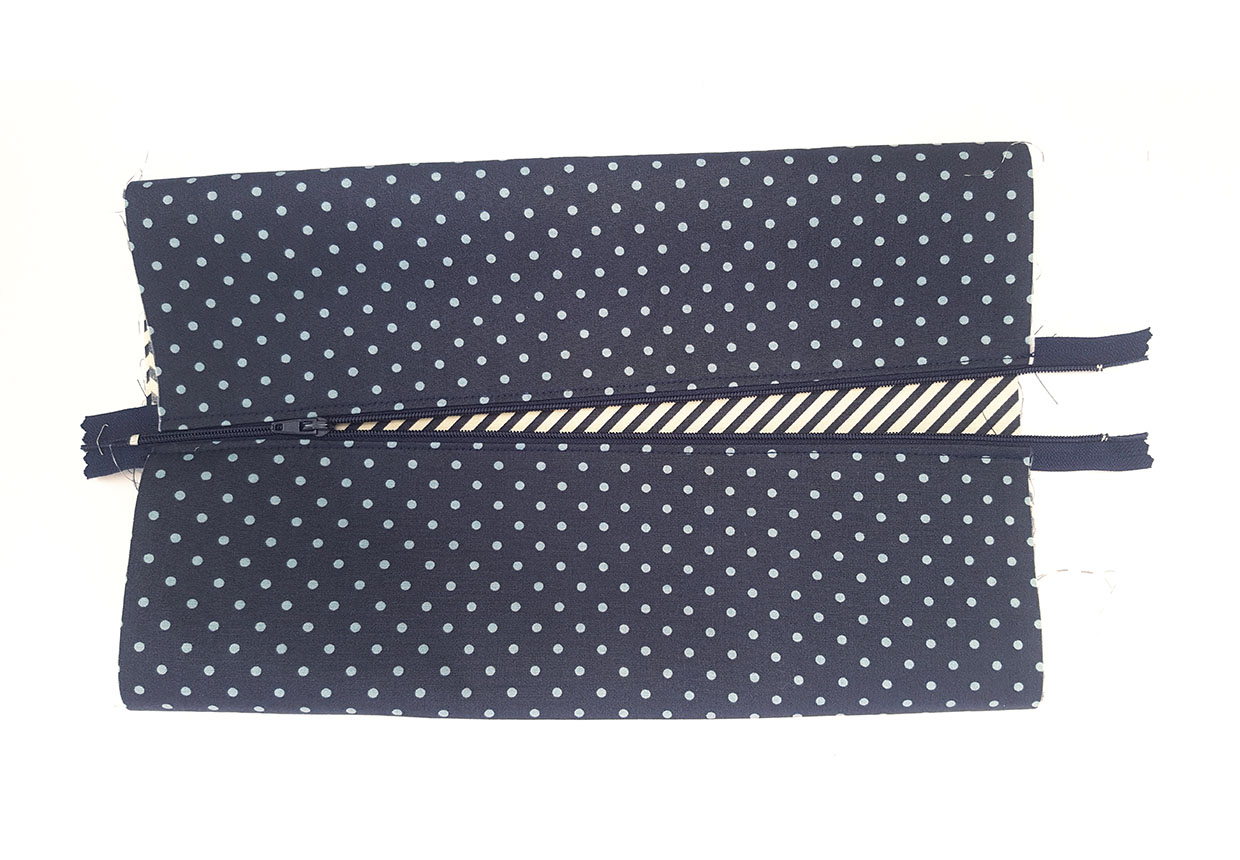
Turn and press so the outer and lining fabrics are WS together then topstitch along the joined fabric edges close to the zip.
Step 6
With the zip pull open and in the middle of the fabric body, close the zip teeth by machine sewing backwards and forwards close to the ends. Cut off the excess.
Attaching the tabs
Step 1
Fold one tab in half widthways RS facing and stitch together down the length.
Step 2
Turn RS out and press with the seam running down the centre of the back. Fold in half, matching raw edges, and press.
Step 3
Repeat to make the other tab.
Step 4
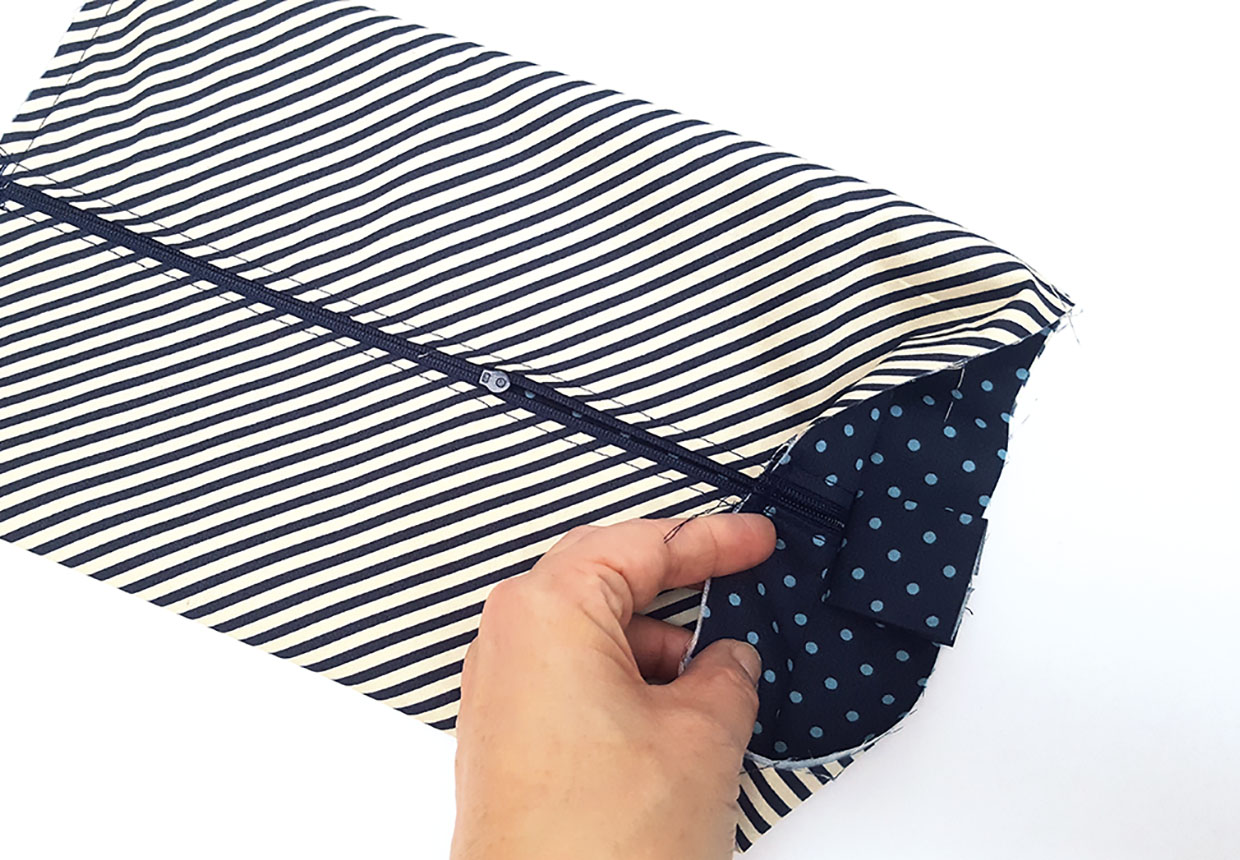
Turn the bag WS out so the lining is on the outside and fold it together so the zip lies exactly down the centre of the top edge and press, then open the zip to the centre.
Step 5
Slip one tab between the outer fabric layers so it is centred on top of the zip and matching raw edges.
Step 6
Sew across this side seam of the bag, encasing the edges of the tab as you go. Repeat this for the other tab and bag end.
Cutting the corners
Step 1
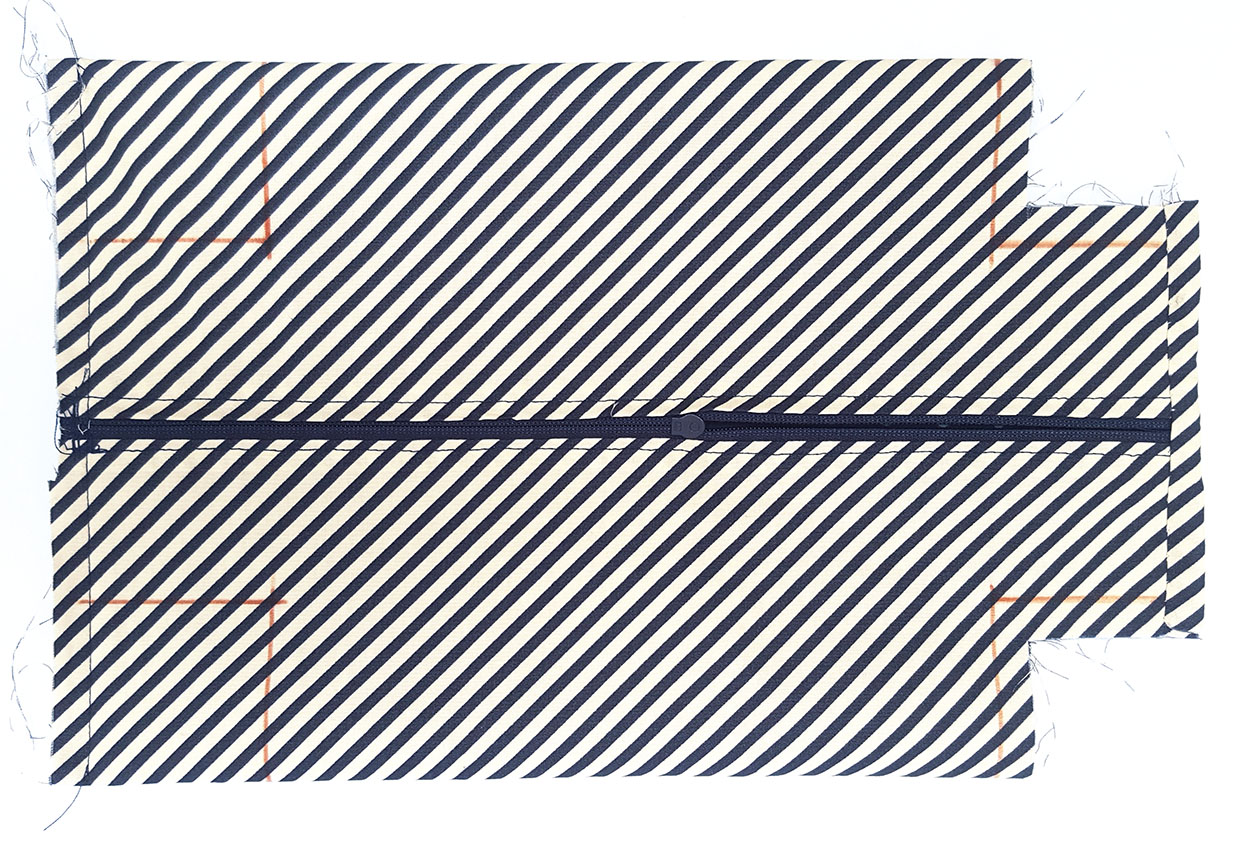
Mark a 5x5cm (2x2in) square at all four corners of the bag. The marked line is your stitching line.
Step 2
Cut 1cm (3/8in) outside this line, so you’re cutting a 4cm (15/8x15/8in) square at all four corners.
Binding the seams
Step 1
Take one binding strip and fold the long edges WS together into the centre and press.
Step 2
Unfold then fold the raw edges so they meet at the centre crease. Fold in half again to encase the raw edges and press.
Step 3
Fold this bias strip around one of the stitched side seams to cover all the raw edges, trimming to fit if necessary, then hand-sew into place down both sides.
Step 4
Repeat this with another binding strip at the other side seam.
Boxing the corners
Step 1
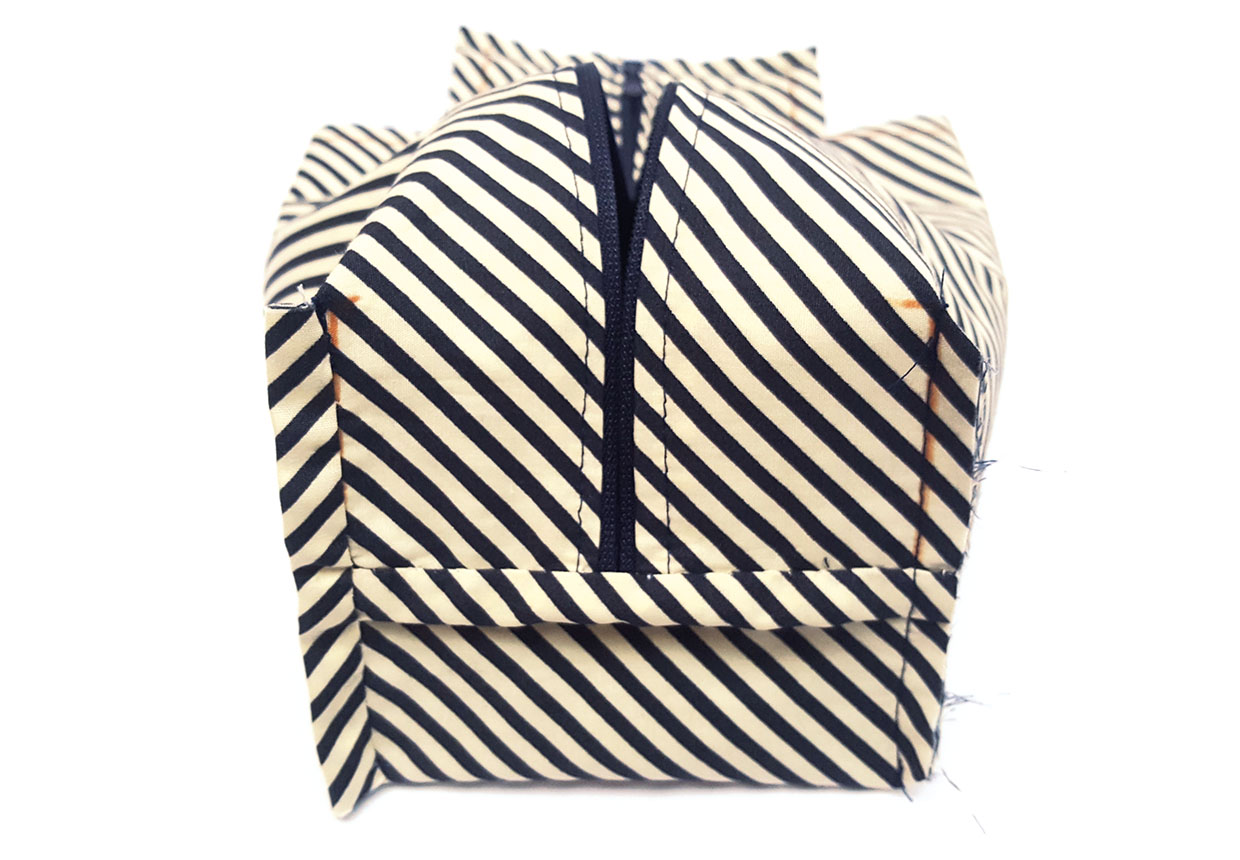
Pull one of the corners apart and pin it RS together so the side seam runs down the centre and creates a box shape. Stitch together.
Step 2
Bind with one of the bias strips in the same way as for the side seams but turn the short ends under to the inside for a neat finish.
Step 3
Repeat this with all four corners and then turn RS out to finish.


