How to sew patchwork bird softies

Add a touch of patchwork brights to your home, with these dinky decorations by Helen Philipps. They're a great way to use up your fabric stash…

Try 6 issues of Love Patchwork & Quilting magazine for £9.99| SAVE 76%

Published: February 12, 2021 at 10:35 am

We've got the perfect quick and easy Spring sewing project for you – make these sweet softie bird decorations with our free bird sewing pattern and step-by-step guide. Each bird will only take you an hour or two to make and you don't need many supplies to try them – in fact even if you don't have a sewing machine you could easily hand sew these with small hand stitches.

(If you don't have a machine of your own, check out our round-up of the best sewing machines for beginners and if you're new to sewing, this is a great project to learn the ropes. Check out our guide to sewing for beginners to learn more.)

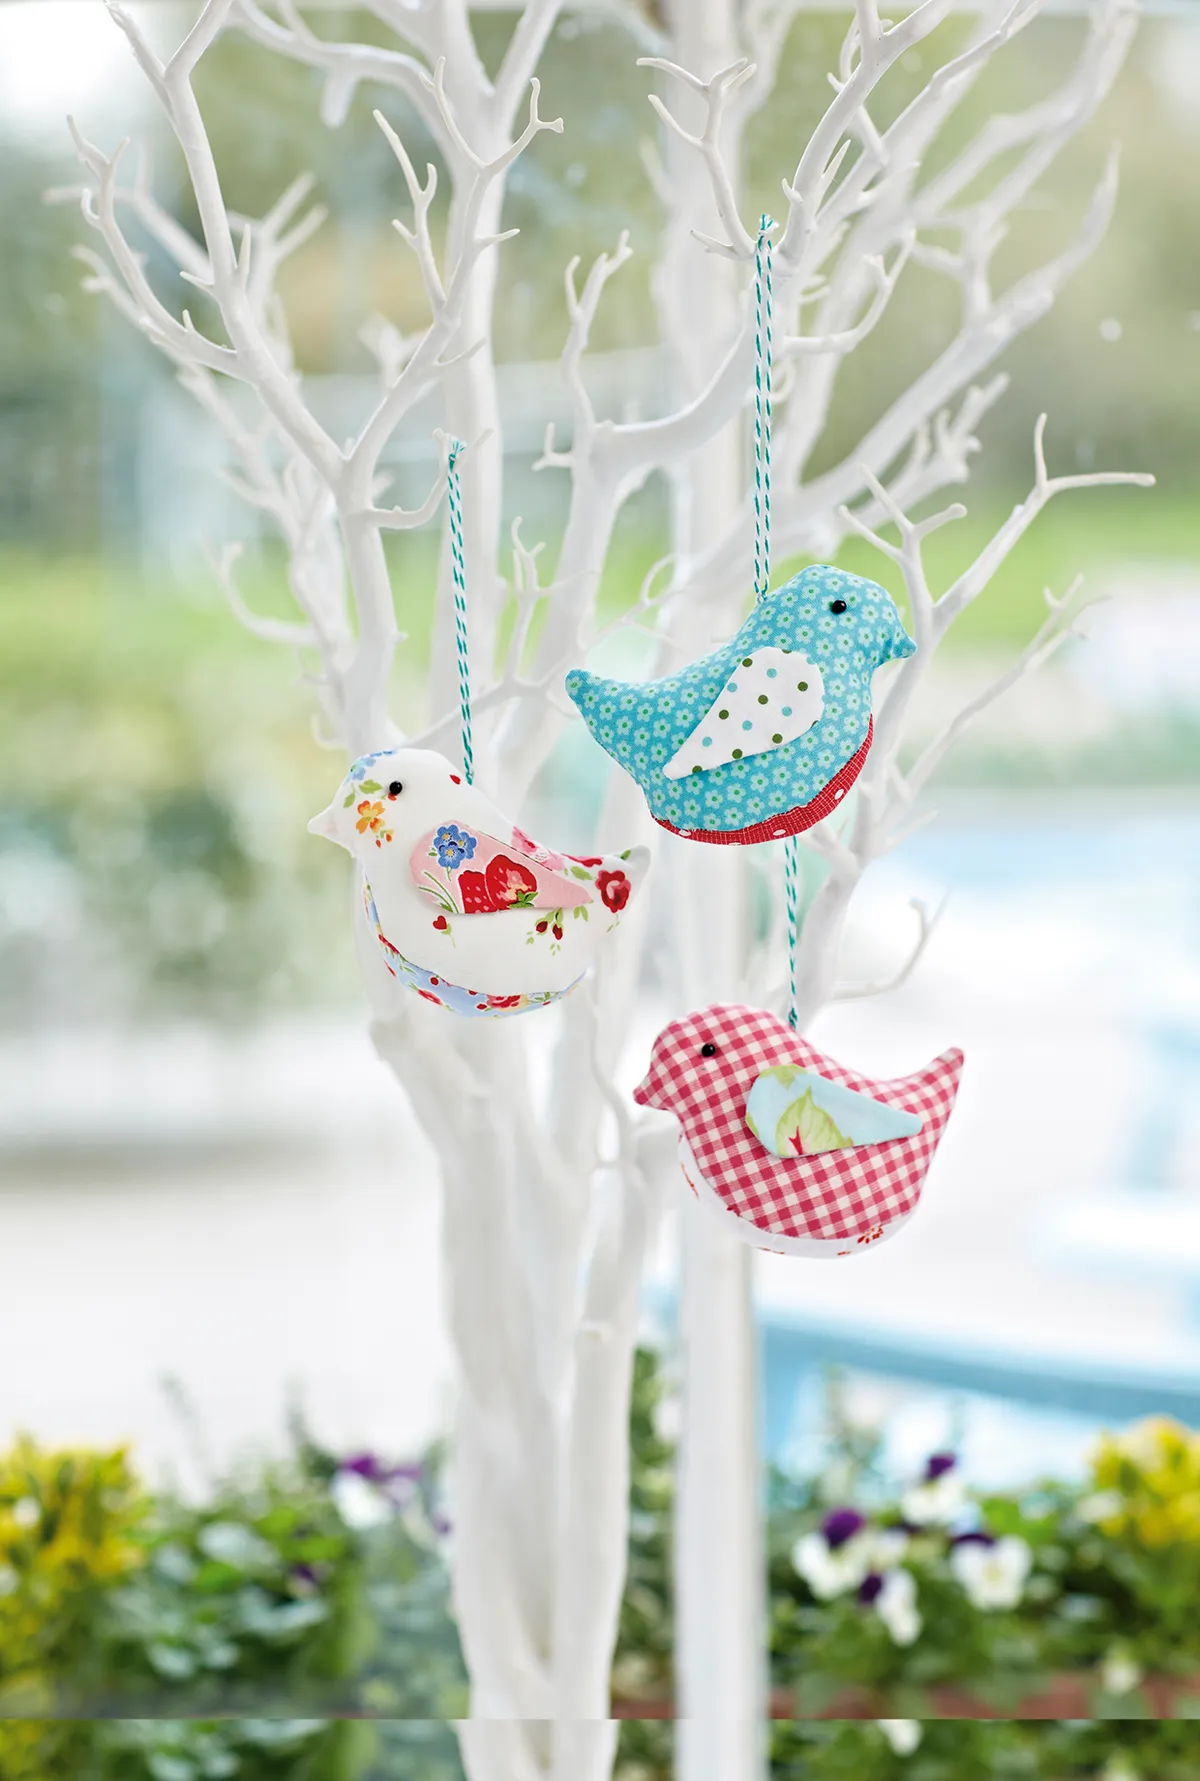
Once you’ve got the hang of the basic construction of these DIY bird decorations, you can start embellishing with your own little details. It really is easy to make these little birdies your own! We've used country-style pastels and floral prints which are perfect for a spring-time feel but this is a handy scrap-buster project too to breathe new life into fabric offcuts from your previous makes. Try solids for a more traditional finish.We used baker’s twine to hang our little birds, but ribbon or ric-rac would look cute too.

You won’t be able to stop at just one!

Helen Phillips’s is an author and designer whose love of needlecraft led her to creating original designs, including patchwork and quilting, and she also has a lovely Etsy store. This project was first published in Love Patchwork & Quilting magazine. For more easy home sewing scrap-buster inspiration, how about our simple guide to how to make bunting?

You could sew French knots in black thread for the eyes if you prefer.

How to make bird sofites free sewing pattern

How to sew bird softies

You will need

  • A variety of small pieces of printed cottons
  • Polyester toy filling
  • Two black beads for eyes
  • Black cotton
  • Teal and white baker’s twine
  • White card for templates
  • Sewing machine or needle & thread
  • Beginners sewing kit

Finished size

4½in x 4in approx

Your free bird softie template

Download our Free bird sewing pattern PDF to help you make this project.

You will need:

  • (Black)
  • Baker's twine
  • Card (to cut templates from)
  • Sewing machine (Or you could hand sew with needle and thread)
  • Thread
  • Basic sewing kit
  • Needle

Making the bird

Step 1

Using our free bird sewing pattern PDF as your template, trace the bird body, the tummy insert and the wing onto a sheet of white card and cut out carefully to make re-usable templates.

Step 2

Cut two 5in squares of printed cotton and place right sides together. Place the bird shape on the wrong side of one piece of fabric and draw carefully round it, marking where the opening will be. Take a piece of contrasting fabric for the bird’s tummy insert and draw around that template on the back of the fabric. Cut out leaving a ¼in seam allowance.

Step 3

Sew around the bird shape by hand or machine and then trim the seam. Turn the bird the right way out, carefully pushing out the beak and the tail to make a clear shape. Take the tummy insert and pin it in place on one side of the opening. Sew with a ¼in seam and repeat for the second side, leaving a small gap for stuffing near the tail.

[pullquote quote="Clipping and notching the body seams before turning will help to achieve a smooth curve to your bird when right-side out." /]

Step 4

Stuff the bird firmly with polyester toy filling and sew the gap neatly closed.

Step 5

For the wings, take two pieces of cotton fabric and with right sides together draw around the wing shape onto one of them. Sew around the wing shape, leaving a small gap for turning. Turn the wing out to the right side, push the shape out carefully and press. Sew up the small gap neatly. Make another wing in the same way.

Step 6

Attach the wings on either side of the bird with a few stitches, or with fabric glue.

Finishing off

Step 1

Sew black beads in place for the eyes using black cotton.

Step 2

Thread a large-eyed needle with a 10in length of baker’s twine and draw it through the top of the bird’s head. Remove the needle and tie the twine in a small knot. Tie another knot at the top of the twine for hanging the bird.

Free birds sewing pattern