Whether you’re a complete newcomer or a relative beginner who could do with a refresher, here’s our top-to-bottom guide to help you find your way around your machine. We guarantee you’ll be running up projects in next to no time with our sewing machine parts guide.
You'll find the different brands and types of machine will vary slightly, but they share the same common parts – once you’ve got to know the main areas of one machine, you'll find it easier to work out where they are on your own machine.
Taking the time to familiarise yourself with your machine will help you to become a more confident sewer in the long run!
Read on to get to know your machine from the thread feed to the presser foot.
You can also read our complete guide to the best sewing machines for everything you need to know before your next purchase.
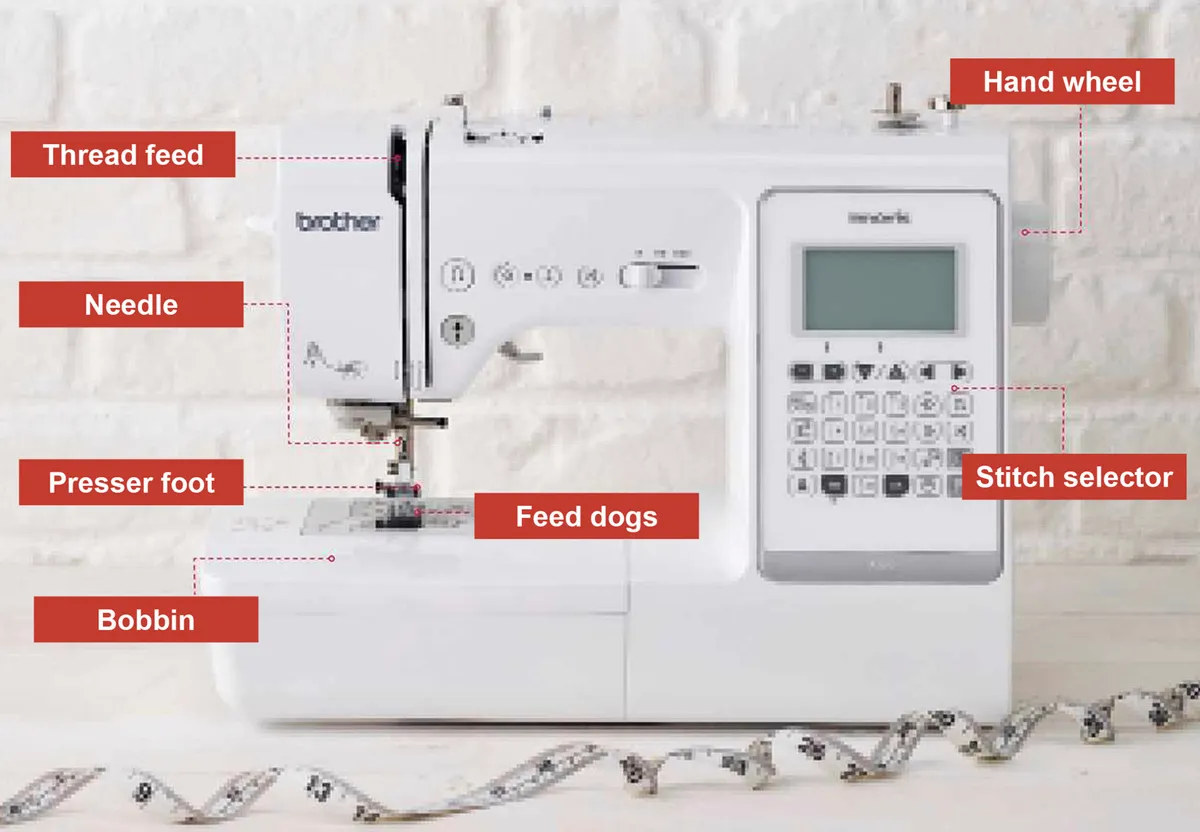
Sewing machine parts guide
Start by identifying all of the different parts of the sewing machine using this handy diagram. Look at your own machine and work out where each part is on your model.
Needle
A sewing machine needle moves in and out of the fabric without going all the way through as it would in hand sewing. Most machines come with a needle already in place, but your manual will show how to swap it for a different one. We also show you the basics of how to change a needle below.
Standard needles are typically size 75 or 80 (UK sizing). For tougher jobs, such as sewing denim or very heavy curtains, go for a larger number – 110 or 120. When sewing a fine fabric such as organza or a sheer net curtain, use a fine size 60. When you buy your fabric, it’s worth asking which needle is best for the job.
Check out our how to thread a sewing machine guide to get started.
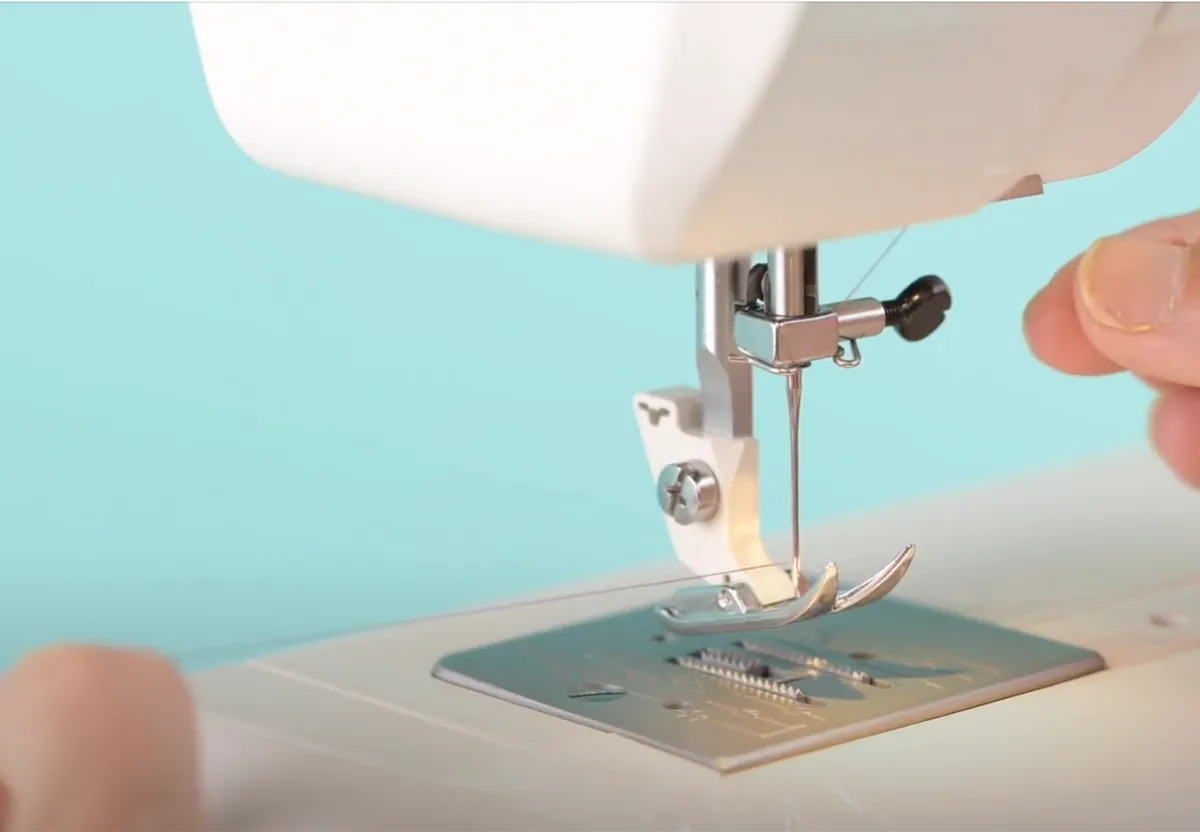
Sewing machine foot
This is the metal attachment that sits beneath your needle and holds your fabric in place. Nearby you'll find a lever to move it up and down. Raise it up when positioning your fabric and move it back down to secure your fabric when sewing.
The basic presser foot is the one you’ll use most, though there are dozens of speciality feet for everything from quilting to attaching zips and creating buttonholes.
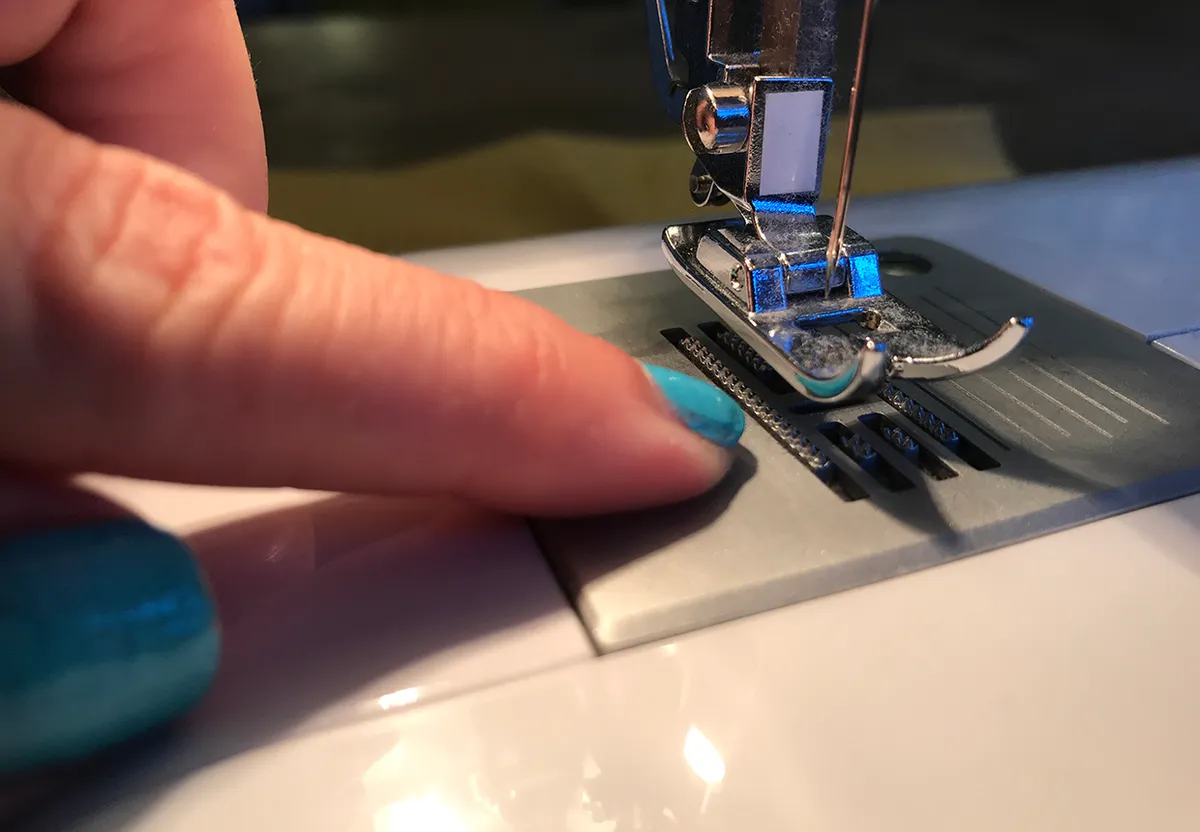
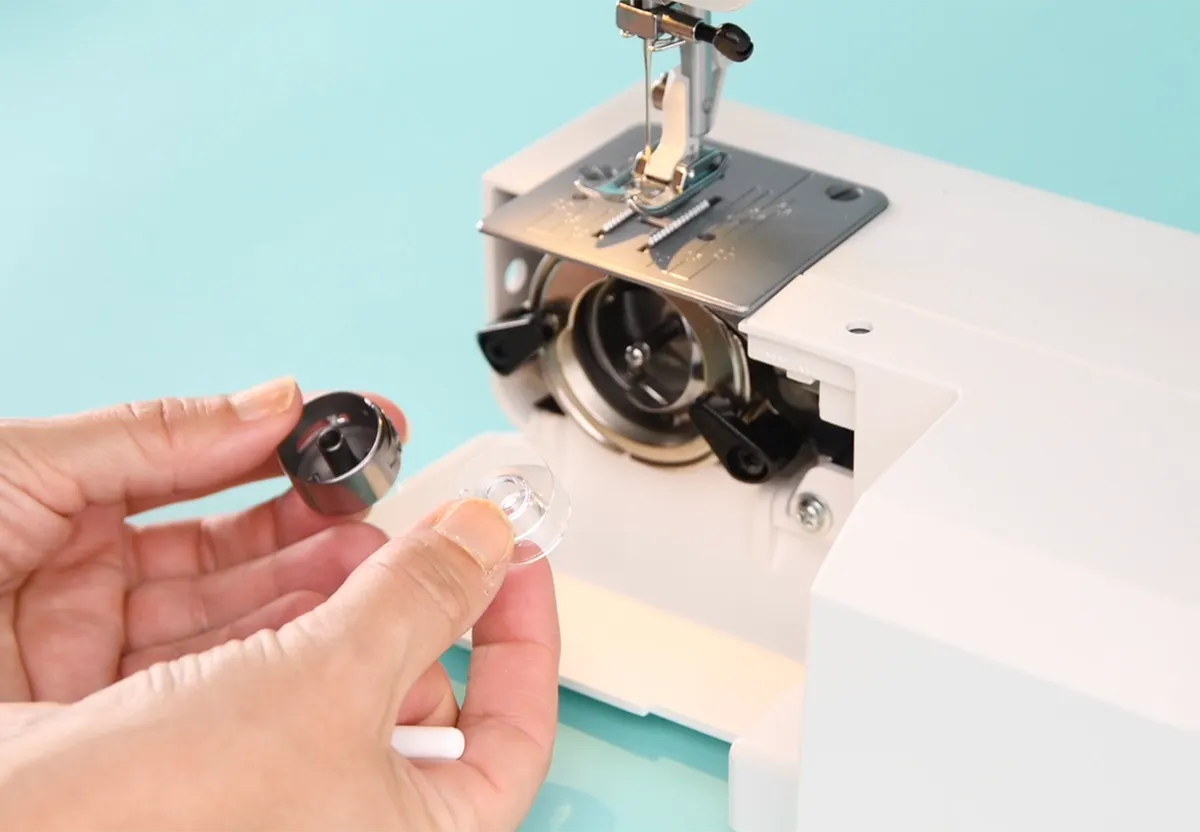
Bobbin
In our machine, the bobbin is hidden beneath the outer machine casing. It's a small plastic or metal spool that sits in a special housing underneath the sewing area, below the foot and needle. Some manuals have a top loading bobbin, some load from the front. Check the manual of your machine to find out exactly how to load your bobbin.
Once loaded, the bobbin thread and the top thread feeds meet to form each stitch. It's easy to release your bobbin when you need to thread it – either with a lever below the machine (for front loading bobbins) or by opening the top-hatch (for top loading bobbins).
For more on this, see our guide to how to thread a bobbin.
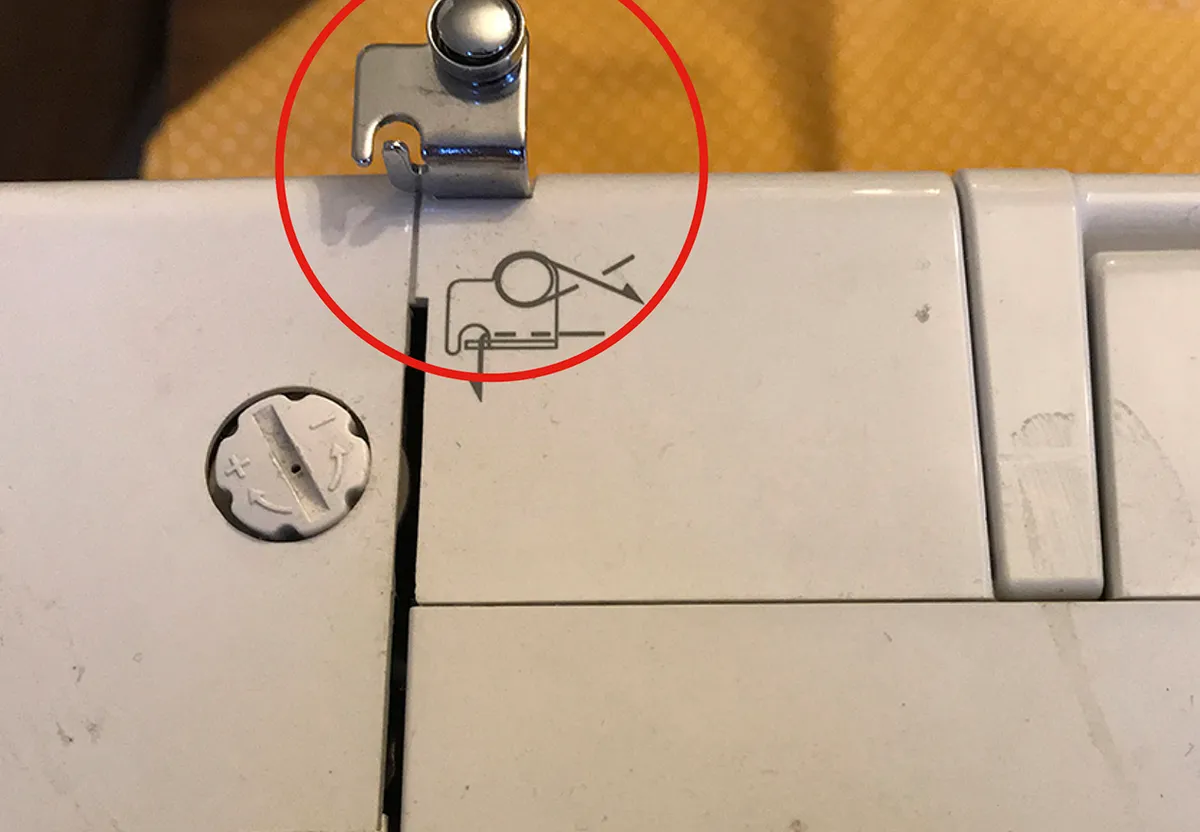
Thread guide
This essential part of your machine will guide the thread from the spool pin, round to the bobbin winder or (on some brands and models of machine) down to the lower needle. The thread guide may sit in a different place on different models or brands of machines so check your manual for how to thread your specific machine.
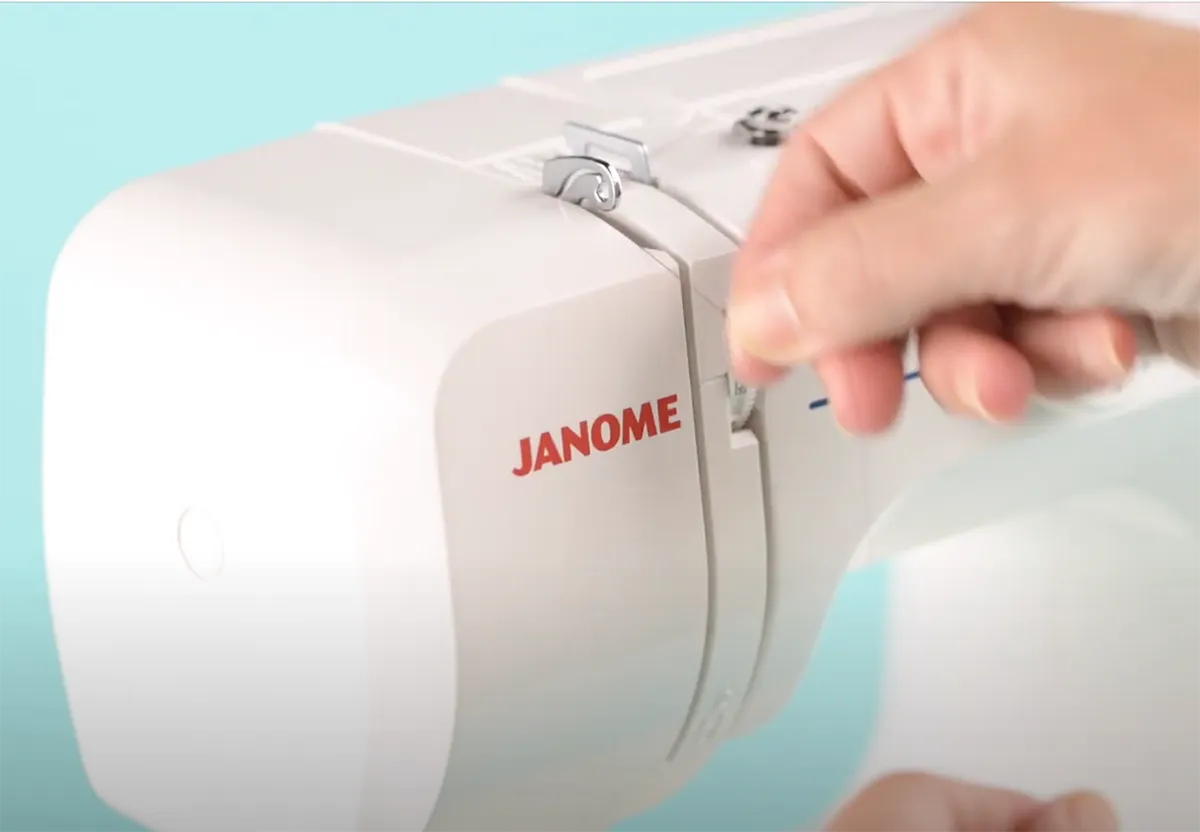
Thread feed
Your spool of thread sits at the top of the machine. It threads through a series of numbered channels and loops before it reaches the needle. This maintains an even thread tension and avoids tangles. Your machine will have a numbered dial that can be raised or lowered to adjust the tension as your fabric requires.
Choose the best sewing machine for beginners
There's a huge range of sewing machines on the market, so it can be hard to know where to start when the time comes to choose your first one. Learn everything you need to know with Gathered's best sewing machines for beginners guide.
Tension dial
All manual sewing machines will have a knob or dial like this one, that allows you to adjust how tight or loose the tension of your stitches is. The thread tension you'll need will vary based on the materials you use – how many layers of fabric and how thick it is (denim or upholstery fabric will need a different tension setting for example than cotton).
If you're not sure where to begin, check your machine manual and it should tell you which setting to start out with.
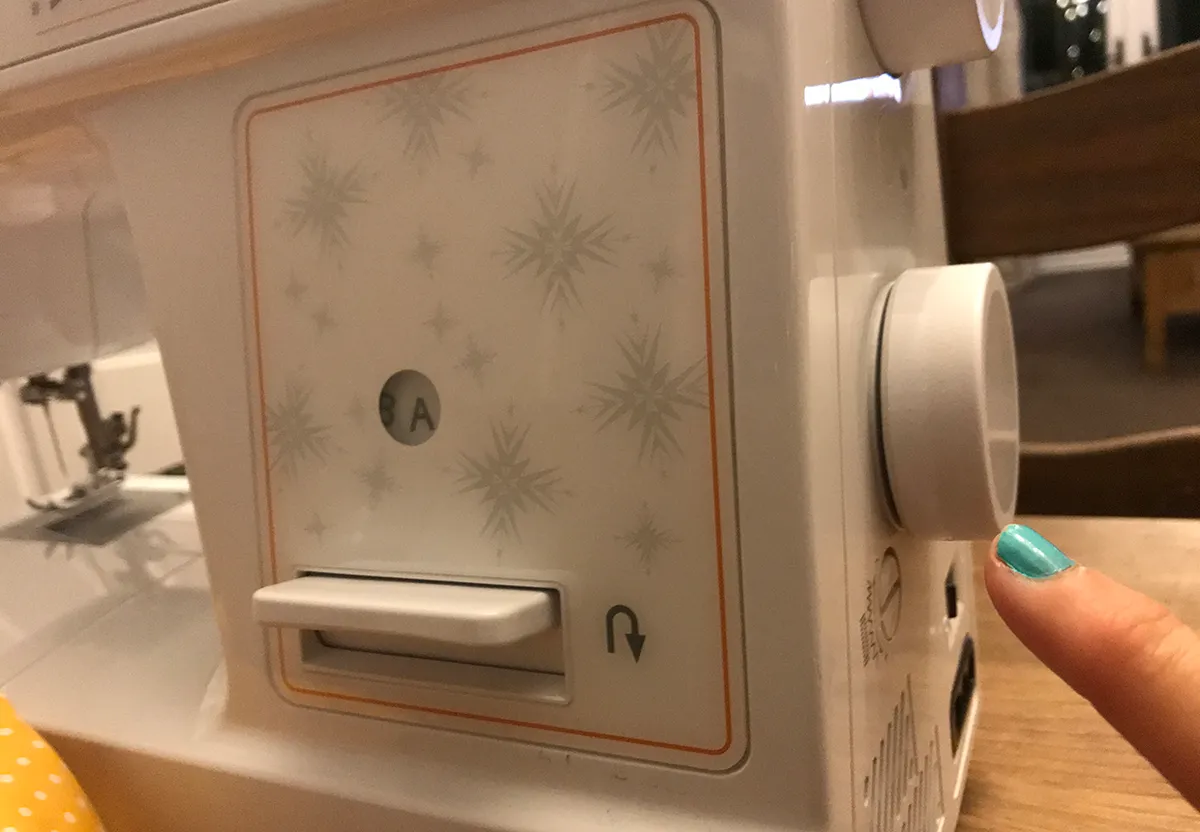
Stitch selector
Dials, switches, knobs… the method used to change the stitch type varies between machines, but the principle is the same. For most projects, all you’ll need are the basic straight stitch and zig-zag.
Once you’re more experienced, you can try some of the more decorative stitches your machine has to offer. On this machine the stitch selector is a dial on the side which switches the stitch mode at the front – here it is set to stitch A - straight stitch.
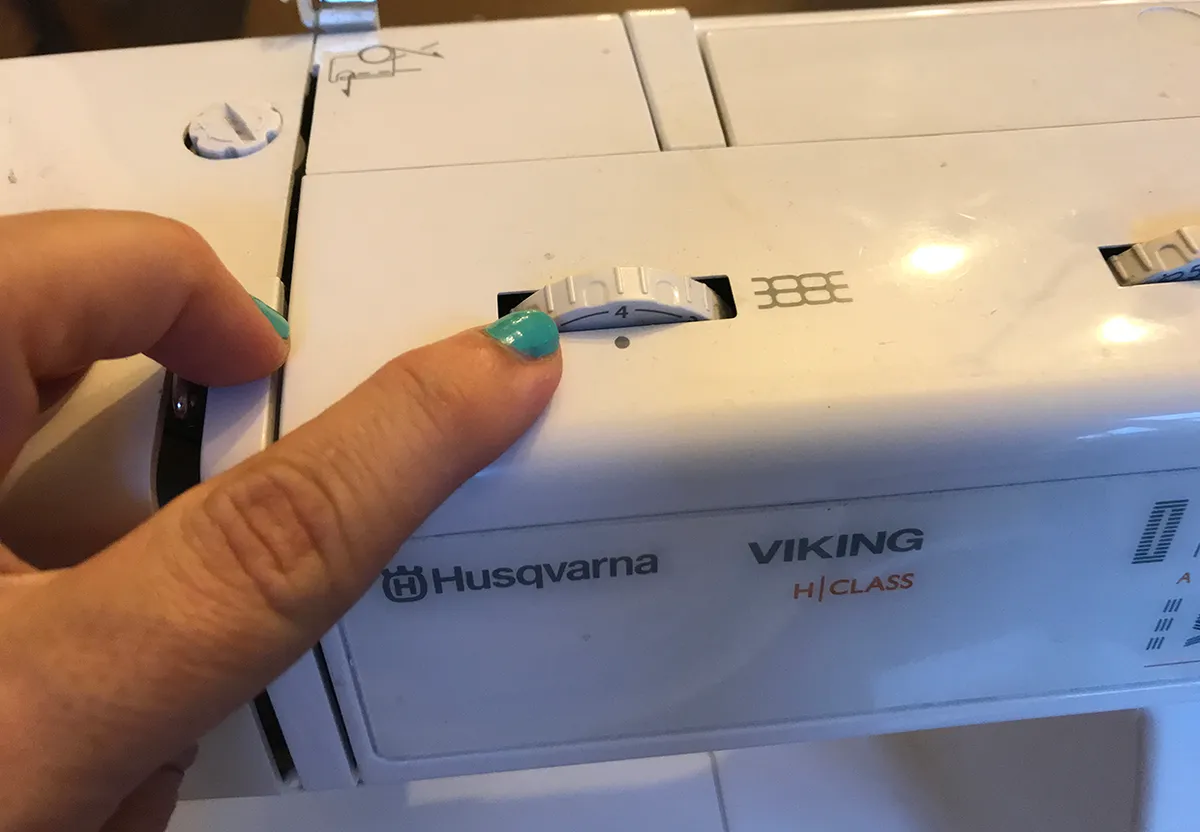
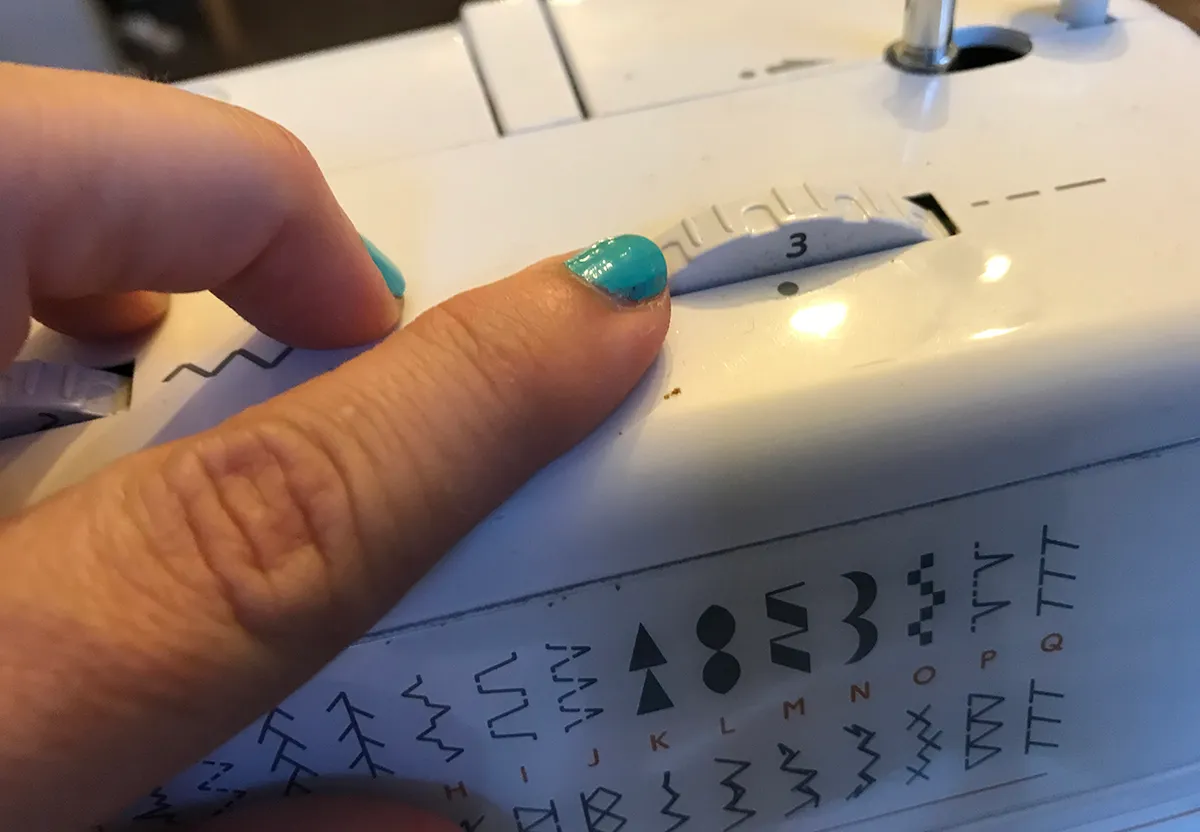
Stitch length dial
A dial or knob will enable you to change the length of your stitches, whether they’re simple straight stitches, zigzags or any other pattern. A long stitch length is useful for creating quick tacking lines. For regular sewing, aim for a length of around 2 or 2.5, which will be strong enough for most ordinary seams.
A quick note about stitch width: Sometimes this function is built in and the machine automatically adjusts itself as you change the stitch type. So for our machine above, you won't see a dial for adjusting the stitch width, but if your machine does have a dial, leave the width at 0 for straight stitches because the needle doesn’t need to move from side to side.
For all other stitches, adjust the width as needed, practising on a scrap of fabric first.
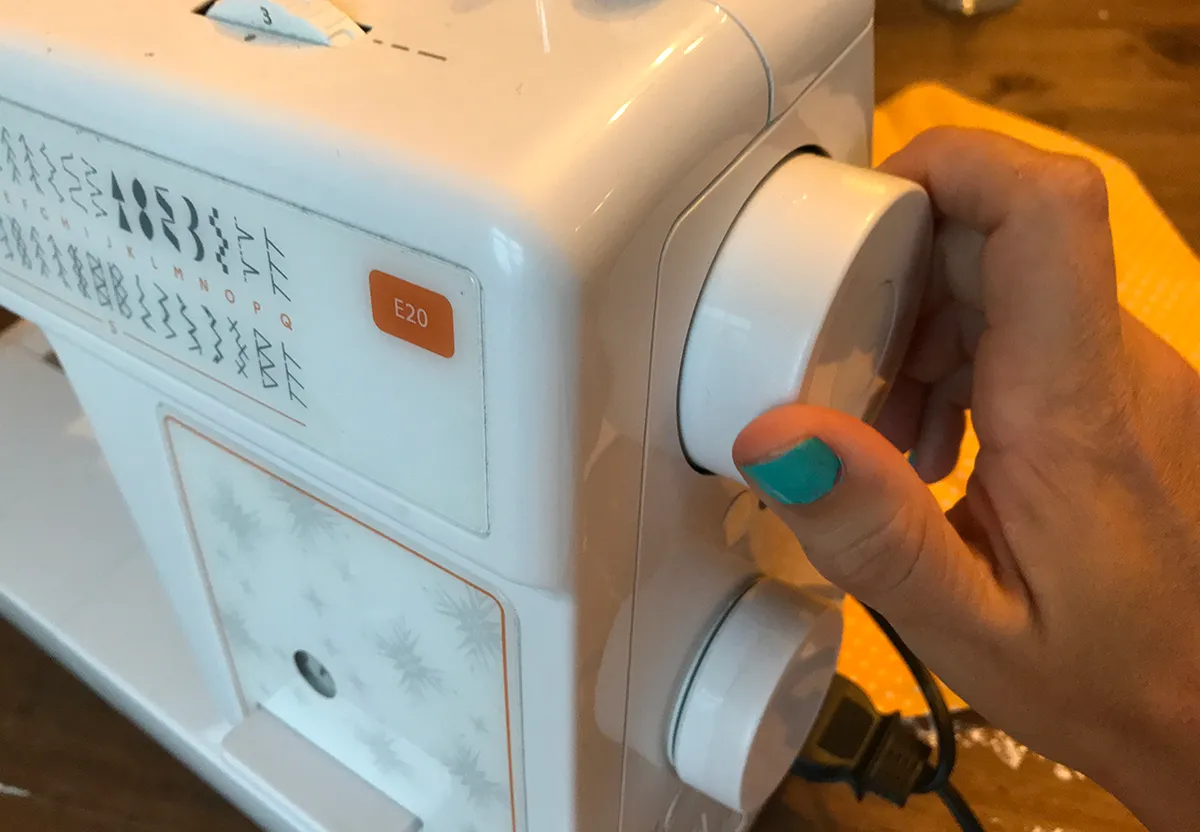
Hand wheel
Use the hand wheel to move the needle up and down manually. This will be essential for controlling the sewing line in tight spots and corners. To avoid your thread getting caught or tangled, be sure to always turn the wheel towards you.
When winding bobbins, on some machines you’ll need to disengage the needle action by pulling out the hand wheel, but not all. Consult your manual to learn exactly how to do this on your machine.
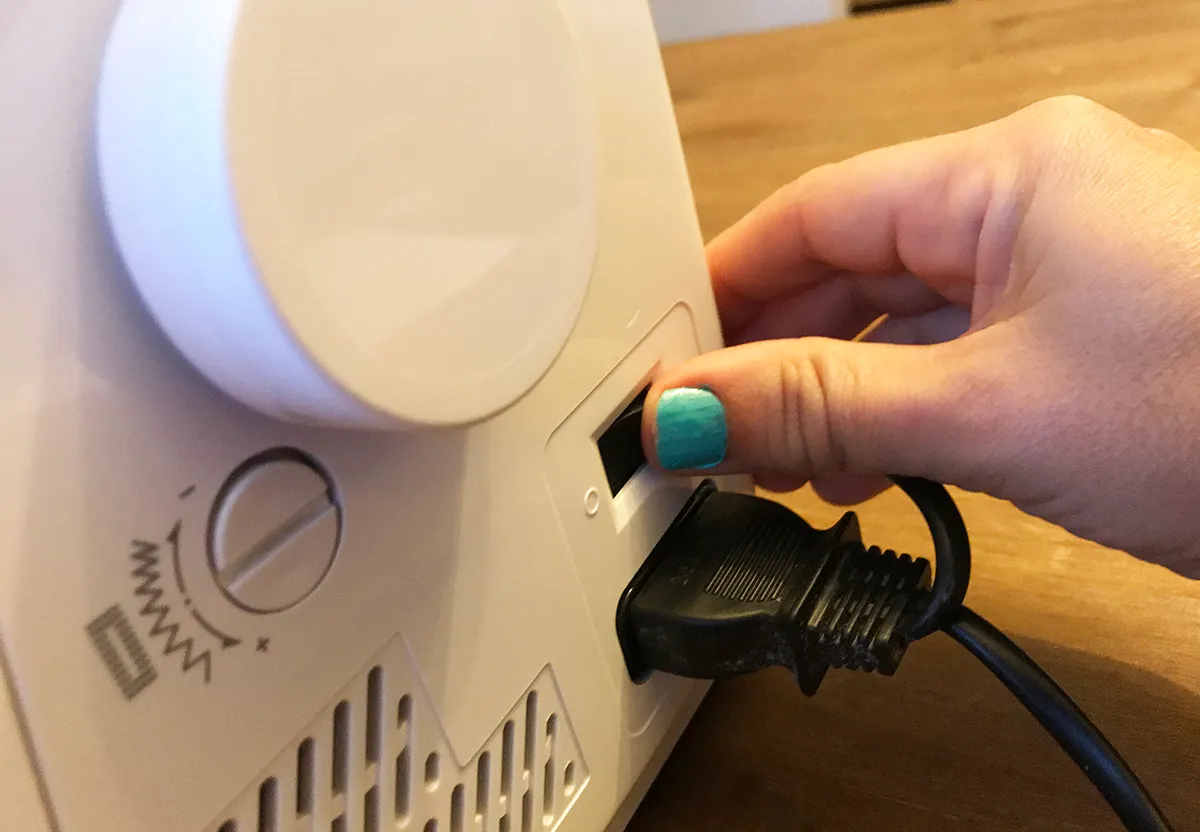
On/off switch
This may sound obvious, but before you start sewing, you'll need to switch the machine on! For most machines, this will bring on a small light above the needle to help you see your stitching. Once you've switched on, you'll need to use the foot pedal that is connected to the machine and sits on the floor to start the needle moving.
The pedal is pressure-sensitive, so gentle pressure results in slow stitching, while pressing harder will run the motor faster. Some machines also have a separate speed control, which gives you even more command over your pace.
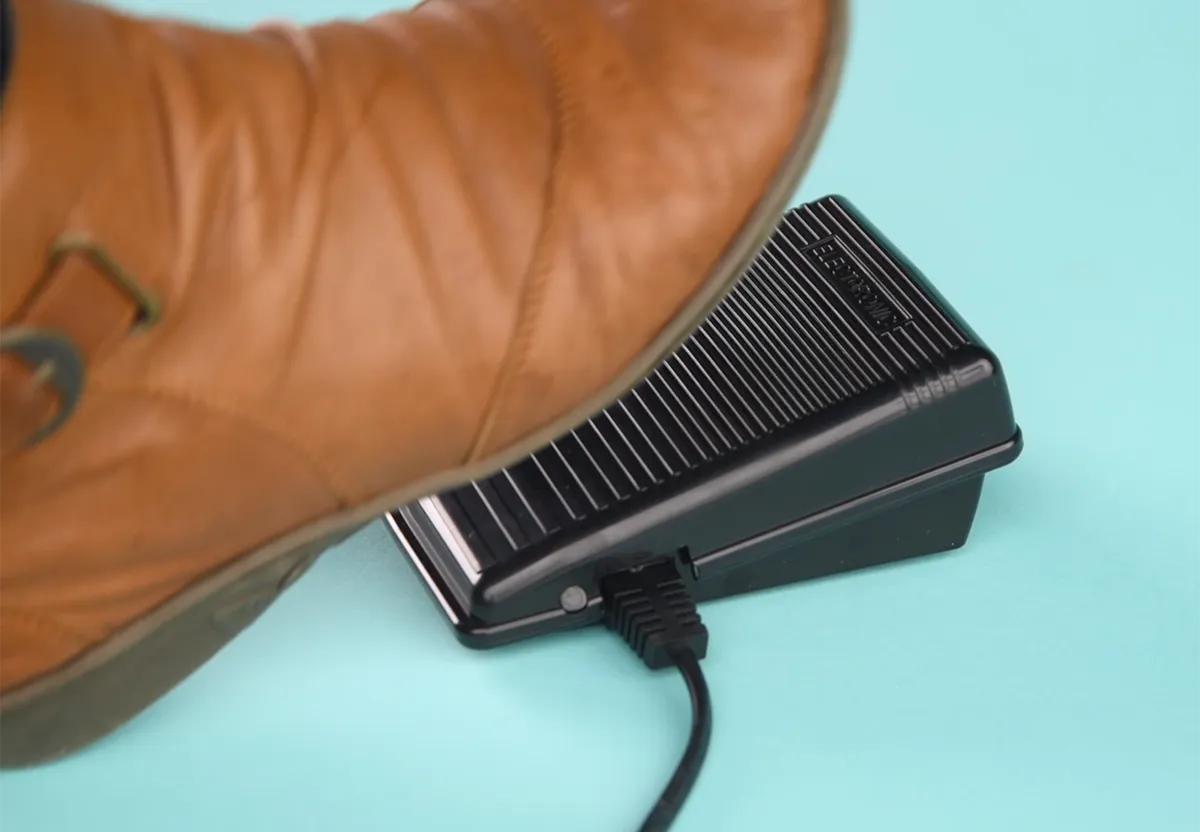
Foot pedal
The foot pedal is the part of the machine that is attached by a wire to the main machine and sits on the floor. When you press your foot on the pedal, the sewing machine needle will go up and down.
Adjusting the amount of pressure you apply to the pedal will adjust the speed your machine sews. Sometimes you'll want to sew quickly, other times you'll need to slow down – for example when passing the needle though several layers at the points where bulky seams meet.
Get to know the parts of a sewing machine
Understanding your sewing machine parts and where to find them is an essential skill for new sewers to master. Even experienced crafters can benefit from a refresher now and then!
If you take the time to learn about your sewing machine, it'll make you a more confident sewer in the long-run.
While different sewing machines may vary in terms of their design, you can use this guide to familiarise yourself with common features and refer back to it whenever you need to.
How to use a sewing machine
Now that you've learnt all about the parts of a sewing machine, it's time to start sewing with it! Head over to Gathered's how to use a sewing machine guide for lots of expert tips and advice.