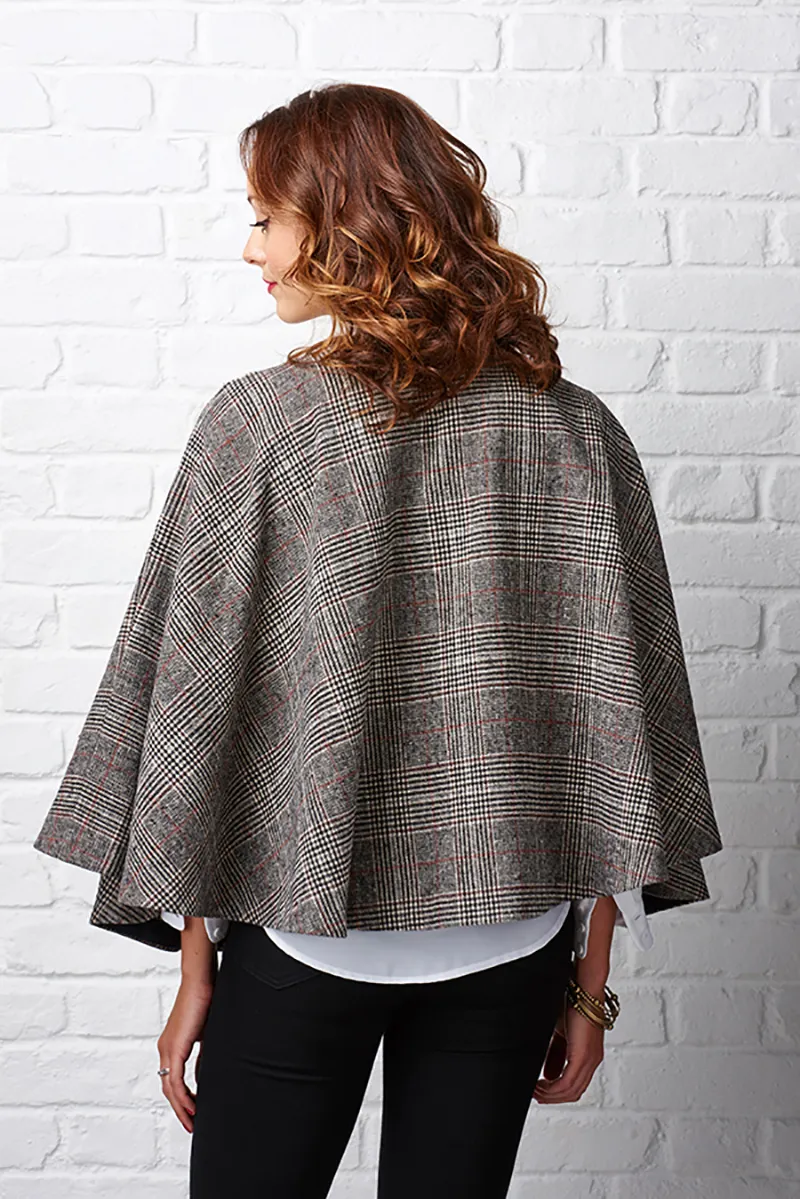
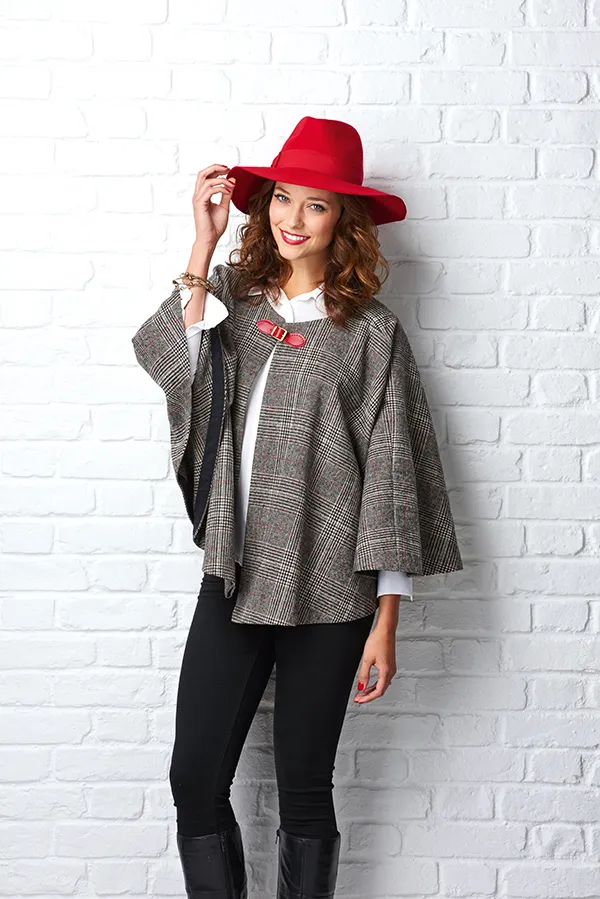
It's too hot for a winter coat yet too cold for just a jacket... what do you need? You need a circle cape! Brilliant for all temperatures, circle cape coats look stylish and are comfortable to wear.
Designer Portia Lawrie created this free circle cape pattern to help you sew your own version. We asked her about her design and she said:
“Capes, ponchos, blanket coats and wraps are always in style, and super-easy to make, too. It’s the perfect on-trend cover up.
The addition of the red leather buckle fastening picks up on the fine red line in the check, adds a subtle pop of colour, modernises the look and prevents it looking too... you know, Sherlocky.
Construction is straightforward and the shape itself is ‘no pattern required’ with just a bit of elementary maths needed (see what I did there?).”
Keep reading to find Portia's free circle cape pattern and for more cosy sewing patterns, head to our round-up of the best coat sewing patterns.
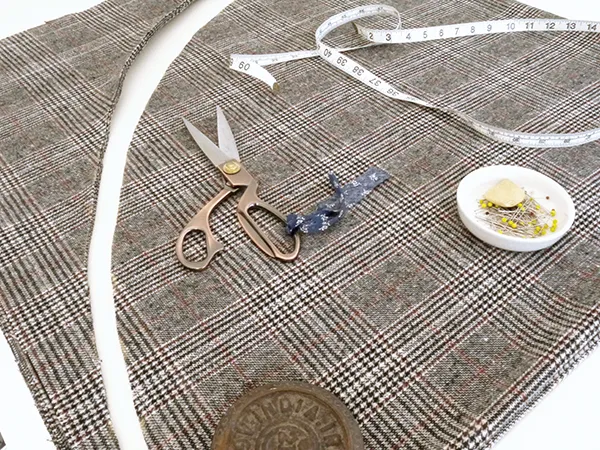
What you need to stitch your circle cape
You will need:
- Wool-weight fabric: 2 metres (2¼ yds)
- Iron-on interfacing: see instructions for details
- Bias binding: to fit around the cape
- Tailor’s chalk
- Basic sewing kit
Notes
- Use a wool weight fabric with a good drape. We used Edinburgh large check tweed – brown from Minerva Crafts. It’s soft, warm and drapey, perfect for a cape or wrap like this.
- Red leather buckles can easily be bought online – ours was a bag buckle bought from eBay.
- Use a 5mm (¼in) seam allowance throughout.
Free cape pattern
Preparing your circle cape fabric
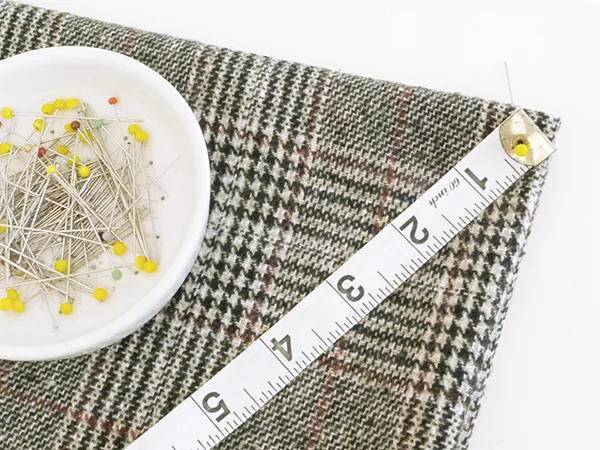
Step one
Start by cutting a square of fabric (use a rotary cutter for this), the same length as the full width of the fabric.
Fold the square in half twice to create a smaller square.
There will be one corner where all the folded edges meet.
Anchor a tape measure in that corner with a pin.
Measuring your circle cape
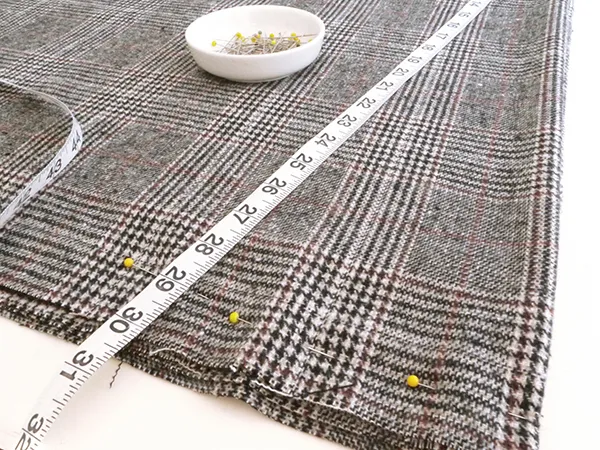
Step two
Decide how long you want your cape to be then add 2.5cm (1in) for hemming to calculate the cut length.
Starting with one of the straight edges, measure down it to the cut length and mark with a pin.
Using the anchored tape, measure as a kind of pendulum, pivot the tape measure around in an arc and mark out a quarter circle with pins until you reach the other straight edge.
Calculating your measurements
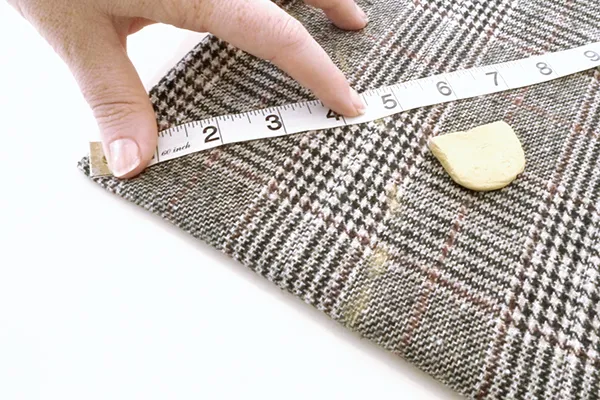
Step three
Repeat this process for the neck hole.
To calculate the measurement here, measure around your neck to see what would be a comfortable size of neck opening for you.
For example, if you want your finished neck hole to be 43cm (17in) then that measurement is the circumference of the circle you need to cut.
You need to calculate the radius of that circle using Pi. So: 43 ÷ 6.28 (pi x 2) = 6.8. Therefore, your radius is 6.8cm, so you need to mark your neckline quarter circle to this measurement with a series of pins.
This is done in the same way as for the hem, starting from the anchored tape measure in the corner.
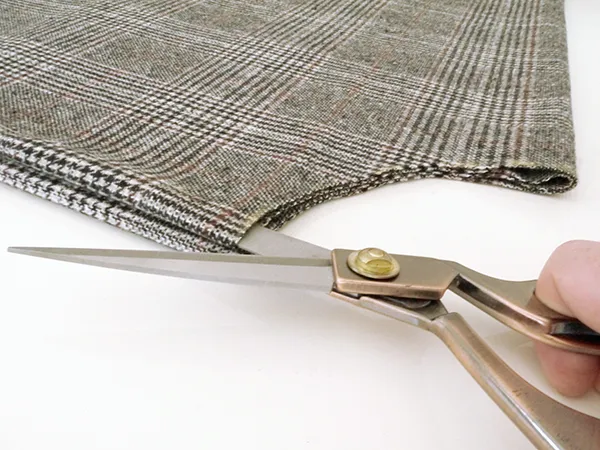
Drawing and cutting out your circle cape
Step four
Using the pin markers you placed along the hem, chalk a smooth cutting line for your hem quarter circle.
Weight the fabric down with some DIY pattern weights and cut through all layers at once.
Step five
Repeat this for the neckline.
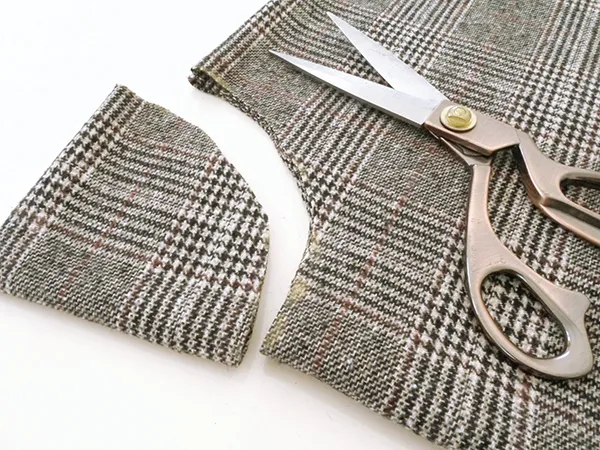
Step six
Cut through just one of the folded straight edges from neck edge to bottom to create your cape opening.
Step seven
Open your cut fabric up and you will have a perfect circle with a smaller cut out circle inside and a single straight edge opening.
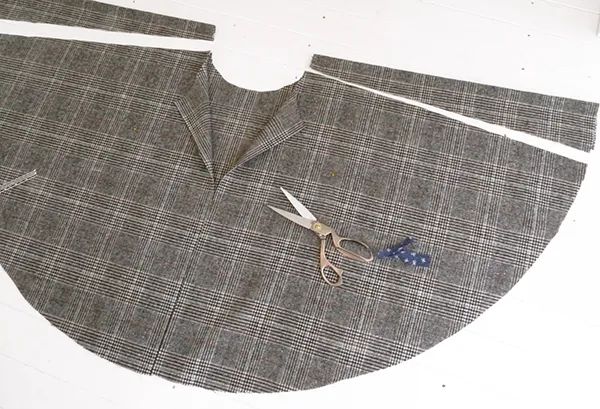
Step eight
With the circle folded in half and all raw edges aligned, remove some of the fullness and add some slope to the shoulders by removing a wedge from the shoulder lines as shown.
Draw a line sloping from the neck edge to the bottom, making it 1cm (3⁄8in) wide at the top and 6cm (2½in) wide at the hem.
Draw the same line on both sides, then cut along them.
Start sewing your circle cape
Step nine
Stitch the cape together along these cut edges. It will be worth pinning these seams first and trying your cape on in case you need to alter them slightly for a more pleasing fit and drape to suit you.
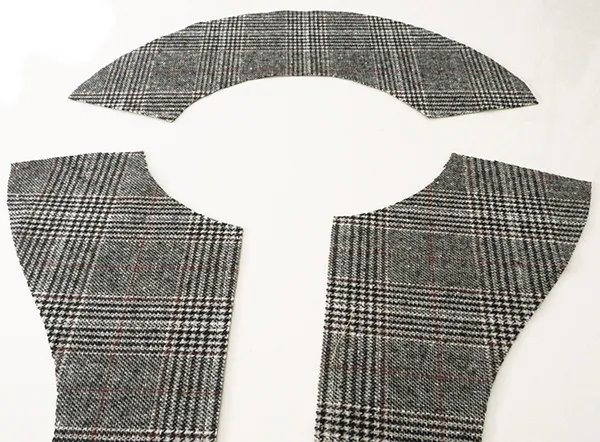
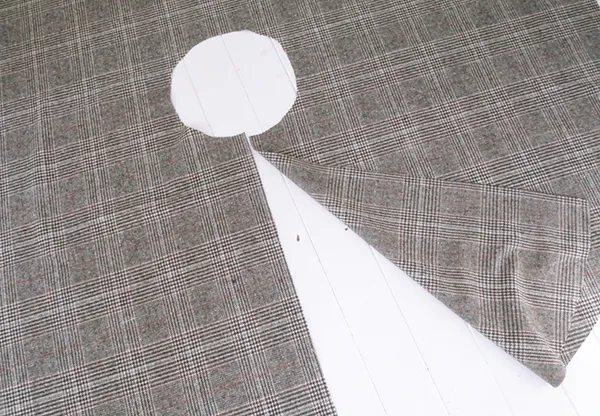
Step ten
For a clean finish on the neckline and front opening, draft a facing by laying tracing paper over the garment and tracing the neckline curves, shoulder lines and open edge.
Trace the front and back pieces separately, and add a 5mm (¼in) seam allowance all the way around.
Draw these shapes as paper patterns and use them to cut your facing pieces from the remainder of your cape fabric.
Sew your own wardrobe
Learn more about dressmaking with our guide on how to make clothes.
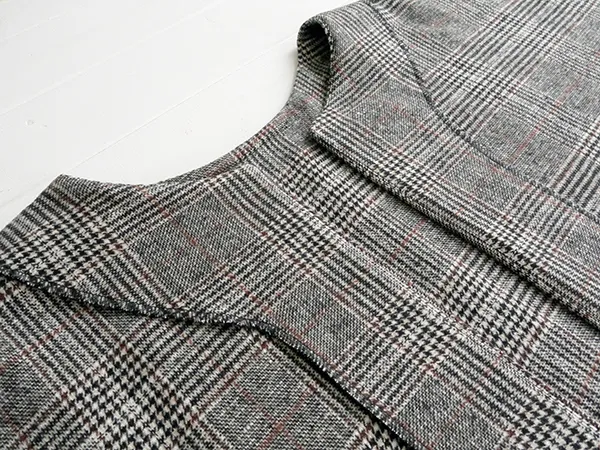
How to interface your circle cape
Step eleven
Interface your facing pieces with light to medium weight fusible interfacing pressed to the wrong side.
Join each of the three facings at the shoulder seams and finish the outside raw edges.

Step twelve
Pin the facing, right sides (RS) together to the cape neckline and opening. Stitch together then clip the curves.
Step thirteen
Press the facing away from garment, then understitch the facing to the seam allowances for a neater edge.
Step fourteen
Turn the facing through to the inside of the cape.
Poke out the corners at the neckline then press everything thoroughly.
Wool will often need steaming and ‘clapping’ to get a crisp edge. This entails applying a good amount of steam and then, very quickly whacking the seam really hard with a tailor’s ‘clapper’ (a rolling pin works well for this too!).
This action has the effect of forcing the steam out of the fabric at speed which in turn helps it to stay flat.
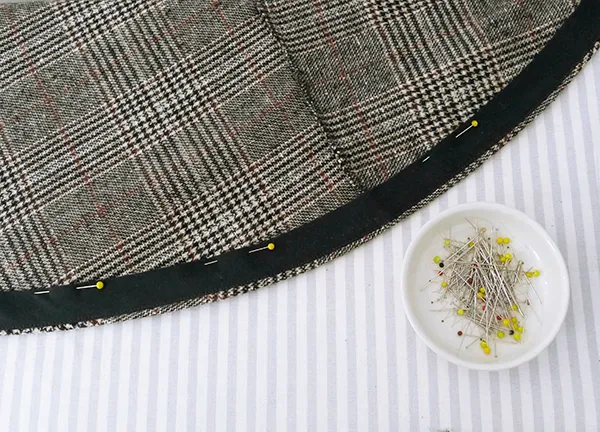
Hemming your circle cape pattern
Step fifteen
Hemming curves can be tricky but using bias binding will give your hem a crisp curve.
Starting in the centre of the back of the hem, unfold one long edge of your bias binding and, matching raw edges, stitch it RS together along the edges of your cape and facings along the fold line of the bias.
Finishing your new circle cape coat!
Step sixteen
Fold and press the bias binding round to the inside and slip stitch in place by hand, overlapping the short edges.
Step seventeen
Stitch your buckle into place and you’re done. Now top with a wide-brimmed felt hat and you’re ready to swoosh!
Whip up your own circle cape
Follow our free sewing pattern and wear your new circle cape out and about. Perfect for dog walks or special occasions, circle capes are great all-rounders and ideal for mild to colder weather.
Pair your circle cape with some black leggings and a simple wrap top for a stylish, comfortable outfit. Now you've made a circle cape you can stitch anything!
Discover more unique sewing patterns with Gathered
Create your dream wardrobe with our collection of sewing patterns for beginners.
