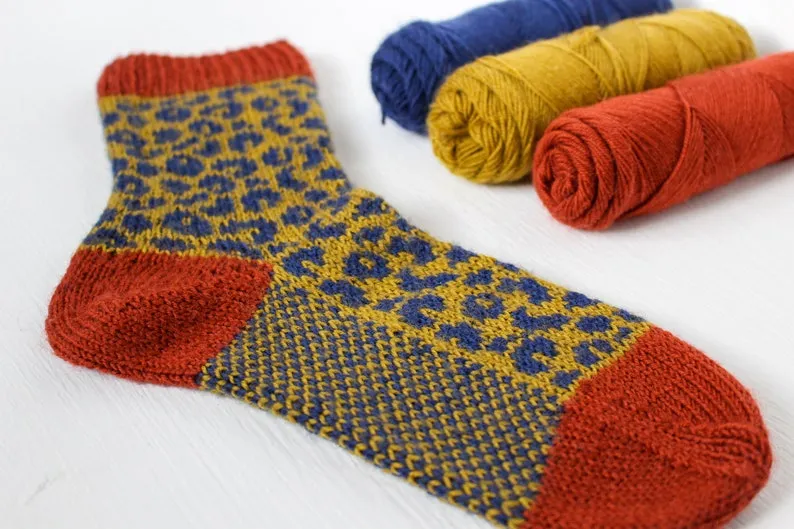
Mend your socks with our guide to darning
It’s so heartbreaking when the worst happens, and a hole appears in your favourite pair of hand-knitted socks, or moths chew through a sweater sleeve. Especially when you’ve spent so many hours knitting them yourself!
- 132 knitting stitches for beginners and beyond
- Yarn weight conversion chart and beginner's guide
- 7 Fair Isle vest knitting patterns to download now
All is not lost though, you can darn and continue wearing them. Read on to find out more about the lost art of darning socks. We have three techniques for you to try below.
- Darning socks with a woven darn
- Darning socks with a knitted-on patch
- Darning socks with Swiss darning
Top tips for darning socks
- My favourite way to darn is with the woven darn technique, which can be used to cover and stabilise any holes in your knitwear. It’s similar to weaving techniques for woven fabric, with vertical warp threads woven through with horizontal weft threads.
- Although the woven darn can be used on wide holes as well as smaller ones, it’s always best to catch holes before they get too big – check your socks regularly for signs of wear or thinning areas of fabric.
- While you could darn your socks with any needle and thread, having the right tools will give you much better results. Use a long darning needle, a thread similar to the original yarn, and a darning egg.
- Darning is a relatively simple technique to work, but don’t worry if your darn doesn’t look perfect when finished, as the fibres will begin to felt together as you wear the item, and start to look neater and tighter. Even a messy-looking darn will mean your sock is wearable again, and won’t need to be thrown away – which is always a good thing!
Tools for darning socks
To darn your socks successfully you need the right tools. You might already have some of these tools in your knitting bag, but if you don't we recommend where to find them below.
Darning thread for socks
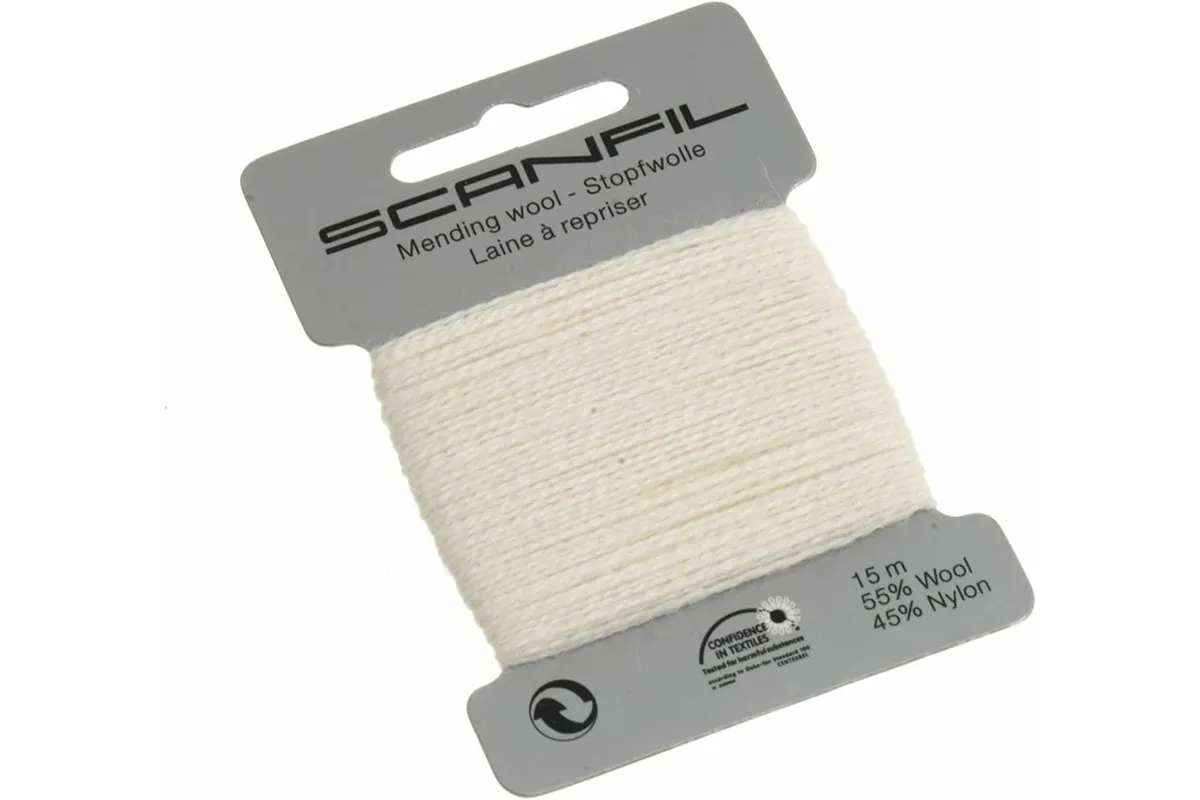
When darning hand-knitted socks, it’s a good idea to use a similar yarn to the one you knitted the sock with. Either use the same yarn if you have some left over, or a yarn in a similar colour – or be inspired by the trend for visible mending, and use highly contrasting colours to make a design feature out of your darn. You can also use cotton embroidery thread (floss).
SQUIRREL_13090871
Darning egg for socks
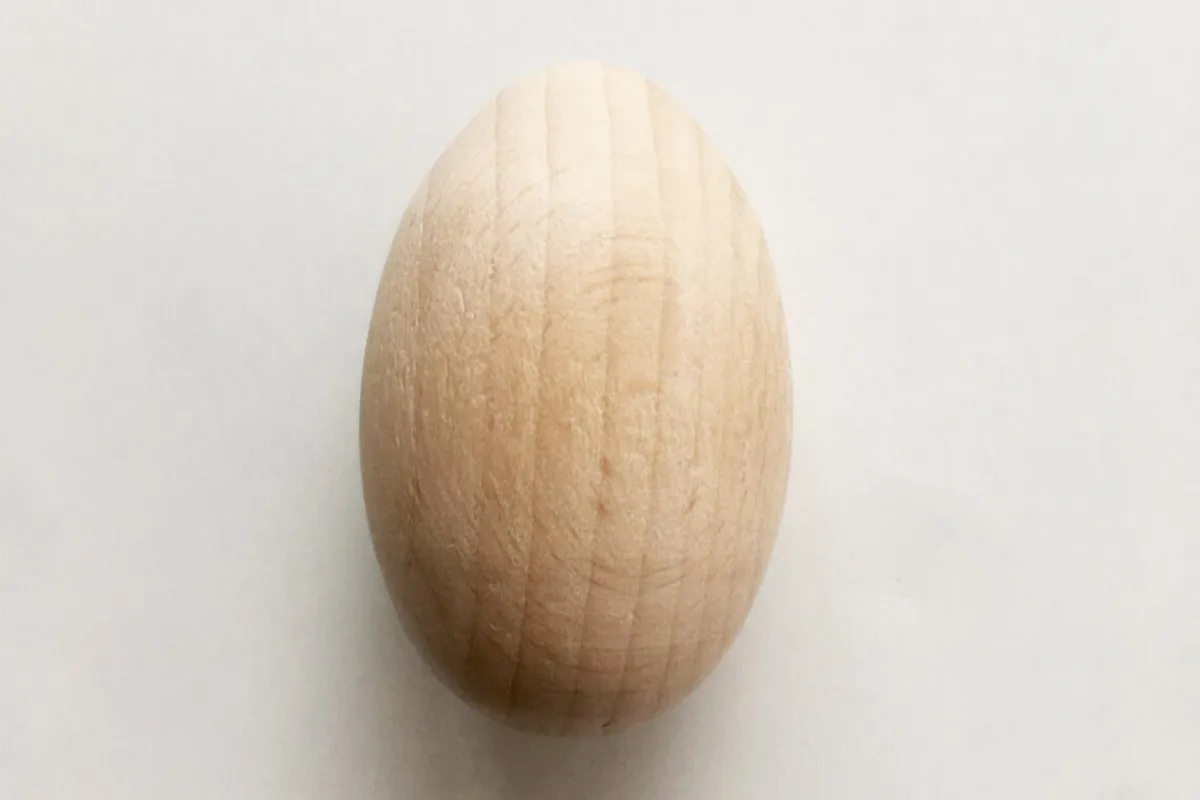
Before you start darning, you’ll need to stretch out the fabric to create tension; this makes it easier to see the area which needs repair, and also which stitches are thinning and at risk of turning into a hole.
The traditional tools for this are darning mushrooms or eggs, typically made from wood. These are available to buy new, or you can pick up a second-hand tool from online auction sites.
Alternatively, you can use another smooth, rounded object of a similar size, such as a ladle, a tennis ball, a pestle or even a hard-boiled egg!
You’ll also need a darning needle or a tapestry needle with a large eye and a bluntish end.
SQUIRREL_13449003
Darning needle for socks
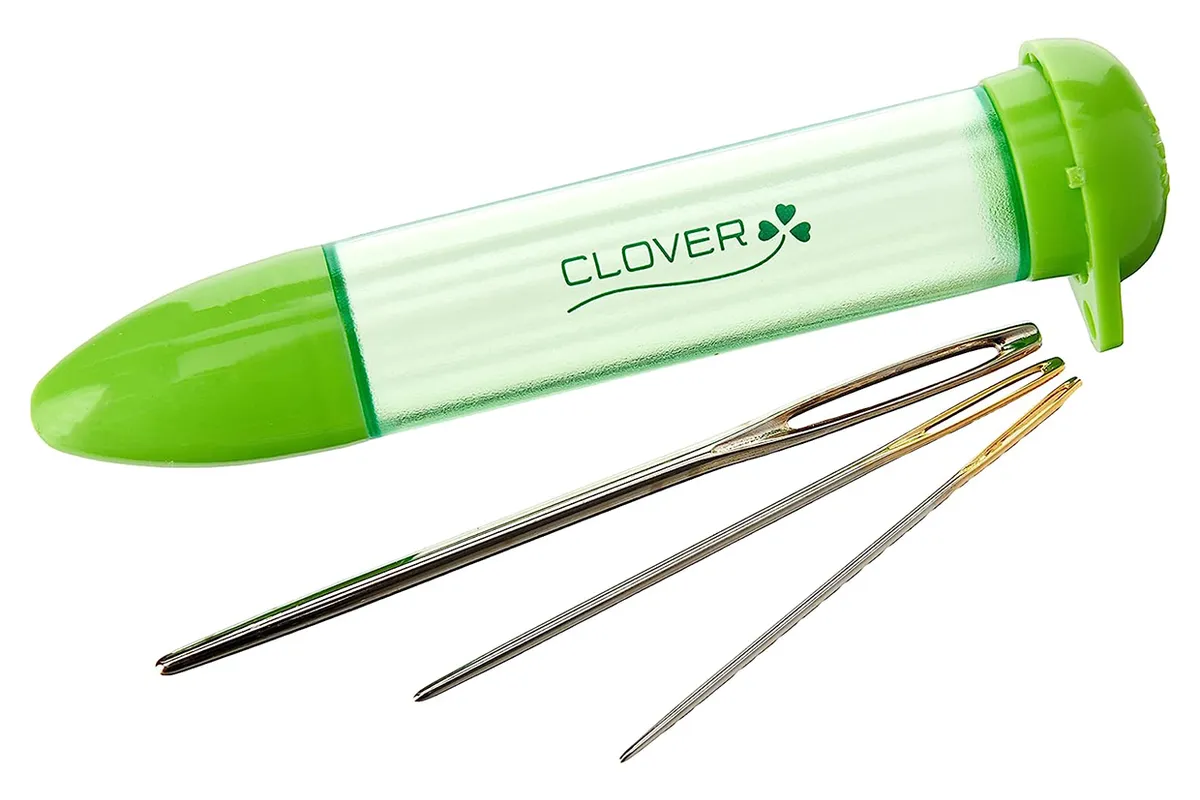
Darning needles tend to be longer and have larger eyes than regular sewing needles, so they're ideal when you're working with wool. You might also find curved rather than straight needles easier to work with.
SQUIRREL_13105268
Knit the perfect socks for your feet
If you're looking to start your sock knitting journey, or are keen to find a pair that fit just right, you'll want to read our guide to sock knitting patterns.
How to darn a sock
First consider whether you want to work the darn on the outside or inside of your item. For socks and other items which are worn next to the skin, it’s usual to darn on the right side of the fabric. For sweaters, you might prefer to darn on the wrong side, so that on the outside you’ll only see a small woven patch, which will integrate better with the fabric when washed and worn.
Next, cut a decent length of yarn or thread to sew with, which will be long enough to complete the darn but still be manageable to work with – a couple of arm’s lengths should be plenty. Thread the yarn or thread onto your darning needle.
Insert your darning egg or mushroom into the sock so that the area to be darned sits centrally, and the fabric is stretched out. If you’re using a darning mushroom, you may choose to secure the sock in place by wrapping an elastic hairband around the stem of the mushroom.
To watch a video guide to darning socks using a woven technique, take a look at this sock repair tutorial from Our Gabled Home.
You will need
- Darning thread, leftover yarn or embroidery thread, Roughly 100m
- Darning egg or mushroom
- Darning needles
Working the warp
Step 1
To create the darned patch, first you will create the warp threads vertically over the hole, then you will weave the weft threads horizontally through the warp threads. For our walkthrough, we’ll be working from right to left.
Using your darning needle, bring up the yarn from the WS to the RS of the sock, around 5mm away from the top right edge of the hole and through a section of undamaged/unaffected fabric. Leave a yarn tail on the inside which will be long enough to weave in later – around 10cm will be fine.

Step 2
Catch one of the stitches to the left in the knitted fabric and pull the yarn through to secure it. Pull it through firmly but not too tightly, to avoid puckering.

Step 3
Take the yarn down over the front of the hole and catch a stitch directly below your first stitch, around 5mm below the lower right edge of the hole, taking the needle through from right to left. As you pull the thread through, you’ll create a vertical line.

Step 4
Now take the yarn up over the hole and pick up another stitch next to your first stitch and pull the needle through to form a second warp thread.

Step 5
Continue in this way until the warp threads cover the hole and for 5mm beyond. It’s helpful to finish up with an odd number of warp threads, as this makes it easier when you come to weave through the weft threads.

Working the weft
Step 6
In our photographs, we’re using a different coloured thread to work the weft, but for your darn, you can continue to use the thread in which you worked the warp.
Rotate your work if necessary so that you can work from right to left, and your working yarn is at the top right of the darning area.

Step 7
Pick up a stitch in the knitted fabric at the corner of your area of warp threads, to help anchor it to the fabric.

Step 8
Pass the darning needle under the first warp thread, missing the second, pass it under the third warp thread, passing over the fourth and going under the fifth, alternating until you reach the left-hand side. Pull the yarn through fully but not too tightly.

Step 9
Rotate your work 180 degrees.

Step 10
Catch a stitch in the fabric in the row above your first weft thread and pull the yarn through, and weave the yarn back across the hole in the opposite way to the first row, going over the first warp thread and under the second, over the third and under the fourth to the end of the row.

Step 11
Continue in this way, picking up a stitch at the end of each row to anchor the yarn in place. Avoid sewing through the warp threads, as this will split them.

Finishing
For something worn next to the skin, such as a sock, it’s best to weave in the yarn tails on the right side (RS) of the work so that the darned area won’t feel uncomfortable or lumpy. If preferred, you can pass the yarn ends through to the back of the fabric and weave them in around the edge of the darned area.
After completing the darned patch, applying gentle steam from an iron can help to ‘set’ the threads.
Find more finishing techniques, including tips from designer Judy Furlong, in our dedicated article.
Darning socks on the wrong side
If you’ve decided to work your darn on the wrong side of the fabric, aim to pick up only the back loops of the stitches so the darn will be less visible on the front of the garment. Using the same yarn you knitted your project in will give a neater result that will be much less visible on the RS.
For reversible projects where you’ll be able to see both sides of the fabric – a shawl or scarf, for example, or a collar or cuff – you may consider working a woven darn patch on both the outside and the inside of the project.
Other methods of darning socks
Darning can be done using a multitude of different methods – you might have to try a few before you find the one that works best for your socks.
Darning socks with a knitted on-patch
Step 1
Pick up stitches from the rows above and below the ‘at risk’ stitches (above and below the hole). Pick up across the top and bottom of the hole, and pick up an equal number of stitches top and bottom. You need to pick up a single ‘bar’ from each stitch – make sure it’s the same both top and bottom.
Determine how many rows of fabric there are between the top and bottom rows of picked up stitches. In our sample, the patch needs to bridge across five rows, the last of which will be grafted, so we will need to knit four rows.

Step 2
Knit down one row from the top, and then knit up three rows from the bottom. Break off the yarn with a tail at least 20cm long, and thread it onto a tapestry needle.

Step 3
Now graft the two ‘live’ rows together using Kitchener stitch. When you have finished, use the yarn tails to catch the patch to the side stitches of the hole, to secure them, and remove any further gaps.

Step 4
Weave the yarn tail in around the edge of the mini patch, as this will give extra strength to the area.
To watch a video guide to creating a knitted-on patch, take a look at this sock repair tutorial from River City Yarns.
Darning socks with Swiss darning
For areas that are worn, but not worn through, consider reinforcing with Swiss darning to provide extra strength and prevent holes. This is done by tracing the path of the stitches using a tapestry needle and matching yarn, and can also be used to fix minor mistakes in colourwork.
See our Swiss darning guide for a full step-by-step tutorial.

Now you’re the darning expert!
Once you’ve tried all the different techniques and found your favourite, you can mend not only your socks, but all your knitted items to give them a new lease of life and help you to be more environmentally friendly.
Why not make your mending a feature?
Try a colourful darning technique with our guide on how to do visible mending.