
This blog post is sponsored by Wildwoven.
Weaving is a gorgeous timeless craft, so we thought it was about time we made a library of basic weaving techniques for you!
This guide to weaving technique was made by our good pal Lucy Rowan @peasandneedles and shows you everything from how to warp the loom to the different knots which will make your weave beautiful! Lucy will cover the following simple weaving techniques...
- Warping the loom
- Tabby weaving
- Rya knots
- Interlocking
- Soumak
- Weaving with roving
- Loop stitch
- Taking the weave off the loom
The material for our fab weave was kindly provided by Liz from Wildwoven, whose 'feel good yarns for fibre artists' come in a wide range of textures and colours. Based in rural Wales, Liz learnt to weave in Chile, where women still spin yarn by hand using a simple homemade spindle.
Her love for richly-textured, handspun yarns and the tactile quality of their weavings led Liz to work with rural women in Chile and Peru to produce her own range of yarns and kits in a kaleidoscope of colours.
We fully support Wildwoven's business ethics and love knowing the history and production behind all our materials so make sure you check out her shop and pick up the bits you'll need to weave.
Before we get into all the basic weaving techniques though we thought we'd explain a little more about what weaving is so you can become a weaving expert.
What is weaving?
Traditionally, weaving is the action of creating fabric through interlacing threads. This was originally the way to make fabrics like cotton but weaving also has a rich heritage dating back to 10,200 BC. Weaving has been used by many cultures, tribes, and collectives as a way of telling stories and passing down family lore from generation to generation.
The act of weaving is said to have a deeper meaning too, teaching people about the delicacy of life and how all living things connect together to make one world. Aside from the spiritual aspect of weaving it is also a really calming craft that produces beautiful results.
Modern-day weaving (in terms of craft) has moved away from creating fabrics. Weaving now often uses a loom, yarn, roving, ribbons, and other materials to make beautiful hanging pieces.
String or yarn is attached across the loom and the yarn, roving and ribbons are woven through it to create a textured piece which you can then cut off the loom and hang. It's for this type of weaving that Lucy will be teaching you all the basic weaving techniques.
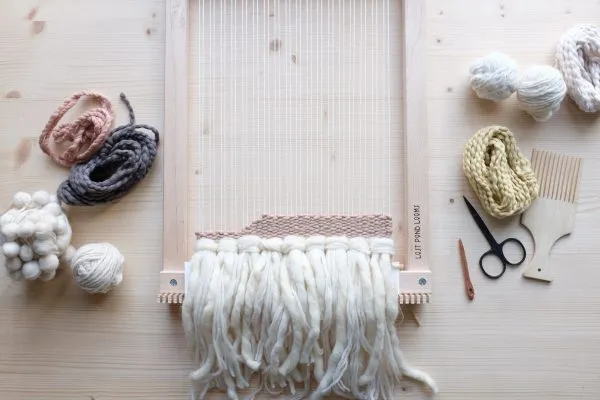
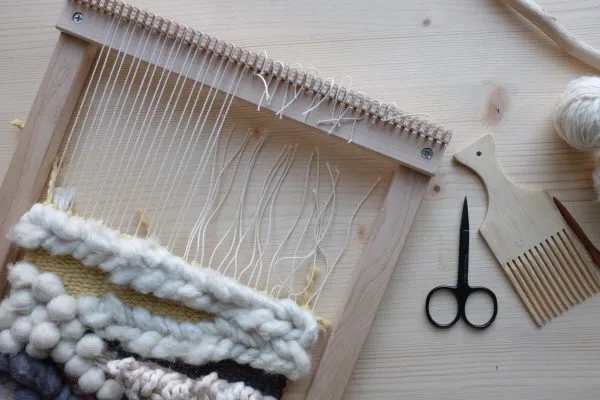
What do you need to start weaving?
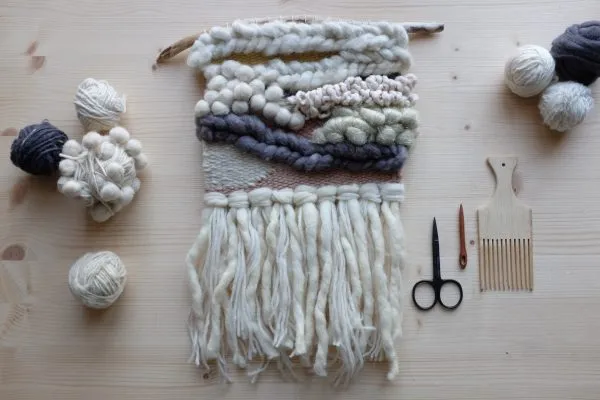
To start weaving you need a few materials. Many of these materials and tools you can buy cheaply online or even make yourself. Weaving is also a great stash buster because you can use yarn, ribbon, and roving scraps to add into your designs for extra texture. Here's the materials you'll need to start weaving...
Weaving loom
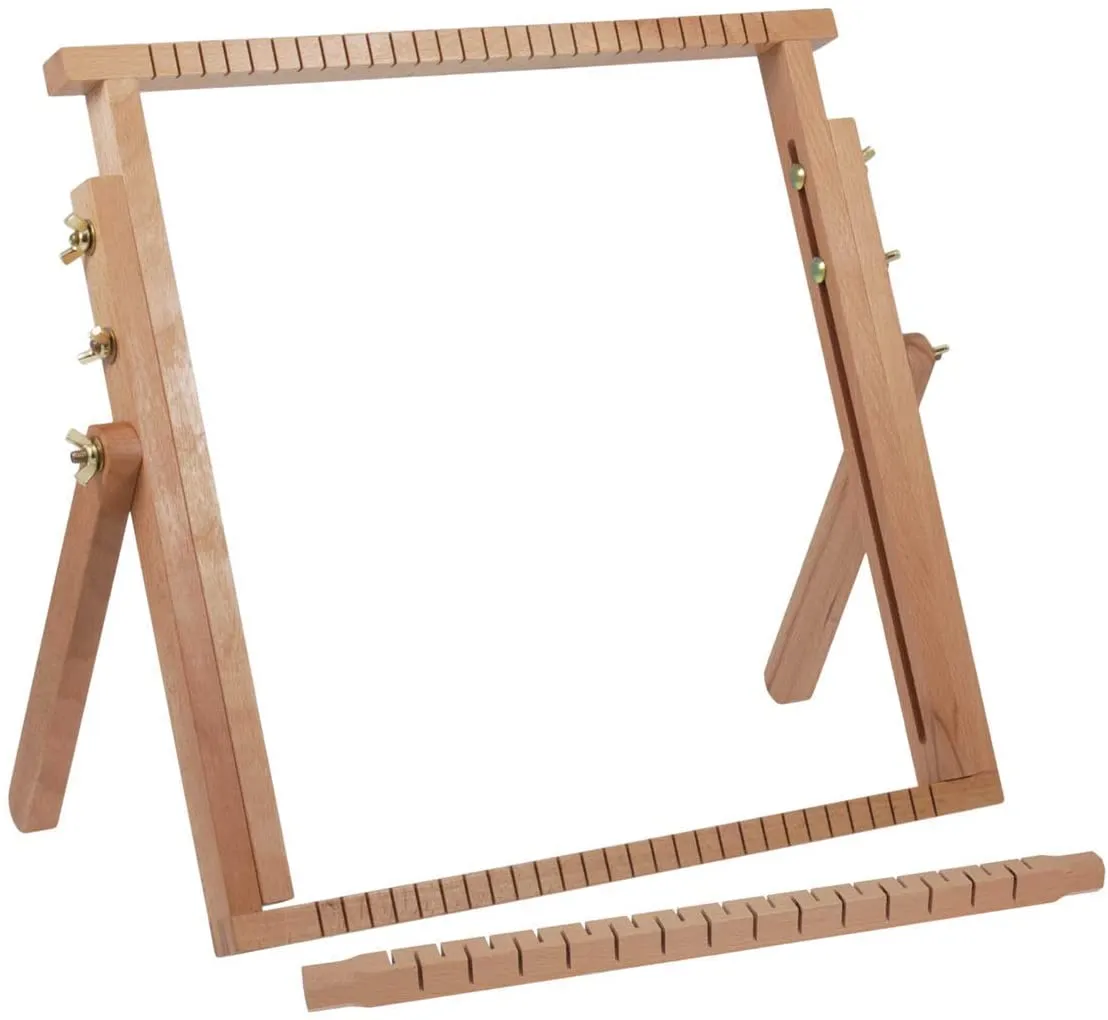
Firstly you'll need a weaving loom. You can buy all different sized looms from Etsy and Amazon so think about the size of your project when picking a loom. This loom is a great option for beginners because it's extendable. You can expand the loom up to 40cm to 61cm making it perfect for small projects and big ones.
Its retractable legs are also brilliant for beginners. Many looms come without legs but this can cause issues if you're weaving for a long time as you'll be crouched over.
This design allows you to stand the loom upright when weaving but lay it flat when storing away. Weave with this loom stood up and laid flat to see which position you find it easier to weave it.
You can also make your own looms from wood, nails, and string. We show you how to can make your own loom in our how to weave and DIY loom tutorial.
Weaving needle
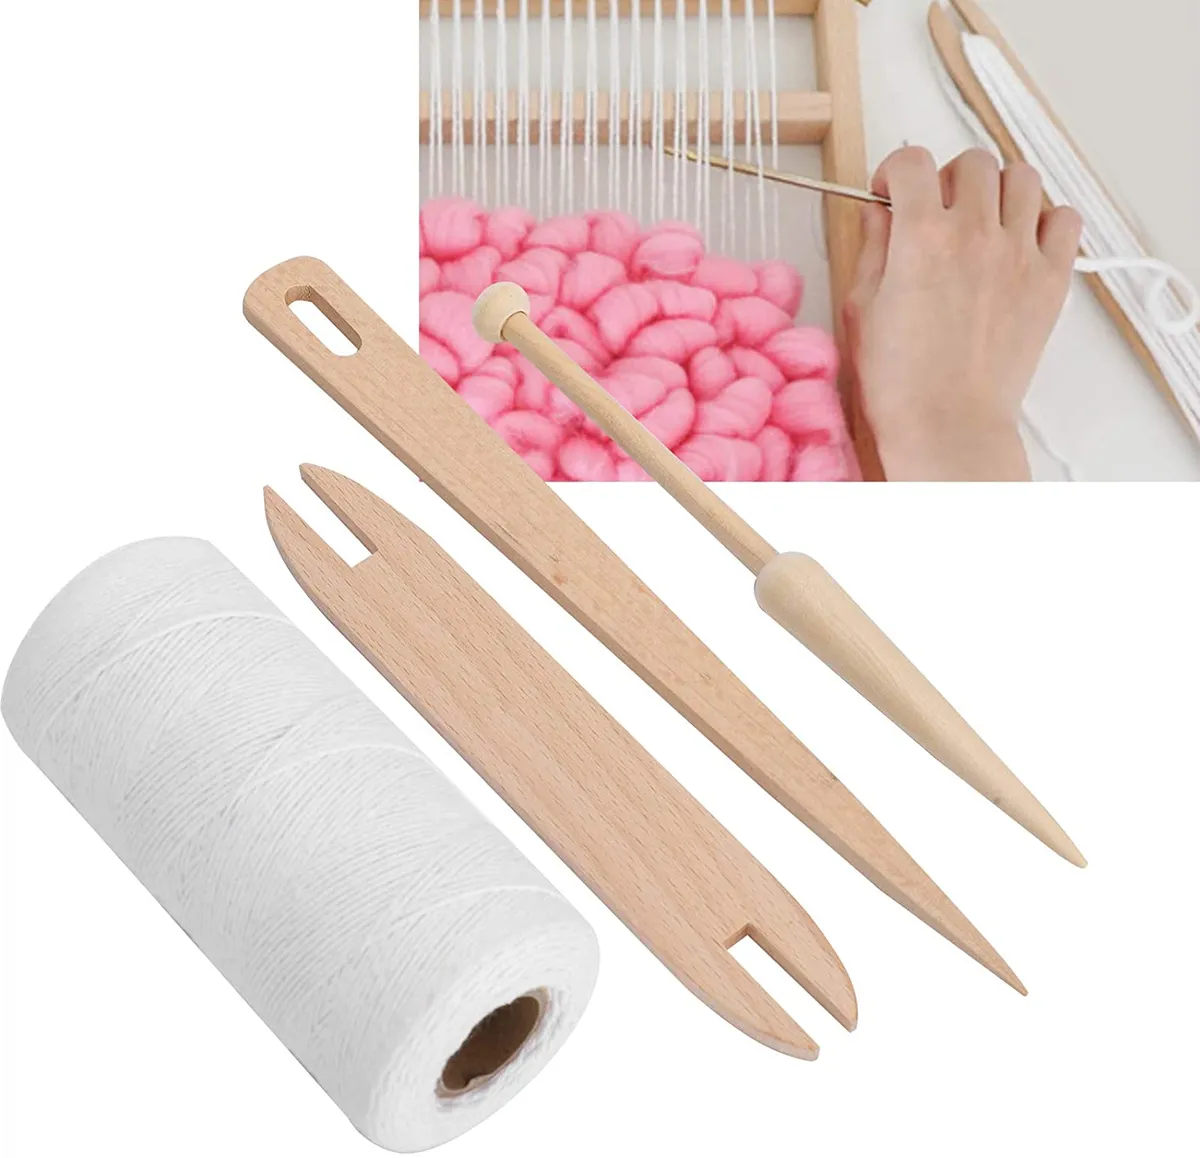
Weaving needles are used to thread the yarn under and over the loom strings. It's a really important tool for weaving and we'd definitely recommend buying some before you start weaving.
Amazon sells a range of different-sized needles and the size of the needle you get will depend on the size of your loom and yarn. For this beginner project, we'd recommend buying the 10cm needle.
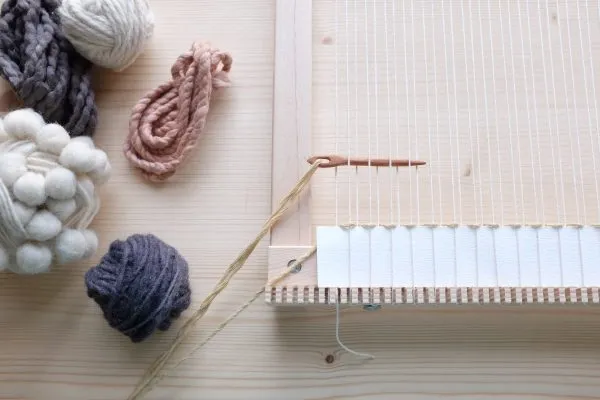
Yarn
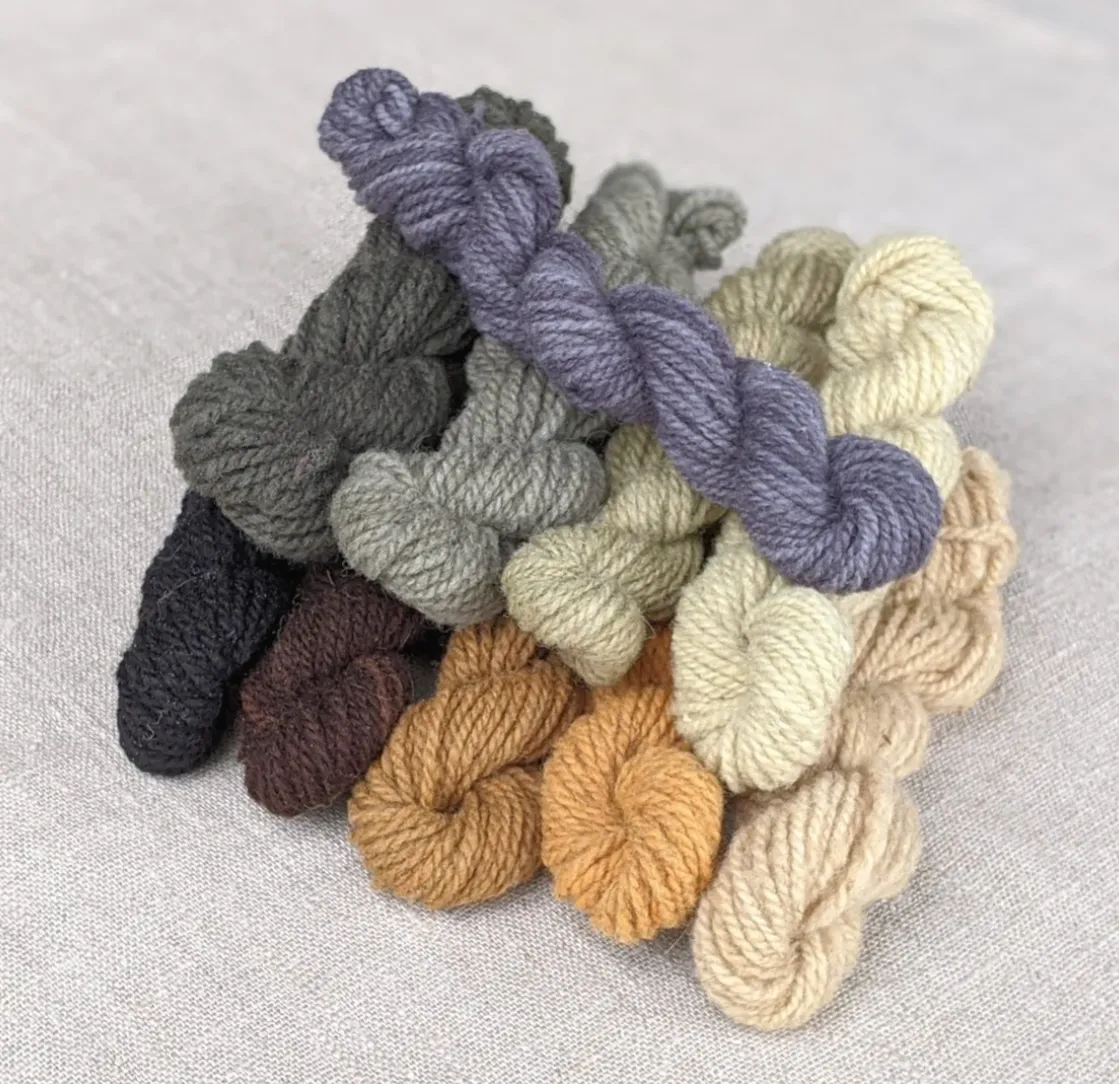
Now you've got the tools you need material to weave with! There's no rule as to what you can and can't weave with but the most common material is yarn in different thicknesses. Thin yarn (the same as you'd use for crochet or knitting) will make up the base of your design then thicker roving and yarns can be woven in between to create patterns.
This bundle by Wild Woven is perfect because it includes five different yarns. DK weight yarns, Aran weight yarn, chunky rustic yarns, bulky yarn and super bulky rustic yarn.
Then you can add ribbons, pom pom strings, thin fabric strips - whatever is in your stash to give your weave an extra edge.
Basic weaving techniques
Once you've mastered few simple weaving techniques, you'll be making your own stunning wall hangings and textiles in no time.
Read on to learn essential weaving techniques covering how to warp the loom, tabby weaving, rya knots, soumack, loop stitch, interlocking and more.
Warping the loom
Step 1
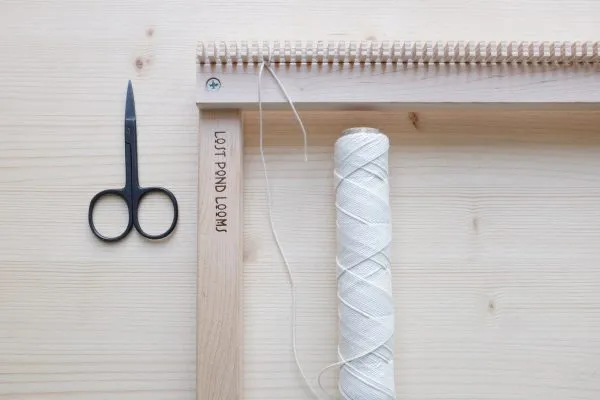
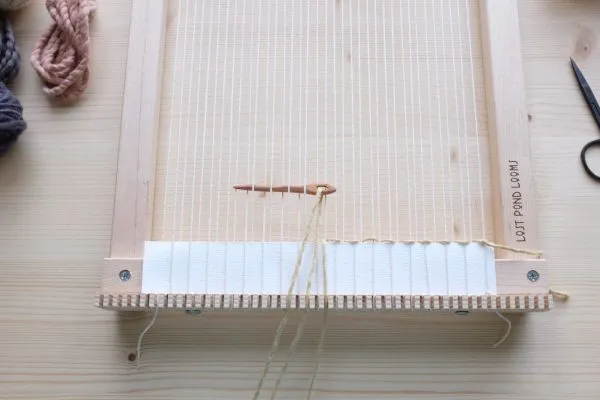
Start by tying the end of a length of cotton string to the top left corner of the loom.
Step 2
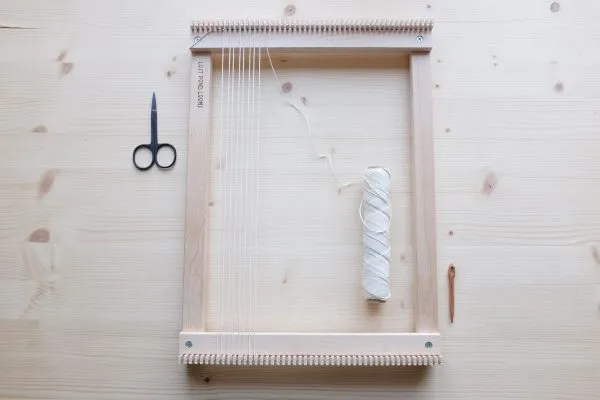
Keeping the cotton string tight, bring it straight down and loop it around the opposite notch at the bottom of the loom. Take the string back up to the top and loop it around the next notch.
Repeat this process until you reach your desired width – this base is called the warp.
Step 3
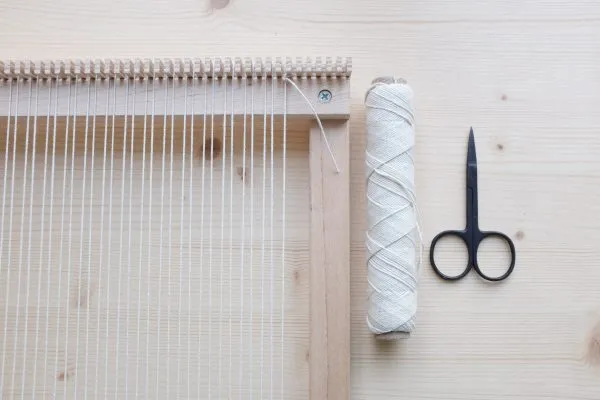
Tie the string off to the last warp thread. The tension of the threads should be fairly tight. You can learn more about the anatomy of the weaving loom in our more detailed guide.
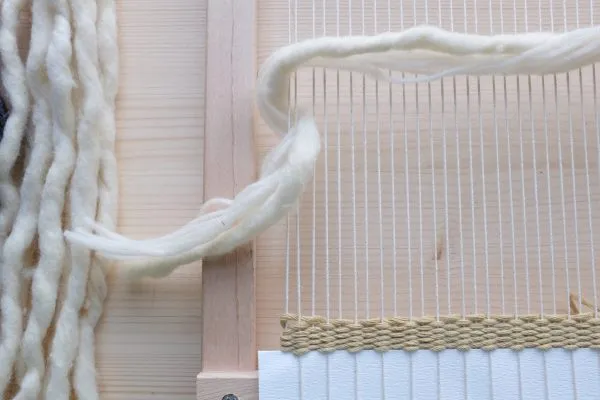
Tabby weaving
Step 1
Cut a small piece of card to the width of the loom, then weave it through the warp threads, over one thread, then under the next. Repeat until you reach the opposite side.
Thread the needle with your chosen length of yarn and knot it around the first warp thread at one side, just above the piece of card.
Step 2
Thread the needle under the next warp thread, then back up and over the next. Repeat along the width of the warp, going over and under – this creates the weft.
Step 3
To weave the next row, repeat Step 2, this time going over the warp threads you went under, and under those you went over.
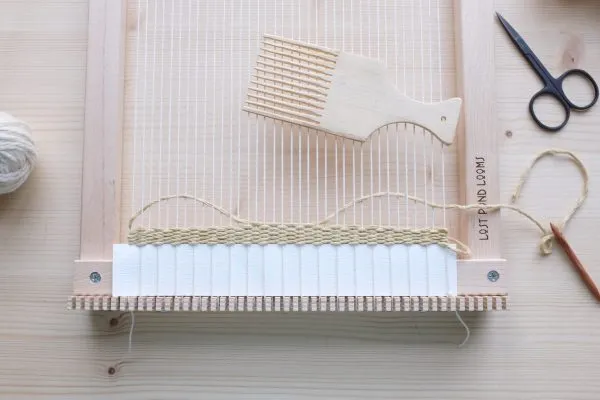
Step 4
When weaving, try to not pull the yarn too tightly as this will bring the edges of the weave in and cause it to narrow. One way to prevent this is by pulling the yarn through at a 45º angle, bringing the needle down to make a hill. Using a comb or a fork push the middle down, and gently push each hill down, as you go. This will give the correct tension.
Now that you've mastered tabby weaving why not put your new skill to use and make our weaving bookmarks!
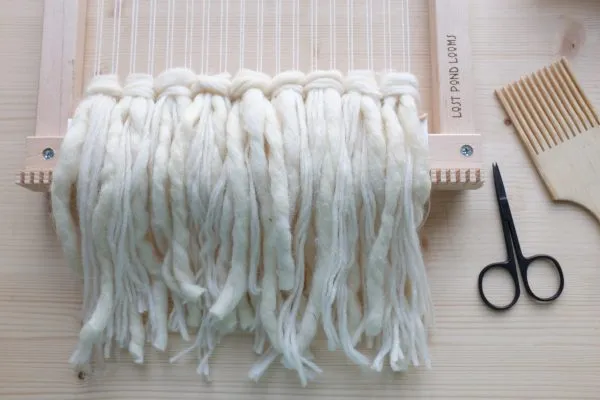
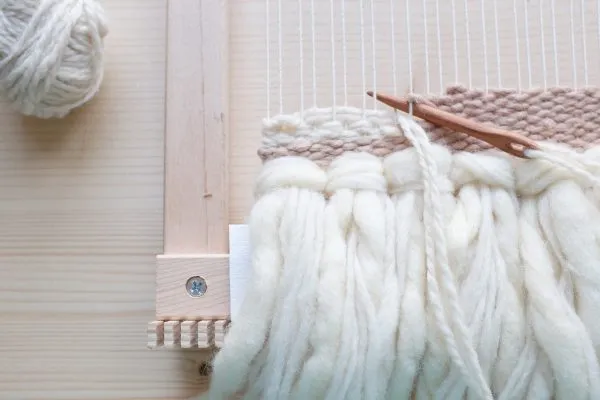
Rya knots
Step 1
To create your tassels (known as Rya knots in weaving terms), you’ll need to cut strands of yarn roughly 30cm (12") long. Each Rya knot will need approximately six threads, depending on how thick the yarn is.
Step 2
Lay the bundle of yarn strands over the top of the warp threads. With the yarn in your left hand, twist the yarn under the first two warp threads and bring the bundle to the front.
Step 3
Do the same with the right side, twisting the yarn under the next pair of warp threads, and bringing the yarn through to the middle. Even out the length on either side, then gently pull the yarn towards you and down to the bottom of the loom.

Step 4
Repeat across the remaining warp threads to create a full row.
Beginner's guide to basket weaving
Baskets are both beautiful and practical for storage around the home. They're also handy for packaging up special gifts!
Take a look at Gathered's beginner's guide to basket weaving to get started today.
Interlocking
Step 1
Weave a few rows of your first colour using tabby weave, decreasing on a few rows to create space.
Step 2
Start weaving a row of the second colour until you reach the warp thread the first colour ended on. Use your needle to pick up that warp thread.
Step 3
Pull the needle through, push the first colour already woven down, then weave back the other way.
Step 4
Carry on weaving back and forth, picking up the warp thread as per Step 2, until the section has been filled.
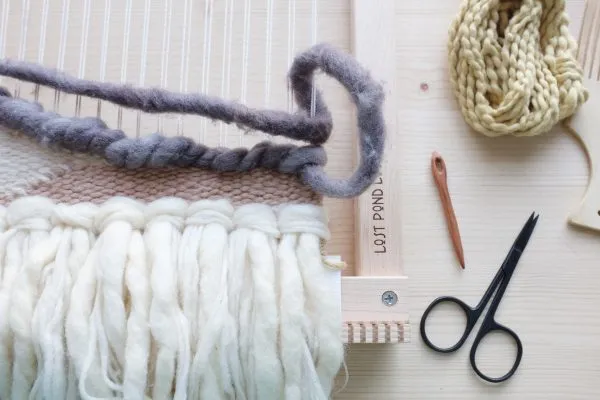
Soumak
Step 1
Take a length of chunkier yarn or roving and weave the end through a couple of warp threads to secure it. Working with the other end, wrap the yarn over the top of two warp threads and twist it back through towards you.
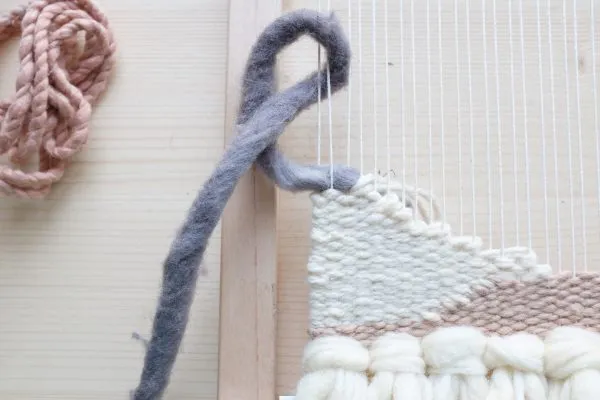
Step 2
Repeat this step with the next pair of warp threads, and continue across the loom. If your yarn is thinner, wrap the yarn over every warp thread instead of every two – this will create a much smaller soumak.
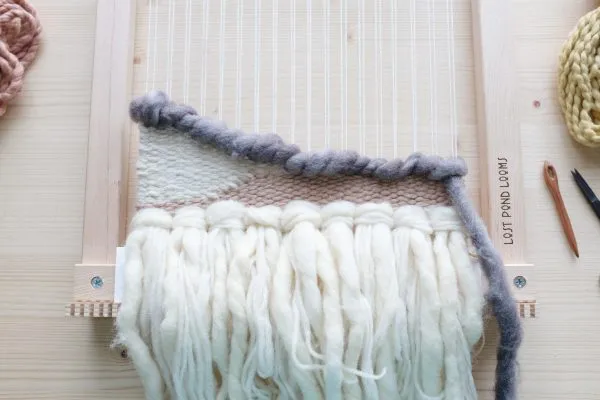
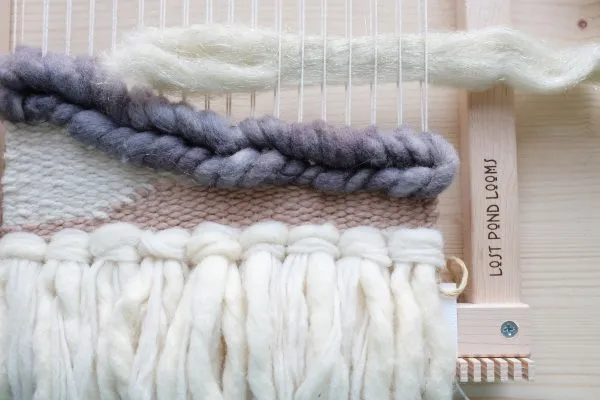
Step 3
For the second row, reverse the weaving technique, this time wrapping the yarn in the opposite direction. Repeat all the way across the width of the loom, and the two rows together will form a Soumak ‘plait’.
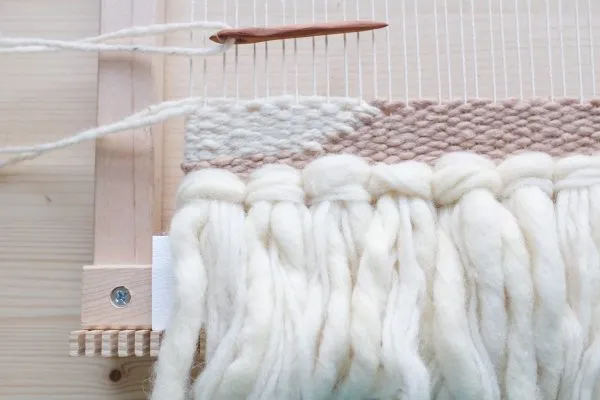
Weaving with roving
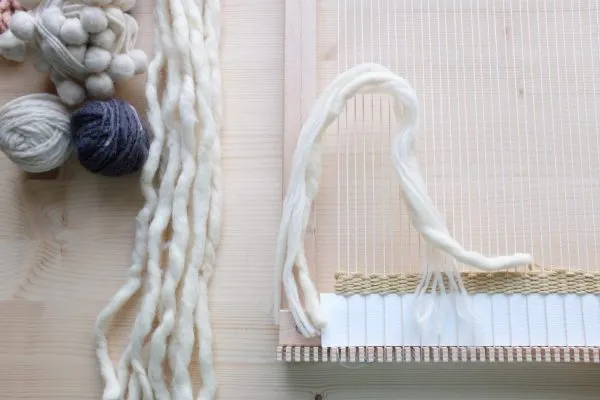
Step 1
Weaving with roving is an easy way to add texture and interest to a piece. If the roving is especially chunky, split it into smaller widths to make it easier to use.
Follow the steps for tabby weaving below, but use your fingers to weave the roving through, instead of a needle.
Step 2
Gently pull the roving forward. For maximum texture, weave the roving loosely so you can tease more out.

Step 3
Weave a couple of rows in the same way, then weave the ends in neatly at the back.

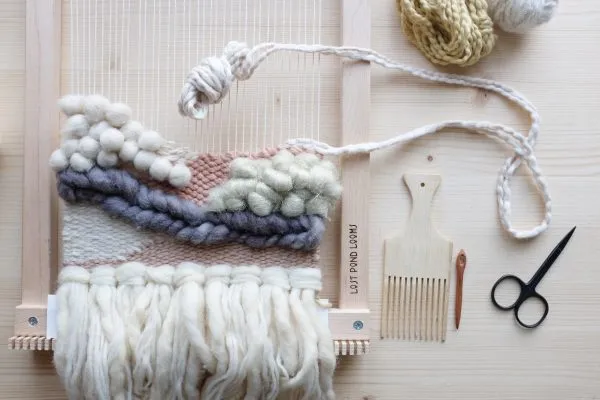
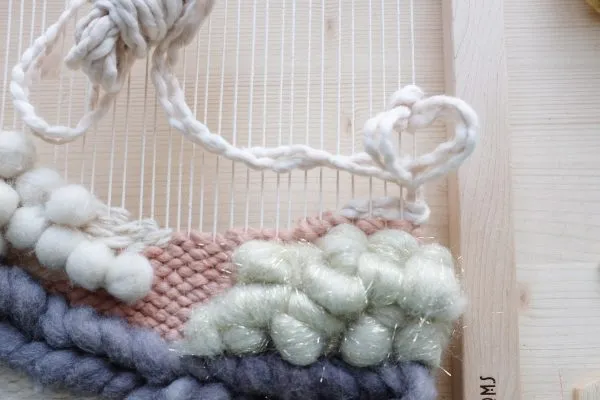
Loop stitch
Step 1
You’ll need quite a bit of yarn for this weaving technique – we doubled ours to give the loops more texture. Weave your ends in.
Step 2
Place the bundle of yarn at the top of the loom. Lay the yarn over two warp threads, then with your right hand, twist one loop in under one warp thread.
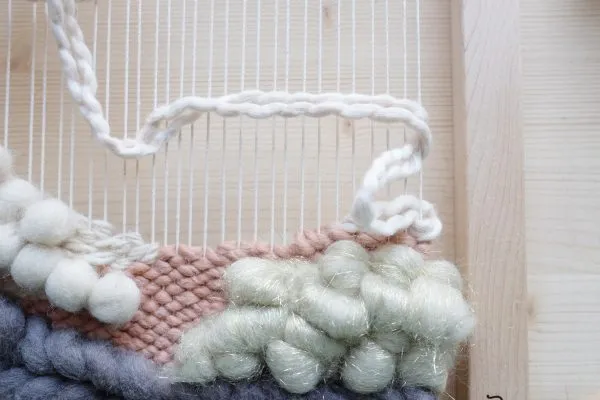
Step 3
Do the same with your left hand, creating a second loop – this weaving technique is very similar to that of a Rya knot. Gently pull the loops down and towards the weave.
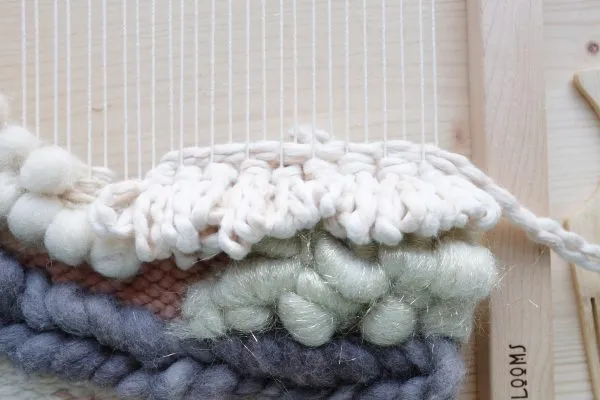
Step 4
Move on to the next two warp threads and repeat Steps 2-3. Once you’ve completed a row of loops, make sure to weave over the top with a couple of rows of tabby weave to secure the loops in place.
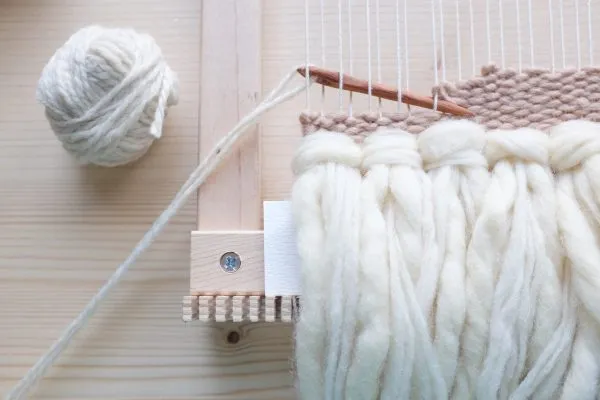
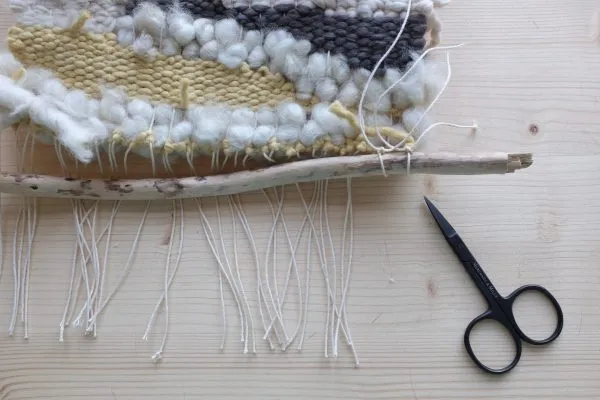
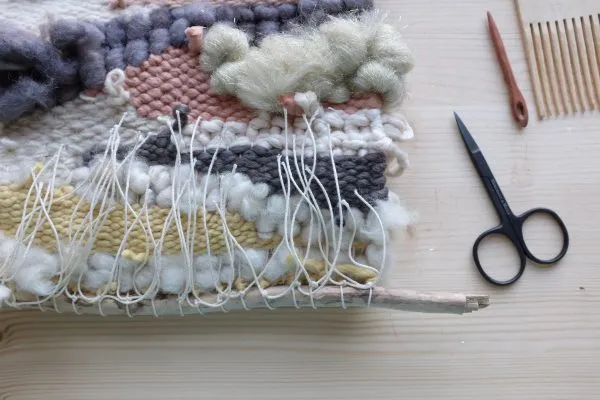
Taking the weave off the loom
Step 1
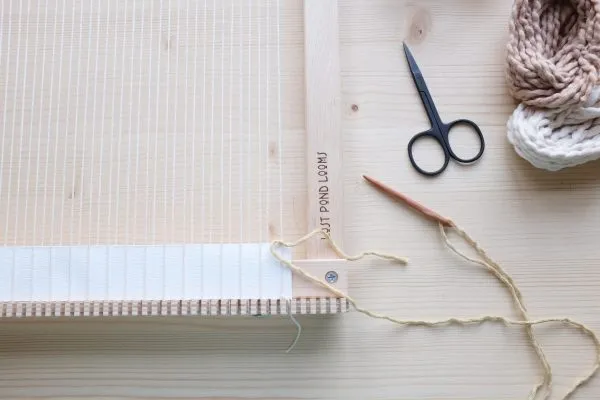
Once the weave is complete, snip the warp threads across the top of the loom. Carefully lift the weave off, gently unhooking the bottom loops from the loom.
Step 2
Turn the weave over so the right side is facing down. Working with two warp threads at a time, tie the thread pairs together around the stick – this could be a piece of wood or length of dowel. Try to keep all the knots on the reverse.
Step 3
Make sure all the ends are woven in and trim any excess yarn or threads. The Rya knots can be left natural or, if you prefer, you can trim them into a straight line, or at an angle for a more geometric look.
Step 4
Tie another length of yarn to either end of the stick, then use to hang up.
Create stunning textiles with our easy weaving techniques
Weaving techniques have been used to create beautiful textiles for thousands of years – and it's really easy to learn a few basic methods at home.
You can use weaving techniques to produce fabulous wallhangings, placemats and much more. The possibilities are endless!
Put your new skills into practice with our free weaving patterns
If you just can't get enough of weaving then head over to our weaving patterns where we've included even more weaving techniques and types of weaving projects to try.
