
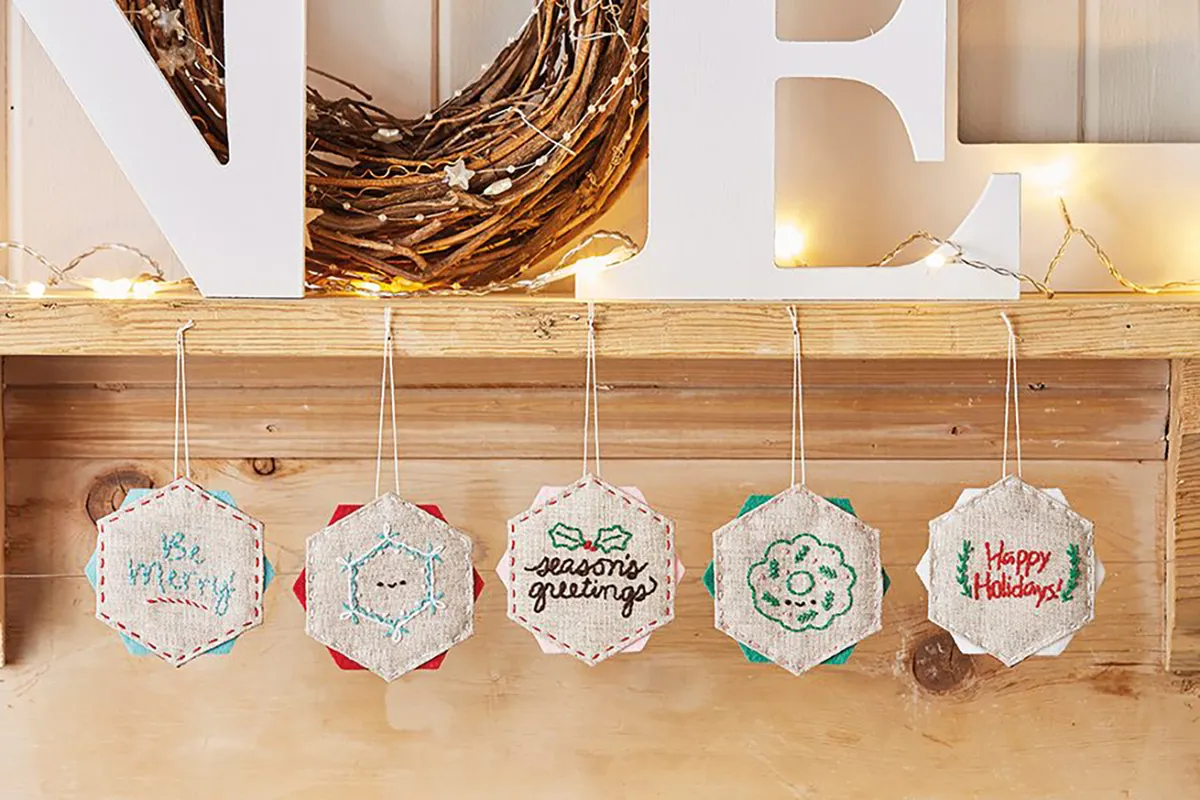
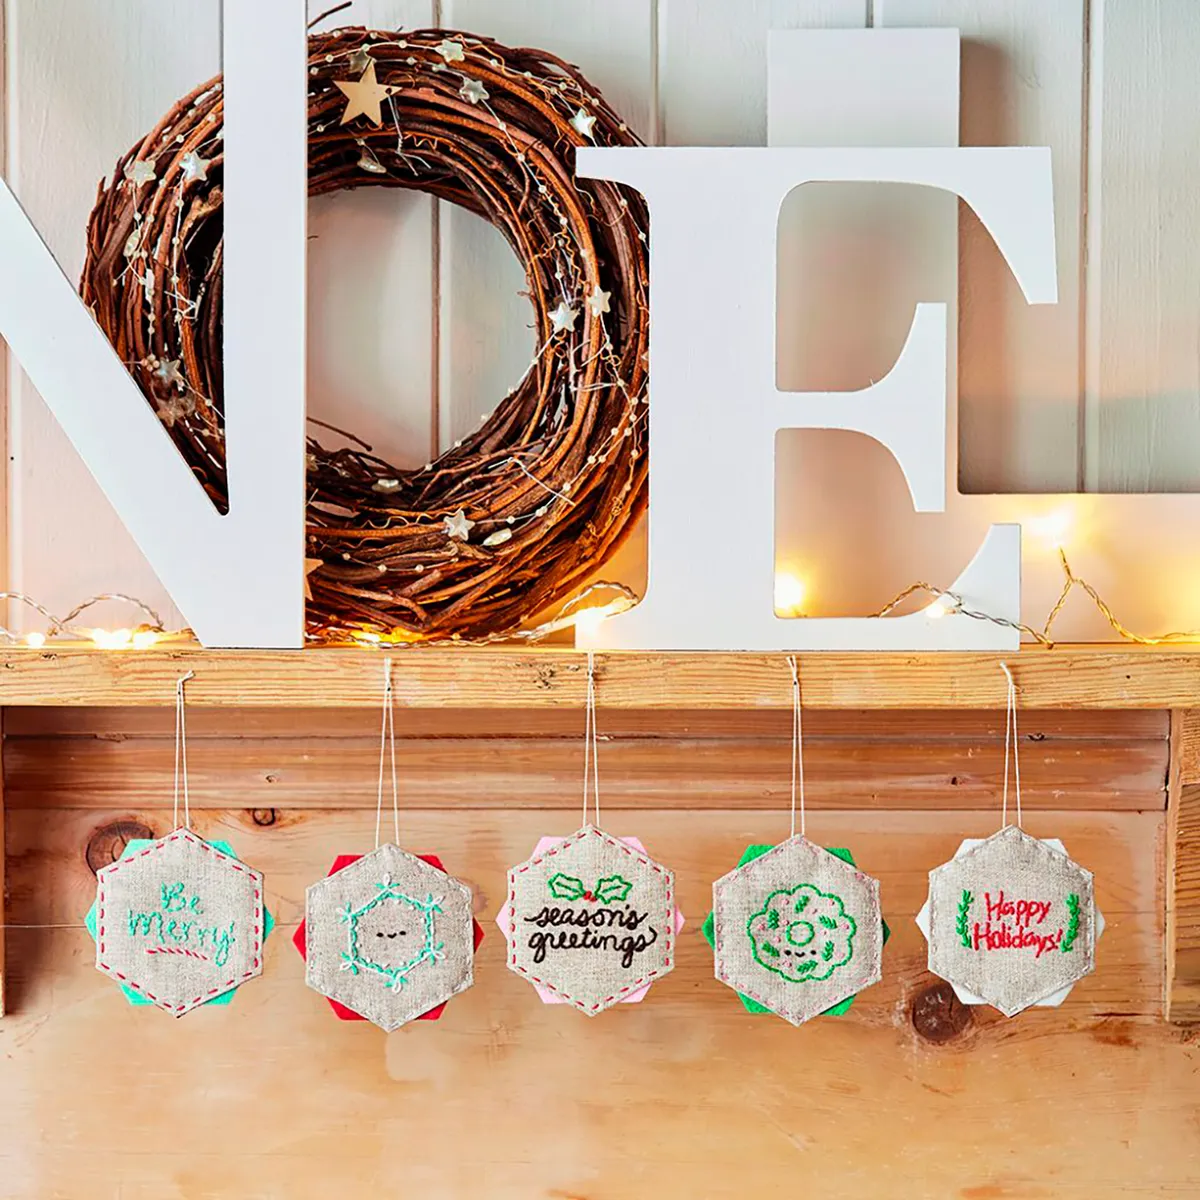
Christmas embroidery hexie decorations
Start feeling in the Christmas spirit with these lovely little hexies! They're simple to make, and you can choose from five different designs. In our tutorial, we'll guide you through the process of creating the hexies and embroidering the designs. You'll find all the materials you need below, plus our free downloadable templates.
First published in Love Patchwork & Quilting magazine, and are designed by Mollie Johanson.
You will need
- Linen: 4½in square
- Print fabric: 4½in square
- Felt: 3½in square
- Six-stranded embroidery floss
- 3in embroidery hoop
- Thin card
Finished size
- 3in square
Notes
- EPP = English Paper Piecing.
Free hexie Christmas embroidery patterns PDFs
How to sew easy hexie Christmas embroidery patterns
You will need:
- Linen (4½in square)
- Felt (3½in square)
- Printed fabric (4½in square)
- Stranded cotton
Cutting out
Step 1
From the felt cut one (1) 1½in hexagon using the shape in all our embroidered Christmas decoration templates.
Step 2
From the thin card, cut two (2) 1½in hexagons using hexagon using the shape in all our Christmas embroidery pattern templates.
Embroidering the motif
Step 1
Choose the Christmas embroidery pattern motif you’d like to make and then transfer the pattern centrally onto the linen square with a water-erasable pen.
Step 2
Embroider the Christmas embroidery pattern with three strands of embroidery floss throughout. Use French knots for eyes and dots, scallop stitch for mouths and scallops on the snowflake, fly stitch for evergreen branches, wrapped backstitch for the candy cane stripe and backstitch for everything else. When the Christmas embroidery is finished, remove any pen marks.
Creating the layers
Step 1
Take one of the card hexagons and lightly glue it to the back of the embroidered linen square. Mollie recommends using washable glue for this to make it easier to remove the template later. Make sure that the Christmas embroidery is positioned centrally on the hexagon and that the hexagon is orientated so its points are at the top and bottom.
Step 2
Cut the fabric around the hexagon, leaving a 3⁄8in seam allowance. Baste the hexagon around the card as you would for English Paper Piecing (EPP), stitching across each fold, without stitching through the card.
Step 3
Repeat step 5 with the second card hexagon and the print fabric.

Step 4
Carefully remove the card hexagons. It helps to gently fold the card first so you can slip it out, corner by corner. Take the 11⁄2in felt hexagon and place it between the wrong sides of the two EPP hexagons. The EPP hexagons should match up. Make sure the felt hexagon is centred with the EPP hexagons but rotated so that its straight edges are top and bottom.
Constructing the decoration
Step 1
Pin or clip the layers of the embroidered Christmas decorations together and stitch around the edge using running stitch and three strands of embroidery floss. Hide the knots between the layers.
Step 2
Thread a needle with cotton or other thread to make the hanging loop – Mollie recommends using perle cotton for this. Pass the needle through the top point of the decoration, catching the seam allowance of either the front or back hexagon. Tie a knot about 2½in from the top of the Christmas embroidery decoration and trim the ends to finish.
Have a merry handmade Christmas!
These little hexies will make lovely decorations for your home, or you could give them away as special gifts to friends and family.
Make a robin cushion
Add a little bit of festive sparkle to your sofa with this cute robin cushion pattern.


