Checked quilt pattern for beginners
Step 1
From Fabric A cut six (6) 61⁄2in x WOF strips. Subcut into thirty-five (35) 61⁄2in squares.
Step 2
From Fabric B cut four (4) 61⁄2in x WOF strips. Subcut into twenty (20) 61⁄2in squares.
Step 3
From Fabric C cut three (3) 61⁄2in x WOF strips. Subcut into fifteen (15) 61⁄2in squares.
Step 4
From the binding fabric cut six (6) 2½in x WOF strips.
Step 5
Take three Fabric A squares and four Fabric B squares. Arrange them as shown, alternating between fabrics. Join and press seams towards the Fabric B squares to complete one AB row. Repeat to make a total of five AB rows.

Fig 1
Step 6
Take four Fabric A squares and three Fabric C squares. Arrange them as shown, alternating between fabrics. Join and press the seams toward the Fabric C squares to complete one AC row. Repeat to make a total of five AC rows.

Fig 2
Step 7
Take the AB and AC rows and arrange them as shown, alternating between them. Join the rows, nesting seams to match up the block points, to complete the quilt top. Press the seams to alternate sides across each row.
Step 8
Cut the backing fabric in half across the width. Remove the selvedges and re-join the pieces with a 1⁄2in seam. Press the seam open.
Step 9
Press the quilt top and backing well. Make a quilt sandwich by placing the backing fabric right side down, the batting on top, then the quilt top centrally and right side up. Baste the layers together using your preferred method.
Step 10
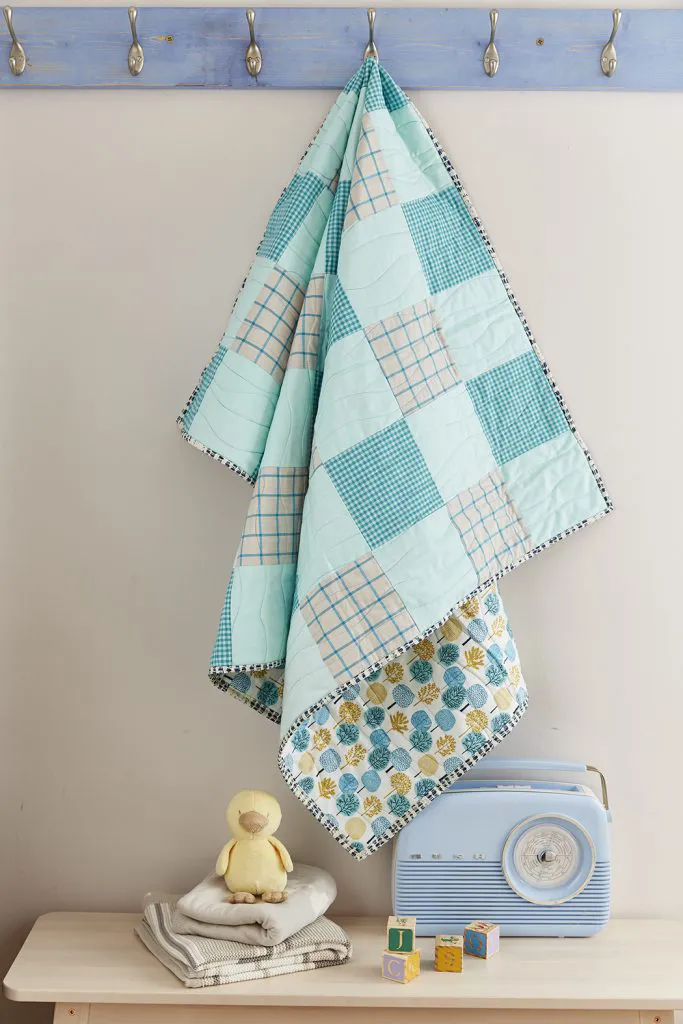
Quilt as desired. Stephanie quilted wavy lines across the width of the quilt in blue thread.

Step 11
Trim off the excess batting and backing fabric and square up the quilt.
Step 12
Join the binding strips together end-to-end using diagonal seams. Press the seams open and trim away the dog ears, then fold in half lengthwise, WST, and press.

Step 13
Sew the binding to the front of the quilt, folding a mitre at each corner, then fold it over to the back of the quilt and hand stitch in place to finish.