Free Bees Patchwork Pattern – Foundation Piecing Pattern Fun
Happy days! We've got a free foundation piecing project to brighten up your day. Read on to find out how to create a buzz with this super-cute mini hoop design. This cute patchwork hoop is ideal for stash busting – mix and match all your leftover print scraps and practise your foundation paper piecing skills too!
To make Susi's beehive design, you'll need assorted scraps of print fabrics plus background prints (around one fat eighth in total), as well as a 9in square of fusible interfacing and an 8in diameter embroidery hoop. Your finished hoop measures 81⁄2in square.

New to FPP? We'll show you how!
Foundation piecing is great for using up scraps, and it’s surprisingly easy, too. If you've never tried FPP before, we have all the help and expert guidance you'll need in our how to do Foundation Paper Piecing guide.
FFP are made from several smaller pieces, sewn one on top of the next to gradually build a bigger design. Those smaller pieces are labelled with numbers, which you sew together in numerical order.
Foundation Paper Peicing bee hive hoop: step-by-step instructions
You will need
- Print fabrics: assorted scraps
- Background prints: a total of approx one (1) fat eighth
- Fusible interfacing: 9in square
- Embroidery hoop: 8in diameter
- Embroidery thread (yellow and black)
Finished size
- 8½in square
Notes
- Seam allowances are ¼in, unless otherwise noted
- FPP = Foundation Paper Piecing
- RST = right sides together
- The free template includes only the outer seam allowance
FFP bee hive templates
Free Bees Foundation Paper Piecing Pattern
Cutting out
Step one
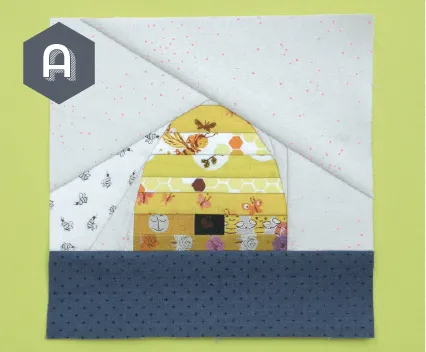
From your print and background fabrics, referring to the photo for placement, roughly cut out fabric for each section of the FPP template. Each fabric piece needs to be at least ¼in bigger all around than the section marked on the template.
Piecing the hive
Step two
Take the FPP template and place the fabric for Section 1 right side up against Section 1 on the unprinted side of the template, making sure that the edges of the fabric extend by at least ¼in all around the marked lines of the section. Pin in place. Place the Section 2 fabric piece right side down on the Section 1 fabric piece, matching up the raw edges where Sections 1 and 2 will be joined. Check that when flipped over at the seam line the new fabric will cover section 2 plus at least ¼in all around.
Step three
Turn the template over and stitch on the marked line between Sections 1 and 2, extending the line by a few stitches at each end of the seam line. Fold back the template and trim the seam allowance to ¼in. Flip the Section 2 fabric piece open and press.
Step four
Repeat steps 2–3 to piece the remaining sections in numerical order. Press well and then trim the pieced unit on the outer dashed line of the template (Fig A).
Embroidering the bees
Step five
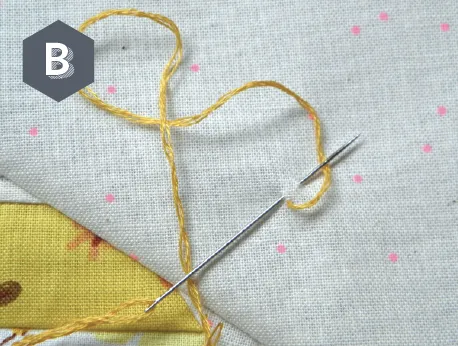
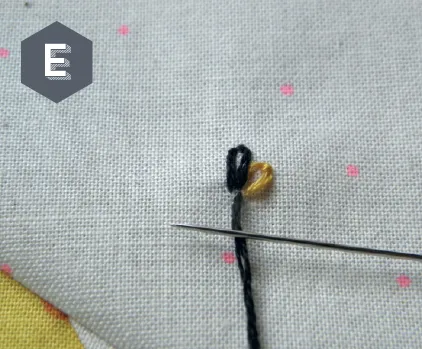
To make the bee’s body, stitch a detached chain stitch in yellow thread by making a loop on top of the fabric and passing the needle through the loop (Fig B).
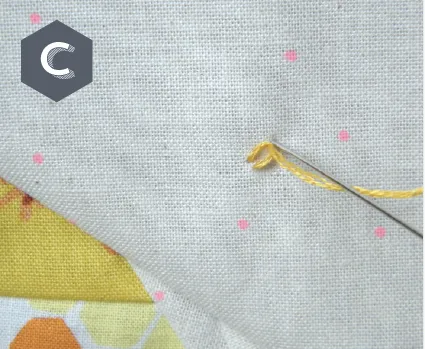
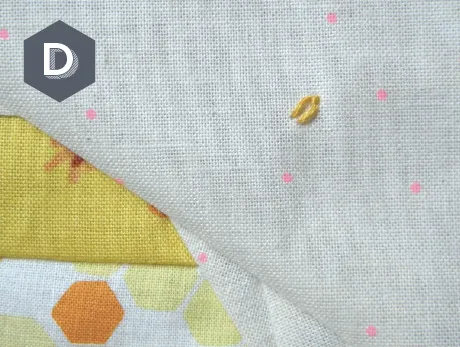
Stitch over the loop to secure it and then fasten off (Figs C and D).
Step six
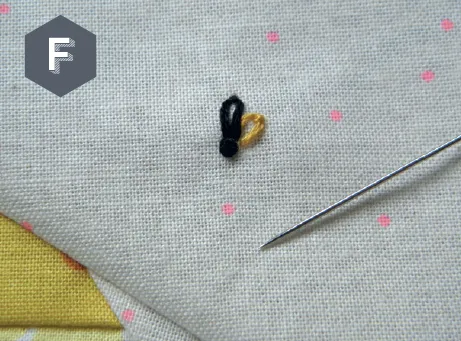
Add a detached chain stitch in black thread to form the bee’s wing (Fig E).
Finally, make a French knot using black thread to complete one bee (Fig F).
Repeat to make as many bees as desired.
Finishing the hoop
Step seven
Trim the fusible interfacing square to the same size as the finished beehive design, then fuse it to the wrong side of the beehive design, making sure to follow the manufacturer’s instructions.
Step eight
Place the embroidery hoop on top of the beehive design, making sure that the hive is centred (Fig G).

Step nine
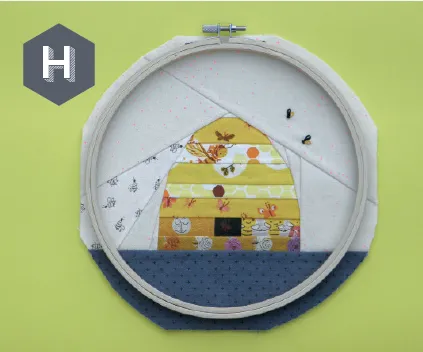
Carefully trim the beehive design around the hoop, trimming beyond the hoop by slightly more than the depth of the hoop’s rings (Fig H).
Step 10
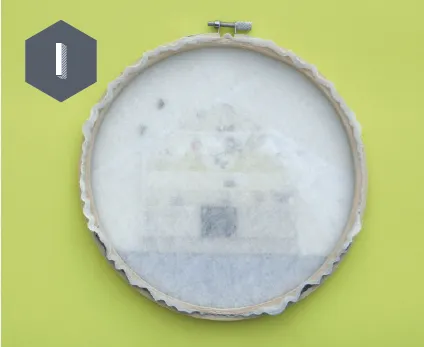
Place the beehive into your hoop and close the screw to finish (Fig I). Trim the fused design once it is secured in the hoop if required.

Practice your FPP skills with our bee hive pattern
This sweet patchwork bee hive hoop is a wonderful way of practising your FPP skills and using up your scrap stash. You could also add more embroidered details, including foliage, florals and more buzzing bumble bees.
Discover more FPP projects
Time to make more FPP animals! Stitch our free fish Foundation Paper Piecing pattern.