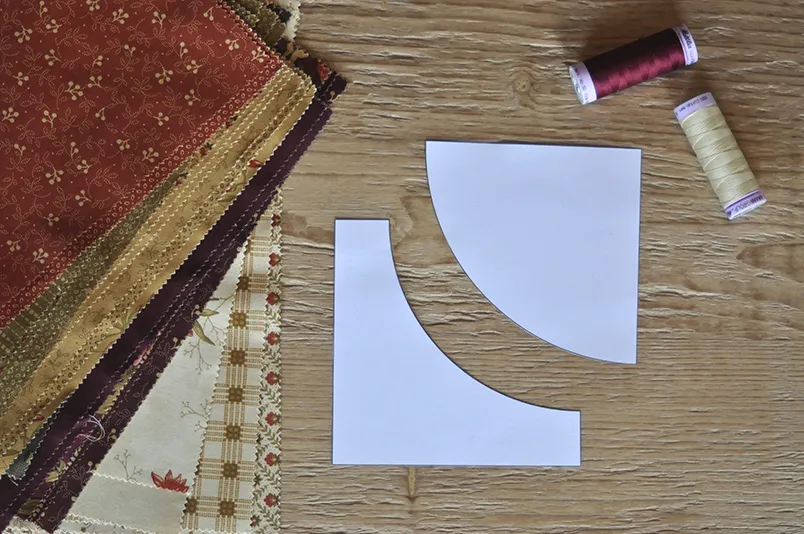
Cutting out
Step 1
If using two fabrics, cut from each two (2) background pieces using our template above, and two centres.

If you have chosen four (4) fabrics cut one of each shape from each. First draw around the template and then carefully cut out with a rotary cutter or scissors.

Piecing the quilt block
Step 1
Pair up each background piece with a centre piece from a contrasting fabric then press each piece in half to mark the centres.


Step 2
Next, place the background piece on top of the centre piece, right sides together, aligning the centre creases and the raw edges. Pin through the two layers.


Step 3
Line up the flat raw edges of the background piece with the edges of the centre piece. You will need to ease the background piece to line them up properly. Pin at each end. To begin with, we’ll add some more pins. With practice, you’ll be able to piece together the curves together without them!


Step 4
Using your fingers, nudge the raw edge of the background piece around the centre background and pin in place. We added an extra two pins on each side.

Step 5
Take the unit to the sewing machine. Keeping the background concave piece on top, so you can see how it’s easing around the convex curve, start stitching at one end.
The key to stitching smooth curves is to take it slowly, and stop with the needle down and pivot every few stitches. It’s a great opportunity to use a knee lift if you have one as this will help keep your hands free to control the fabric.
Use your fingers to ease out the top fabric if it starts to fold or pucker up, but remember to handle bias edges gently to avoid stretching them out of shape.


Step 6
Once you get to the end, take extra care to make sure the raw edges of the two pieces stay aligned and continue pivoting to keep the seam curved. If you find you have caught any puckers in the seam, you can unpick a few stitches either side, ease it out and restitch.


Step 7
Press the seam towards the background fabric, it should naturally lean this way. Use some steam if you need. Trim the block square to 41⁄2in. Repeat to make three more Drunkard’s Park blocks.


Step 8
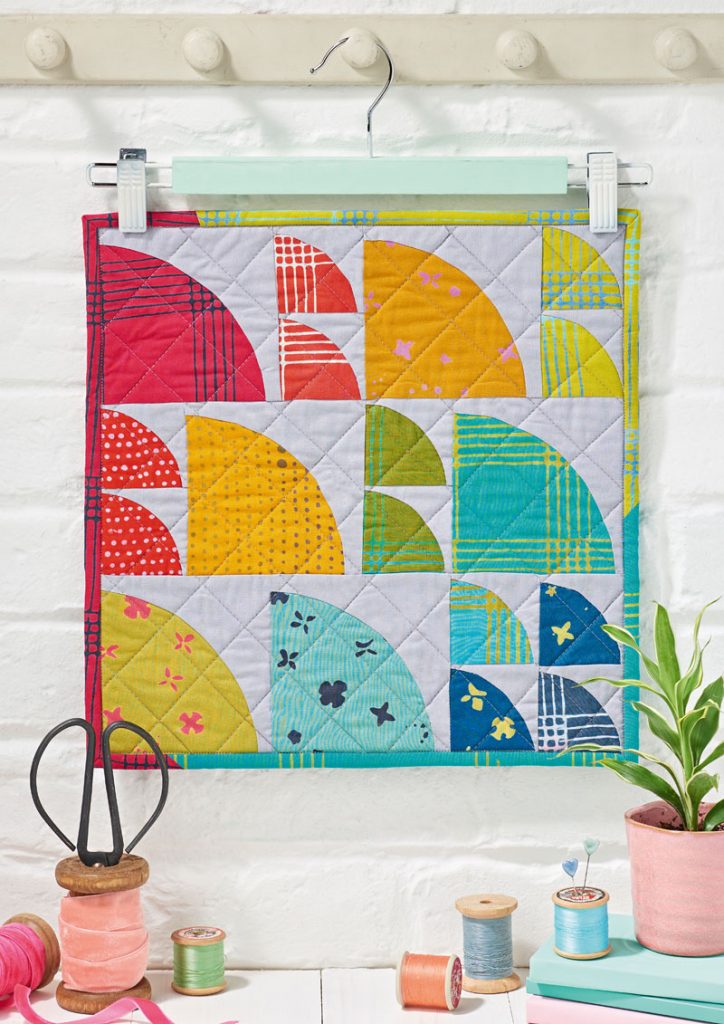
Stitch the four blocks together in a layout that pleases you. Your block will be 81⁄2in square.