
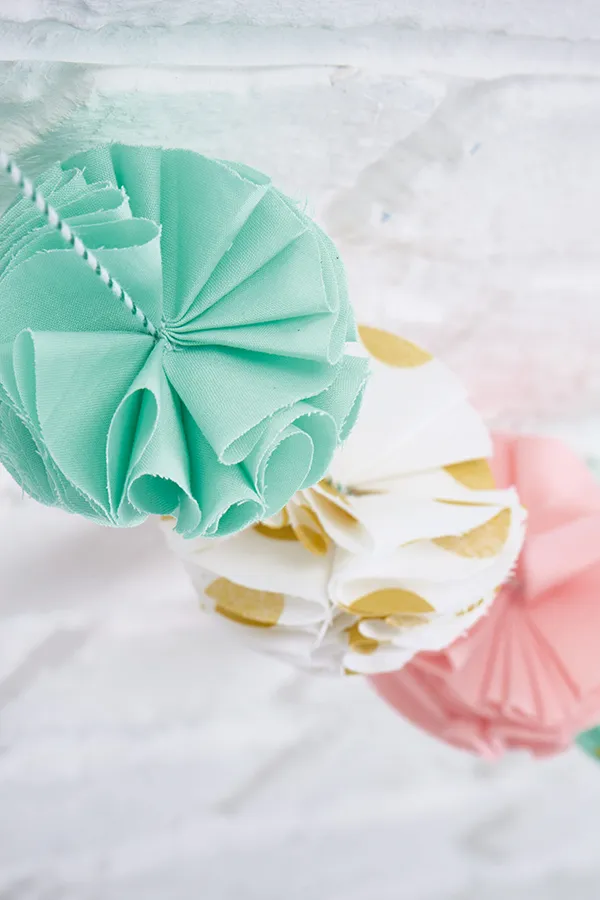
DIY fabric pom poms tutorial
These stylish pom poms are great for parties – and you can use them again and again.
Read on for Rebecca Reid's free tutorial on how to sew up a quick garland of fabric pom-poms. It’s our party, and we’ll sew if we want to!
DIY fabric pom poms garland tutorial
Paper garlands can be easily bought in the shops, but only fabric ones will do for us! Make a few of these simple fabric pom coms and string them together for a glitzy garland that Gatsby himself would be proud of.
You will need...
For each pom pom
- Fabric: 40x32cm (16x13in) – we Glitz fabrics by Michael Miller– see EQS for stockists
- Matching sewing thread
- Basic sewing kit
- Twine - to hang them from
Measurements
Each finished pom pom measures 7cm in diameter (23⁄4in).
Cutting out the fabric
Step one: Draw a circle with a 7cm (23⁄4in) diameter onto paper and cut this out to make the template.
Step two: Place your circle template onto the wrong side (WS) of the fabric, draw around it and cut it out. Repeat to make 20 circles.
Folding the circles
Step one: Cut a length of matching thread. Fold this in half and thread the two ends through your needle.
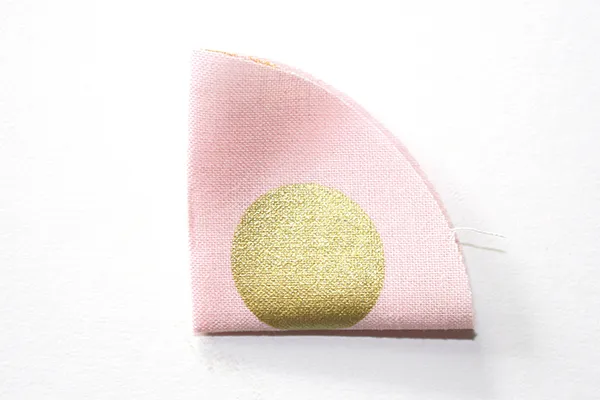
Step two: Take one fabric circle and fold it in half WS together then half again to make a little fabric wedge.
Assembling the pom pom
Step one: Hold the pointed end of one folded circle between your finger and thumb, then push the needle through the end of it a couple of millimetres up from the bottom. Thread the needle through the loop at the other end and pull up to secure.
Step two: Attach nine more circles in the same way, by folding them and threading them on the end of your needle. Work a tiny stitch after you have threaded each folded circle on to secure.
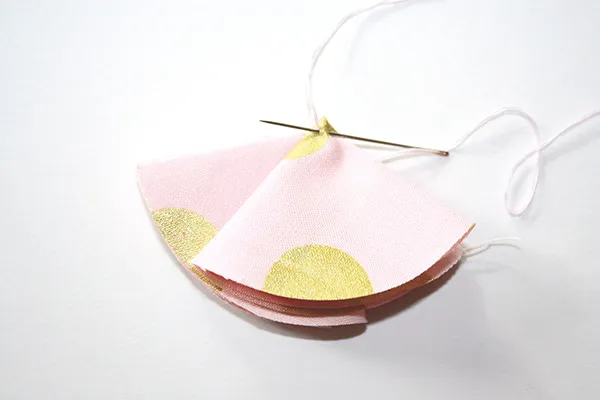
Step three: Take the thread and sew it back through the first folded circle again so you have a ring of folded circles – this will form one half of your pom pom.
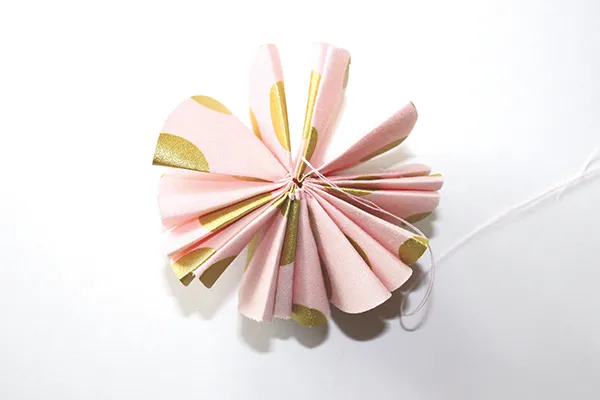
Step four: Repeat with the other ten circles to make the other half of the pom pom.
Step five: Stitch the centre points of one half to the centre points of the other half securely, to finish your pom pom.
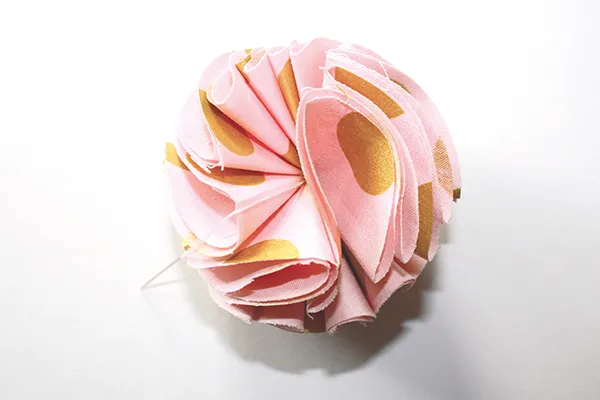
Step six : Make several more pom poms in the same way using a variety of fabrics, then thread a length of twine through the centre of each pom pom to hang as a garland.
Add a playful touch to your décor
Creating a DIY fabric pom poms garland is a fun, simple project that brings colour and cheer to any space. Once you’ve made one, you’ll want to craft a few more to brighten up rooms, parties, or festive occasions.
Sew your own fabric paper chains
Learn how to turn fabric scraps into charming paper chains – a simple, eco-friendly way to decorate for any occasion.


