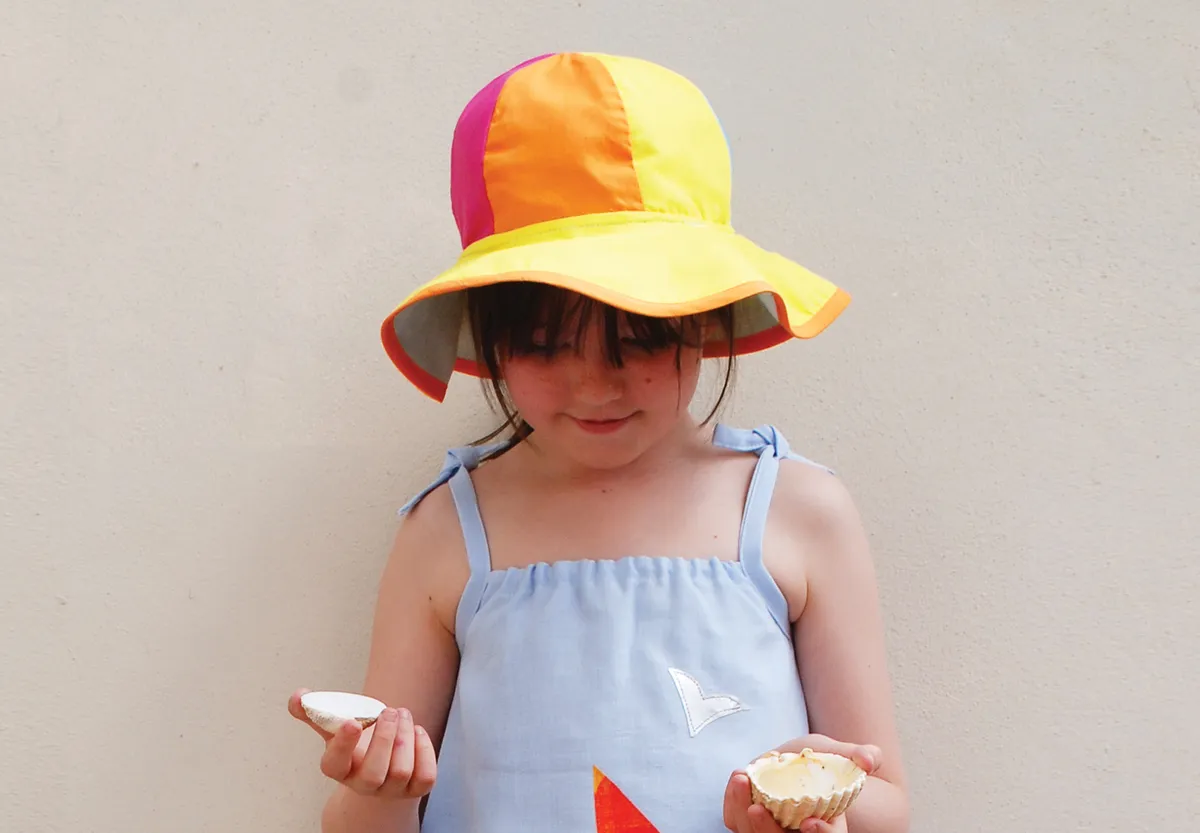
How to sew a children's sun hat
Make a DIY sun hat for girls and boys with our step-by-step guide, or if you fancy making a sun hat for yourself too, simply enlarge the hat template for the biggest size by around five per cent. Kirsty Hartley will show you how to make a sun hat with her tutorial.
- How to sew a patchwork baby ball
- Get the kids sewing with these fun & easy projects they're guaranteed to love!
- 20 toy sewing patterns for babies and children
If you're new to sewing then head to our beginners guide to sewing which will show you all the basics. We also have a best sewing machines for beginners guide if you're in the market for a new machine.
You will need
- Cotton fabric
- Main fabric: light to medium weight cotton, pale blue, 30x114cm (12x44in)
- Inner fabric: 30x114cm (12x44in)
- Fabric scraps (Fabric scraps for bias binding trim)
- Ribbon (for the loop: 0.5x6cm (3/8x23/8in)
- Basic sewing kit
You'll need to download and print our sun hat template before learning how to make a sun hat!
How to make a children's sun hat
Cutting out
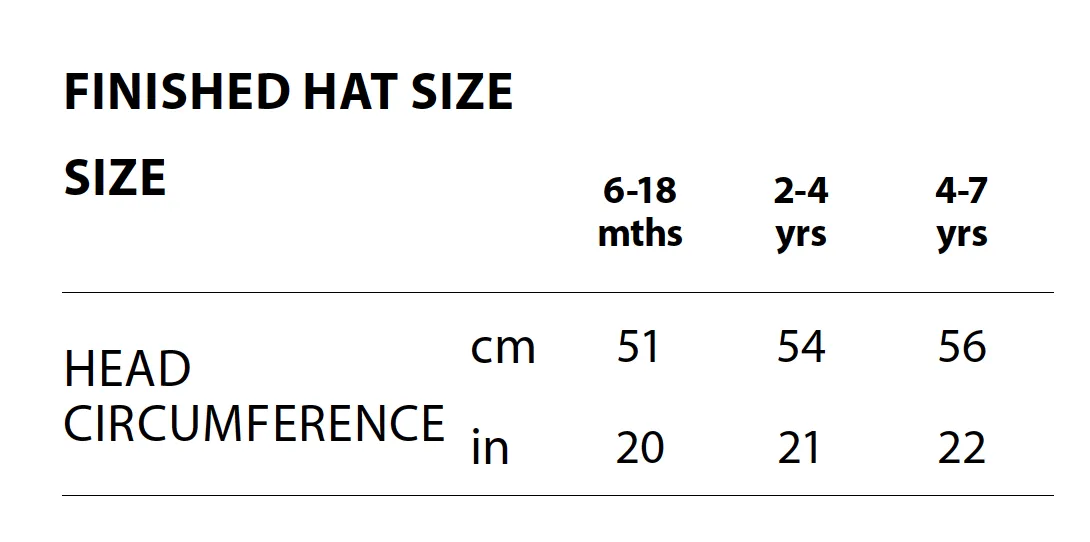
Trace the sun hat template for the hat segments and brim following your chosen size lines.
Place the hat segment pattern on your fabric and draw around it, adding a 5mm (¼in) seam allowance. Cut six hat segments from the main fabric for the hat outer and six hat segments from the inner fabric for the hat inner. Or, use a mixture of fabrics, using a different one for each segment.

Cut one hat brim from the outer fabric and one from the inner fabric, adding a 5mm (¼in) seam allowance to the inner and outer edges.
Mark the notches from the pattern to the inner circle of both pieces. This will help you align the pieces accurately before sewing them together.
Joining the hat segments
Step 1
To make the hat outer, take three outer segments and stitch them together down the curved edges. Repeat for the other three segments to make two halves of the hat. Press the seams open.

Step 2
Fold the ribbon in half to make a loop and pin the two ends to the centre of one half of the hat, matching raw edges.

Step 3
Sew the two halves together, trapping the folded loop at the crown.
Step 4
Repeat to join the six inner hat segments together but without the loop.
Step 5
Place the hat outer and hat inner WS together and stitch all the way around.
Attaching the brim
Step 6
Take the brim sections and carefully snip into the inner curve by just 2mm (1⁄16in) only. This will release the curve as you sew the brim into place.
Step 7
Pin the outer brim RS together with the outer joined hat segments. Stitch together all the way around, taking care to match notches at the sides.
Step 8
Repeat to stitch the inner brim RS together with the inner hat, using your original sewing lines as a guide.

Step 9
Press the brims away from the hat, trapping the seams between them.
Step 10
Topstitch around the brim 5mm (¼in) from where it joins the hat segments, to flatten it.
Step 11
Pin then sew the outer brim to the inner brim all the way around the outside edge. Trim the edge if necessary to neaten so it’s ready for binding.
Making the binding
Step 12
Cut a bias strip of fabric, or several lengths which are cut at a 45-degree angle to the selvedge. You will need approximately 100cm (40in) cut to a 4cm (15⁄8in) width. Cutting fabric on the bias is an excellent way to finish a curved edge as the fabric has a little stretch to it when cut this way.
Step 13
Stitch the strips together, if necessary, at a 45-degree angle.

Step 14
Press the long edges under by 1cm (3⁄8in) to the WS.
Step 15
Press the binding in half WS together, encasing the folds.
Attaching the binding
Step 16
Measure carefully around your hat outer brim edge. Cut the pressed binding to this length, adding 5cm (2in) extra for ease and turning.

Step 17
Unfold the binding and turn one short end under by 1cm (3⁄8in). Place one unfolded long edge RS together with the brim inner, matching raw edges. Stitch together all the way around along the opened fold. When you reach where you started, overlap the other short end by 1cm (3⁄8in) and trim.
Step 18
Carefully fold the binding over and around to the hat brim outer and stitch this into place. This can be a little tricky, so take your time. You may find it easier to tack and ease it into place first before you stitch. You've officially learn how to make a sun hat.
We hope you’ve enjoyed learning how to make a sun hat!

Stylish sewing for cool kids
Make even more masterpieces for your little ones with the help of our 15 kids sewing patterns that you can make as a beginner.