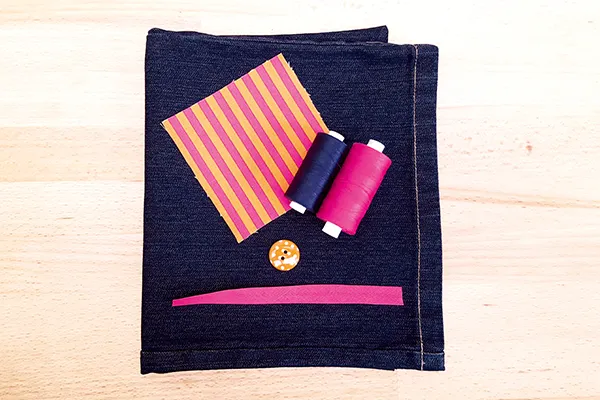
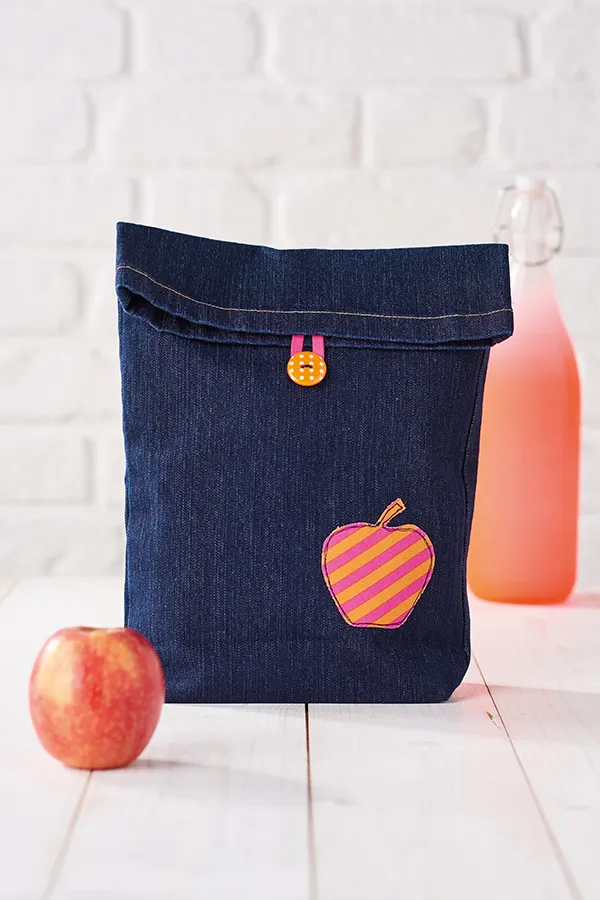
Cutting out and appliquéing the motif
Step 1
Cut the bottom 40cm (15¾in) off from one leg – to about knee height. Zigzag the raw fabric edge to stop it from fraying. This will be the bottom of the bag and the original jeans hem will be the top.
Step 2
Download and trace around the apple template above then turn it over and draw around it on the paper side of the Bondaweb. Cut out 1cm (3/8in) outside the drawn line. Press this paper-side up on the wrong side (WS) of the printed fabric and cut around the drawn line.
Step 3
Decide where you want your apple motif to be. Ours is 10cm (4in) up from the bottom zigzagged edge and slightly off centre. Remove the paper backing from the Bondaweb and press in place.

Step 4
Stitch around your apple twice, being careful to sew only through the bag front. Use a dark blue thread so it shows up to give a hand-drawn effect.
Boxing the corners
Step 1
Turn your bag WS out and fold flat. Pin along the bottom edge and stitch together 1cm (3/8in) up from the bottom. Zigzag stitch to neaten the raw edge.

Step 2
With your bag WS out, fold it in half lengthways so that the jean leg seams are in the centre. Pinch the bottom corners to form a triangle and press the corner seams open. Mark 3cm (1¼in) up from the point and draw a line across, then pin.

Step 3
Stitch along this line to make one box corner. Cut off the corner and machine zigzag to neaten.
Adding a loop and button
Step 1
Fold your bias binding in half lengthways and stitch along the folded edge. Now fold this in half to make a button loop.

Step 2
Turn the bag right sides (RS) out. Fold the top of the bag over and mark the centre. Pin then stitch the loop on the underside. Stitch twice to strengthen.

Step 3
Fold over the top of the bag and pin where the button needs to go under the loop. Stitch the button securely in place.
Finishing off
Step 1
Finally, press the bottom of your bag into a lunch box shape by ironing a horizontal crease from each bottom corner to corner for both sides of the bag.