
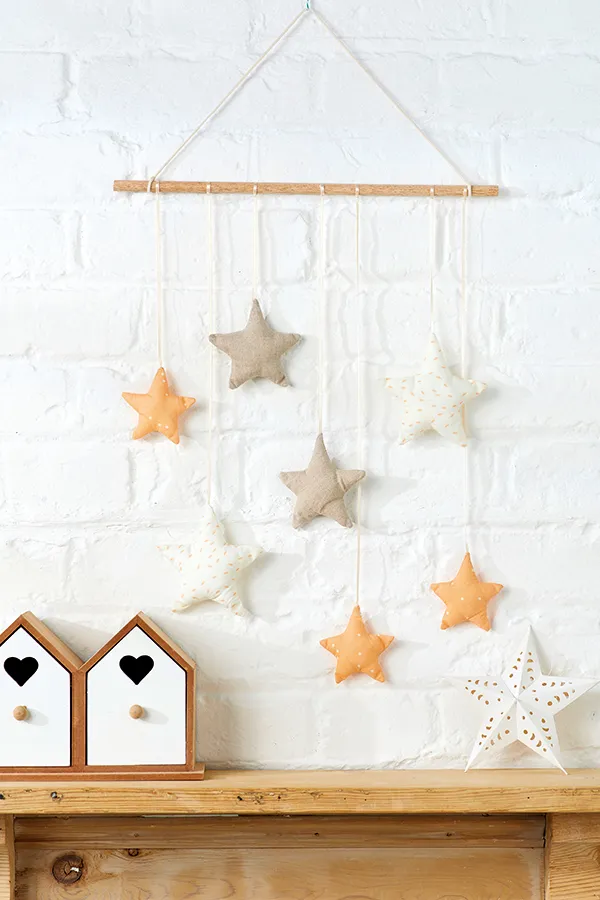
Always wanted to sew? This adorable star wall hanging is the perfect project to start with, even for complete beginners!
You don't need to be a sewing expert to make this stunning fabric star wall hanging, in fact it's an ideal first project.
Even if you don't have a sewing machine, the simple star shapes can easily be sewn by hand. You can even get creative with the rest of the materials if you're. new to crafting – swap the wooden dowel for a simple stick, and if you don't have any polyester fibrefill stuffing you can always stuff them with cotton wool.
This star wall hanging is perfect for a child's bedroom, but the fabric stars would also look stunning hung in a window, especially as the nights start to draw in.
- How to create a space-themed bedroom
- How to make a folded fabric star ornament from fabric scraps
- A complete guide to sewing for beginners
You will need
- Fabric A: 30x30cm (12x12in), for large stars
- Fabric B: 30x30cm (12x12in), for medium stars
- Fabric C: 30x40cm (12x16in), for small stars
- Polyester fibrefill stuffing
- Narrow ribbon: 3m (31⁄4yds)
- Cotton cord: 50cm (20in)
- Wooden dowel: 1cm (3⁄8in) diameter x 35cm (14in)
- Matching thread
- Basic sewing kit
- Download and print our free Free star templates
Notes
Use a 1cm (3⁄8in) seam allowance throughout.
How to make a star wall hanging
Cutting out
Step one: Download, print and trace the three star templates and cut them out.
Step two: Fold fabric A in half with right sides (RS) together.
Step three: Draw around the largest star template twice onto the wrong side (WS) of the fabric.
Step four: Pin the two layers of fabric together in the middle of each star and cut out at least 1cm (3⁄8)in outside the drawn lines.
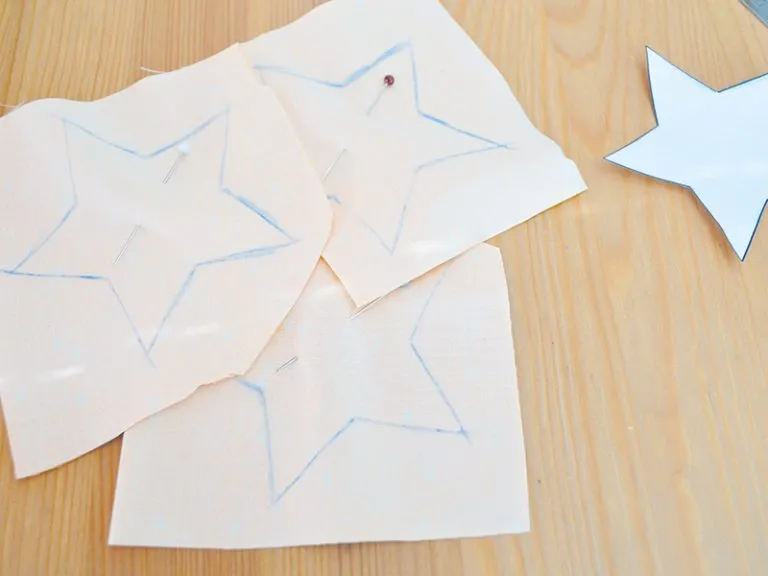
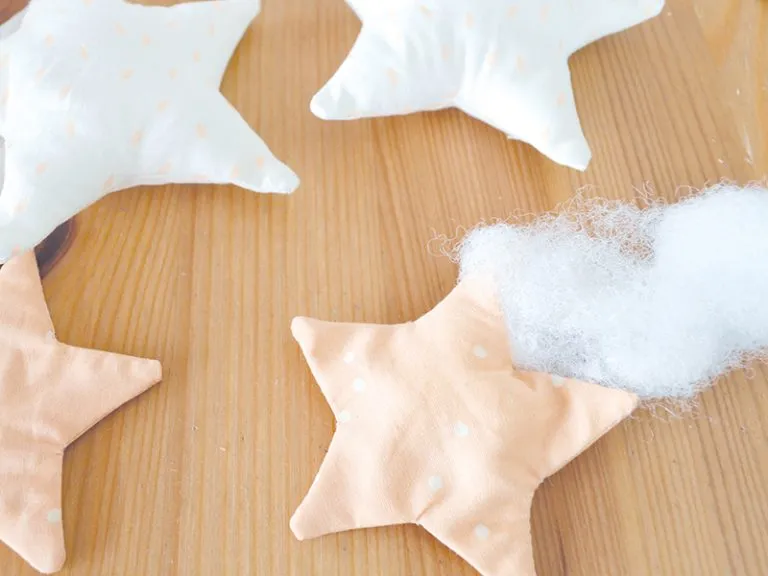
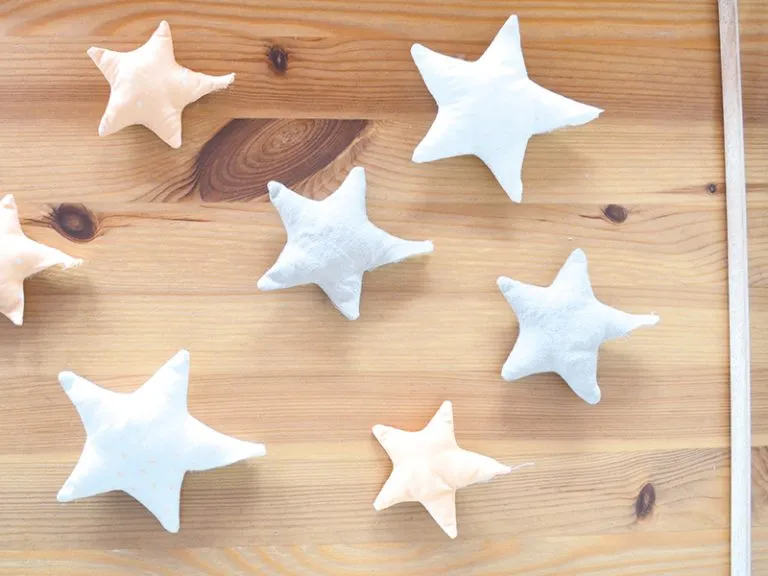
Step five: Repeat this to cut out: Fabric B: two medium stars. Fabric C: three small stars.
Making the stars
Step one: Take one star and, starting at the tip of a point, sew along the edges following your drawn lines, leaving the last edge unsewn for a turning gap.
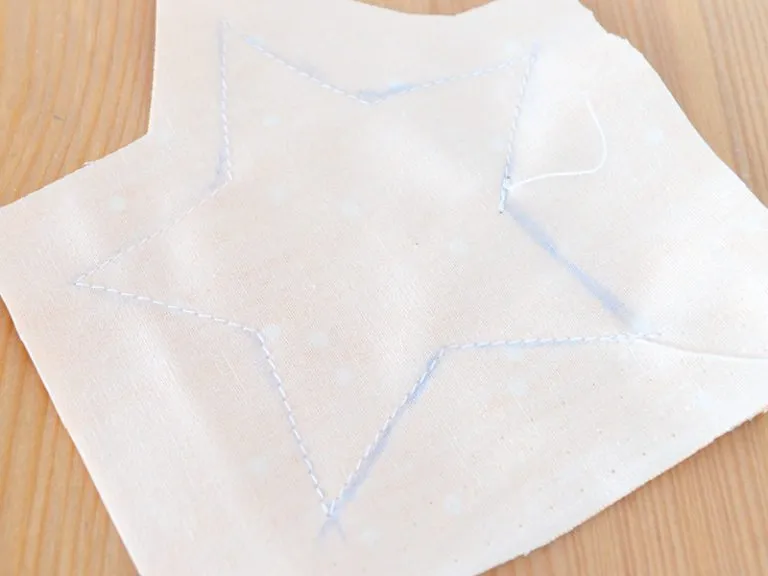
Step two: Trim the seams and snip the points and inner corners.
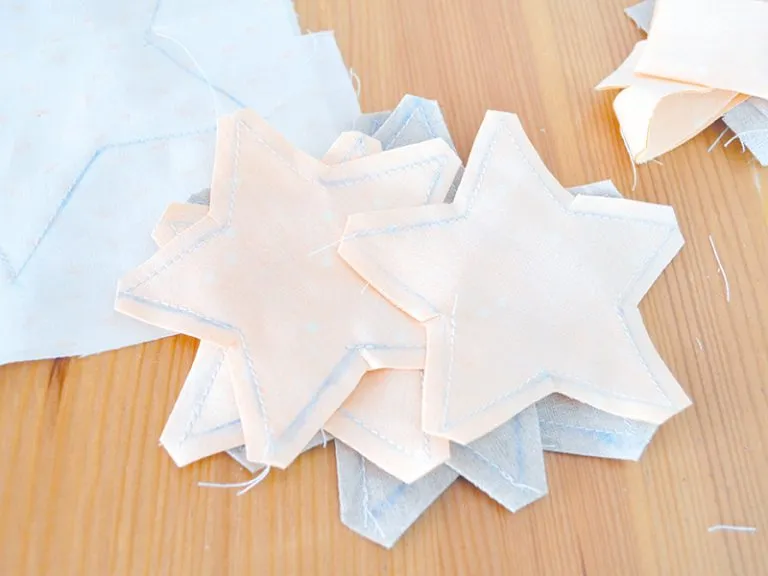
Step three: Turn the star right side out then stuff the star lightly.
Step four: Repeat this to make all the stars in the same way.
Attaching the ribbons
Step one: Arrange the stars as you’d like them to hang, with the dowel at the top.
Step two: Measure from the dowel to a star, add 3cm (11⁄4in) to this and cut ribbon to that length.
Step three: Repeat this for all stars.
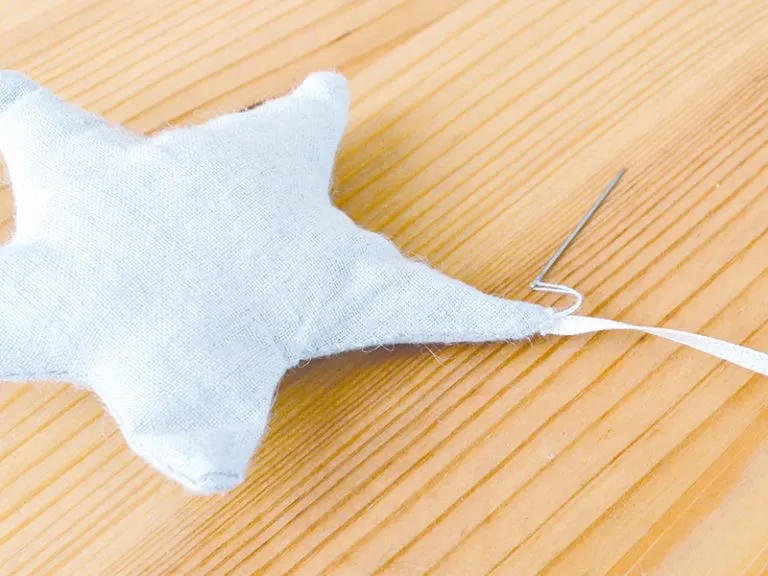
Step four: Take the first star and tuck its ribbon 1cm (3⁄8in) in at the tip where the opening ends.
Step five: Pin the gap closed and hand sew together, stitching the ribbon securely in place too.
Step six: Repeat this for each star.
Assembling the hanging
Step one: Loop the other end of the ribbon around the dowel 11⁄2 times and hand stitch.
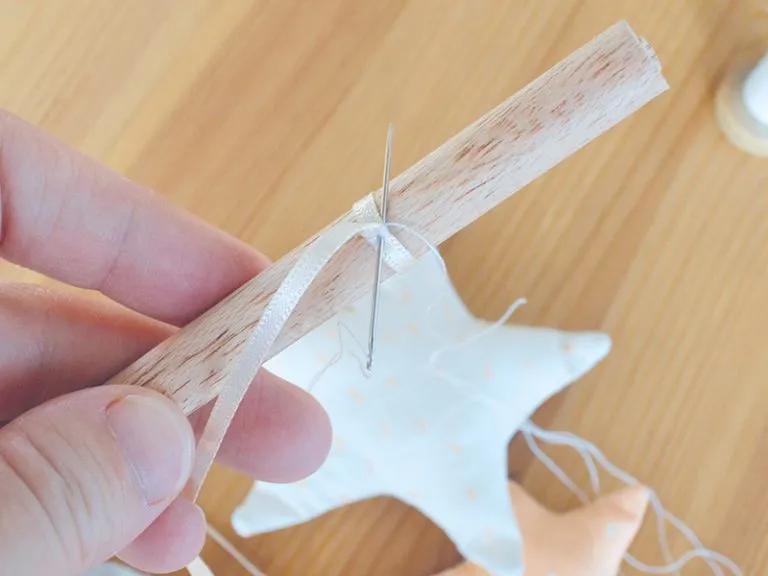
Step two: Repeat this for all the stars, making sure there’s 4cm (15⁄8in) of dowel left at each end.
Step three: Fold the end of the cord by 5mm (1⁄4in) to make a neat edge and hand stitch in place.
Step four: Loop the end around the dowel and hand-stitch to make a loop.
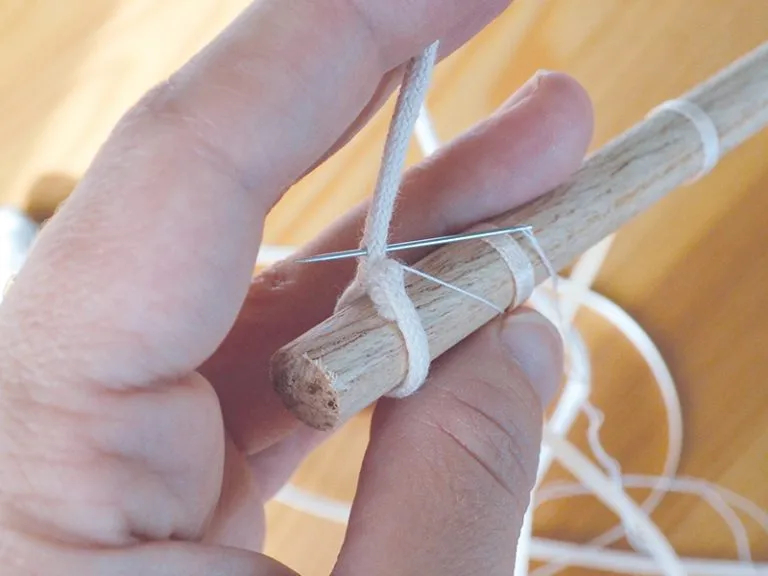
Step five: Repeat with the other end of the cord at the right edge.
More fabric makes for beginners
Keep the creativity going and continue your journey into the world of sewing with our guide – What can I sew in 30 minutes? 5 beginner projects to make tonight!

