How to sew fabric gift bags
Good things come in small (handmade) packages like this little gift bag by Jennie Jones, made with one fat quarter.
Ah Christmas wrapping... whether you love it or loathe it, we've found the perfect way to give it a new twist this year! These fabric gift bags are a lovely way to customise your gifts this year and use up some of your favourite prints from your fabric stash at the same time...
How to make quick-sew fabric gift bags
You will need
- 1 fat quarter
- Medium weight interfacing – 60x30cm (24x12in)
- Elastic: 10cm (4in)
- Button
- Basic sewing kit
Note
- Use a 1cm (3⁄8in) seam allowance.
Cutting the fabric
Step 1
Cut the fat quarter in half lengthwise.
Step 2
Take one piece and press the interfacing on the wrong side (WS). This will be the outer bag.
Step 3
Fold the outer bag fabric in half widthwise with WS together and draw two boxes in the corners along the folded edge, 5cm (2in) wide and 4cm (15⁄8in) deep.
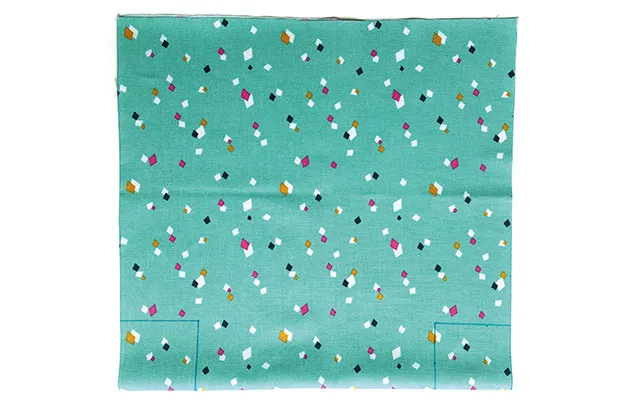
Step 4
Cut out the boxes along the drawn lines through both layers of the folded fabric.
Step 5
Repeat this with the other piece of fabric, which will be used for the bag lining.
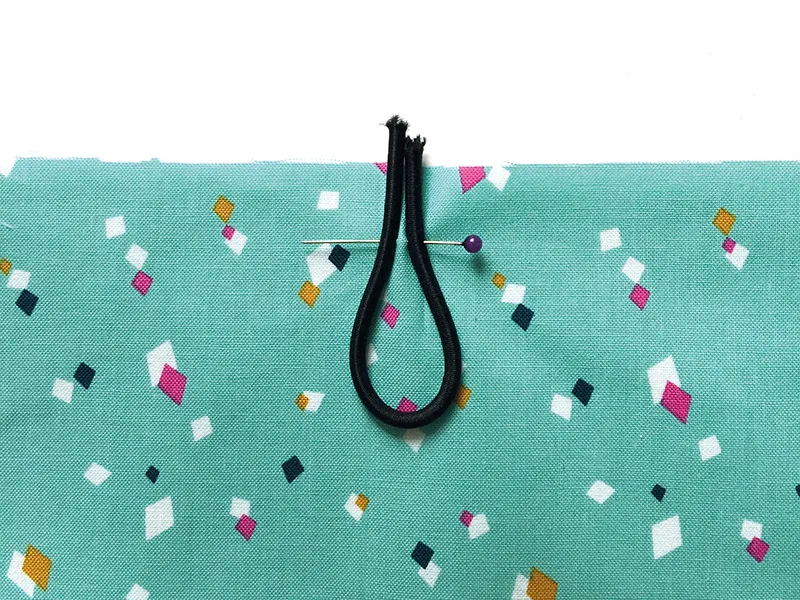
Adding the button loop
Step 1
Fold the elastic in half to make a loop, then pin the ends to the right side (RS) of the back of the outer piece of fabric, positioning it centrally across the top edge. The ends of the elastic should match up with the raw edges of the fabric.
Step 2
Stitch across the ends.
Joining the outer to the lining
Step 1
Open out the outer and lining pieces of fabric and place them RS facing.
Step 2
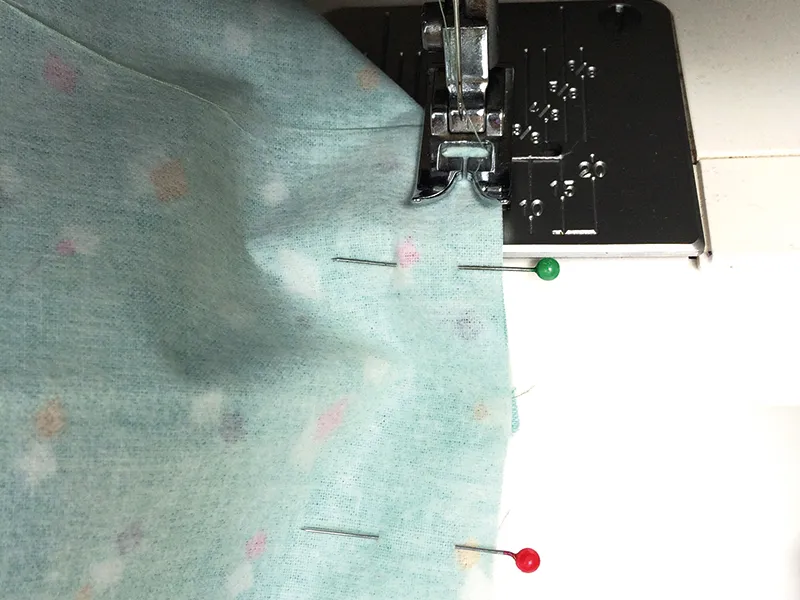
Stitch along both of the top edges.
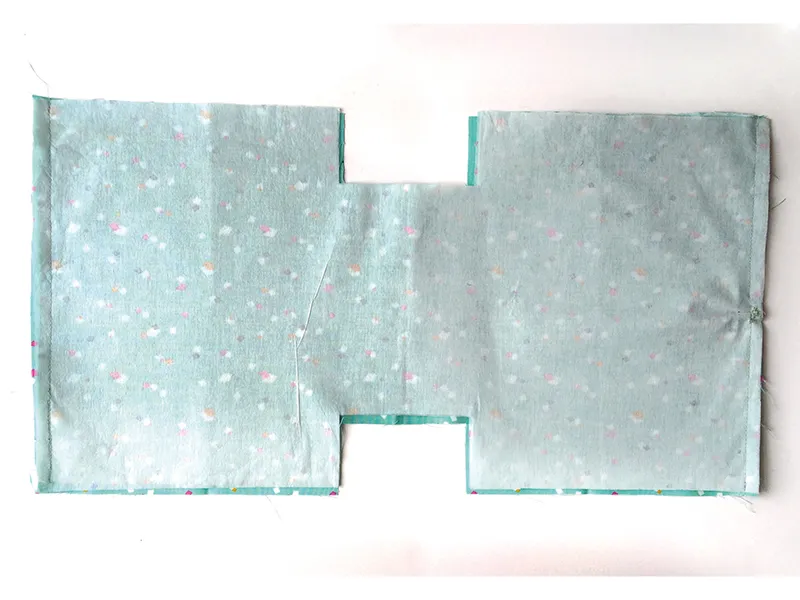
Step 3
Open out the fabrics and match the seams together.
Step 4
Sew together along the side edges, leaving the cut-out boxes in the corners unstitched. Leave an 8cm (3in) opening in the centre of one side unstitched for turning your bag RS out later.
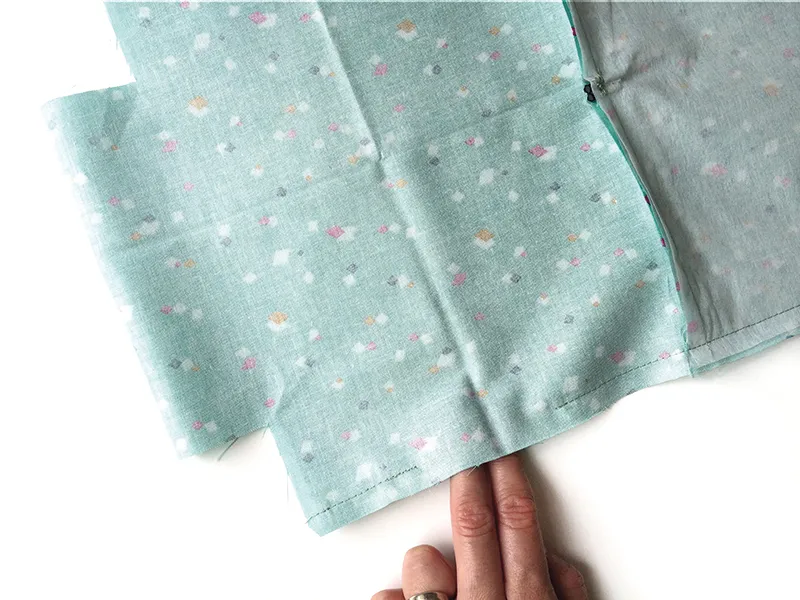
Making the boxed corners
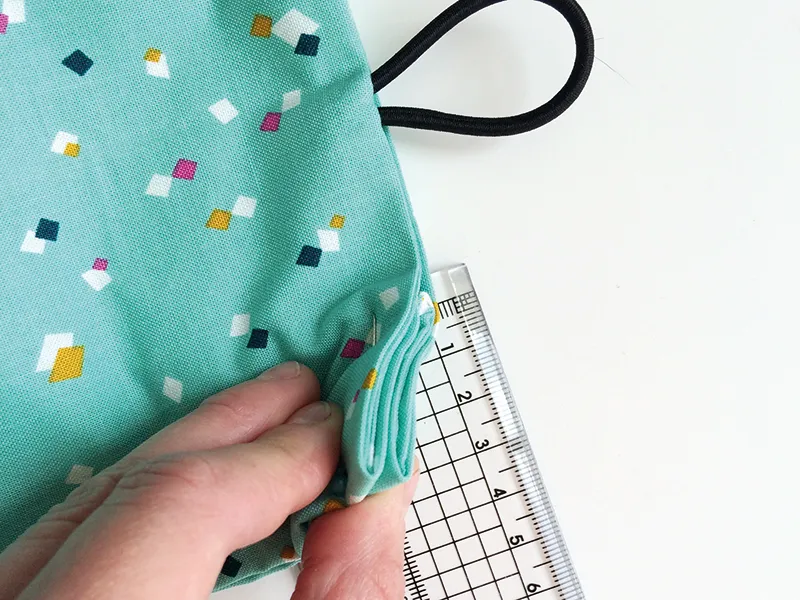
Step 1
Working on one corner of the outer fabric, open out the corner, matching the side seams with the bottom fold and press it flat.
Step 2
Pin across the corner then stitch.
Step 3
Repeat this to box the other corner of the outer fabric and the two corners of the lining fabric in the same way.
Step 4
Turn the bag RS out through the turning gap then slip stitch it closed.
Step 5
Press the bag well.
Finishing off
Step 1
Pinch the sides together 4cm (15⁄8in) from the side seams at the top, then pin and press into place.
Step 2
At the top of each of the gathers, work a few holding stitches with your machine. This will hold these sides in place to give the bag some shape and rigidity.
Step 3
Fold the top of the bag over, then stitch the button into place to match up with the end of the loop. Now fill with treats!
Wrap your gifts the handmade way
With just a few stitches, you can create reusable fabric gift bags that not only look beautiful but also cut down on waste.
Create your own gift tags
Add a personal, handmade touch to your presents with our easy fabric gift tags tutorial.