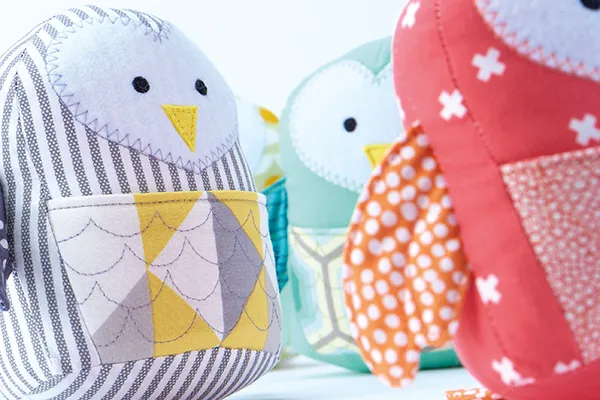
Needles at the ready! We're here to show you how to make your very own owl softie toys. All you need are some small pieces of fabric, a few sewing basics and our step by step guide, plus free owl sewing pattern, below! This lovely project is a great gift idea for children (or grown up owl fans!) in the family. This DIY softie toy tutorial was designed by Jo Carter was first featured in Love Patchwork & Quilting magazine.
You will need...
- Fabric A: 14in square, for body
- Fabric B: 9in square, for wings and tail
- Fabric C: 6in x 7in, for pocket
- White felt: 4in x 3in, for eye patch
- Yellow felt: 1in square, for beak
- Iron-on adhesive (fusible web): 5in x 3in
- Batting scraps
- Polyester toy filling
- Black embroidery thread
Download the free pattern
For more free projects and inspiration sign up to our newsletter!
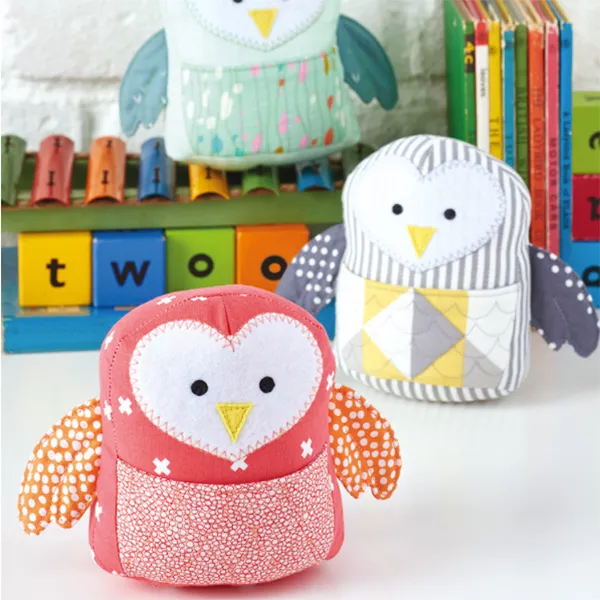
Finished size
5in tall approx
Notes
- Seam allowances are 1⁄4in, unless otherwise noted.
- When using our Owl sewing pattern templates Arrows on the pattern pieces indicate pile/print direction for marking and cutting out.
- RST = right sides together
Cutting out
Remember: When the pattern specifies "cut 2" (or more) of a pattern piece, after marking out half of the pieces required, the template needs to be turned over to mark out the remaining half so that the pieces are cut as mirror images.
Step one
From Fabric A cut:
- One (1) Front Body.
- Two (2) Side Body.
- One (1) Base.
Step two
From Fabric B cut:
- Four (4) Wing.
- Two (2) Tail.
Step three
From Fabric C cut:
- Two (2) Pocket.
Sewing the pieces
Step four
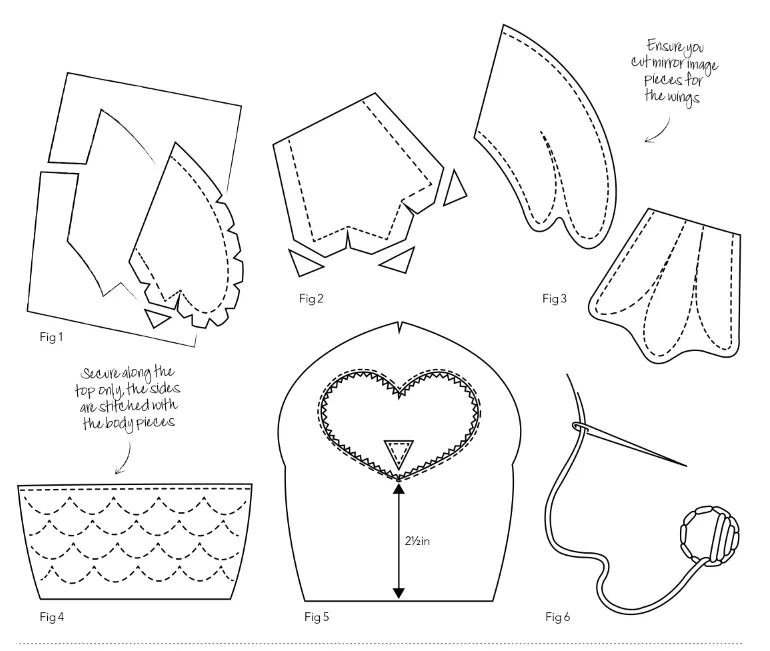
First place two mirror-image wing pieces one on top of the other on top of a piece of batting that is larger overall than the wing. Sew all three layers together around the edge of the wing (leave the straight side open) and trim away the excess batting. Clip 'V'-shaped notches in the seam allowance around the curves, clip the seam allowance at the internal corner and lastly clip the corner (Fig 1). Turn the right way out and then repeat for the opposite wing.
Step five
Make the tail in the same way as the wings by placing the tail pieces RST one on top of the other on top of a piece of batting. Sew around the edges, trim the excess batting, clip the seam allowance at the internal corners and then clip the corners (Fig 2). Turn the right way out.
Step six
Lightly press the wings and the tail with a cool iron and then quilt as shown (Fig 3).
Step seven
Place one pocket piece right side up, on top of a piece of batting that is larger overall than the pocket and quilt as shown. Trim away the excess batting from around the sides of the pocket and then RST place the two pocket pieces together and sew along the top edge to join them (Fig 4).
Turn the right way out and then topstitch along the top edge. Baste the bottom edges to securely align the front and back of the pocket.
Step eight
Trace out the eye patch onto the backing paper of some iron-on adhesive, cut out roughly and following the manufacturer's instructions, iron onto the reverse of the white felt. Cut the eye patch out, peel off the backing paper and press in place on the front body 21⁄2in up from the bottom edge, taking care not to scorch the felt (press through a cloth if preferred). Sew a line of straight stitch around the outside of the eye patch and then sew around the inside edge of the patch with zigzag stitch.
Step nine
Back the beak with iron-on adhesive in the same way as the eye patch, cut out and press the beak in place at the bottom of the eye patch, again taking care not to scorch the felt. Sew twice around the beak with a straight stitch (Fig 5).
Step ten
Mark the position of the eyes with a water erasable pen and then embroider by backstitching a small circle in black thread and then filling it in (Fig 6).
Step eleven
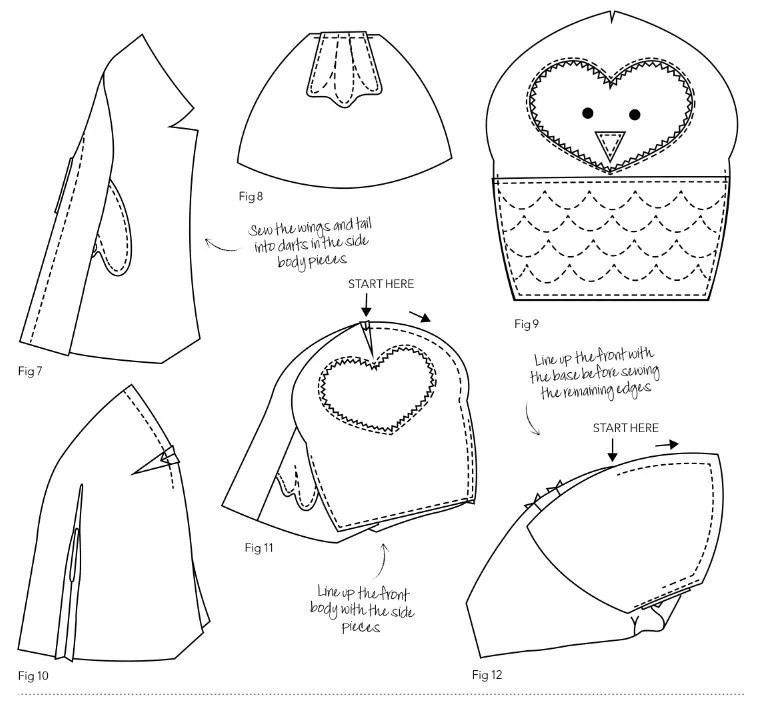
RST pin a wing in place in the long dart in a side body piece and then sew the dart together capturing the wing in place and tapering the end of the dart at the top (Fig 7). Repeat for the other side.
Step twelve
Right sides up, baste the tail in place at the back of the base (Fig 8).
Step thirteen
Right sides up, baste the pocket to the front body along the sides and the bottom (Fig 9).
Step fourteen
Close the small darts in each of the side body pieces. With the two side body pieces RST, partly sew together from the top along the back, stopping approximately 1in after the darts (Fig 10).
Step 15
Close the dart at the top of the front body, tapering the end. RST line up the dart in the front body with the central seam joining the side body pieces and from this top point, sew the front body to one side from the top to the bottom edge (Fig 11). Return to the top point and sew the other side of the body together. Clip 'V'-shaped notches in the seam allowance around the curves.
Step 16
RST line up the marker at the centre of the front body to that on the centre front of the base piece and from this point sew the base to the body around one side, finishing at the centre of the tail (Fig 12). Return to the front centre point and sew the remaining side. Turn the owl the right way out, stuff and close along the back using a ladder stitch or similar.
About the designer
Jo Carter is a quilting and sewing designer and regular Love Patchwork & Quilting contributor. We love her designs. Find out what she's up to over on her blog twoowls.typepad.co.uk or on her instagram @Jo2owls.
While you're here, why not find your next sewing project? We have free tutorials to teach you basic sewing skills. Learn how to make a face mask or learn how to sew a dress for beginners. We also have a pattern round-up of the best sewing patterns for beginners so you can start making your own clothes! If you enjoyed making this owl, you might also like our rabbit sewing pattern.