Cutting out the bunny toy pattern
Step 1
From Fabric A cut:
- One (1) upper body.
- Four (4) upper limb.
- Two (2) lower front ear – you will need to cut one regular and one mirrored piece.
- Two (2) back ear – you will need to cut one regular and one mirrored piece.
- One (1) middle face.
- Two (2) side face – you will need to cut one regular and one mirrored piece.
- Two (2) back head – you will need to cut one regular and one mirrored piece.
Step 2
From Fabric B cut:
- One (1) lower body.
- Four (4) lower limb.
- One (1) base.
- Two (2) upper front ear – you will need to cut one regular and one mirrored piece
Step 3
From Fabric C cut: One (1) tail.
Prepare the ears for your bunny toy
Step 1
Right sides together, sew an upper front ear piece to the corresponding lower front ear piece – use the markers on each piece to match correctly. Then place the complete front ear on top of a mirror-image back ear piece and put this on top of a piece of batting cut slightly larger overall than the ear (Fig 1).

Step 2
Sew around the edge of the ear, sandwiching all three layers together. Trim away the excess batting from around the ear and make several ‘V’ shaped notches in the seam allowance around the curves at the tip of the ear (Fig 2). Turn right sides out and repeat for the other ear.
Step 3
With a cool iron, gently press the ears and then quilt them following the curve of the ear (Fig 3). Work from the outside in, using a colour that matches Fabric A.
Step 4
Fold the sides of the ear into the centre so that they overlap slightly – position with the outer, more curved side underneath, as pictured. Baste the folds in place (Fig 4).
Prepare the arms and legs
Step 1
Sides together, sew a lower limb to an upper limb piece and then fold the limb over lengthways. Sew down along the side and around the bottom. Clip ‘V’ shaped notches in the seam allowance around the curve (Fig 5).
Step 2
Turn right sides out and stuff leaving the top 2cm empty. Repeat to make the remaining 3 limbs. Baste the top of two of the limbs closed following the original fold so that the seam is at one side (these are the legs) and baste the other two closed with the seam running centrally down one side of the limb (these are the arms). Fig 6.
Prepare the face and head
Step 1
Right sides together, sew closed the dart at the top of the middle face. Then, with right sides together again, sew a side face piece to one side of the middle face beginning at the ‘nose end’ and sewing up to the top back of the face (Fig 7). Repeat for the other side.
Step 2
Baste an ear in place on the right side, between the dart and the marker on the middle face, ensuring that it is facing the correct way. Repeat for the second ear (Fig 8).
Step 3
Right sides together place the two back head pieces together and from the top, sew a 4cm long seam down along the back, just to hold them together (Fig 9). Finger press the seam open.
Step 4
Match the seam of the back head pieces with the dart at the top of the middle face piece, right sides together. Stitch the face to the back head in two attempts beginning at this top point each time and working down to the neck edge (Fig 10).
Step 5
Sew the side face pieces together at the bottom of the face, the ‘neck to nose’ seam (Fig 11).

Assemble the body
Step 1
Sew the upper body to the lower body, matching up the central markers to keep the seam on course.
Step 2
Baste the arms in place between the markers on the upper body ensuring that the arm seam is against the right side of the body so it is on the underside of the arm and less visible on the finished rabbit. Baste the legs in place on the lower body, preferably with the seams facing each other (Fig 12).
Step 3
Right sides together, beginning at one side sew the head to the body ensuring that the seam in the lower face lines up with the marker on the upper body (Fig 13).
Step 4
Next you need to attach the base. This is an awkward piece to attach because of the curve and the legs and we recommend that you tack it on by hand first before machine-sewing it in place. With right sides together, beginning at the back of the rabbit sew the base around the bottom of the body (Fig 14).
Step 5
With the rabbit still inside out, stuff the ears into the front of the face and move the limbs to the front of the body and out of the way. Return now to the short seam made earlier to join the back head pieces and this time close the back of the head entirely by continuing this seam down to the bottom of the head. Also sew the lower body together leaving the upper back of the body open (Fig 15).
Step 6
Turn the rabbit the right way out and stuff with polyester filling.
Step 7
Using dark brown embroidery and following the seams on the rabbit’s snout, stitch a nose and mouth.
To reduce puckering in the fabric around the nose as it's stitched, push the stuffing tightly into the snout from the still open back of the rabbit so the fabric is taut as the nose is being embroidered.
Sew eyes onto the face and then with a single strand of embroidery thread sew 2 whiskers on either side of the nose. Close the back of the rabbit.
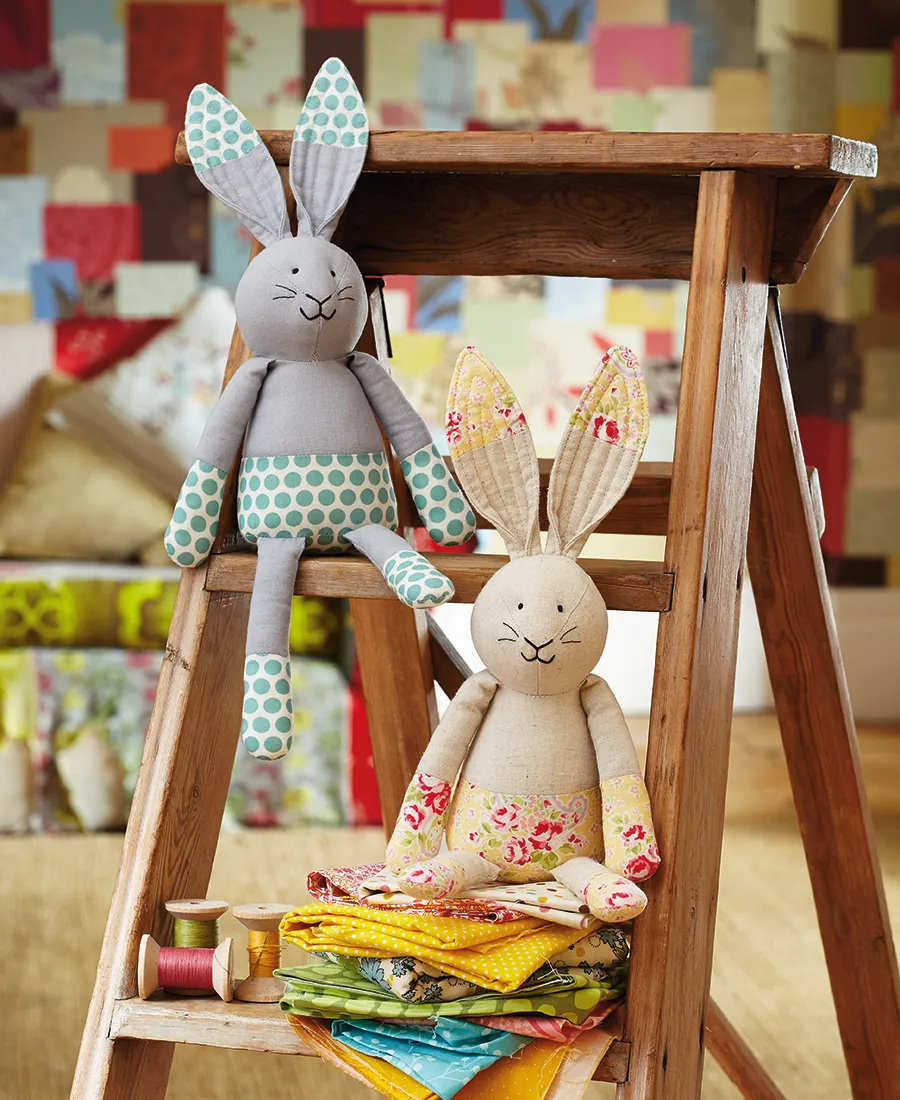
Use our free bunny toy sewing pattern to sew up your own pair of sweet softies
Add the tail
Step 1
Place the tail piece right side up on top of a piece of batting slightly larger overall than the tail itself. Quilt lines up and down and then from side to side over it to form a grid and then trim away the excess batting from around the tail.
Step 2
Using running stitch, hand-sew right around the tail piece with a 5mm seam allowance. Pull on the thread so the edges of the tail gather forming a cup shape (Fig 16). Add filling into the centre and pull the thread more folding the raw edges into centre as it draws up.
Step 3
Once the tail is drawn up as tightly as possible, secure the thread before sewing the tail in place on the back of the rabbit just above the base. Stitch all around the tail in a circle so that it’s held firmly in place. Secure the thread and cut off. Your DIY stuffed bunny toy is complete!