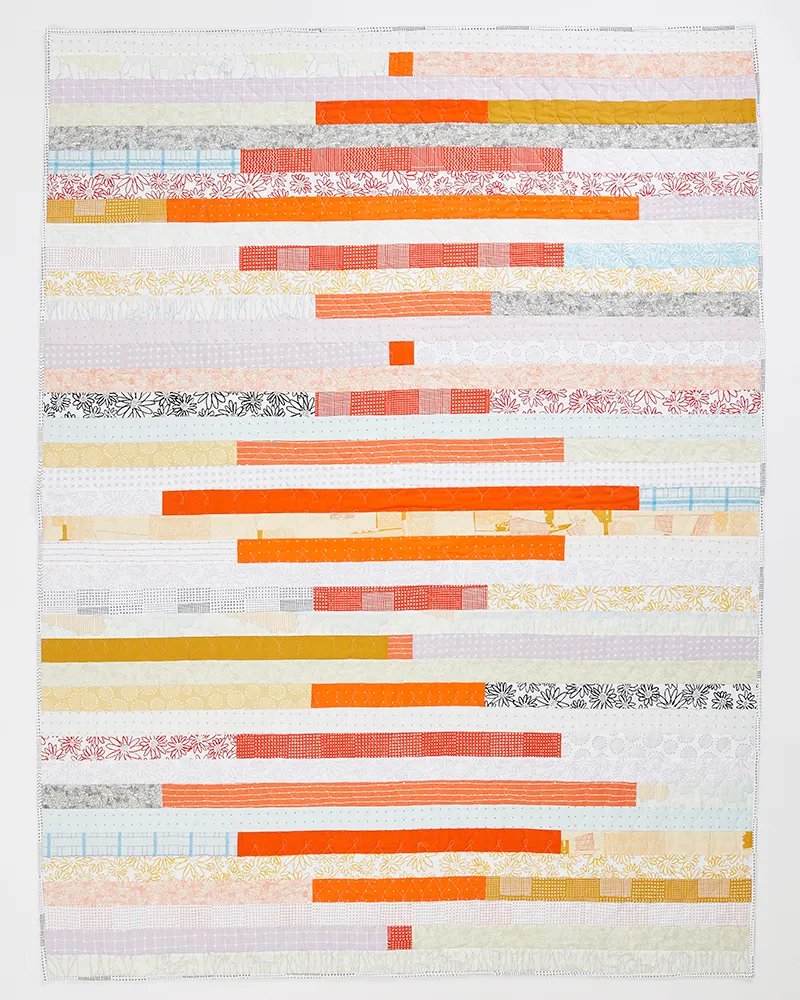
This is the first of two free patchwork tutorials by Karen Lewis where we'll be making the most of simple fabric strips. You can see more of Karen's designs on Instagram @karenlewistextiles.
You will need
- Print fabrics (red): 1yd total
- Background fabric: 3⁄8yd each of nineteen fabrics
- Backing fabric: 5yds
- Batting: 66in x 88in
- Binding fabric: 5⁄8yd
Notes
- Seam allowances are ¼in, unless otherwise noted.
- Press seams open, unless otherwise instructed.
- RST = right sides together.
- WOF = width of fabric.
- WST = wrong sides together.
- Fabric provided by Robert Kaufman.
We used...
Print fabrics are from the Euclid collection by Carolyn Friedlander for Robert Kaufman, along with solids from the Brussels Linen collection also by Robert Kaufman, that Karen screen-printed.
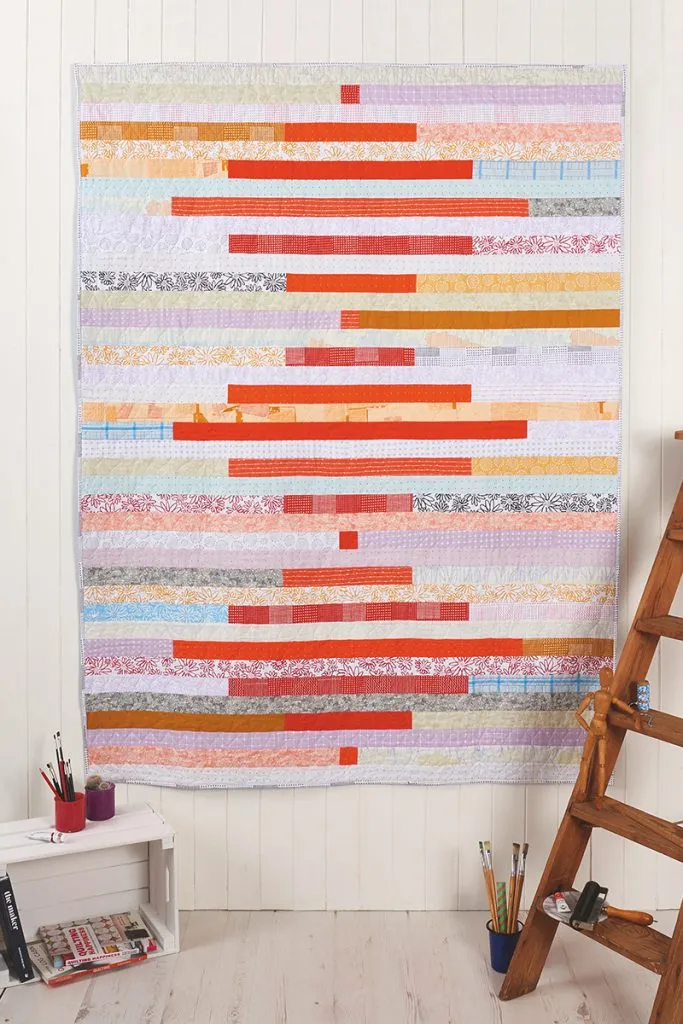
How to sew an easy strip quilt
Finished size
58in x 80in
Cutting out
Step 1
From the print fabrics cut eleven (11) 2½in x WOF strips. Subcut into:
- Three (3) 2½in x 38½in rectangles.
- Six (6) 2½in x 26½in rectangles.
- Six (6) 2½in x 14½in rectangles.
- Four (4) 2½in squares.
Step 2
From each of the nineteen background fabrics, cut two (2) 2½in x WOF strips. Sew two matching strips along the short ends, from each set of strips. You will have nineteen long strips.
Step 3
From the remaining background fabrics, cut at least nineteen (19) 2½in x WOF strips. Subcut the strips as follows, mixing up the fabrics between lengths:<
- Eight (8) 2½in x 28½in strips
- Twelve (12) 2½
- Twelve (12) 2½in x 16½in strips
- Six (6) 2½in x 10½in strips.
Step 4
From the binding fabric cut eight (8) 2½in x WOF strips.
Piecing the strips
Step 5
Sew a 2½in x 28½in background strip to either side of a 2½in print square. Press seams toward the background. Repeat to make four of these strips.
Step 6
Sew a 2½in x 22½in background strip to either side of a 2½in x 14½in print rectangle. Press seams toward the background. Repeat to make six of these strips.
Step 7
Sew a 2½in x 16½in background strip to either side of a 2½in x 26½in print rectangle. Press seams toward the background. Repeat to make six of these strips.
Step 8
Sew a 2½in x 10½in background strip to either side of a 2½in x 38½in print rectangle. Press seams toward the background. Repeat to make three of these strips.
Assembling the quilt top
Step 9
Press your print/background strips in half, widthwise, to mark the centres of each strip.
Step 10
Arrange your strips with the long background strips, referring to the photo for placement.
Step 11
Sew the strips together, aligning the centres of the print/background prints with the centre seams of the long background strips. To avoid bowing, sew each strip from the centre outward, making sure to backstitch a few stitches over the centre each time. Press seams toward the background strips.
Step 12
Trim the excess from the background strips in line with the quilt top.
Quilting and finishing
Step 13
Cut the backing fabric in half across the width. Remove the selvedges and re-join the pieces with a ½in seam. Press the seam open.
Step 14
Press the quilt top and backing well. Make a quilt sandwich by placing the backing fabric right side down, the batting on top, then the quilt top centrally and right side up. Baste the layers together using your preferred method.
Step 15
Quilt as desired. Karen quilted a horizontal swirly design.
Step 16
Trim off the excess batting and backing fabric and square up the quilt.
Step 17
Join the binding strips together end-to-end using diagonal seams. Press the seams open and trim away the dog ears, then fold in half lengthwise, WST, and press.
Step 18
Sew the binding to the front of the quilt, folding a mitre at each corner, then fold it over to the back of the quilt and hand stitch in place to finish.
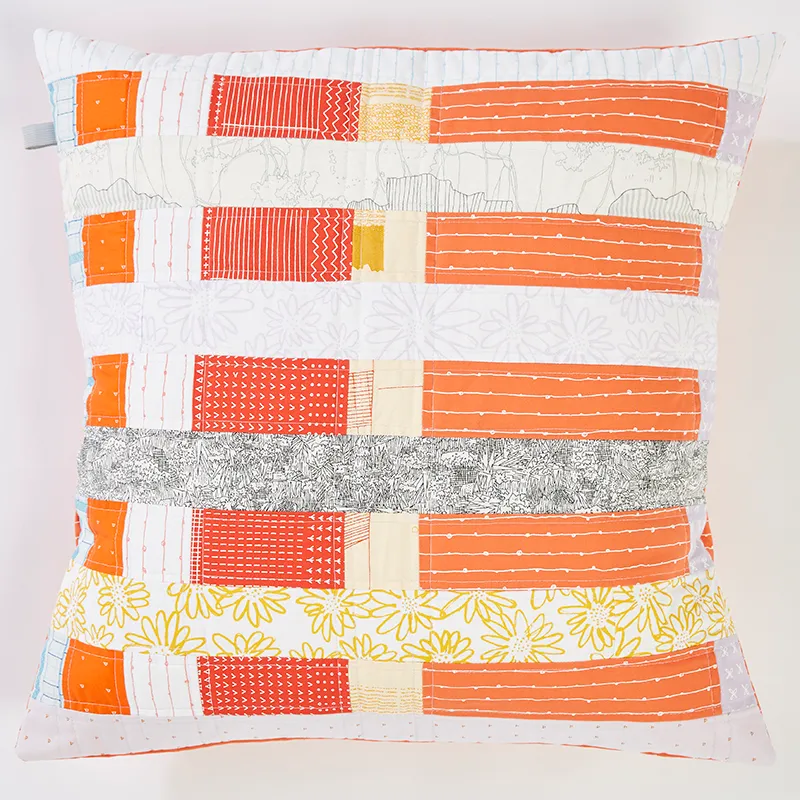
Now make the cushion to match!
If you like this design, why not sew up Karen's matching strip cushion tutorial to use up your scraps with style!