Have you tried crafting with iron-on vinyl yet? This brilliantly versatile craft material is perfect for personalising, decorating and gifting, allowing you to make a huge variety of creative projects.
The different types of craft iron-on vinyl you can buy will let you create your own t-shirt designs, personalised mugs, wall art, window decals, and a whole lot more besides! Have fun exploring the different methods and techniques you can employ to expand your craft vinyl range and repertoire.
Show off your passion for crafting with a cute iron-on vinyl T-shirt transfer that's quick and easy to make with a Cricut cutting machine!
Read on to learn about vinyl crafts, what iron-on vinyl is, and what types you should buy.
How to personalise a t-shirt using your Cricut Joy™ 2
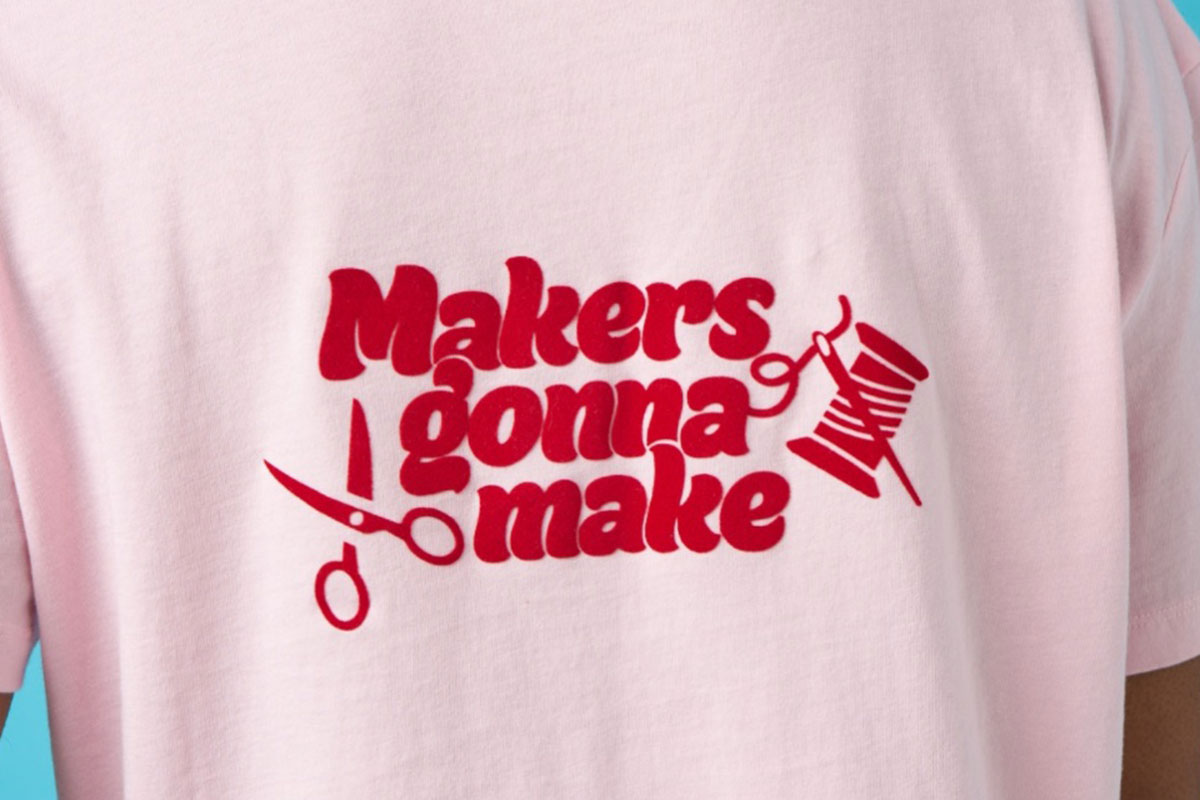
You will need
- A laptop, tablet, or phone with Cricut Design Space™ downloaded on it
- The design file (see below)
- Cricut Joy2
- Cutting mat
- Heat transfer vinyl
- Plain t-shirt
- Weeding tool
- Scissors or a guillotine
- Tape measure
- Heat press or an iron
Notes
- Download this design file template at simplysewingmag.com/templates
- We used flocked vinyl for our t-shirt but there are lots of Cricut smart materials that don’t need a mat and can be loaded straight into the machine – check out cricut.com for more options.
A Cricut is a smart cutting machine that uses state of the art technology that allows you to precisely cut, draw, score, and engrave various materials to create personalised crafts, homeware, and apparel. Cricut offers a range of smart cutting machines that help you fulfil your DIY dreams. We used a Cricut Joy 2 for this project.
Every Cricut machine works with a variety of materials and cuts each piece of your design with intricacy and precision. From personalising t-shirts to decorating your home, you'll be amazed by what's possible.
Follow the steps below to make your own vinyl t-shirt design or watch our video tutorial:
Tweaking the design
Step one
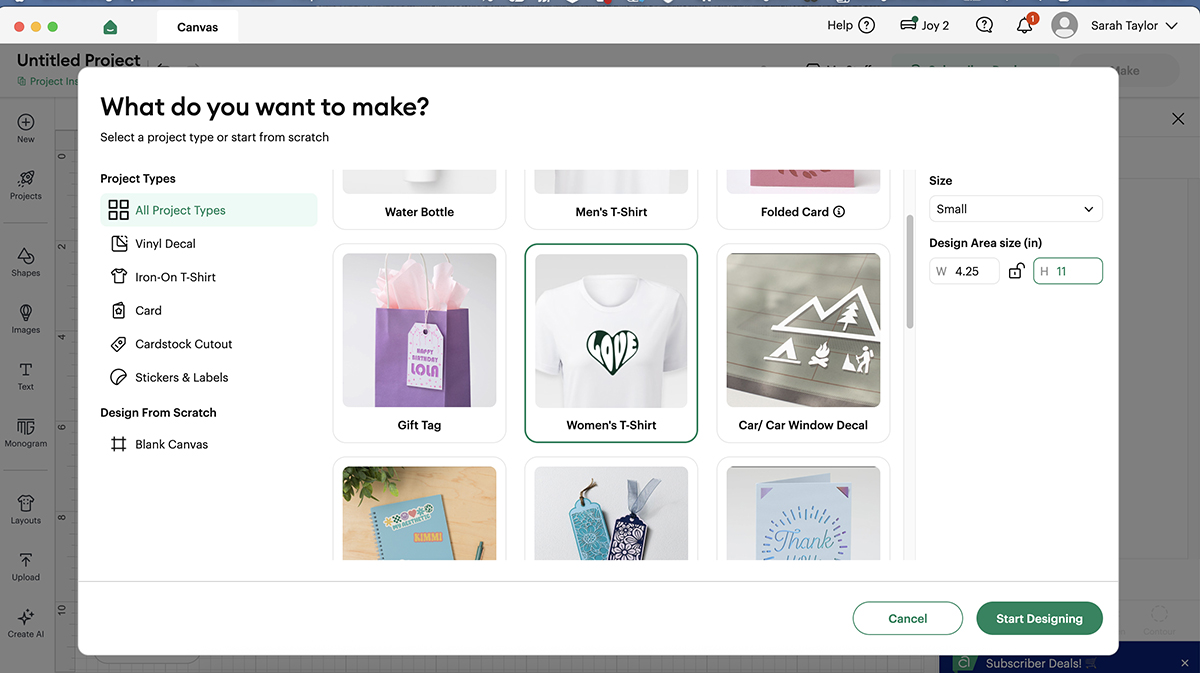
All Cricut machines work using the Cricut Design Space App which links to the machine to help your creative ideas come to life.
To start your project, simply open up Design Space, click on the '+' button to create a new project. Choose what you would like to make – we chose a women’s t-shirt and changed the canvas to the cutting size allowed by the Cricut Joy 2, which is 4.5 inches x 11.5 inches (other Cricut machines allow different sizes, so check your machine).
Step two
Load the design file into Cricut Design Space – this will let us customise it and get it ready to cut out. Design Space will then guide you through various prompts, thanks to the step-by-step guided flows installed in the app.
Step three
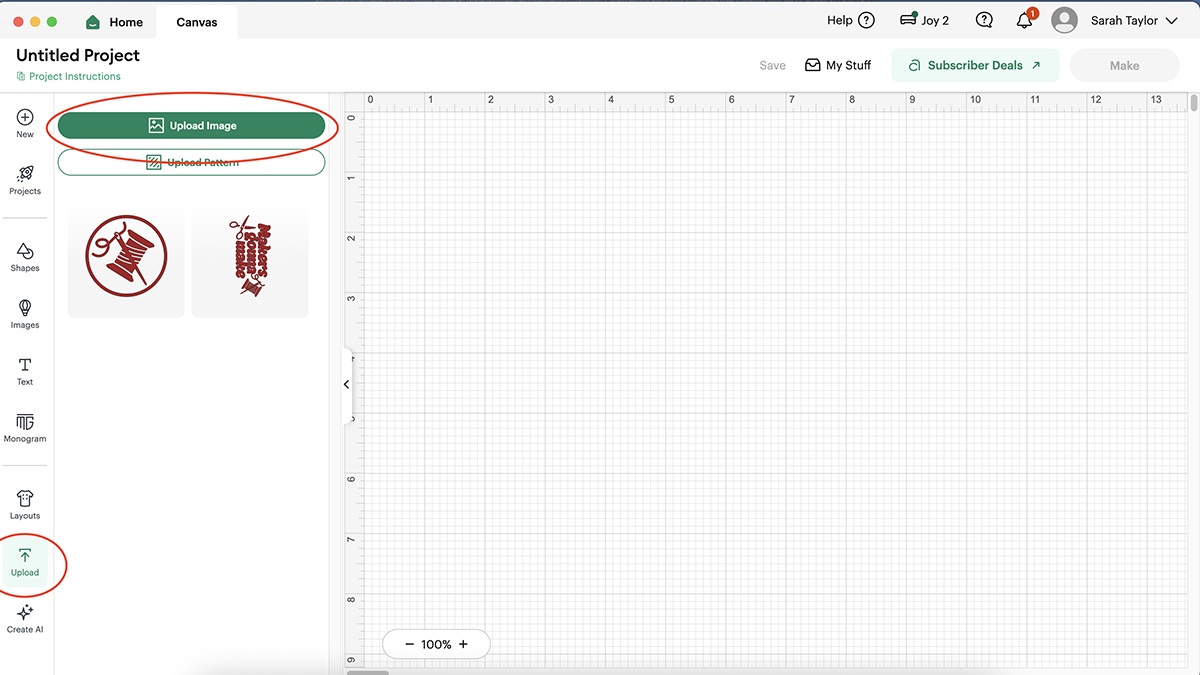
Click on 'Upload Image' and locate your downloaded file.
Step four
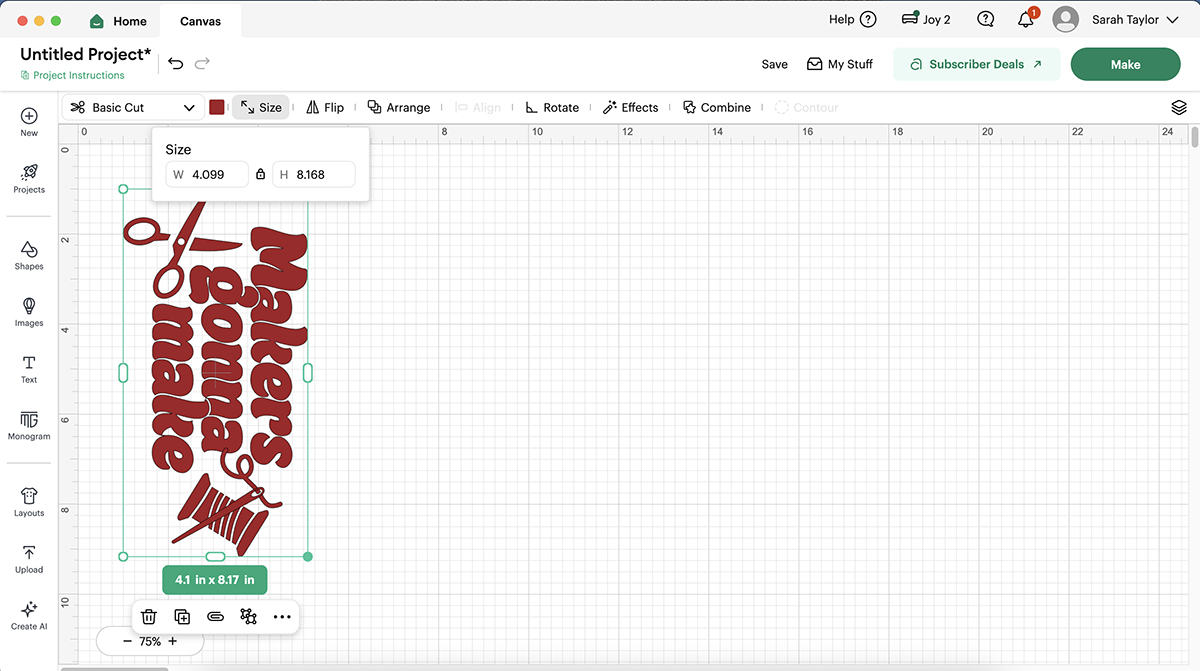
Drag the corner of the image to resize if needed, or type in a specific size at the top.
Cutting the design
Step one
Click on the design to highlight it and then click on the paperclip to attach all the elements together and then click on 'Make'.
Step two
Design Space will then guide you through various prompts.
Step three
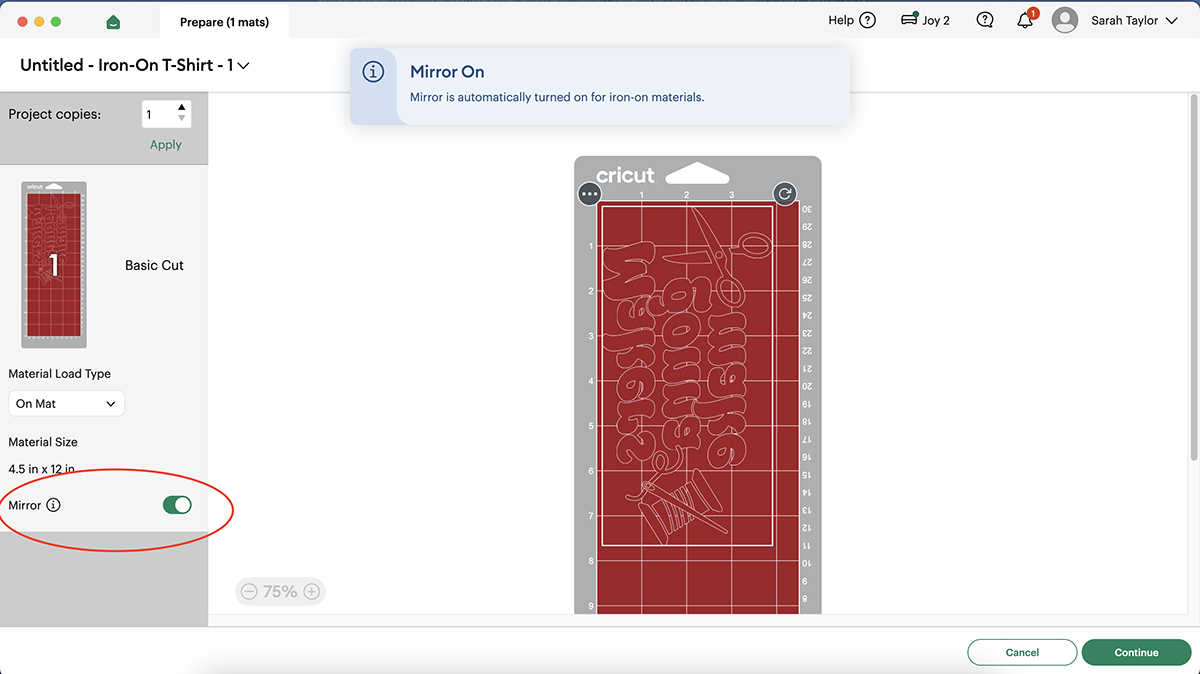
For iron-on vinyl, we need to make sure that the design is mirrored.
Step four
Choose the correct material – we used red flock vinyl for our t-shirt.
Step five
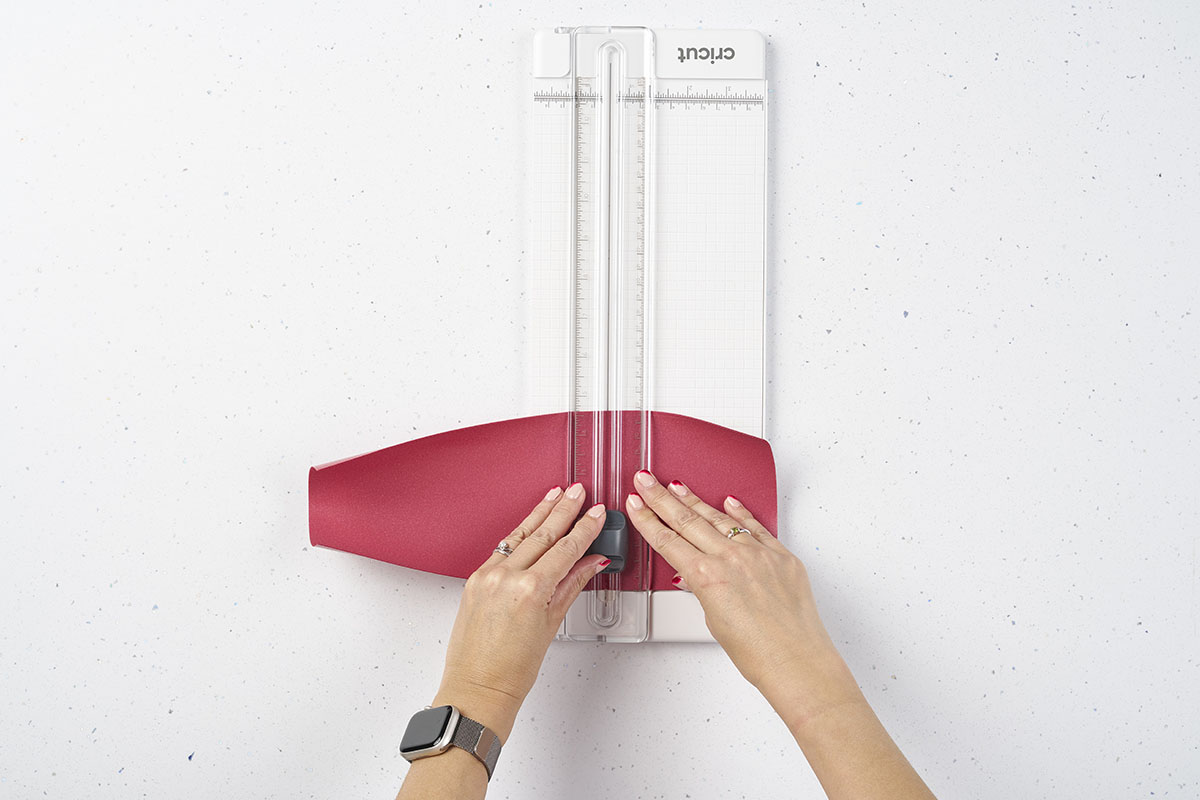
Cut the vinyl down to the correct size for your mat using a guillotine or scissors.
Step six
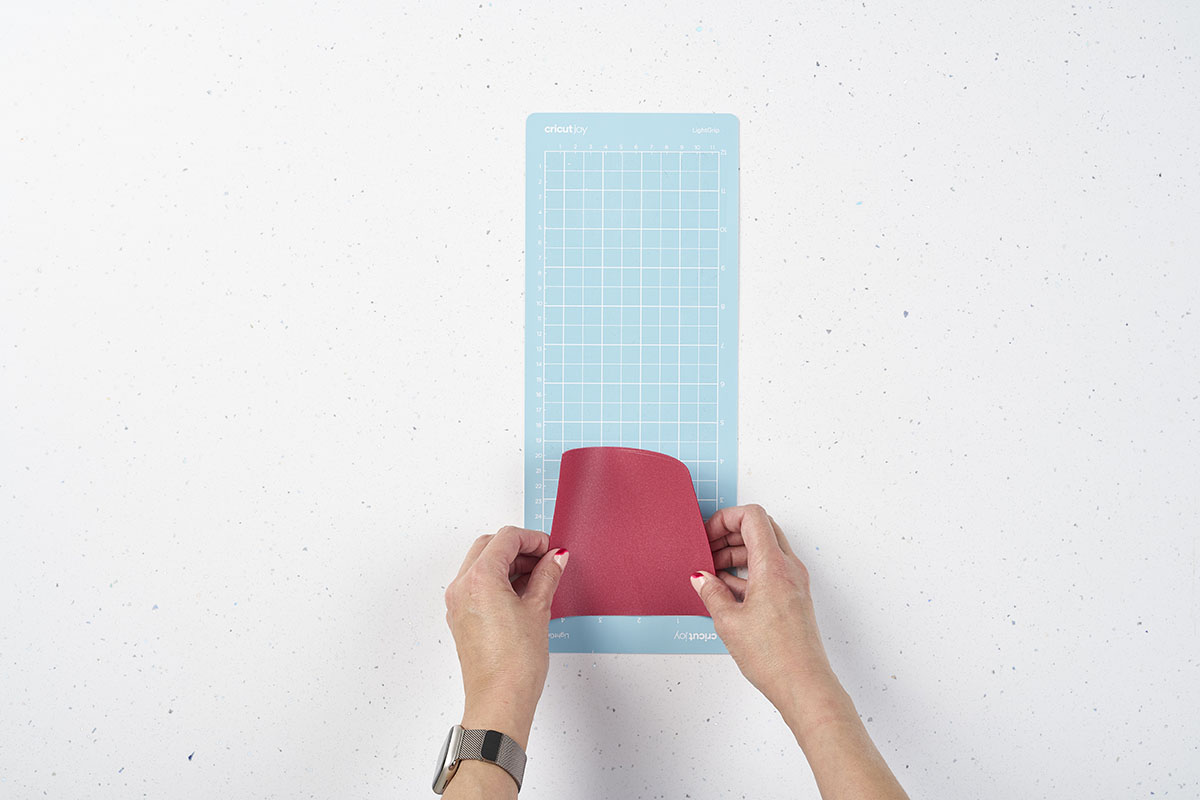
Place the vinyl shiny-side down on the mat. This is a very important step!
Step seven
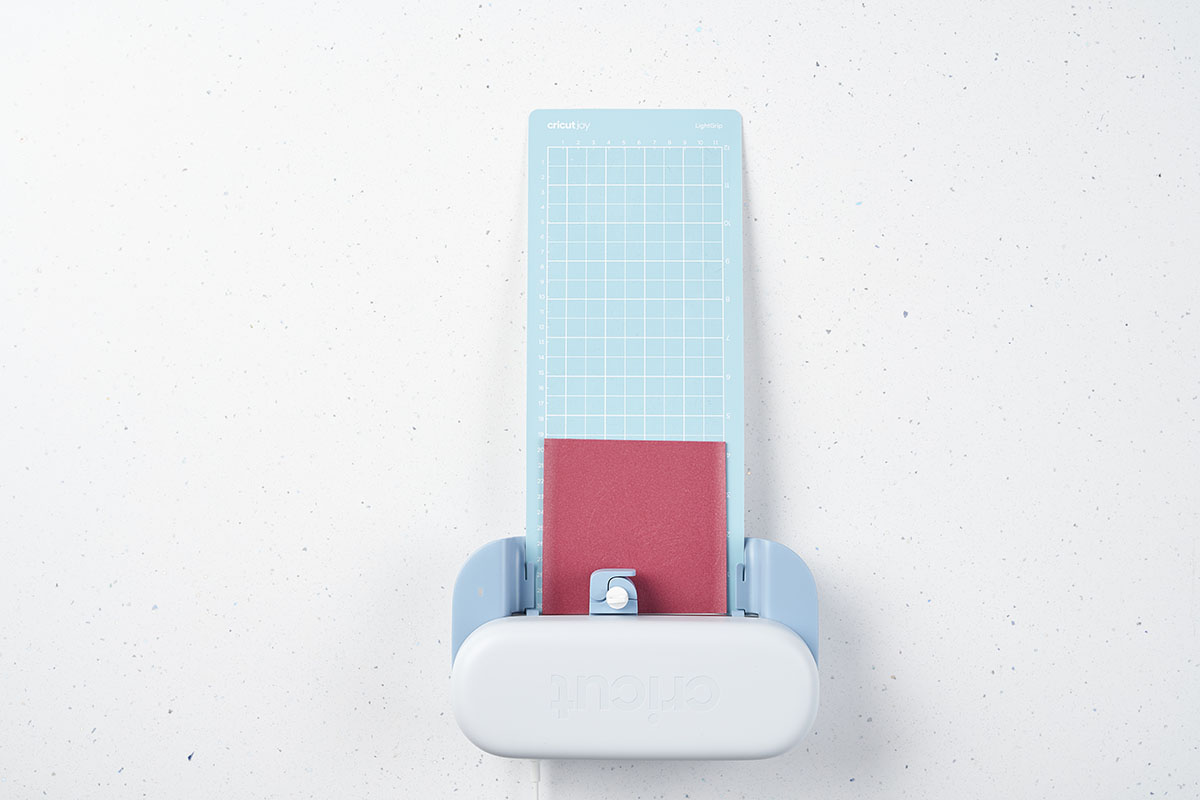
Load the mat into the machine and it will begin cutting.
Step eight
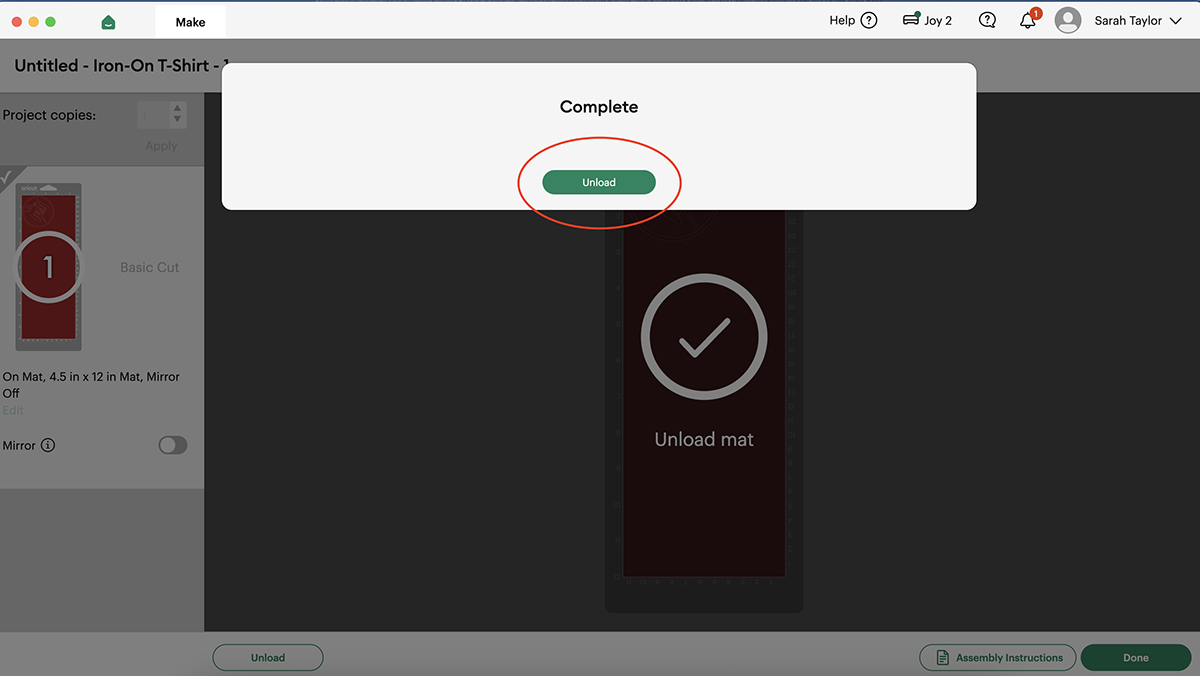
Once finished, hit 'Unload' on the screen.
Weeding the design
Step one
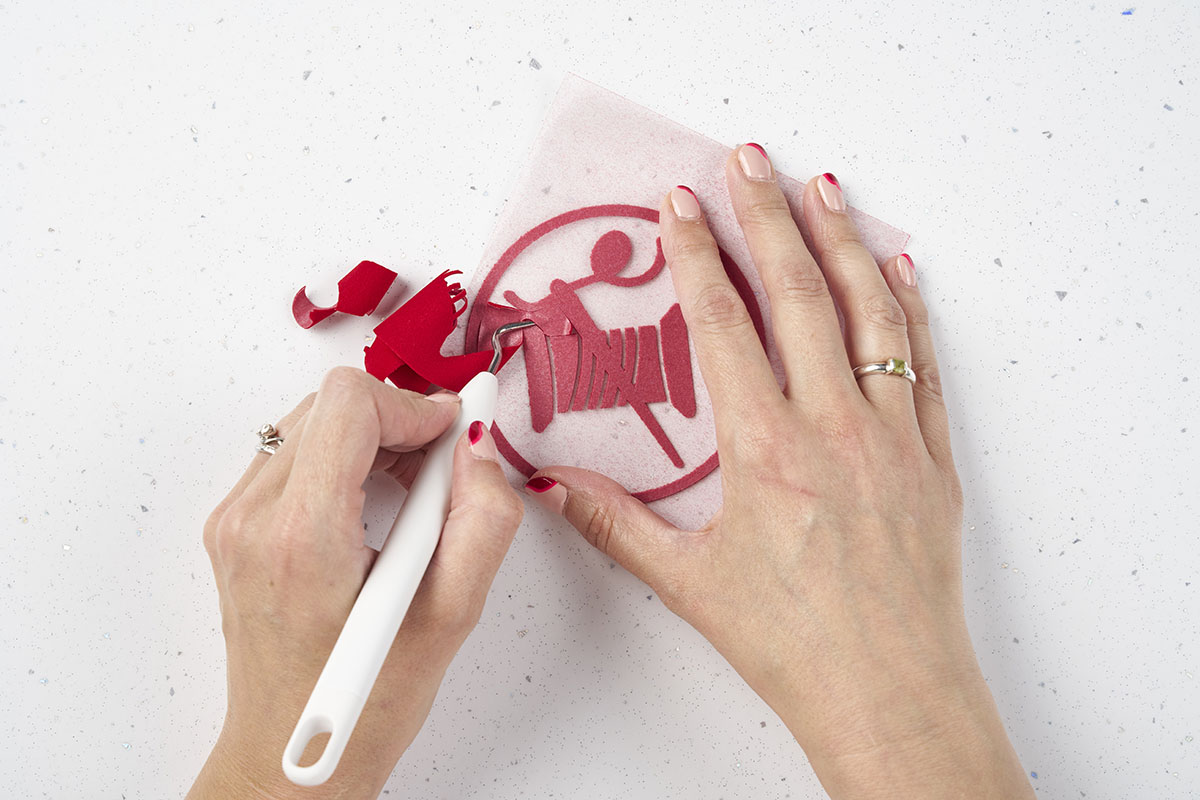
Peel the vinyl away from the mat and weed out the design using a weeding tool.
TOP TIP: Have the image up on screen or printed out in front of you so that you can refer to it and make sure you are weeding out the correct pieces.
Using the easy press
Cricut Design Space has a helpful heat guide so you can find out the exact temperature and time needed for your project.
Step one
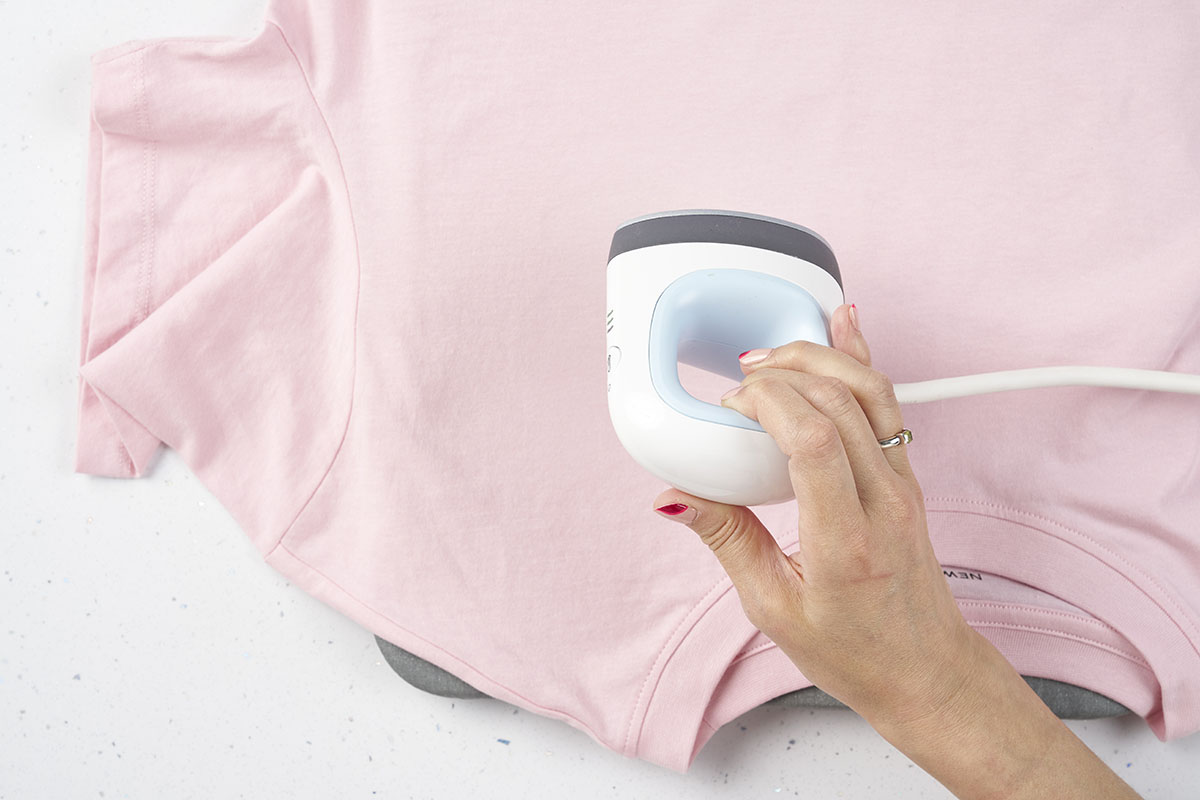
If using a heat press, protect your surface with a heat-proof mat.
Step two
Pre-heat the t-shirt for 5 seconds to make sure it is completely flat and to remove any moisture. This will help the vinyl adhere to the fabric.
Step three
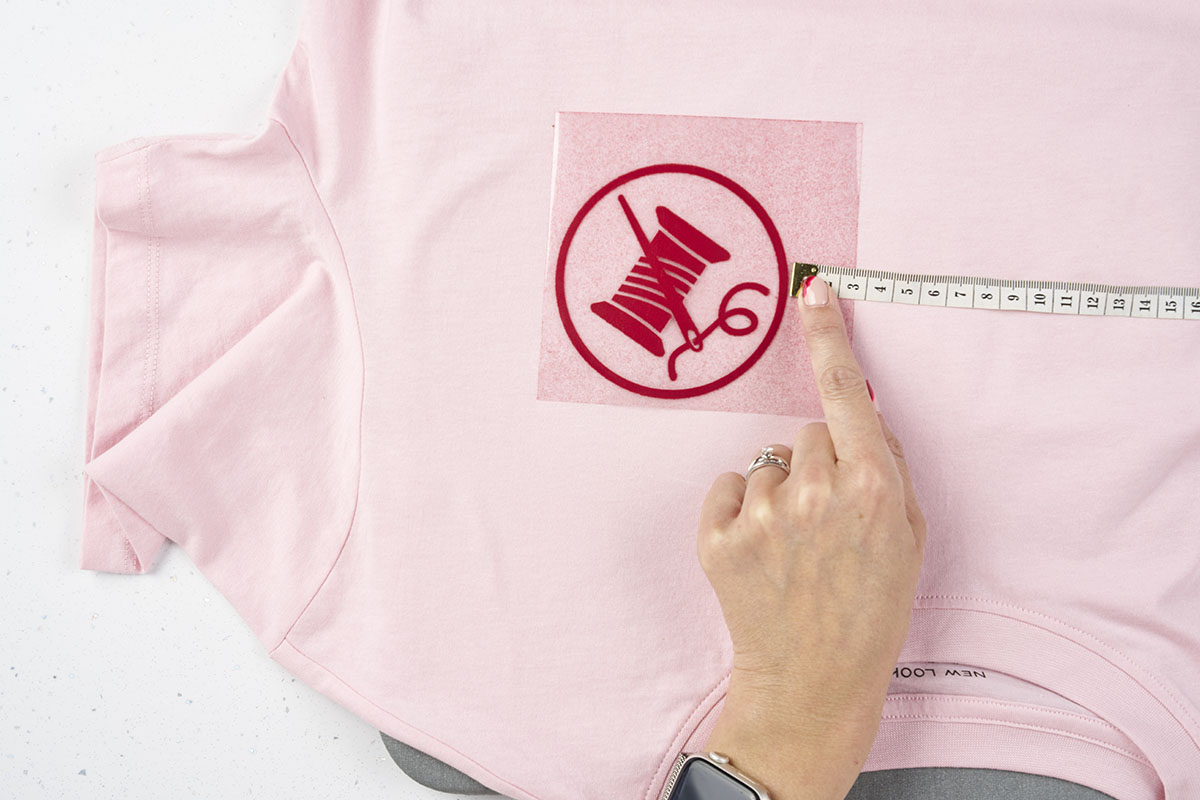
Place the vinyl on of your t-shirt and make sure the design is exactly where you want it – use a tape measure to help.
Step four
Give everything a good press with the heat press, as per the instructions for the fabric and vinyl you are using.
Step five
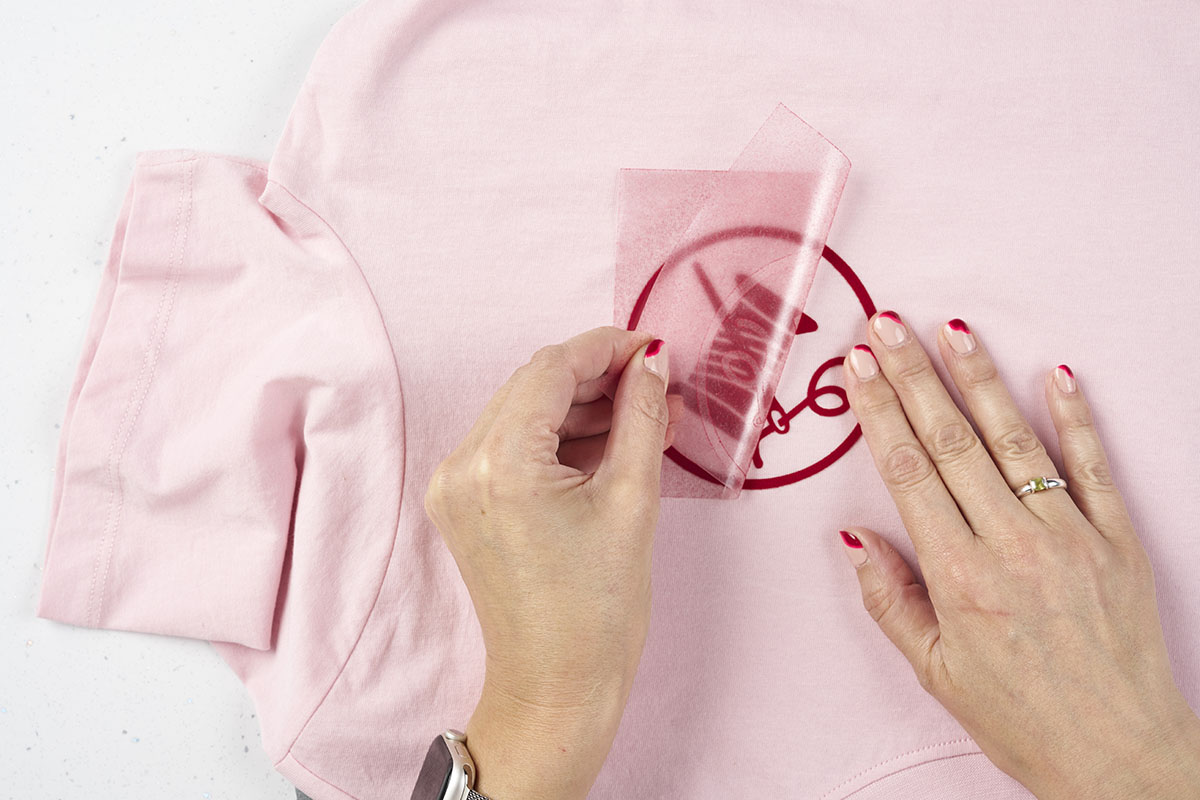
Follow the instructions for peeling the carrier sheet off – it may need removing when it is still warm, or once cooled completely.
Step six
If any areas lift, replace the liner and press again.
TIP: There are lots of other designs available in Cricut Design Space!
Project by Sarah Taylor. Illustrations Illustration: Beth Giovanelli
Different types of craft vinyl
Expand the range of vinyl craft projects you make by getting to grips with the different craft vinyls available and the different properties they can bring to enhance your creative crafting.
Self-adhesive craft vinyl
If you grew up in the 70s, you will have come to love sticky-back plastic, which featured as part of many brilliant Blue Peter makes. Self-adhesive craft vinyl is sticky-back plastic. It is a thin plastic layer that comes with its own adhesive on the back that attaches the plastic layer to anything that you fancy! Maybe you want to add a decorative name to your child's lunchbox, or embellish their bike with some butterflies.
Self-adhesive craft vinyl is the simplest way to style these flourishes. Self-adhesive craft vinyl is available in different finishes, including metallic, glitter and pearl, and it can be cut with a digital cutting machine or by hand with scissors or a craft knife. You can also cut with a die and a die-cutting machine, but you won't get such a precise cut as with a digital cutting machine.
Cricut iron-on vinyl
Cricut iron-on vinyl is available in a variety of colours and sizes, so there's a vinyl to suit every project. There are metallic versions to add sparkle to any project, flocked vinyl for a soft finish and even glow in the dark vinyl! Use it to make personalised t-shirts, bespoke accessories and much more.
Heat transfer craft vinyl aka iron-on craft vinyl is not actually vinyl at all, but usually polyurethane. This is the material you need if you want to iron a design onto a t-shirt or other fabric item. You cut the shapes you need, either by hand, with a die or with an electronic cutting machine, then use an iron to transfer the vinyl onto the fabric, where it will bond and stay in place even after washing.
Different heat transfer craft vinyls have different properties depending on how you plan to use them; choose from a wide range of different finishes if you are working with most fabrics, or look for flexible heat transfer craft vinyl for clothing with a big stretch in it like lycra sportswear. Different heat transfer craft vinyls have different heat and time setting for ironing, so check the packaging to see what is recommended for the finish you have chosen.
Browse the Cricut iron-on vinyl range to find the right match for your next make.
Cricut window cling vinyl
Window film craft vinyl is your choice if you are looking to apply any decoration on to glass – it isn't just for windows! But it is a great material for window decals or adding fancy flourishes to mirrors that will stick to these surfaces, but be easy to remove if you change your mind at a later date.
If you have glossy walls, it's a good choice for making your own giant wall stickers, too. Get it in either transparent or non-transparent finishes, depending on the look you want to create.
Vinyl craft accessories
You have seen now that you don't need loads of fancy tools to start discovering the vinyl craft projects you can make. But different tools and accessories will influence the style and detail of the vinyl craft projects you can complete. Here are some of the vinyl craft accessories you may want to bring into your vinyl crafting to expand your options.
Craft knife: You can cut craft vinyl with scissors, but you'll get a much smoother finish if you use a craft knife instead.
Cutting mat: Protect any surface you are using your craft knife on with a cutting mat to make sure you don't accidentally slice through your tablecloth while you are cutting your craft vinyl.
Electronic cutting machine: These clever machines let you digitise your cutting file and will do the blade-work for you. Cricut cutting machines are versatile and easy to use with a wide selection of different tools allowing you to cut a diverse range of media from paper and card, adhesive vinyl and heat transfer materials and so much more.
Craft dies and die-cutting machine: Beloved by papercrafters but a very useful tool for vinyl craft enthusiasts, you can combine a die-cutting machine with craft dies to cut more intricate shapes than you could cut by hand, but you'll need a die for each different shape you want to cut. Die cutters may not be ideal for some types of heat transfer vinyl.
Transfer tape: This is the ultimate material for positioning your vinyl cuts together when moving them to a new home. This clear adhesive sheet keeps all the parts in place while you transition them to where you want them to go.
Application tool: Think of this as being like a big plastic squeegee that lets you press your craft vinyl down securely and work out any air bubbles that would stop it from sticking as it should.
Make your own personalised outfits with Cricut
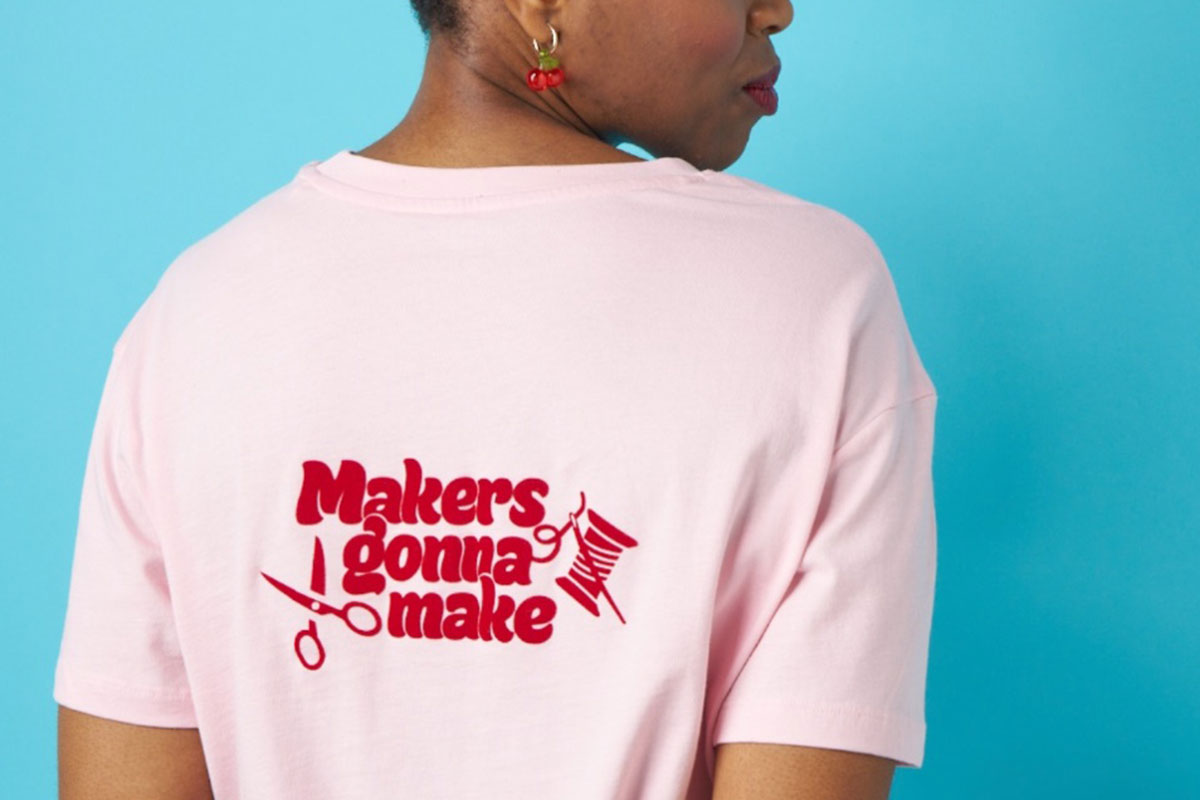
Customising your clothes and accessories couldn't be easier when you use a Cricut machine.
Not sure which to choose? Find out how to choose the best Cricut machine for you with our helpful guide, then head to Cricut.com to buy your perfect machine and stock up on supplies.