
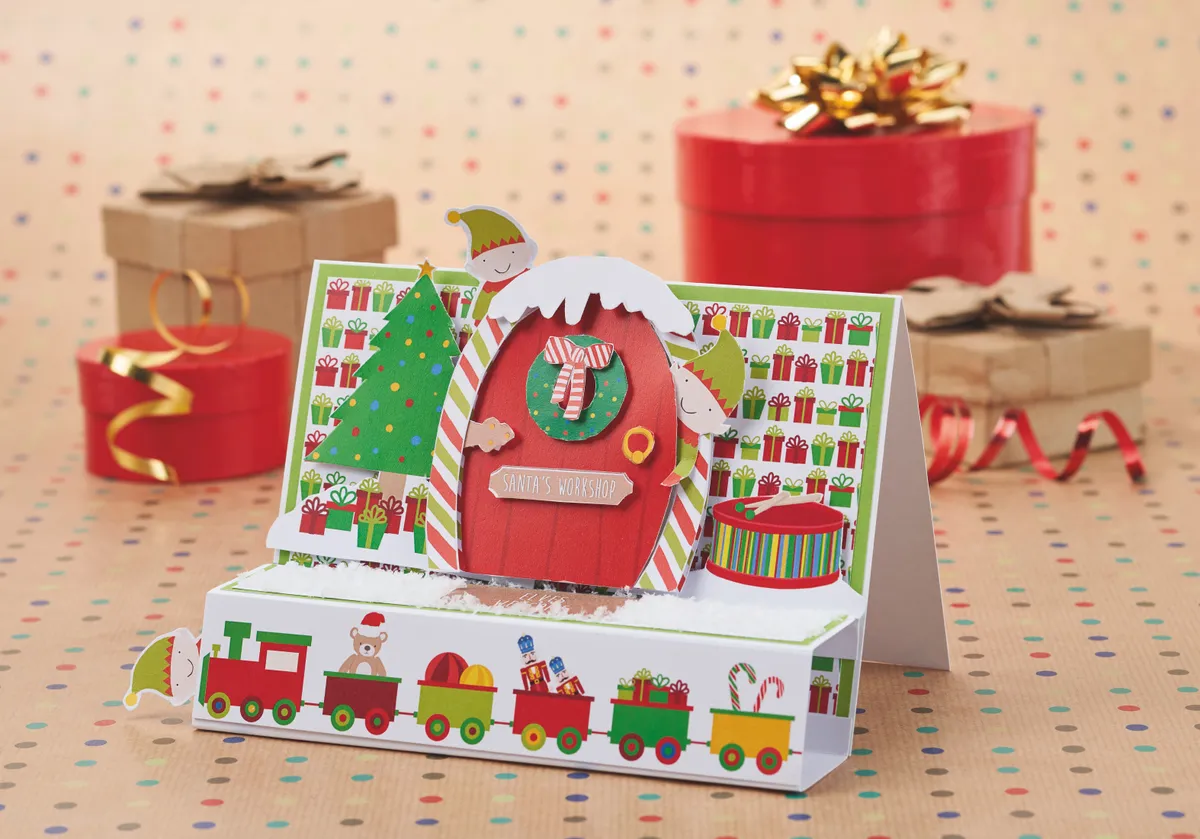
Download our free Santa's workshop printables and learn how to make a box ledge card following our step-by-step tutorial below.
The elves look super cute when peeping out from behind the different card elements! This is a deceptively easy card that anyone can learn, and once you've got the basic card design down, why not personalise it using different papers as a fun card to make for any occasion.
If you like these free papers, check out our other free patterned papers, there are lots to choose from and there are lots of different festive themes. We love these Nativity characters, or for non-traditional free papers, how about these free sloth downloads for making your own sloth Christmas cards? Or, for more general card making, let us show you how to make cards.
We love seeing what you make with our free printable papers, so don’t forget to share your cards and papercraft projects with us on Facebook and Twitter, too!
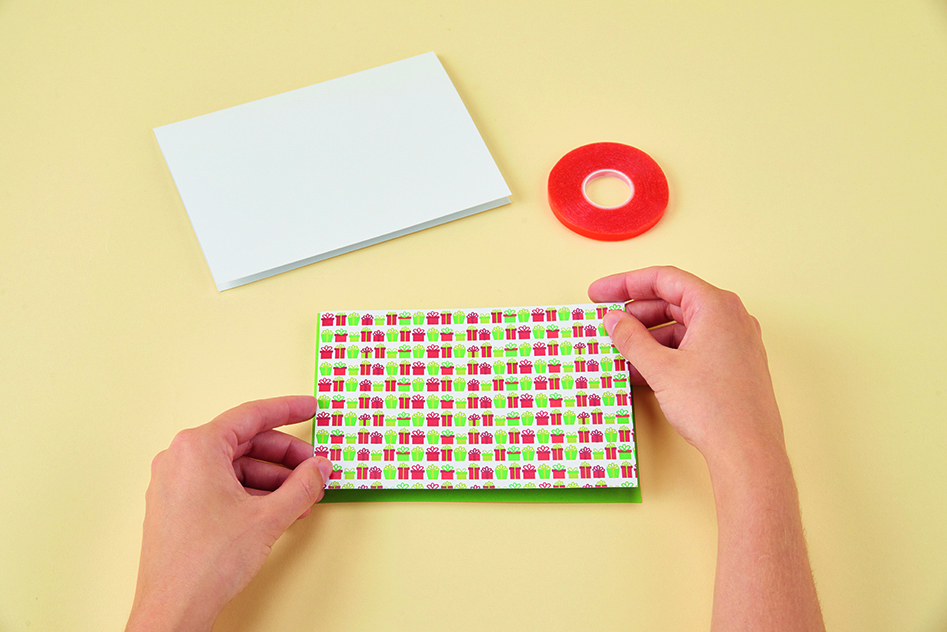 First, download your
 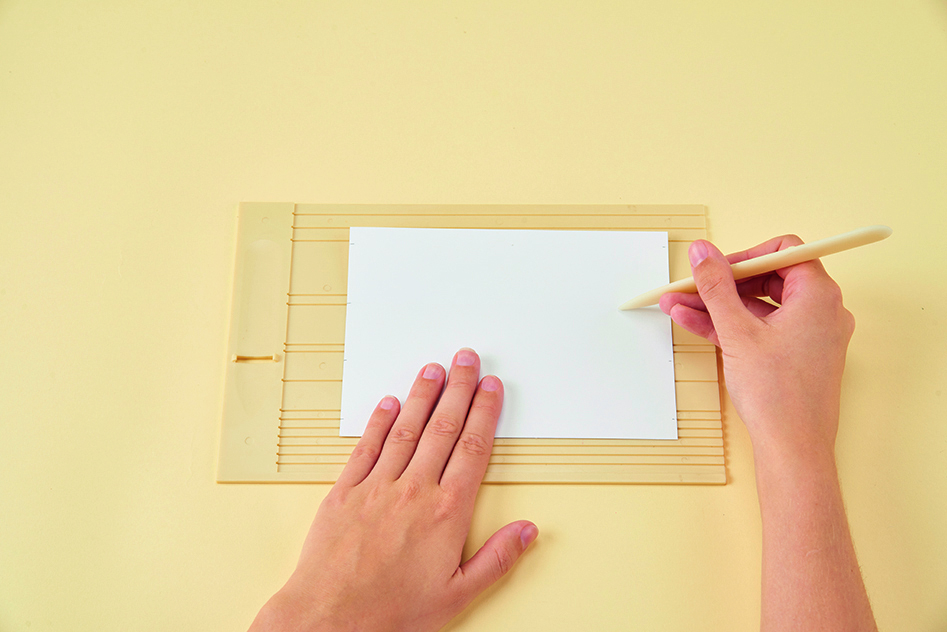 Trim a piece of white card to 12.5 x 17cm then score across it at 1cm, 4.5cm, 8cm and 11.5cm down from the top edge. Run double-sided tape along the top and bottom 1cm-wide scored sections.
 Trim two pieces of green card to 3 x 16.5cm then attach them either side of the central section on the card from step 2. Affix a 3.5 x 17cm piece of train-patterned paper to the central section.
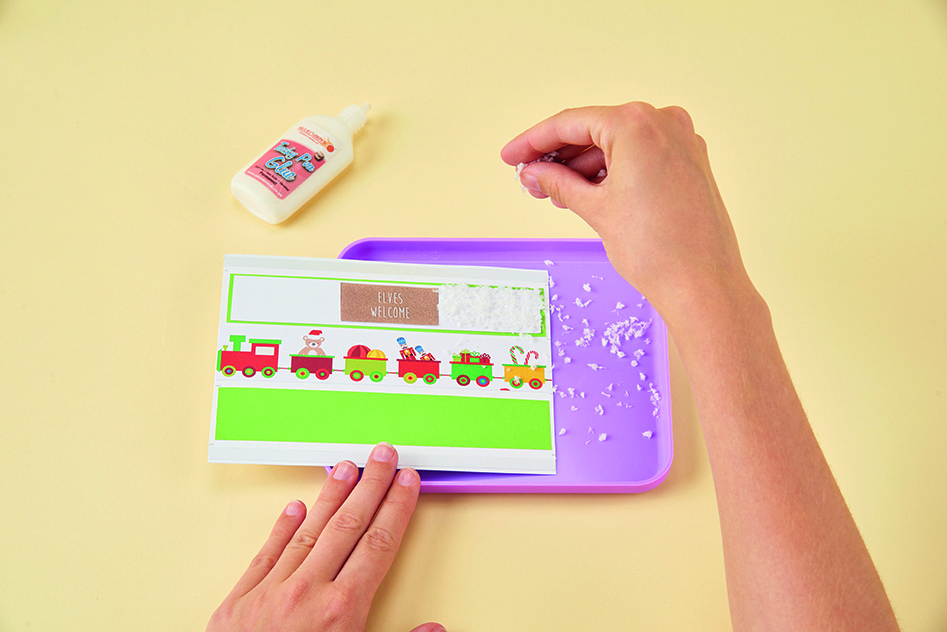 Trim white card to 2.5 x 16cm and stick a doormat topper in the middle. Glue faux snow (or white glitter!) over the rest of the card strip, leave it to dry then glue the strip to the top green card panel from step 3.
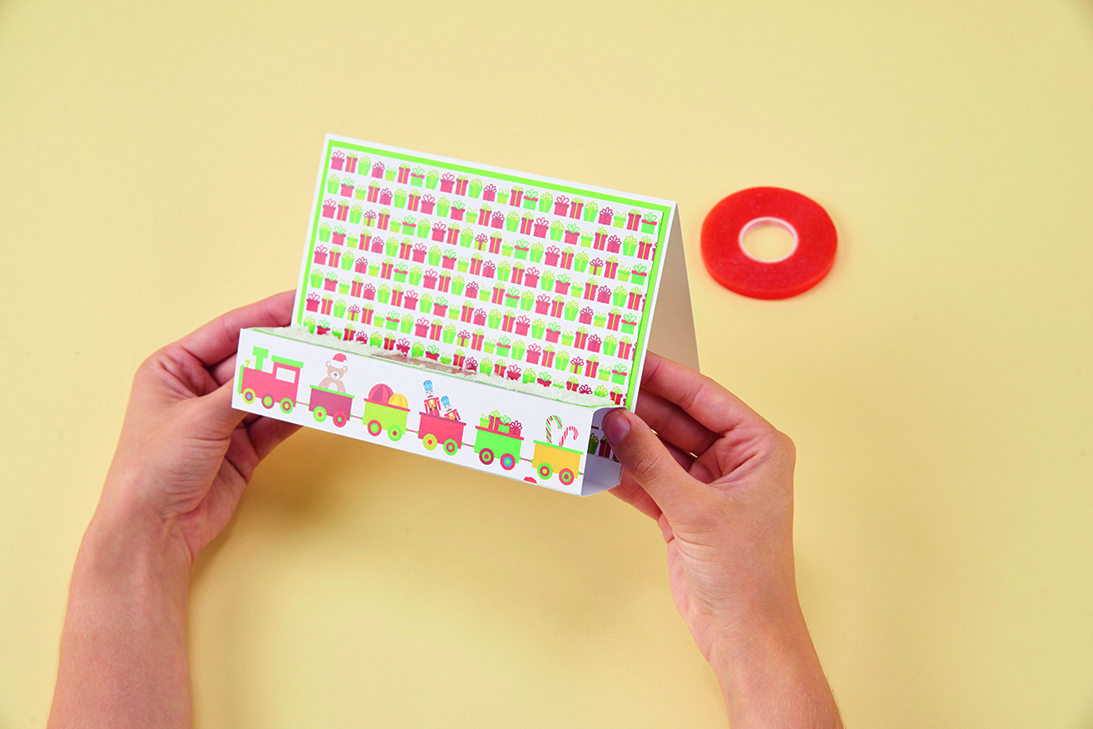 Once dry, fold the panel from step 4 into a box shape and attach it to the bottom of the card front. Fussy cut a tree and a drum, leaving some white along the bottom edge, to look like snow.
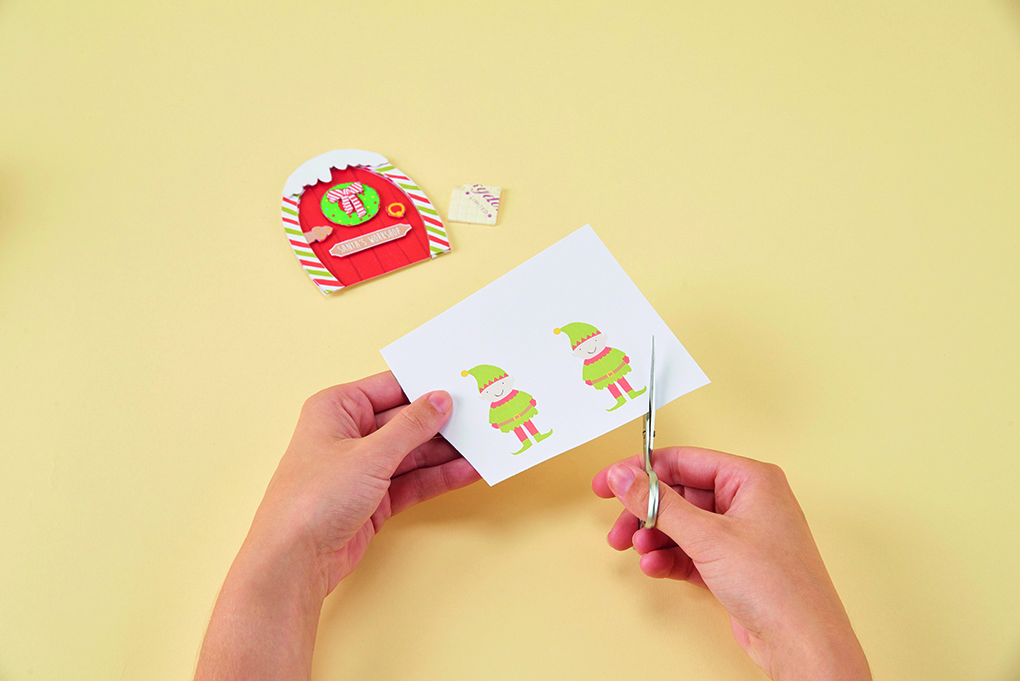 Cut out the Santa’s workshop door elements then use sticky foam pads to layer them. Trim along the right-hand side of the door, so it opens slightly, then add an elf behind it.
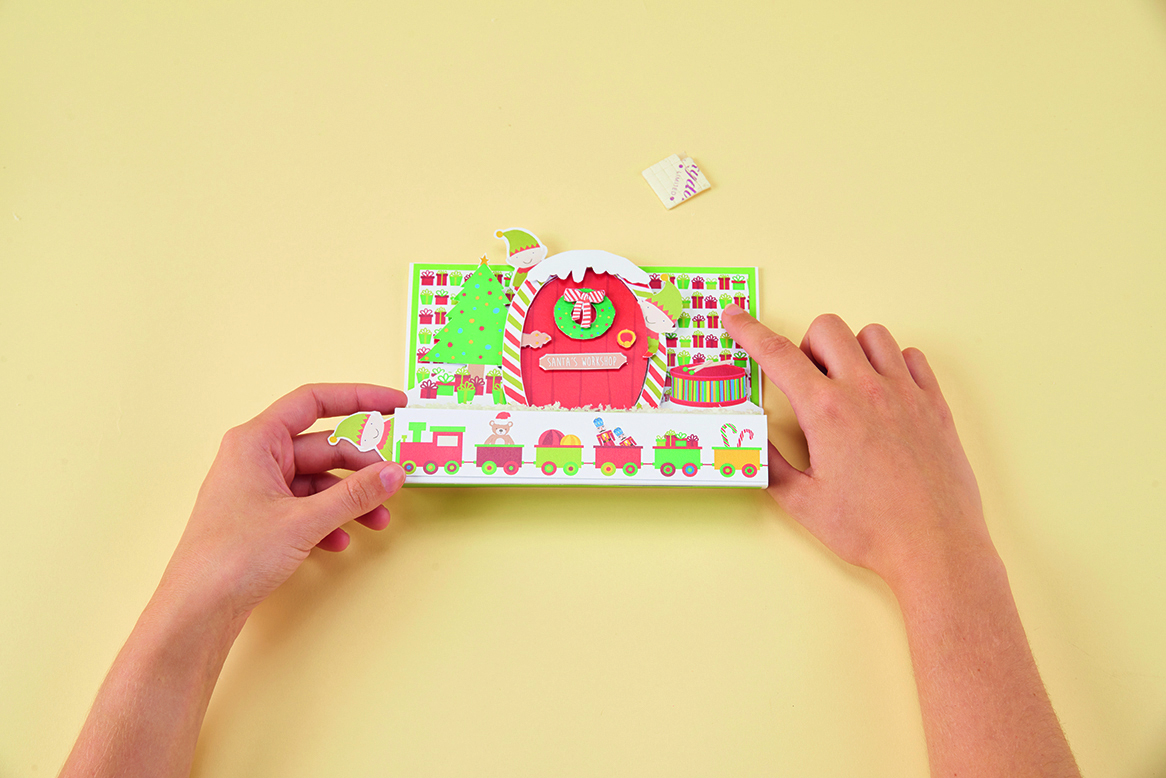 Use sticky foam pads to attach the door, tree and drum to the card front. Fussy cut two more elves then attach one behind the top of the door and one inside the front box panel for a cheeky finish.
