All products were chosen independently by our editorial team. This review contains affiliate links and we may receive a commission for purchases made. Please read our affiliates FAQ page to find out more.

How to tie dye a shirt – step by step guide for beginners

Get ready for a colour explosion! Discover how to tie dye t-shirts, clothes and homewares with our easy photo and video tutorial.

Try our magazines – get 6 issues from just £9.99!

Published: March 7, 2023 at 11:00 am

Tie dye has seen a huge surge in popularity in recent months, and it's easy to see why it's the trend that always comes back for more. Any of us who lived through the 1990s, 1960s – or both! – will remember the allure of a tie-dye t-shirt. Those rainbow colours, those psychedelic patterns… not to mention the amazing uniqueness of any tie-dye creation. Fast-forward another 30 years and tie-dye is back with a bang!

If you're a complete newbie to tie dye we'd recommend heading over to our complete guide to tie dye. Our guide covers the origins, styles and techniques. Once you've browsed our guide you'll be ready to follow our step-by-step tutorial below.

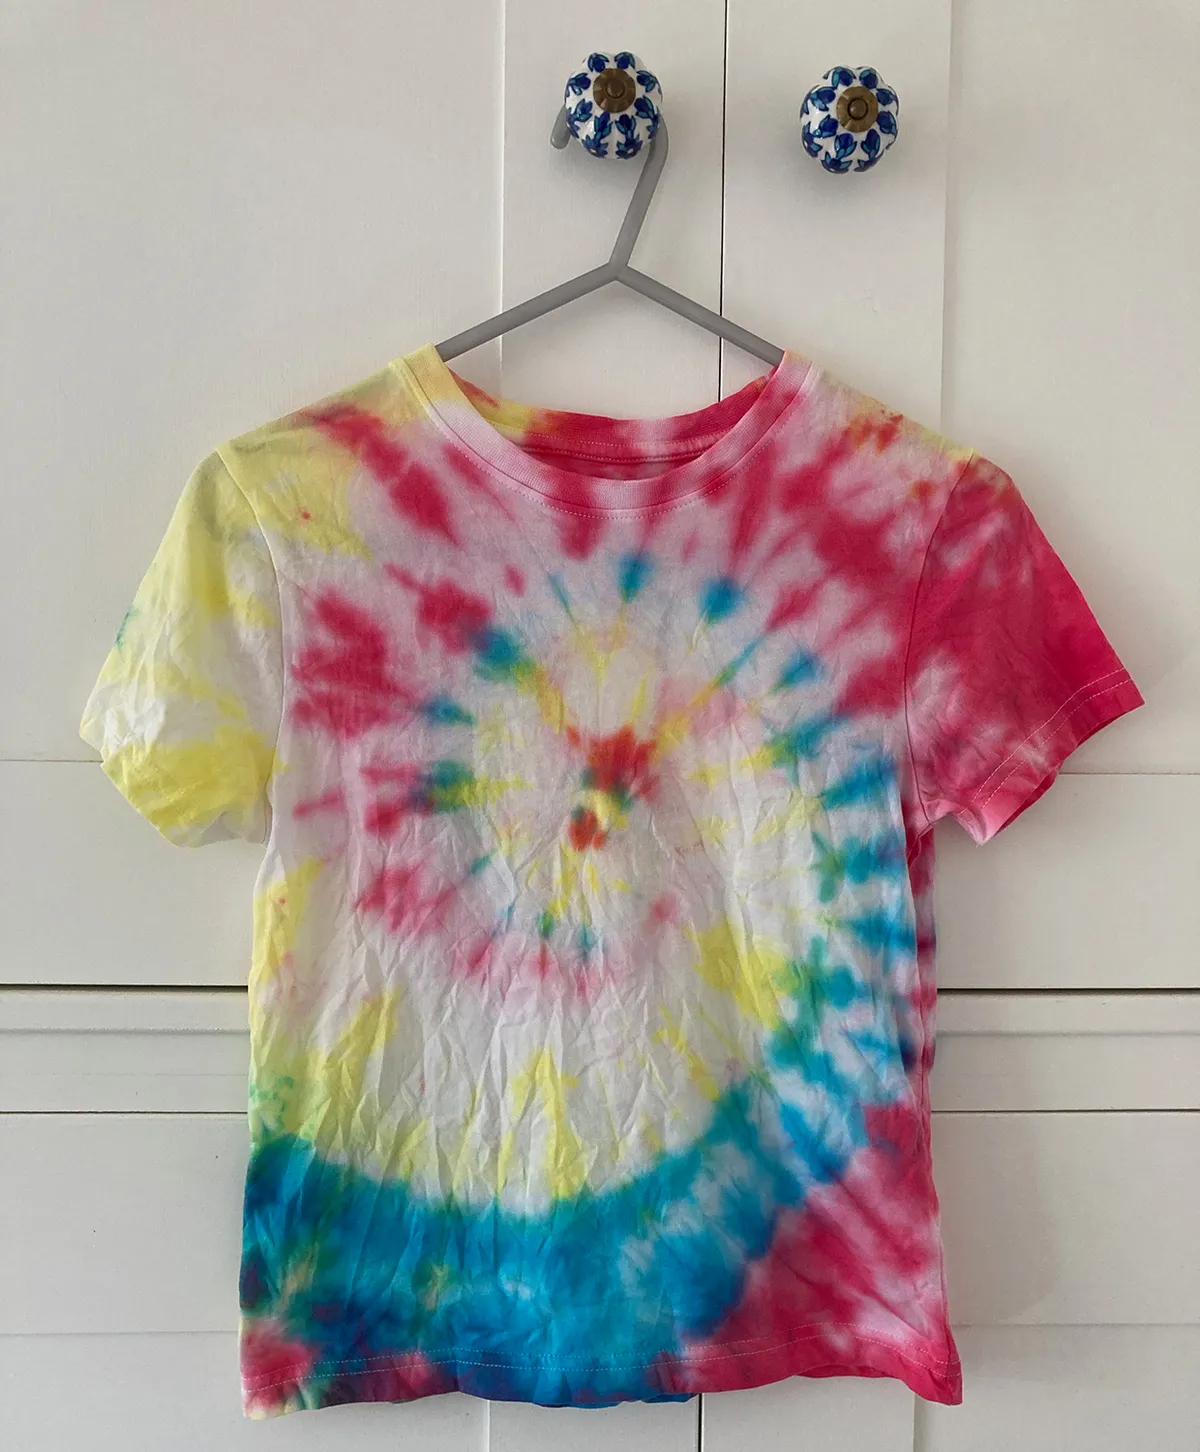
We're going to show you how to tie dye t-shirts (or other fabric items) using a classic swirl pattern – taking them from boring to beautiful using Dylon fabric dyes. These are readily available and come in a fantastic range of vibrant colours, giving you the chance to really experiment with this cool process and create something original.

Once you’ve mastered the basics on a T-shirt, these techniques can also be used to dye tote bags, baseball caps, hoodies, cushion covers, bedding… anything that’s 100% cotton works brilliantly. We all know how satisfying it is to repurpose and upcycle, too, so rather than buying new, why not have a rummage through your drawers and look for white cotton items that have seen better days? Tie-dye is great for covering up those pesky little stains! We've even created an article which includes over 20 things to tie dye to get you excited.

We’ve got a couple of words of warning before you crack on with tie-dying. Firstly, protect your surfaces and yourself. The dyes are can permanently stain, so make sure you’re well prepped for accidental spills and splatters. And secondly, be aware that you need the patience of a saint while waiting for the dyes to process, but the results will be totally worth it!

If you're in the mood to try this beautiful craft, you might also like our guide to the best tie dye kits.

In this post we will show you how to tie dye a t-shirt. You can use these methods to tie dye sheets, pillow cases, cushion covers or clothes.

Read on for our full step by step guide to how to tie dye.

What do you need to tie die?

How to die dye: step by step

You will need:

  • Cotton t-shirt
  • Rubber gloves
  • Elastic bands
  • Dye
  • Salt
  • Plastic squeeze bottle
  • Measuring jug
  • Paper towels (and old tea towels)
  • Aprron (to protect your clothes)

Step 1

First of all, protect your table with a plastic tablecloth (or tape down a large bin bag if you don’t have one) and set out all your supplies. It’s a good idea to have some paper towels or old tea towels handy in case you spill any dye, and to set up somewhere well away from soft furnishings or anything you don’t want stained.
What do you need to tie dye?

Step 2

If using an old t-shirt, make sure it is washed first, but leave it damp. For a new t-shirt, soak your t-shirt in lukewarm water, then squeeze out as much excess water as you can. Be sure that the water is warm and not hot ­–warm water helps your dyes to spread more effectively.
How to tye dye a tshirt step 1 soaking

Step 3

Lay your damp t-shirt flat on the table. Now, pinch the fabric in the middle of the t-shirt between your thumb and fingers, and start to twist the fabric round to create a spiral effect.

How to tie dye a tshirt step 3 twistKeep twisting until you have spiralled the whole t-shirt into a tight ball.
How to tie dye a tshirt step 3 twist more

Step 4

Take your elastic bands and wrap them around the spiralled t-shirt. Overlap them, using at least three to create different sections.

How to tie dye a tshirt step 3 4 bands

Pop your bound t-shirt into a plastic bowl and leave it to one side. The next step is preparing the dyes, so put your bowl somewhere it cannot be accidentally splashed.

Step 5

­­Put on your gloves to prepare the dyes. Measure 500ml of warm water into the measuring jug, then add the contents of one pack of dye, plus 250g of salt. Stir the mixture well. This quantity of dye will easily tie-dye two or three t-shirts if used with the other colours, so you may want to plan to do a few projects at a time. Alternatively, if you’re only tie-dying one t-shirt, we recommend halving the quantities of dye, water and salt, saving the remaining dye for another time.
How to tie dye a tshirt step 5 add dye

Step 6

Once your dye is completely mixed, carefully pour it into one of your plastic squirty bottles.

How to tie dye a tshirt step 6 pourWash out the measuring jug and repeat the process for each further colour.
How to tie dye a tshirt step 5 dyes

Step 7

Now it’s time to add the dye! Lay your damp, bound t-shirt onto a couple of pieces of kitchen paper.

How to tie dye a tshirt step 7 dyes

Using your three squirt bottles, apply the different colour dyes to the different sections of the t-shirt, with the nozzle close to the t-shirt for a nice direct application and no splashes.

How to tie dye a tshirt step 7 colour 4

We started with three segments in pink, followed by three in yellow and two in blue. Make sure that every bit of visible white fabric is saturated with the dye.

Step 8

Once the top half of the t-shirt is covered in dye, lay another piece of kitchen paper on top of your bundle and carefully flip it over. Now cover this side with dye in the same way, making sure that the colours on top are mirrored below.
How to tie dye a tshirt step 8

Step 9

Once it is completely covered, put your t-shirt into a plastic bag and leave the dyes to set overnight. Try to leave it for 24 hours if possible – the longer you leave it, the brighter the colours will be! You can speed up the process by leaving the bag in a warm place, such as an airing cupboard.
How to tie dye a tshirt step 9

Step 10

Put your gloves back on to remove the t-shirt from the bag, and rinse it under cold water to remove any excess dye. It’s a good idea to do this in the bath to avoid splashing your clothes. When the water starts to run clear, remove the elastic bands and rinse some more. Now wash the t-shirt straightaway in your washing machine on a cool cycle, without any detergent.
If you want to keep your tie dye vivid and bright then make sure you head over to our how to wash tie dye tutorial.

Step 11

Hang your t-shirt up to dry, making sure it’s not in direct sunlight. Once it is dry, iron on the reverse.
How to tie dye tshirts main

Upcycle your wardrobe with tie dye

Give your wardrobe a colourful makeover with tie dye. Anything you can think of you can tie dye. It’s a great way to upcycle clothing and homewares and give them a new lease of life.

There’s endless tie dye designs for you to experiment with. The only limit is your imagination!

Discover more tie dyeing goodness with Gathered

Now you’ve learned how to tie dye you can start experimenting with patterns! Head over to our collection of the top 20 tie dye patterns which cover a huge range of techniques including how to do crumple tie dye.