Make your own weaving bookmarks

The art of weaving is at your fingertips with Lucy Rowan’s yarn scrap bookmarks.

Try 6 issues of your choice of craft magazine from just £9.99

Published: November 12, 2020 at 1:06 pm

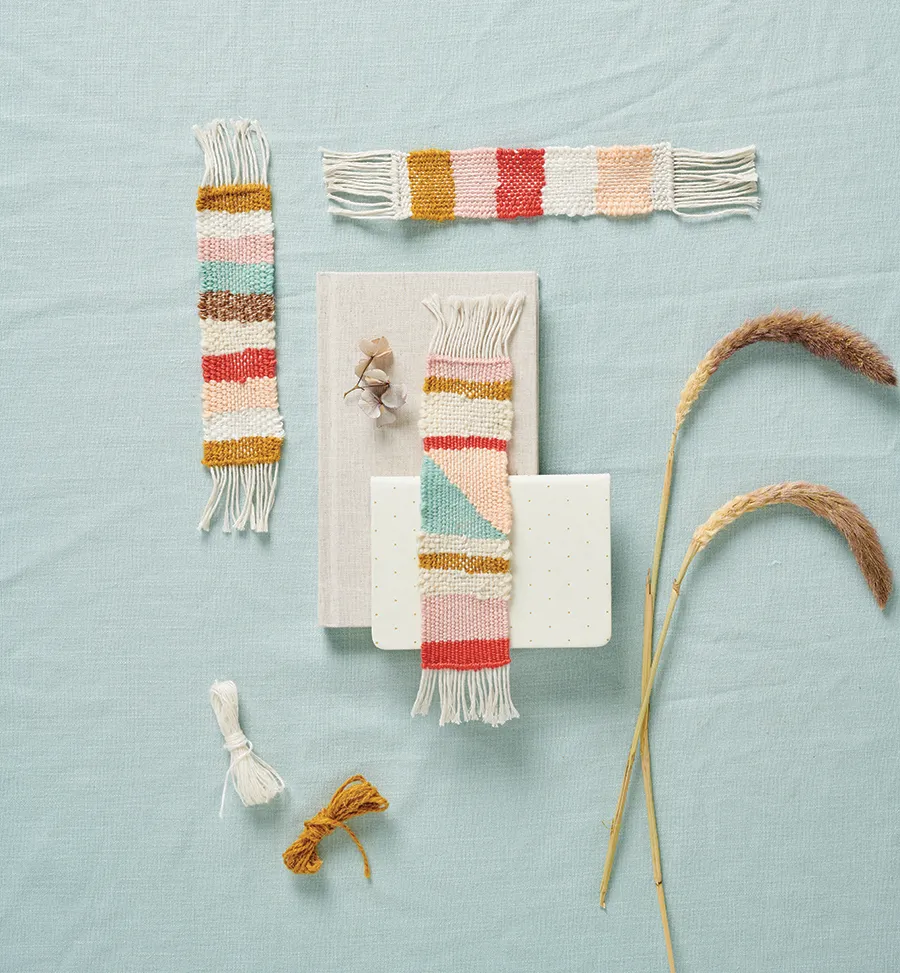
Dream big, start small – that’s our motto when it comes to weaving. Think of these striped weaving bookmarks as your gateway to the craft, as all you’ll need are yarn odds and ends from your stash and an old picture frame.

They’re quick to make with simple weaving techniques and a bit of colour play. Plus, at the end of it you’ll have a DIY mini loom you can use over and over again.

This project was created by Lucy for Mollie Makes magazine – for more easy-make craft projects and creative inspiration, subscribe to Mollie or click here to find out more.

Materials

  • Wooden picture frame, approx. 24 x 31cm (91⁄2 x 121⁄4")
  • Hammer
  • Nails or tacks
  • Cotton string
  • Scraps of yarn
  • Yarn needle
  • Cardboard
  • Fork

If you need help learning the basics of weaving check out the weaving loom blog post which talks you through the anatomy of the loom and our weaving techniques guide.

Weaving bookmarks tutorial

You will need:

  • Yarn
  • Thread
  • Wood frame

Step 1

Step_01 weaving bookmarks

To create a loom, start by removing the glass from the picture frame. With a ruler and pen, mark 11 notches on the picture frame, 0.5cm (1⁄4") apart, along one of the short edges. Try to keep it in the centre of the frame. Repeat this at the opposite end of the frame, making sure the measurements are exactly the same. Gently hammer in the nails on both ends securely, so none of them are wobbly.

Step 2

Step_02 weaving bookmarks

Tie one end of the cotton string to the first nail at the top left of the loom using a double knot. Make sure the knot is tight.

Step 3

Step_03 weaving bookmarks

Keeping the cotton string tight, bring it straight down and loop it around the first nail on the opposite side of the frame. Take the string back up to the top and loop it around the second nail. Repeat this process until you reach the last nail, creating the warp.

Tie the string off around the last warp thread – the tension of the threads should be fairly tight.


Step 4

Step_04 weaving bookmarks

Cut a small piece of cardboard, longer than the width of the warp threads, and weave it through the threads, over one and under the next, repeating until you reach the end, as shown. This will help you to leave a length of fringe at this end. Next, take a length of scrap yarn and tie it in a knot around the first warp thread on the left-hand side.

Step 5

Step_05 weaving bookmarks

Move onto the second warp thread where you’ll need to tie a double half hitch knot. To do this, wrap the yarn over the top of the warp thread, twist it around the warp, then pull it back through towards you. Pull the yarn down and repeat again on the same warp, making sure it’s tight. Work across, making a double half hitch knot on each warp thread.

Step 6

Step_06 weaving bookmarks

Thread the yarn needle with the remaining yarn length and weave across the warp threads, creating the weft. To do this, take the needle over and under each thread alternately. For the next row, work tabby weave over the rows went under, and under the rows you went over, otherwise you’ll undo the previous row.

Step 7

Step_07 weaving bookmarks

When weaving, try to not pull the yarn too tightly as this will pull the edges in and make the weave narrow. One way to prevent this is

by pulling the yarn through at a 45° angle, bringing the needle down to make a hill. Using the needle, push the middle down, then gently push each hill down with a fork. This will give you the correct tension.

Step 8

Step_08 weaving bookmarks

Once you’ve completed the first colour, weave the end into the middle and leave it hanging out the back – the ends will be sewn in last. Select the next yarn colour and thread the needle again. Bring the needle up through the warp where you left off and carry on weaving the rest of the row. Try to leave at least 10cm (4") of yarn at the back ready to sew in later. Continue using tabby weave to create sections of stripes, changing colours as you wish.

Step 9

Step_09 weaving bookmarks

To create a triangle shape, weave across and decrease a warp thread every row until you have none left. Fill the remaining warp threads with another colour, as shown, weaving up to the existing weft until you reach the top point of the triangle.

Step 10

Step_10 weaving bookmarks

Carry on weaving up the loom until the work measures around 20cm (77/8"). Finish the weave off by tying a double half hitch knot on each warp thread. This will stop the weave from coming undone when you take it off the loom.

Step 11

Step_11 weaving bookmarks

With scissors, cut the warp threads about 3cm (11⁄4") away from end of the weave. Do this at both ends. You’ll need to take the small piece of cardboard out before you snip the bottom ones.

Step 12

Step_12 weaving bookmarks

Once the weave is off the loom, sew in the ends. Take the needle – you might need a thinner one for this – thread one of the yarn ends through it, then sew it into the back of the weave to secure it in place. Snip off the very end. Repeat until all the ends have been sewn in to complete the bookmark.


We hope you enjoyed making Lucy’s project. Share a picture of your weaving bookmarks with us on Instagram using #molliemakers, and don’t forget to subscribe to Mollie Makes to get creative inspiration delivered to your door every month! For more weaving projects head to our how to weave and DIY loom tutorial.