How to crochet a bow and make a bow tie
If there's one quick and easy project that wraps everything up nicely, it's a sweet little crochet bow. They may look fancy, but they're actually remarkably simple, so we're going to show you how to make a crochet bow solely using chains and double crochet stitches.
- Free Crochet Necklace Pattern
- 50 crochet flower patterns and what to do with them
- Free crochet friendship bracelet patterns
This little crochet bow is the perfect quick make if you're in need of a last minute gift. You can use it for all sorts of purposes, you could use it to decorate a special present, or with a little crafty creativity you can transform it into a hair band, clip, brooch or even a stylish bow tie!
Talking of crochet bow ties, once you've learnt how to crochet a bow, you'll also find a special free crochet bow tie pattern further down this post.
You will need
- Any DK yarn in a colour of your choice.
- A 4mm (US G/6) hook
- Yarn needle
- Ruler or tape measure
Abbreviations
You can find a full list of all abbreviations we use in our abbreviations and conversions guide. This pattern is written in UK terminology but you can easily convert it to US terms using the guide.
How to crochet a bow
Main piece
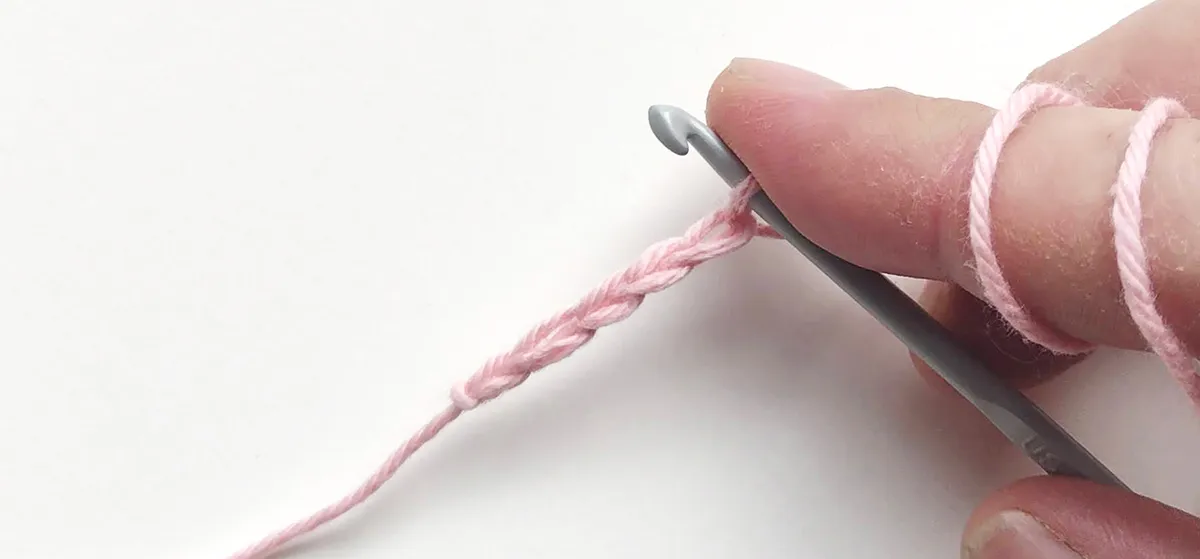
Ch17 loosely.
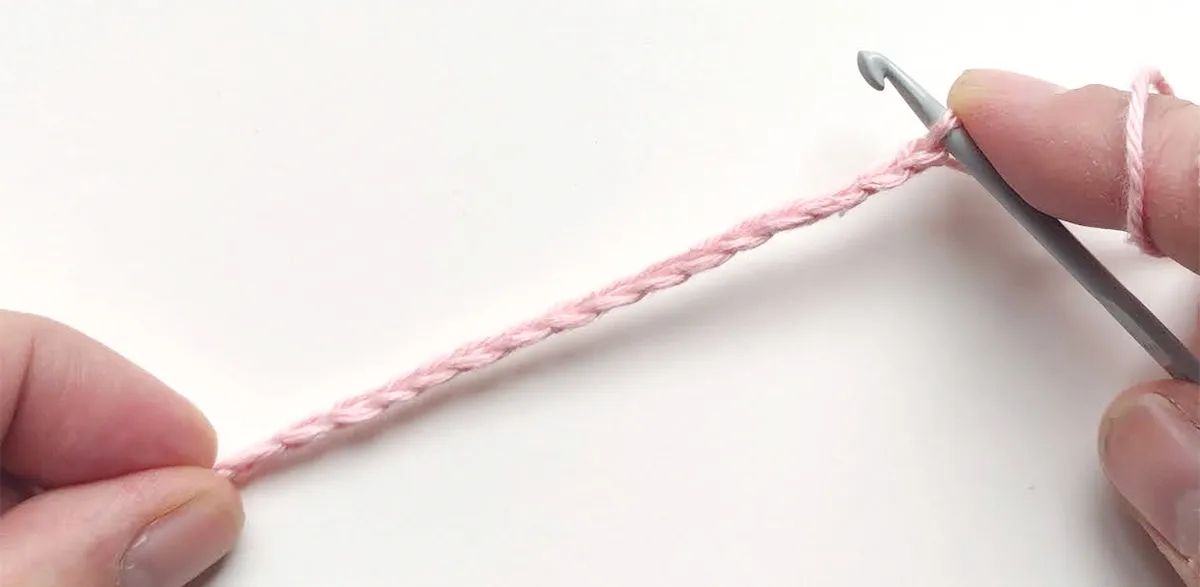
Row 1 Dc in second ch from hook and in each ch along, turn. [16 sts]
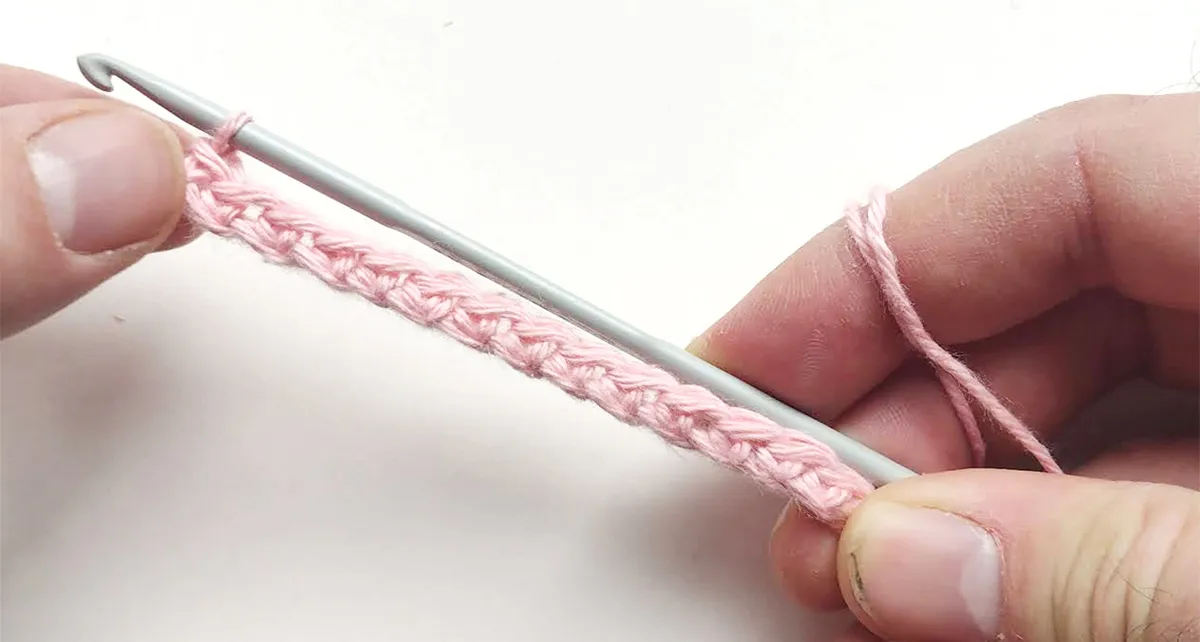
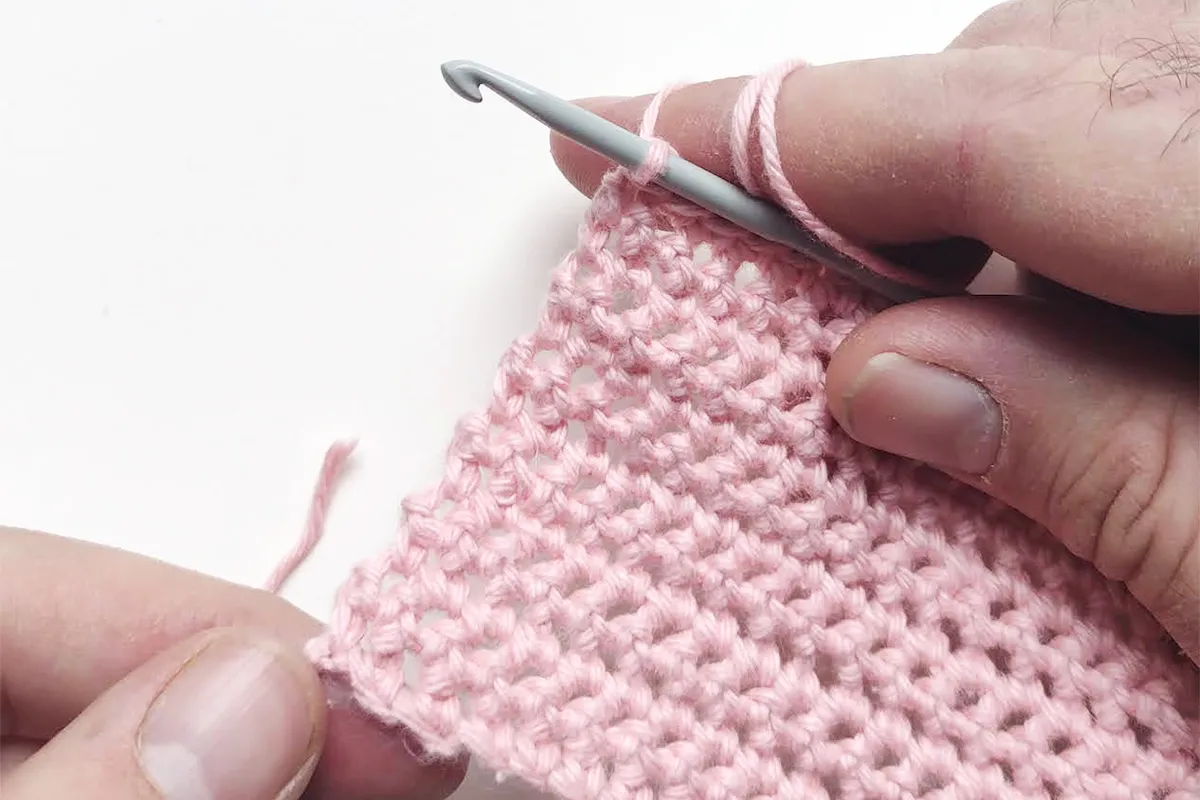
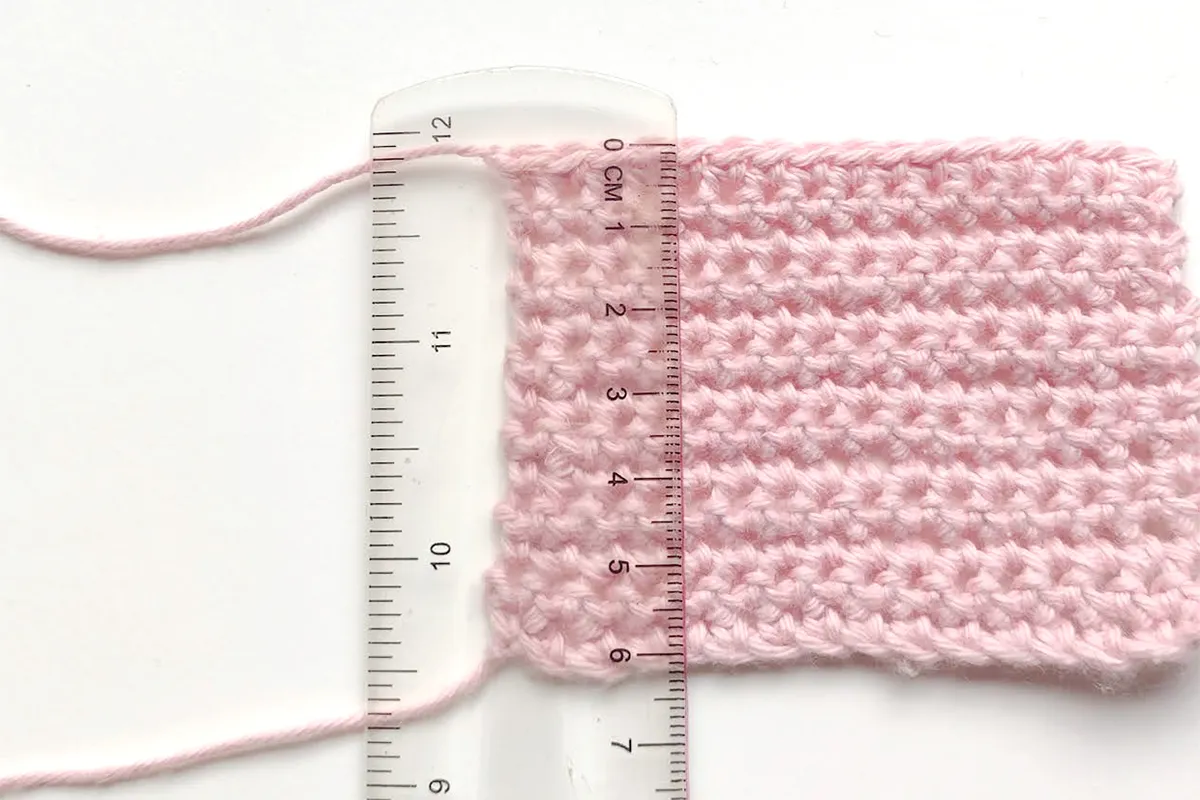
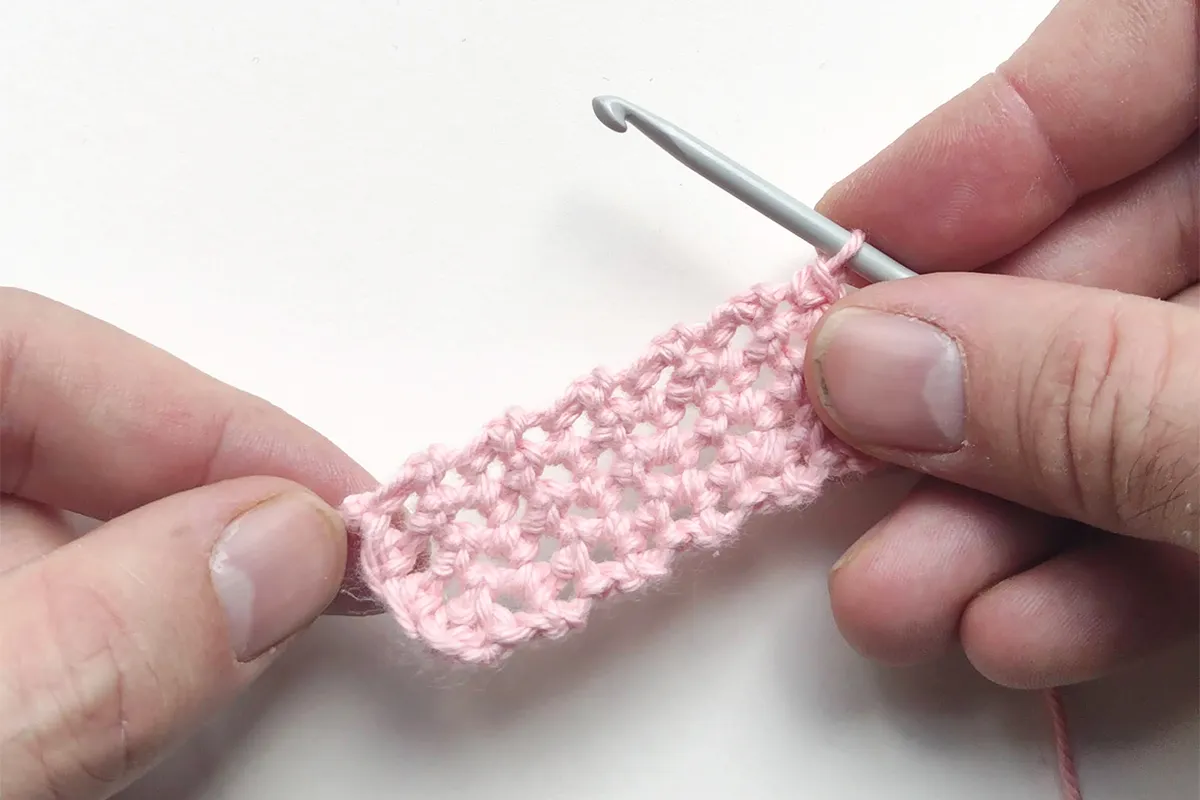
Row 2 Ch1 (does not count as st), dc in each st to end, turn. Repeat row 2 until piece measures 6cm.
Fasten off and weave in ends.
Centre piece
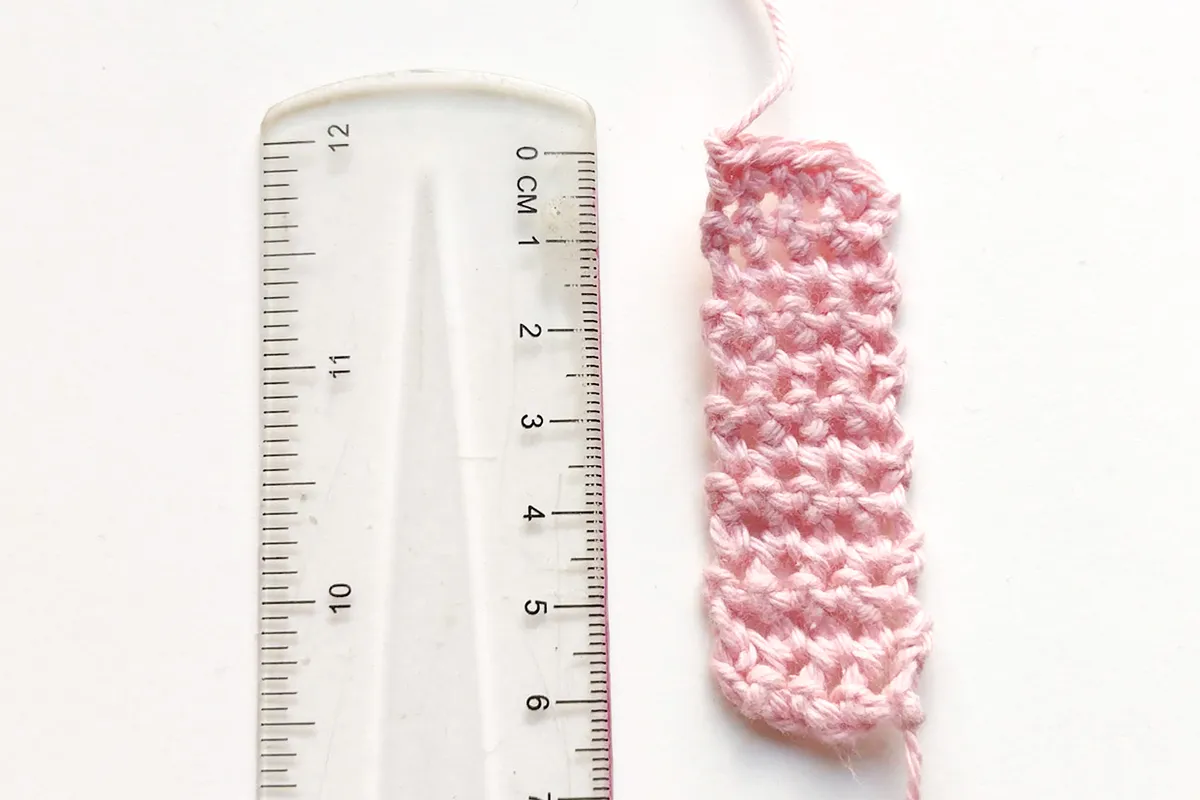
Ch5 loosely.
Row 1 Dc in second ch from hook and in each ch along, turn. [4 sts]
Row 2 Ch1 (does not count as st), dc in each st to end, turn.
Rep row 2 until piece measures 6cm.
Fasten off, leaving a long tail of yarn.
Use the tail of yarn to sew the two short edges together to make a ring, and leave the tail of yarn attached.
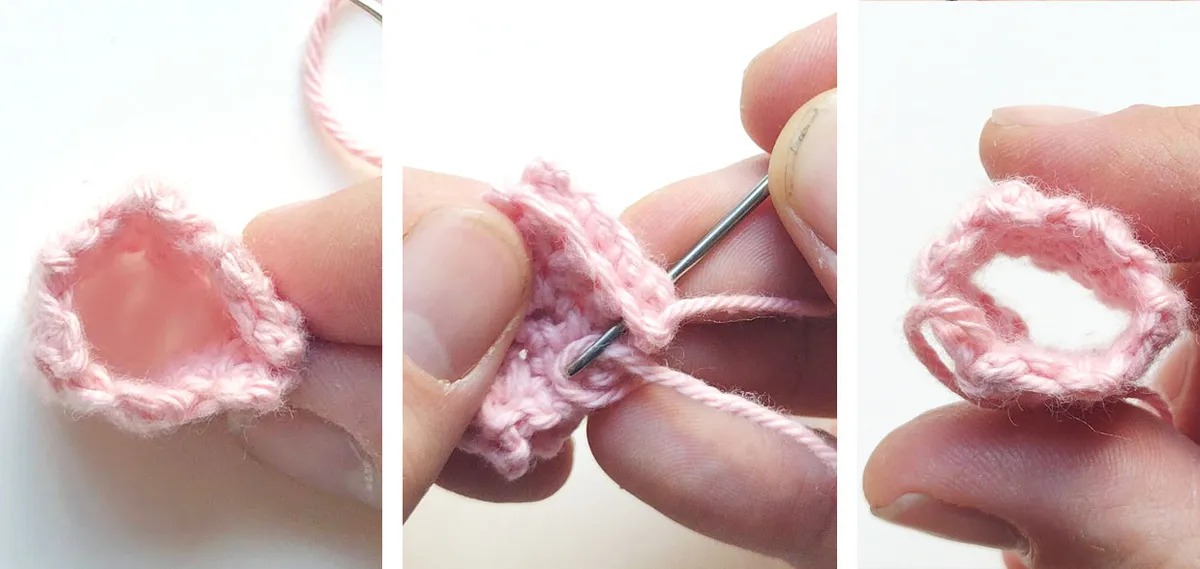
Making up
Put the ring over the main piece, and position it centrally with the seam of the centre piece at the back. You may need to fold or roll the main piece of the bow in order to fit it through the middle piece
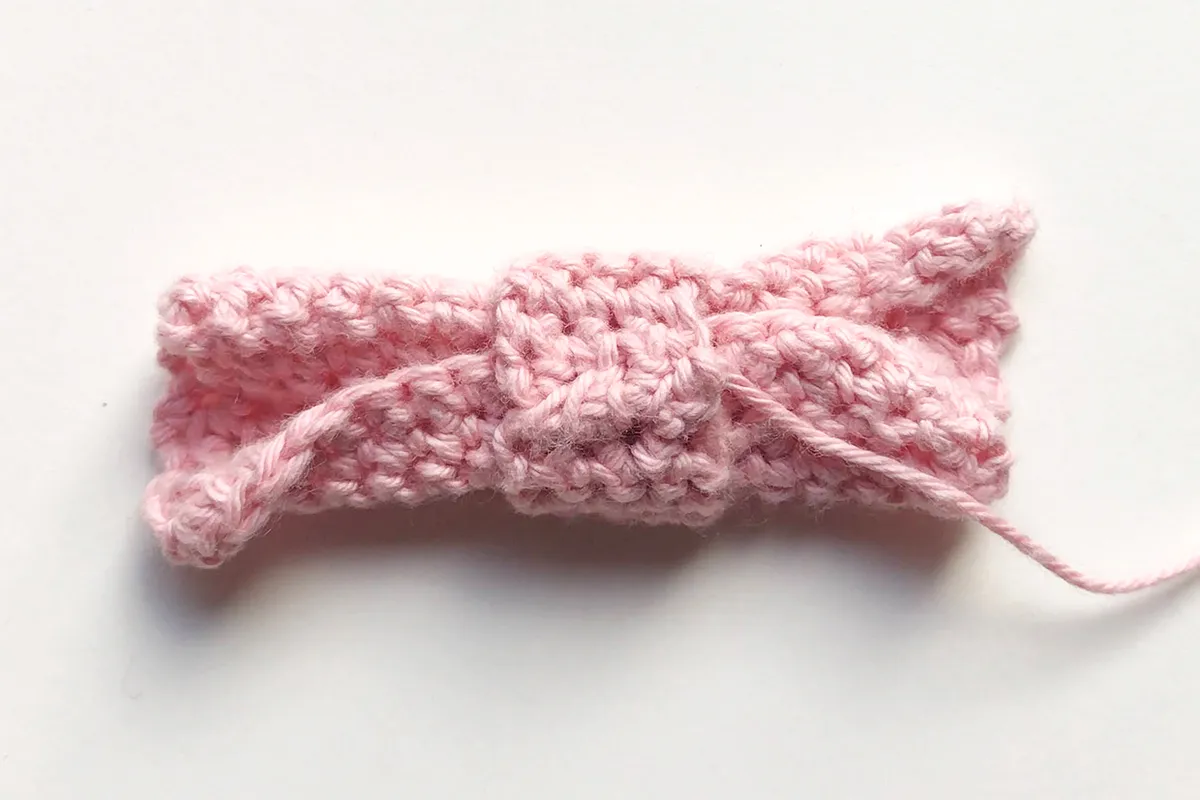
Once central, manipulate your bow into place so that it has the correct shape. You want to pinch/gather the back side of the middle of the main piece so that you create a horizontal crease at the front on each side of the bow.
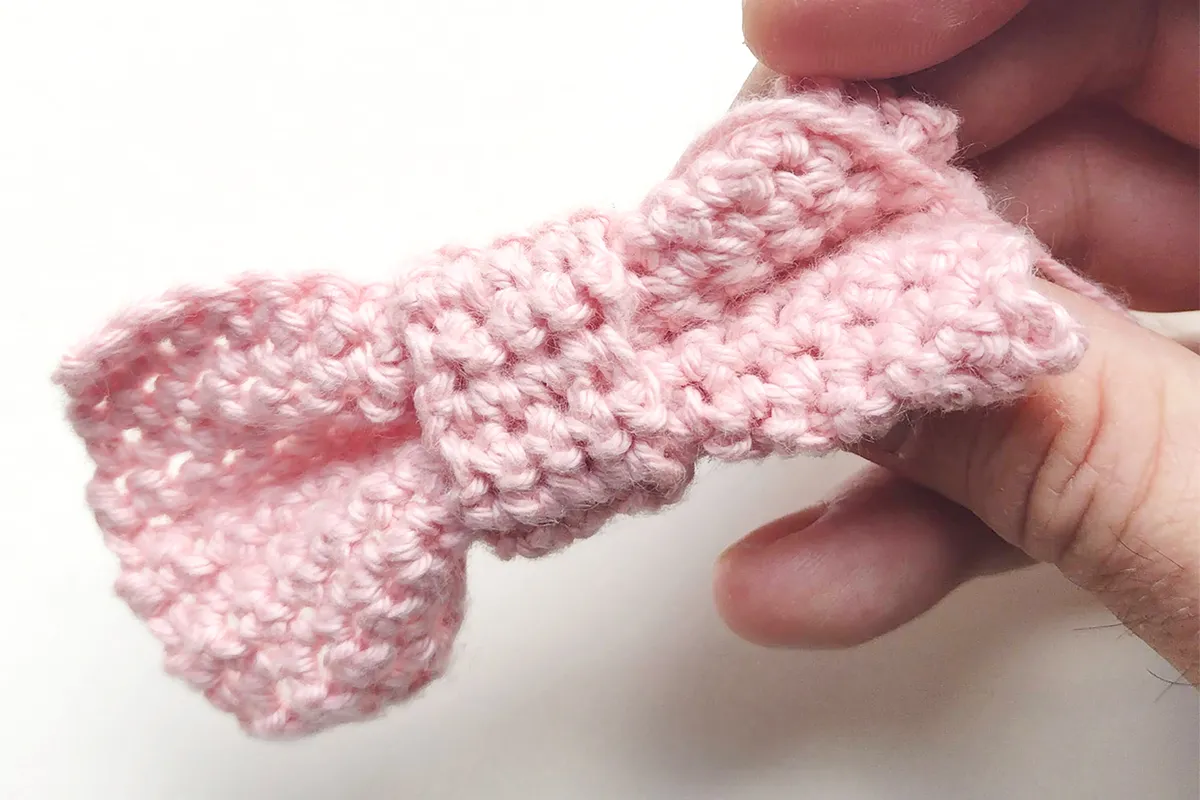
Once you're happy with the way your bow is positioned, use the tail of yarn on the centre piece to secure the gathers of the bow and to sew the two pieces together.

Fasten off and weave in ends.
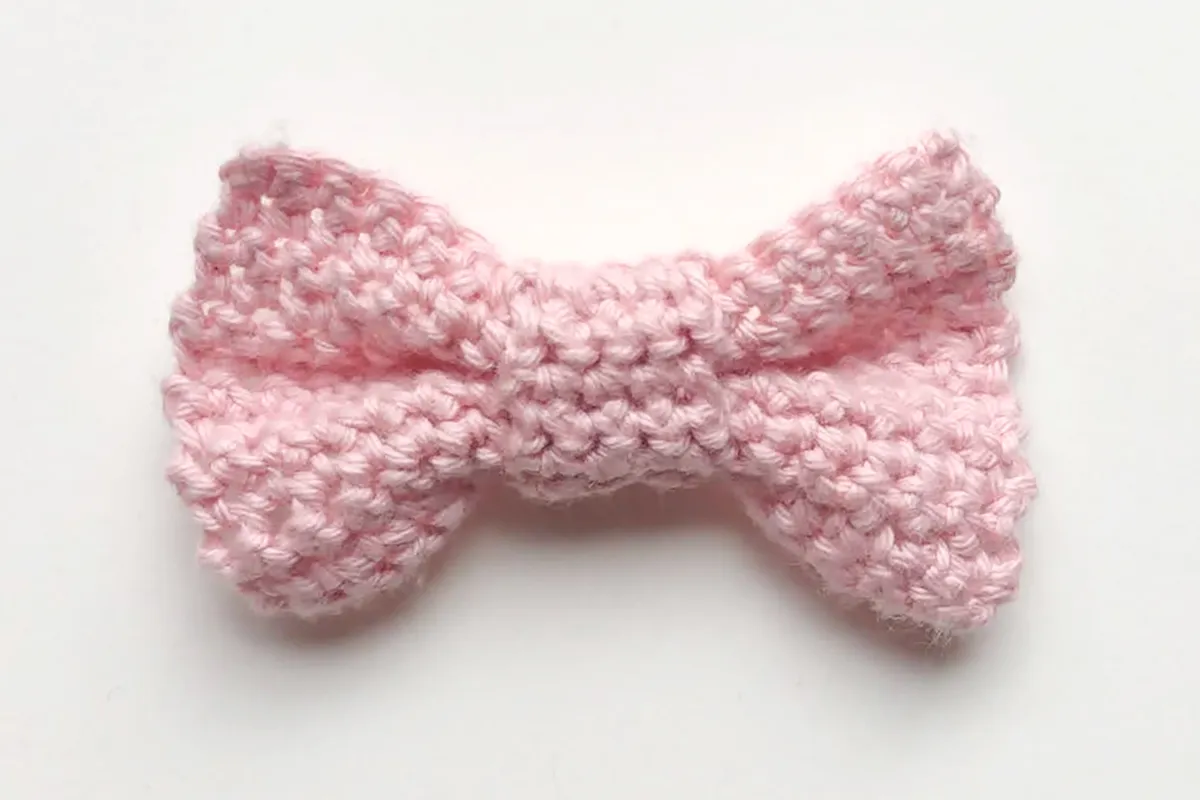
Voila! A sweet little crochet bow to use however you'd like, and if you need to make your bow ties bigger, just increase the width and height of your main piece, but ensure that your middle piece still measures the same height as the main piece.
If you want a fuller looking bow tie, you can even double the width of your main piece and then join both ends to form a loop. This will give it more of a tied bow effect, and you can see how this is used in our free crochet bow tie pattern below.
Free crochet bow tie pattern
Perfect for parties, weddings, and special events, this adorable free crochet bow tie pattern will make any little one look even cuter on the big day!
Designed by Delia Randall of Delia Creates, it's a lovely touch for birthdays and celebrations.

They're a great beginner crochet project and come together quickly. I hope you enjoy making them as much as I did! These should only take you about 30 mins to an hour to make. They are pretty easy and do-able even for a beginner crocheter. When you sew your pieces together, mistakes or inconsistencies become a little less visible so it's a good first project.
Delia Randall - Designer
You will need
- 4mm crochet hook
- Any DK yarn
- Needle and thread
- Yarn needle
- Tape measure
- small button
Abbreviations
You can find a full list of all abbreviations we use in our abbreviations and conversions guide. This crochet bow tie pattern is written in UK terminology but you can easily convert it to US terms using the guide
How to make a crochet bow tie
To start with we’re going to make the main piece which will form the bow.
Row 1: Chain (ch) 34.

Row 2: Double crochet (dc) in the second chain from the hook and each ch across, turn. [33 stitches]

Row 3: Ch3 (counts as a treble crochet stitch), treble crochet (tr) in each stitch (st) across, turn. [33sts]

Row 4: Ch2 (counts as half double crochet), half double crochet (hdc) in each st across, turn. [33sts]

Row 5: Ch3, tr in each st across, turn. [33sts]

Row 6: Ch1, dc in each st across, turn. [33sts]

Fasten off and weave in the loose ends with a yarn needle. Whip stitch the two ends together with a needle and thread (or with a yarn needle and length of same coloured yarn) to form a loop.
Alternatively you can join them together with a crochet seam, find out more in our how to join crochet shapes together guide.

How to crochet the neck band
Measure your intended wearer’s neck. Chain the length of that person’s neck circumference.

Treble crochet in the 3rd chain from your hook and in each ch across. Fasten off and weave in the ends with a yarn needle.

Note: The neck band will stretch a little, so even though we’re reducing the original measurement slightly by making our first treble in the 3rd chain from the hook, this will allow for stretch and should be fine.
Centre piece of crochet bow tie
Now for the little centre piece that brings it all together.
Ch13
Row 1 Double crochet in the second stitch from the hook to the end. (12 stitches)
Row 2 Ch1, double crochet to the end
Repeat Row 2 to desired width. We’ve used four rows in our example.
Step 3
Fasten off and weave in ends with a yarn needle. Then whip stitch the two ends together by hand to form a loop.

Making up
Slide the centre piece loop over the main bow tie piece.

Before you slide the neck band through the centre piece loop too, hand stitch a cute little button to one end.

You don’t have to make a button hole on the other end, as the button will be able to slip through a hole either side of a treble stitch (which means you can adjust the tightness too).

Customise your crochet bow
Now that you know how to crochet a bow, it’s time to start getting creative! Try adding stripes or using variegated yarn, or you could even try sewing beads or sequins to give your bow extra bling!
Find more small crochet projects
If you’ve enjoyed this quick make and fancy trying some more projects that you can hook in no time at all, check out some more of our small crochet patterns on Gathered.