How to join granny squares
Once you've mastered crochet shapes, there's one final part of assembly that everyone dreads - joining your crochet shapes together!
Fortunately, when it comes to how to join crochet pieces together, there are a few different crochet joining techniques, which use either a yarn needle or a crochet hook, and all of which have their own individual qualities.
In these tutorials, we'll be showing you how to join granny squares together, but you can use these crochet joining techniques for connecting any types of crochet fabrics together.
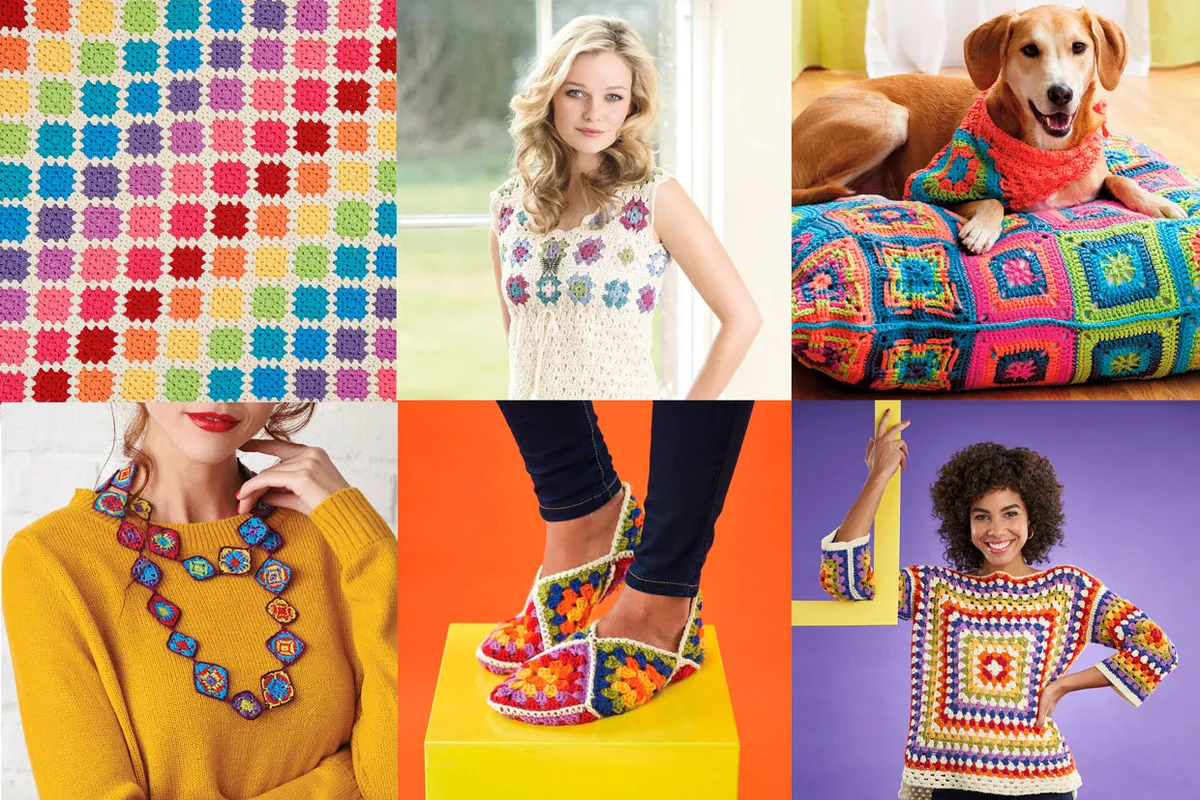
If you would like to make some granny squares to follow this guide, then check out our huge archive of free granny square patterns. Make sure you don't miss out on Granny Square Day, too!
Keep reading below for some handy information on joining crochet pieces together, or you can use these links to jump straight to the specific crochet joining techniques.
How to join granny squares
Blocking Granny Squares
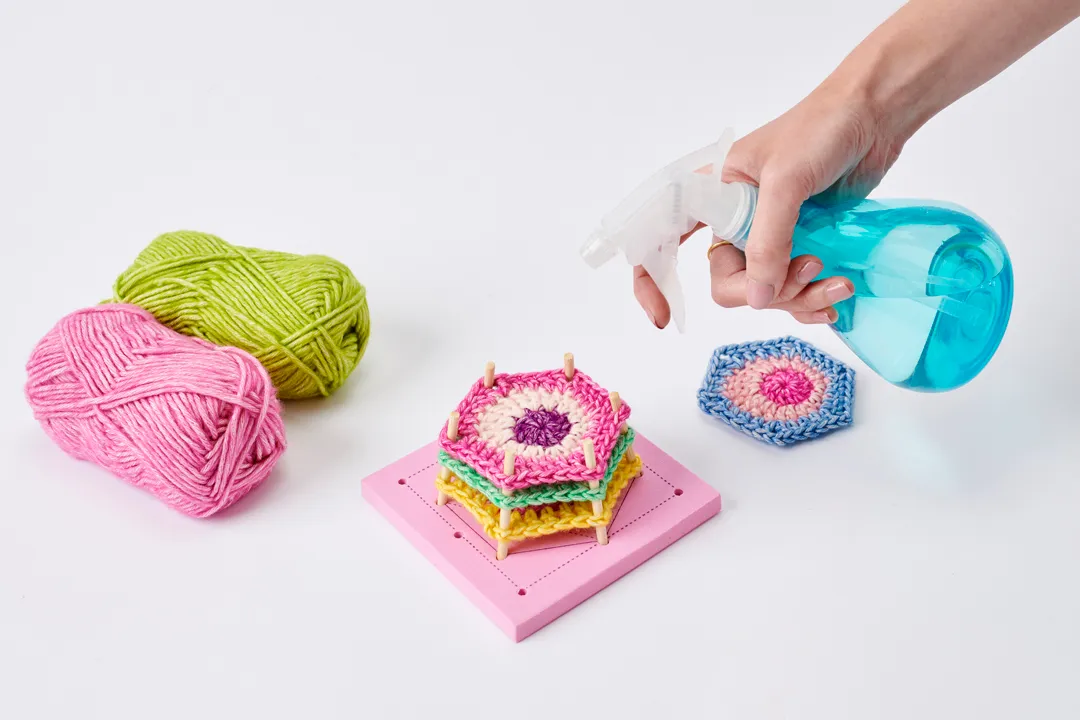
Before learning how to join granny squares, it's worth taking the time to block your crochet squares first. Blocking is an important but often overlooked part of finishing your crochet fabrics, and is especially important with motifs such as granny squares.
Blocking is the process of dampening the yarn, which not only helps to relax the fibres but also to stretch and fix your shape to the desired size and shape. You may notice that your crochet edges can be a bit wobbly, which is largely due to tension and the twist/springiness of the yarn, but blocking will help you to get your edges nice and straight.
Blocking granny squares will not only help make your square shapes perfect, but will also mean it's easier to line up stitches before you join. It's always a good idea to block your granny squares before joining, and you may need to block once more after joining – for example, if you're adding an additional border.
- Find out everything you need to know in our how to block crochet guide.
Crochet joins - Counting stitches
One of the first stumbling blocks for people learning how to join granny squares together can be where to start.
When you combine two pieces of crochet, your stitches are almost always going to be going in opposite directions (unless you're joining into the sides of stitches).
So, for example, let's say you've got two flat pieces of crochet and you want to start your join at one side. To start a join, you would be working in the first stitch on one piece, and the last stitch on the other.
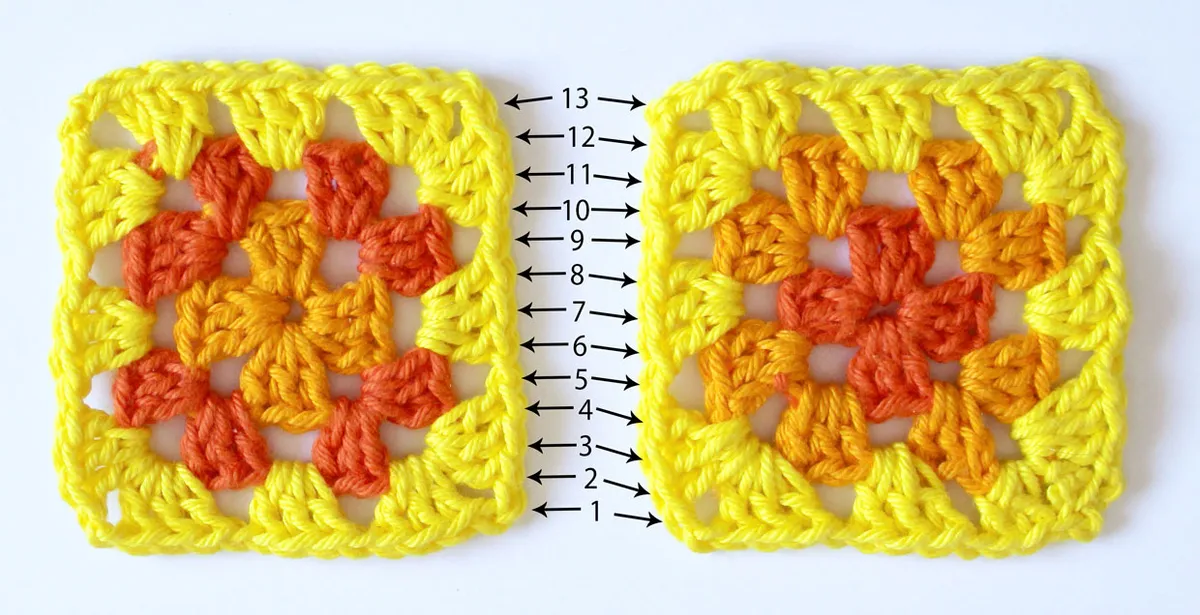
When it comes to how to join granny squares, it can get a bit more confusing as you have chains as well as stitches to join. Most commonly, your corner spaces will be made from a ch2, so if you're joining two squares together, you need to include one of those chains on each corner to ensure your join is the correct size (like in the diagram above).
For joining granny squares, it's normally best to work into chains rather than around them, as this will help to keep your join straight.
Get the right needle
Yarn needles are bigger than regular sewing needles, so make sure you've got the right ones to hand!
- Pony Wool Needles 2 pack
- Pony Aluminium Loop Needles 3 pack
- Jumbo Bent Tapestry Needles 8 pack
- Large Eye Blunt Tapestry Needles 9 pack
Joining crochet shapes with a needle
As you'd imagine, you can treat your crochet much like you would treat any sewing fabric. That said, though, there are a few techniques that will help you to join your crochet shapes together perfectly and neatly.
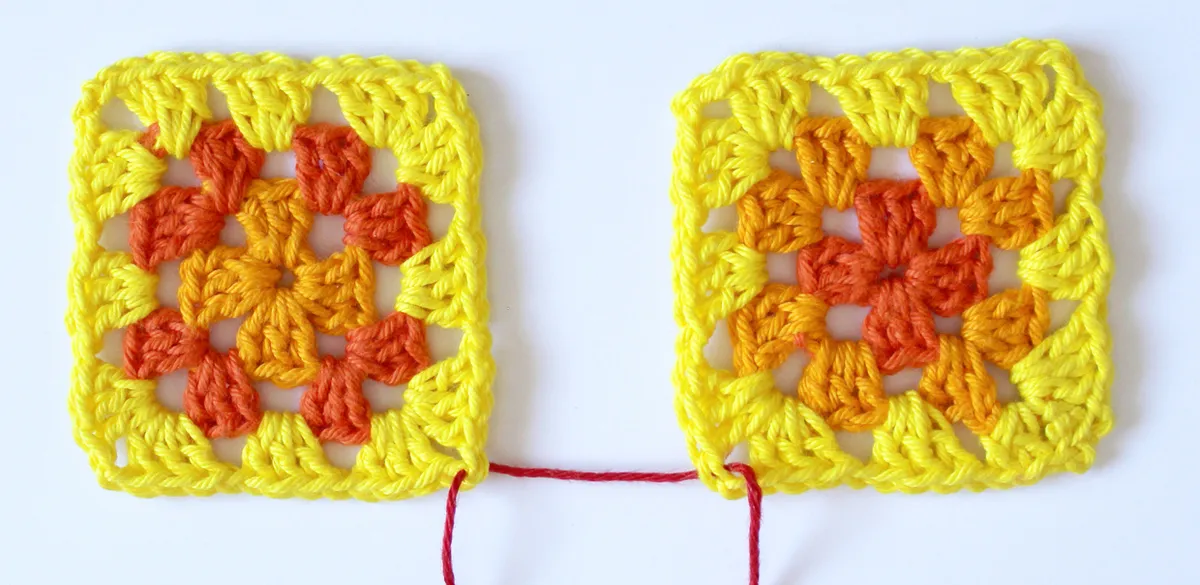
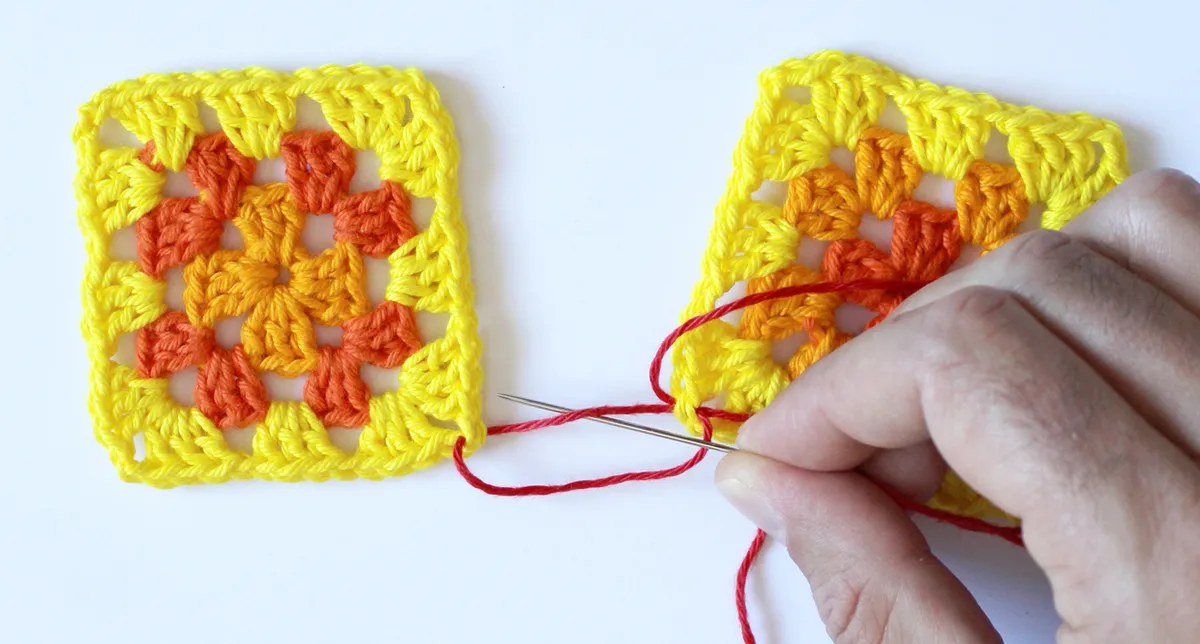
If you're going to join your crochet shapes with a needle, you'll need to start by attaching the yarn to your crochet. Here's a simple way to do this!
Step 1
Using a yarn needle and length of yarn, thread the needle through your first stitch on your right hand piece, going from front to back (going under both loops of the stitch, or in the example below, through the corner chain of the side you want to join).
Then thread your needle through the parallel/corresponding stitch on your left hand piece, taking the needle from the back to the front.
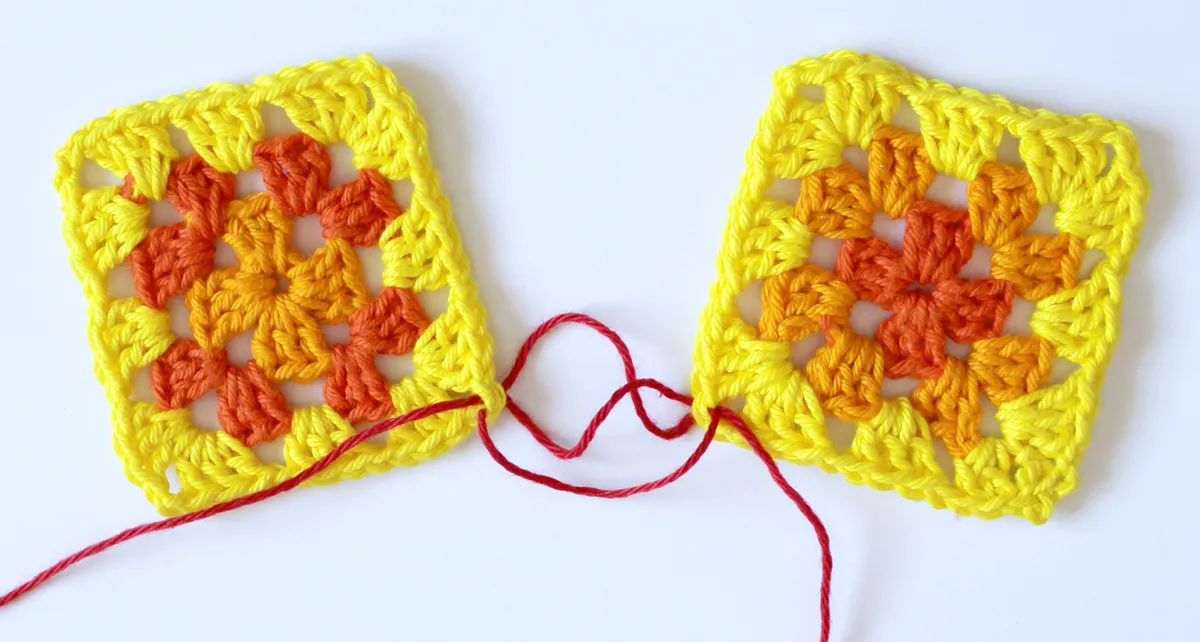
Step 2
Thread the needle back through the same stitch on the right hand piece in the same way as before, and then take your needle underneath the first needle stitch that you made (as in the picture below).
Step 3
Bring your needle through the same stitch on the left hand piece, again going from back to front. By twisting your needle around the thread in step 2, you will now have what looks like a figure of 8 in your thread - this is what will help to lock it in place.
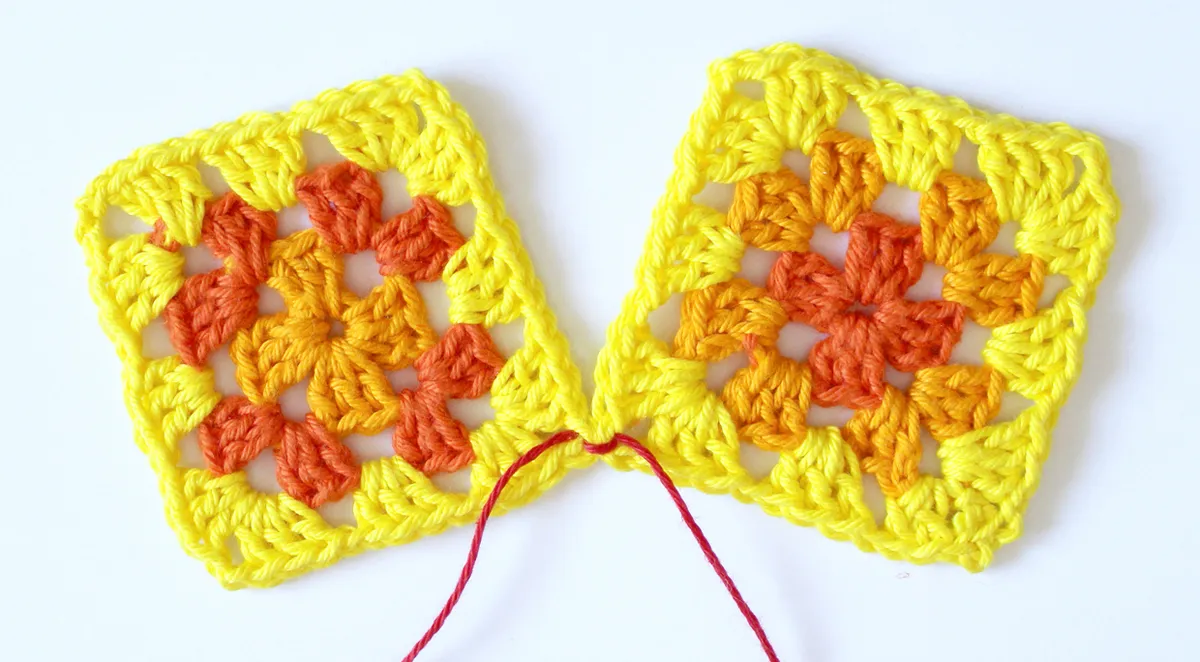
Step 4
Pull tightly on your thread to finish your join (you may need to pull gently on both ends for it to close up neatly). Make sure you have enough yarn on your needle end to sew all of your joins.
You're now ready to sew your shapes together using your preferred method.
How to join granny squares - 5 ways!
You will need:
- Yarn
- Crochet hook
- Tapestry needle
Whip Stitch Crochet Join
Step 1
If you’re not too bothered about neatness and just want your shapes joined together asap, then the whip stitch crochet join is the simplest and quickest way of how to join your crochet pieces together. It’s easiest if you use a tapestry needle for this crochet joining technique, but you can do it with a crochet hook, too.
Please note – for the neatest results with whip stitch, you would normally do this on the wrong side of your crochet; however, to make it easier for you to see where we are inserting our needle, we have done this tutorial with joins on the right side.
To make your crochet whip stitch less visible, use the same colour yarn as on your crochet shapes, but we’ve used a contrasting yarn to make this tutorial easier to see.
Attach your yarn to both shapes using the method above.
Working into the next stitch up from your join, thread your needle (front to back) under both loops of the stitch on the right piece of crochet, and then thread your needle (back to front) on the parallel/corresponding stitch on the left piece of crochet

Step 2
Then just repeat, working into the next stitch on the right hand piece and then the corresponding stitch on the left hand piece, until you have joined your sides. You can finish off with the same method as we used to join the yarn in the first place, and then just weave in your ends.

As you can see, whip stitch is a super-quick way of joining crochet shapes and is pretty simple when it comes to counting your stitches.
However, it’s not the neatest method, and once you’ve finished, the join will be pretty solid, which is good for projects that you want to be sturdy and solid, but it’s not great for things like garments that might need a little bit of stretch.
Needle weave join
Step 1
If you’re looking for a slightly neater needle crochet join, and one that has a bit more give to it (important if you’re making a garment that will need to stretch a bit), then one of the best crochet joining techniques is to make a needle weave join.
Start by joining your yarn to both pieces as in the method above. Then start by threading through the next stitch on the right hand piece and the corresponding stitch on the left hand piece, just the same as you would with a whip stitch.

Step 2
Now thread your needle into the next stitch along on the left hand piece, taking the needle from front to back. We’ll then thread our needle back into the same place as the previous stitch on the right hand piece (needle going back to front)

Step 3
Now, insert your needle (front to back) through the next stitch along on the right hand piece, and back into the same place as the previous stitch on the left hand piece (back to front).

Step 4
Continue along repeating steps 2 and 3. This can get a bit confusing at times, but you can simplify it to thinking of it as:
Same place as last time on first shape, next stitch on first shape, same place as last time of second shape, go into next stitch on second shape.

If you’re struggling to understand the sequence, this diagram might help.

Step 5
As you work along, give your thread a pull from time to time, but not too tightly. Remember that you want your crochet to sit naturally and have a bit of give to it. Once you have worked into both of your last stitches, you can tie off your yarn and weave in your ends.

As you can see above, by weaving your shapes together, you get a much less obvious join, which should hopefully be a bit more flexible than a whip stitch.
One downside of this crochet joining technique is that it can ruffle up your edges a little bit, meaning that if you’re making something to precise measurements, it may take off some of your width.
Slip Stitch Crochet Join
Step 1
If the idea of sewing all your crochet pieces together has you yawning with boredom already, fear not, you can always join your shapes with your crochet hook!
It's significantly quicker for us hooksters, and again, there are a couple of different crochet joining techniques that you can use.
A bit like the whip-stitch method, slip stitch joins are a super-quick crochet join that is easy to do.
Start by making a slip knot to attach the yarn to your hook. Insert your hook through the first stitch on your right crochet piece (under both loops, going front to back) and through the corresponding stitch on your left crochet piece (under both loops, going back to front). Then just slip stitch as normal - yarn round hook, pull through work and loop on hook.
Step 2
Now just continue along, slip stitching the next stitches of both sides together. You may find it easy to almost 'sandwich' the pieces together so you can place your hook through both pieces in one go. Once you reach the end, you can fasten off as normal
And that's how you do a quick slip stitch crochet join. As we mentioned earlier, normally, you would do your crochet join with the wrong side facing.
Slip stitch crochet joins tend to raise the fabric a bit where the crochet join is, and slope to one side when the join is facing you, like in the image below.
However, the back of the crochet join does look quite neat, with little horizontal lines like in the image below.
Double crochet join
Step 1
Double crochet joins are not only a nice way of joining shapes together, but also add a nice decorative quality.
As they're more raised than our previous joins, they can create a nice waffle-like texture - it's our favourite of the crochet joining techniques for how to join granny squares together! When doing a dc crochet join, you would always do your join on the right side of your work.
The best way to start a dc join is with what is called a standing stitch - basically, you just go straight in and start with a dc, no need to slip stitch or ch1!
So make a slipknot and put the yarn on your hook, insert your hook through the first stitch on your right crochet piece (under both loops, going front to back) and through the corresponding stitch on your left crochet piece (under both loops, going back to front), yarn over hook, pull through the work, yarn over, pull through both loops on your hook.
Step 2
Continue dc stitching along until you've completed your crochet join. Dc joins will ever so slightly lean to one side, so it's important to remember to always do your joins going in the same direction for a neat final project (i.e. top to bottom or bottom to top).
Again, like the slip stitch join method, the reverse of your crochet join will look like little horizontal stitches.
One of the reasons we love double crochet joins is that they're easy to do and can be used to join a whole project very quickly – they're one of our favourite ways of how to join granny squares if you're making a blanket!
You start off joining granny squares together into vertical strips. Then, when it comes to the horizontal crochet join, you would just work across up to your first vertical crochet join, then you can simply ch1, which will take you over the join, then continue your horizontal join on the next square along.
Zipper join method
Step 1
Although all of the crochet joining techniques above are fantastic for quick and easy joins, perhaps you fancy a super-neat join that works seamlessly with your crochet - well, the zipper join method is perfect for this!
It's essentially a slip stitch join done slightly differently, and it creates a crochet join that is perfectly flat and doesn't ruffle up your crochet at all. It can seem a bit tricky to start off with, but once you get the hang of it it's sure to become your favourite way for how to join granny squares together.
Insert your hook (going front to back) in the BACK LOOP ONLY of the first stitch on your left hand piece of crochet
Step 2
Now insert your hook (again, going front to back, you will need to twist your hook a bit to do this) in the BACK LOOP ONLY of the first stitch on your right hand piece of crochet
Step 3
Now yarn over hook. With this method it is important that when doing your yarn over that the yarn is coming from the back of the join.
Step 4
Then pull through the work and the loop on your hook (just like a normal slip stitch). That's essentially all there is to it, but we'll carry on with the next join.
Step 5
Insert your hook (going front to back) in the BACK LOOP ONLY of the next stitch on your left hand piece of crochet
Step 6
Now twist your hook to the front and (again going front to back) insert your hook in the BACK LOOP ONLY of the next stitch on your right hand piece of crochet.
Make sure that your yarn is still at the BACK of your work - it's quite easy to accidentally catch the yarn and bring it to the front, so you need to pay attention to this and may need to reposition the yarn as you do this step.
Step 7
Then just yarn round hook, pull through the work and through the loop on your hook like a normal slip stitch.
Step 8
Continue along to your last stitch and then fasten off. Once complete you can see why this join is called a zipper - because it looks like a nice little zip.
This join will lie almost completely flat with your crochet pieces, and as it's joined in the back loops only, your crochet shapes will still have a nice, defined edge and won't ruffle up at all.
Again, like the dc join, when you come to horizontally joining shapes over vertical joins, you can simply ch1 to skip over the existing horizontal join.
One extra joining method
If you’re making a project that’s going to require a lot of joins and you want a really professional join, try the How to ‘tight join as you go’ method for crochet motifs.
Finding your favourite crochet join
With all of these crochet joining techniques, these guides are just a reference. You can do any of these crochet joins going from top to bottom or vice versa, and if you’re left-handed, then you may find it easier to start your joins in the opposite crochet piece to the ones we’ve started in.
However you choose to do your crochet joins, the most important thing is to remember to be consistent in the direction of your joins for a neat result.
Projects to practice with
Of course, before you start joining granny squares, you need to know what it is you’re making. Fortunately, there are loads of different items you can make, just check out our roundup of 40+ granny square projects for you to try.