How to needle felt your own tropical birds!

These funky needle felted birds are the ideal beginner project! Follow our easy step-by-step tutorial for a fantastic introduction to this versatile craft.

Published: May 12, 2021 at 11:10 am

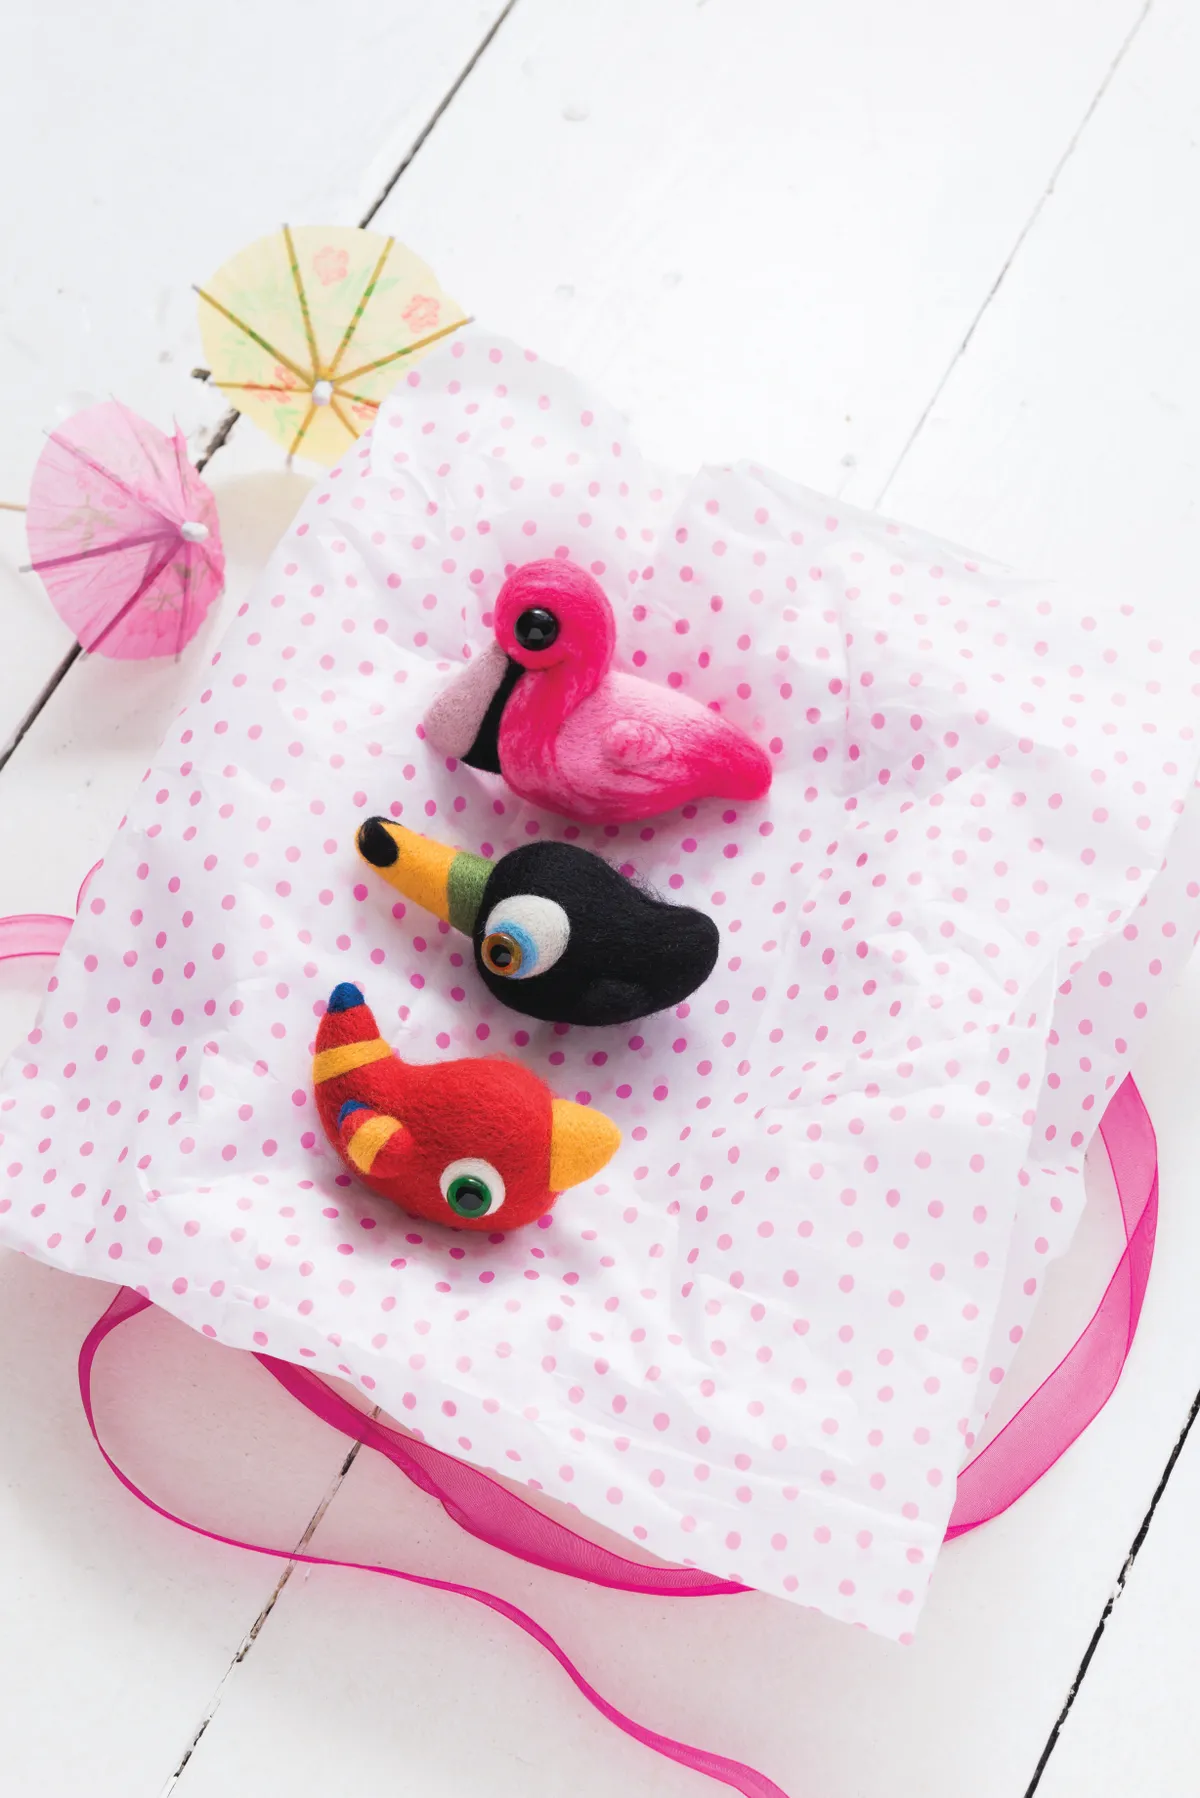
Gretel Parker has designed these gorgeous colourful felted bird brooches, and we think they have serious gift appeal! They are the perfect way to inject a touch of fun into your spring accessories. Needle felting is a great project for profit, and stunning designs like these needle felted birds can command a considerable markup, as well as only using a small amount of roving wool.

If you’ve never tried needle felting before, we think you’ll find it a really satisfying technique. We have a complete beginner's guide to needle felting right here on Gathered which is also written by Gretel and will teach you all the basic techniques.

Gretel has given you a flamingo, toucan and macaw to try in this needle felting project, but you can easily adapt the basic pattern to make other types of birds to complete your flock! Simply jab the roving wool with felting needles to compact the fibres, then gently sculpt and shape and watch in amazement at how your ball of fluff is transformed into a three-dimensional shape full of character.

Check out Gretel's website, for more goodies including Zoom workshops, books and lots of adorable felted animals to buy. Why not follow Gretel Parker on Instagram for more needle felting inspiration, and be sure to look out for her new book, Decorative Needlefelting Projects – 20 Seasonal Projects for the Home, published by White Owl Books as part of their new craft range, which is out later this year. We've rounded up some of the best needle felting books on the market too so once you've finished Gretel's fab book you can try these!

And if you like this project, why not have a look at our other needle felting posts, including needle felting projects for beginners, our felted cherry keyring tutorial and we love this needle felted teacup pin cushion (also by Gretel!).

If you've made this project, why not show us on Facebook or post them on Instagram, we love to see what you make!

Beginner's guide to needle felting, how to make needle felted birds

To make these needle felted birds you will need:

  • Brooch pins – 2.5cm (1in)
  • Felting sponge or brush mat
  • Size 40 or 42 felting needles, spirals or triangular
  • Awl or pointy scissors

For the flamingo

  • 15-20g of medium pink merino roving wool
  • Pinches of merino roving wool in pale pink, dark pink and black
  • 1cm (1⁄4in) looped black glass toy eye
  • Pink thread

For the macaw

  • 15-20g of red merino roving wool
  • Pinches of merino roving wool in medium yellow, blue and white
  • 1cm (1⁄4in) looped green glass toy eye
  • Red thread

For the toucan

  • 15-20g of black merino wool roving
  • A large pinch of merino roving wool in yellow, smaller pinches in white, pale blue, green and black
  • 1cm (1⁄4in) looped amber or yellow glass toy eye
  • Black thread

Measurements

  • Flamingo & Toucan – 9cm (31⁄2in) from beak tip to tail tip
  • Macaw – 8cm (31⁄4in) from beak tip to tail tip
Needle felted birds

Needle felted bird: Flamingo

Step 1

Measure out a length of medium pink roving, no more than 25cm (93⁄4in) and tease it out to make a strip, as shown. Measure out a smaller length of the same colour roving, no more than 6-8cm (21⁄2-3in), and gently muddle it into a loose ball shape.

Beginner’s Guide to needle felting, needle felted birds, step 1

Step 2

Place the ball in the middle of the strip and fold the strip over, enclosing the ball.

Pull the edges of the wool around to form a loose, bulbous pouch. Begin jabbing the wool using two needles. You don’t need to use a lot of force; little and often is the best way to work and the most effective.

Beginner’s Guide to needle felting, needle felted birds, step 2

Step 3

Turn the wool as you work to ensure roundness. Work only on the filled pouch area, which is the main body, leaving the ragged end fibres loose.

Aim to make a small hump-backed egg shape.

Beginner’s Guide to needle felting, needle felted birds, step 3

Step 4

When the wool begins to firm you will hear a faint crunching. Now you can really sculpt the wool. Gently tug out a small amount of the folded end to make a tail and carry on working the wool until it is quite firm and you have a clearly defined body and tail.

Beginner’s Guide to needle felting, needle felted birds, step 4

Step 5

Prepare the neck area of the flamingo by removing roughly half of the remaining loose fibres. Tearing them is better than cutting them as it leaves the wool ends rough and easier to work with.

Beginner’s Guide to needle felting, needle felted birds, step 5

Step 6

Shape two-thirds of the wool into a tubular neck shape.

Beginner’s Guide to needle felting, needle felted birds, step 6

Step 7

While still soft, bend the neck back onto the body, needling and shaping all the time. When the neck is established and sitting securely on the back, open up the remaining end fibres, spreading them out like open flower petals.

Beginner’s Guide to needle felting, needle felted birds, step 7

Step 8

Muddle a small pinch of wool into a ball and enclose it in the neck end fibres, making a base for the head. If it looks too small, just add extra wool. Finish shaping, then work all over the body until you have a uniform texture.

Beginner’s Guide to needle felting, needle felted birds, step 8

Step 9

Take a good pinch of pale pink wool and begin shaping the beak on a brush mat. When you have the basic shape and while the wool is still soft, needle it onto the body and finish shaping it.

Beginner’s Guide to needle felting, needle felted birds, step 9

Step 10

Use one needle and a tuft of wool to shape a tiny wing directly onto the body.

Beginner’s Guide to needle felting, needle felted birds, step 10

Step 11

To give the flamingo a smooth finish, take small amounts of the medium pink wool and tease them into tissue-thin layers. Using one needle, cover the entire body with a thin topcoat, working carefully to smooth out any little bumps or crevices. Then do the same with the beak using the pale pink wool.

Beginner's Guide to needle felting, needle felted birds, step 11

Step 12

Add the black beak pattern using one needle and a small amount of black wool; not much is needed as you are only adding a surface pattern.

Beginner's Guide to needle felting, needle felted birds, step 12

Step 13

Tear off wisps of the brighter pink wool and add it to the body. Use the tip of the needle to drag the fibres into a feathery pattern, anchoring the ends into the body.

Beginner's Guide to needle felting, needle felted birds, step 13

Step 14

Follow the steps below to sew on the eye using pink thread and to attach the brooch back, to finish.

Beginner's Guide to needle felting, needle felted birds, step 14

Needle felted birds: Macaw & Toucan

Step 1

These are made in a similar way as the flamingo but are simpler in shape. Measure about 20cm (8in) of black or red roving and tease into a strip. Take a pinch of filling, about 10cm (4in) and muddle it into a loose ball. Enclose ball into the strip as for the flamingo.

Beginner's Guide to needle felting, Macaw and Toucan, step 1

Step 2

The macaw and toucan are all one dumpy shape, with no neck. The fat end of the wool becomes the head and the thinner, loose
end fibres become the tail. The macaw has a slightly longer, pointier tail than the toucan.

Beginner's Guide to needle felting, Macaw and Toucan, step 2

Step 3

Add a tiny wing to the body – see step 11 of the flamingo instructions. Cover the body with a fine layer of wool as with step 13 of the flamingo instructions.

Beginner's Guide to needle felting, Macaw and Toucan, step 3

Step 4

Work the body until it is firm, then add the beak. For the macaw beak, use a small pinch of medium yellow wool and work it directly onto the head using one needle. Make it stumpy, like a fat little cone.

Beginner's Guide to needle felting, Macaw and Toucan, step 4

Step 5

For the toucan beak, use a larger pinch of medium yellow wool. You may find it easier to form the beak loosely on your mat, before attaching it to the head. This beak is longer and curves downwards; use your fingers to pinch the wool into place as you work, to get a nice pointy shape.

Beginner's Guide to needle felting, Macaw and Toucan, step 5

Step 6

Add the patterns onto the body and beak. You only need small fragments of wool for this, and one needle for precision. For band patterns, wrap the strip of wool around the body part (macaw tail, toucan beak) and stab into place.

Beginner's Guide to needle felting, Macaw and Toucan, step 6

Step 7

To make the eye patches, needle the wool in a circular direction to get a good roundness. Use one needle for precision. The macaw has one white eye patch. The toucan has a larger white eye patch, then a smaller pale blue circle overlaid on top.

Beginner's Guide to needle felting, Macaw and Toucan, step 7

Needle felted birds: Sewing eyes (all patterns)

Step 1

Decide where you would like the eye to be positioned and drill a little socket into the felt, using an awl or pointy scissors.

Beginner’s guide to needle felting, how to sew an eye, step 1

Step 2

Thread the loop of the eye with cotton in a colour that matches the body of your brooch and then re-thread both ends of the cotton into a needle.

Beginner’s Guide to needle felting, needle felted birds, step 14

Step 3

Take needle into the eye socket and pull eye snugly into the head. Tie ends at the back of the head. Re-thread the needle with the ends so you can bring them out further down the body, away from the knot, before snipping off.

Beginner’s guide to needle felting, how to sew an eye, step 3

Needle felt birds: Sewing on a brooch pin (all patterns)

Step 1

Use a needle and coordinating thread to sew the brooch back securely to the reverse side of the brooch.

Beginner’s guide to needle felting, how to sew on a brooch pin, step 1

Step 2

For a neat and professional-looking finish, cover the stitched bar with scraps of wool.

Beginner’s guide to needle felting, how to sew on a brooch pin, step 2

We hope you’ve enjoyed needle felting these birds! Make sure you check out our needle felting kits for even more needle felting goodness.