Learn how to make an origami lotus flower in just one evening!
Transform a simple sheet of paper into a traditional symbol of purity and enlightenment with our fantastic origami lotus tutorial. It’s a quick and easy project, and once complete, will produce a sturdy model that will even float on water (depending on the paper you use).
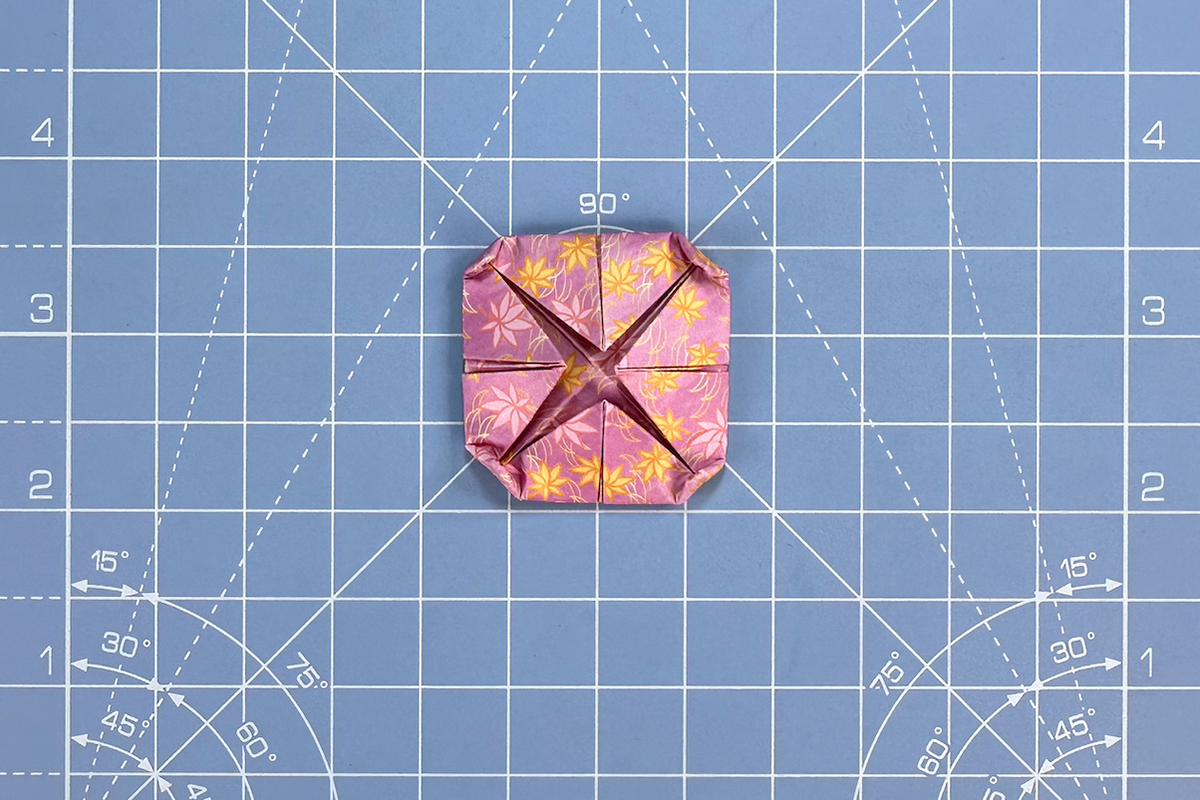
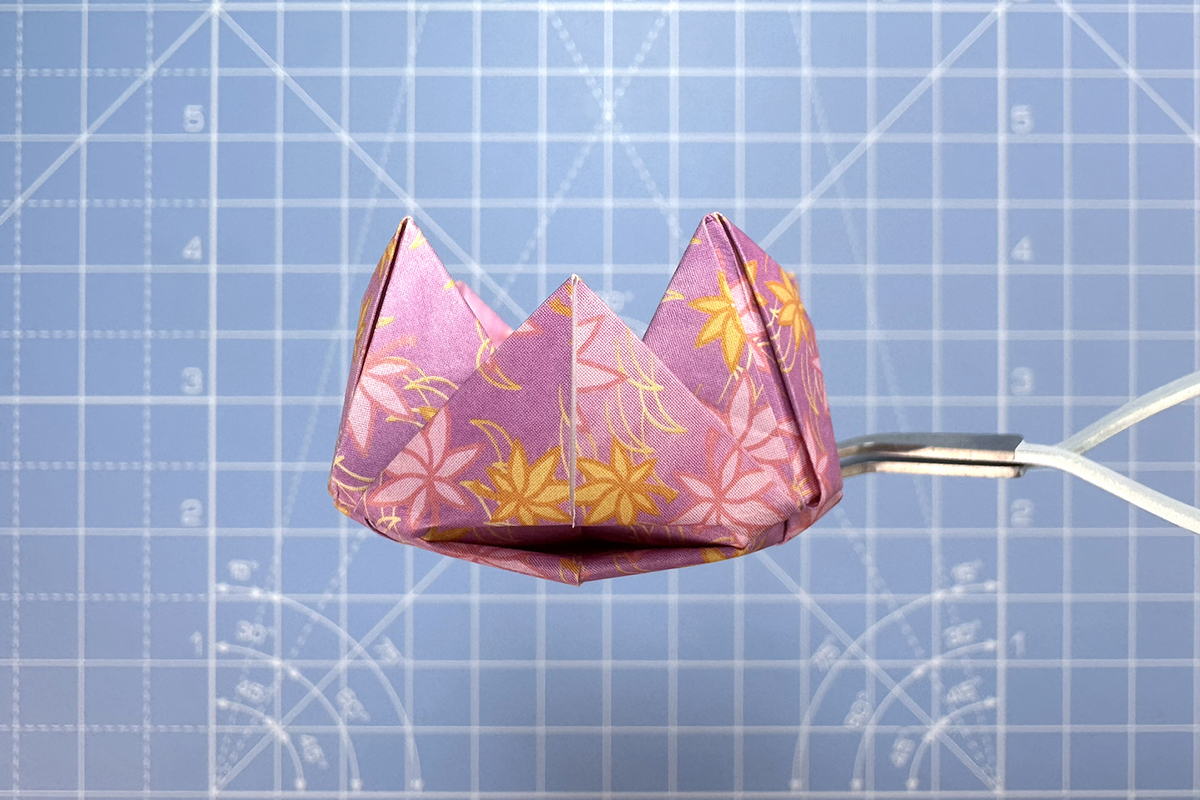
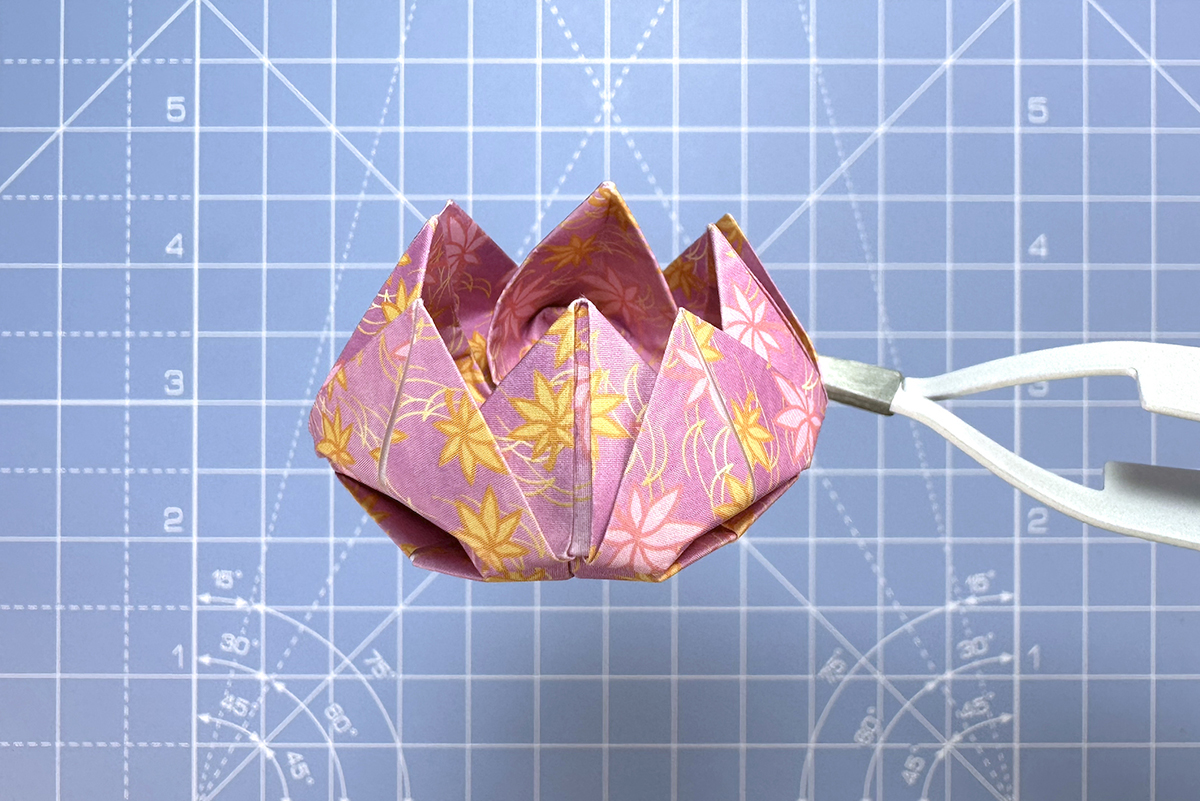
In this tutorial, we’ll teach you all the folds and techniques needed so you can become a pro in no time. The model can get a bit fiddly towards the end, but by going slow and ‘teasing’ the paper into shape, you’ll be able to create your own stunning origami lotus bloom.
Once your origami lotus is complete, curl the edges of the petals outwards to give it a little extra pizazz. And for even more tinkering, why not cut a fringe from yellow paper and roll it up to create a stamen in the middle?
Discover more origami fun here on Gathered:
This origami lotus flower is a great little project, and once you’ve gotten the hang of pulling the petals forward, is one that produces impressive results.
Whether you’re a beginner or just in need of a refresher, join us as we unfold the secrets behind creating this traditional origami model of a lotus flower.
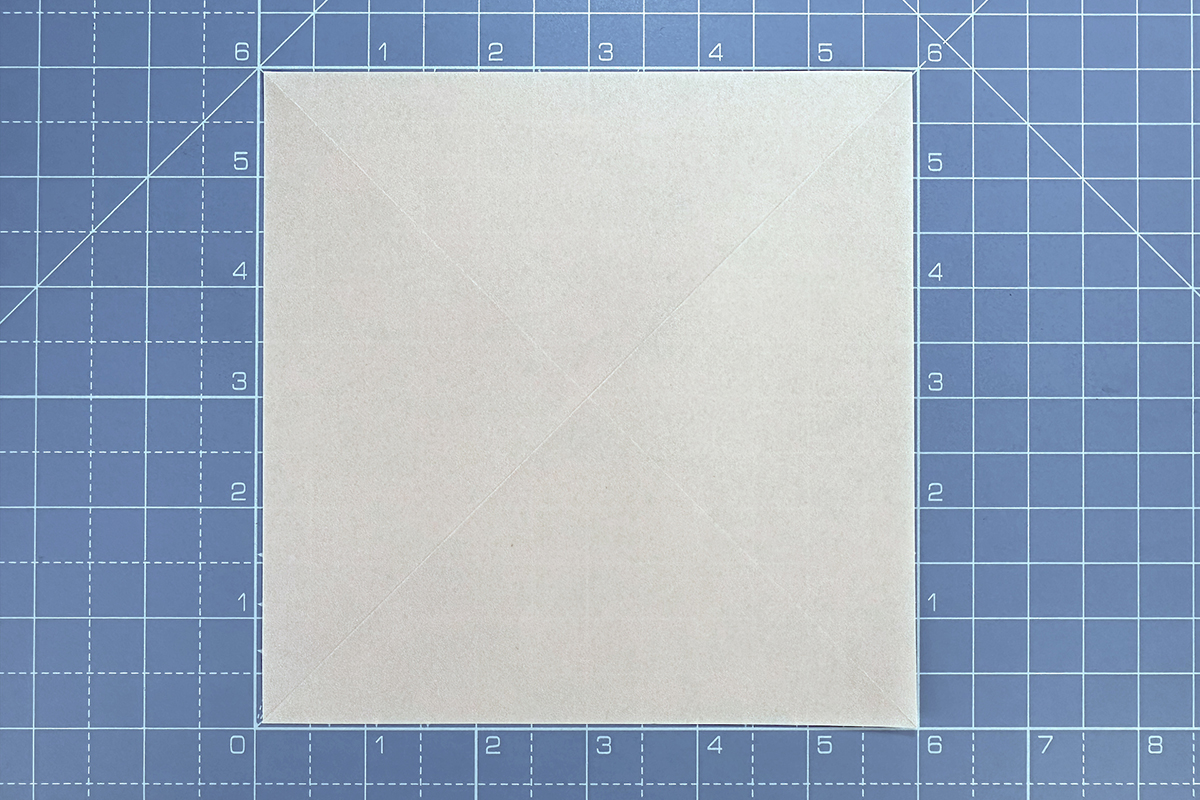
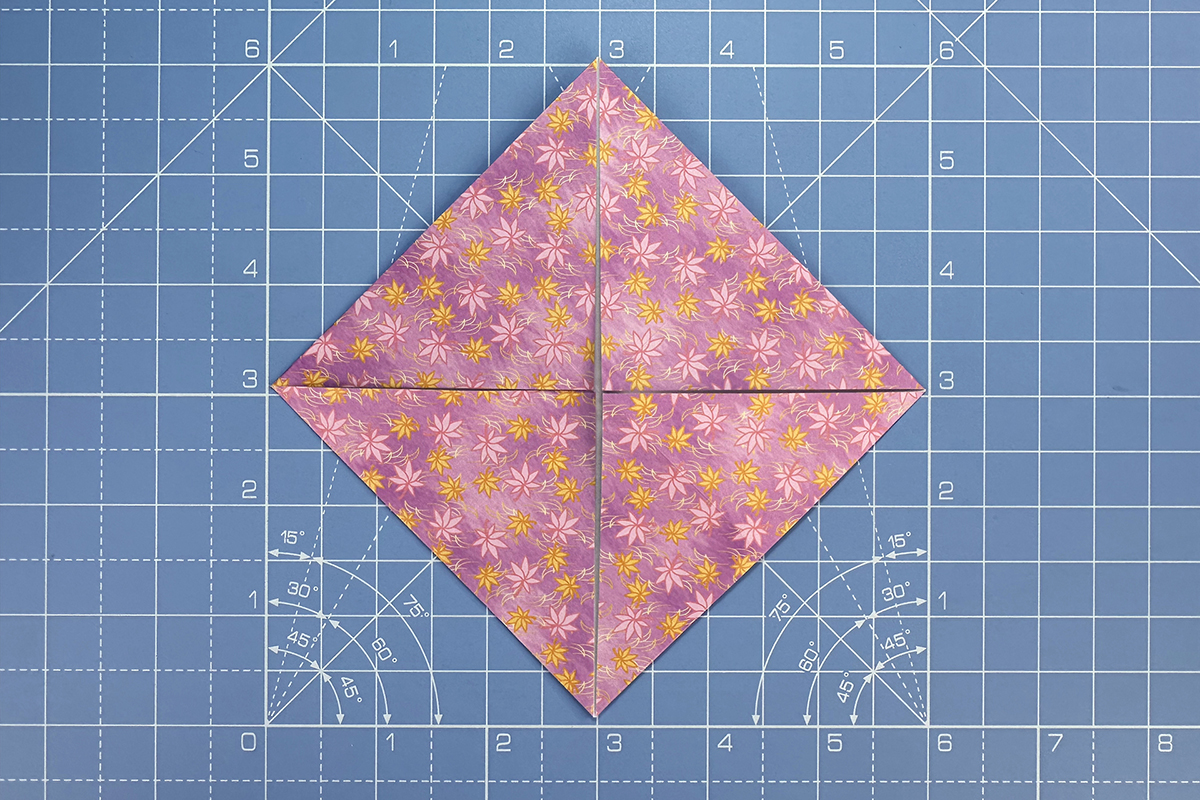
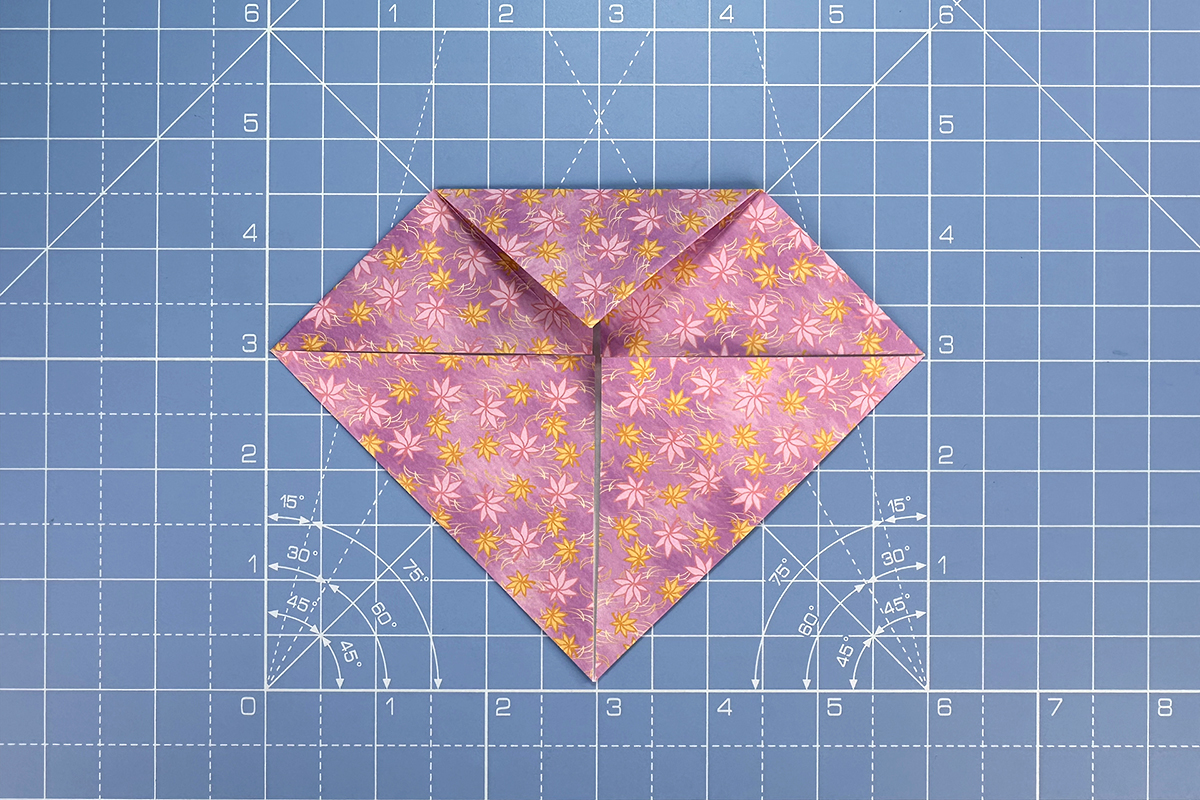
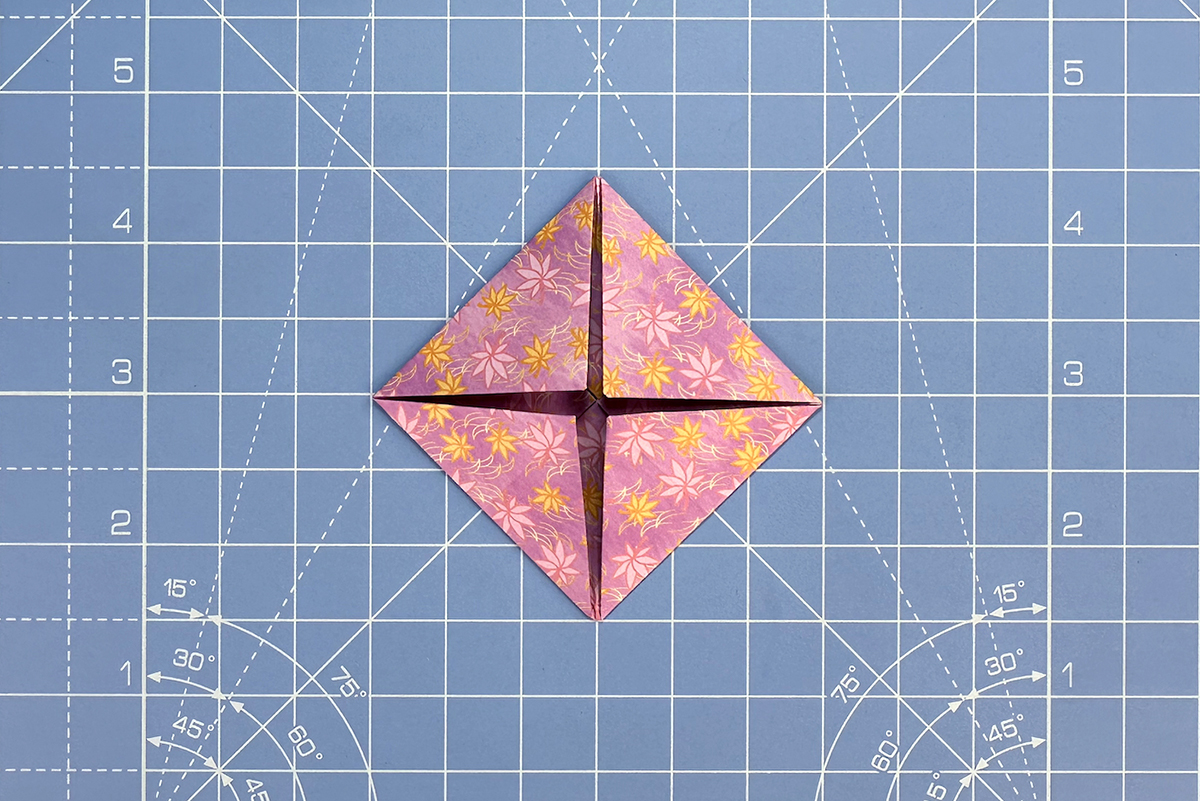
How to make an origami lotus flower step-by-step


Take a digital detox with origami
The constant stream of news, social media and emails can be draining for our mental health. Here’s why origami could help you find your inner peace.