Cutting out
Step 1
From each fat eighth cut:
- One (1) 5in x WOF strip.
- One (1) 2½in x WOF strip. Subcut to give two (2) 9in x 2½in rectangles and one (1) 2½in square. You will only need a total of four (4) 2½in squares for this quilt.
Step 2
From the background fabric cut:
- Twelve (12) 5in x WOF strips.
- Three (3) 10½in x WOF strips.
- Four (4) 13½in x WOF strips.
Step 3
From the binding fabric cut eight (8) 2½in x WOF strips.
Cutting out the triangles
Step 1
Take the 5in x WOF print and white strips. Referring to Figs A–D, cut a total of ninety (90) print fabric triangles and one hundred and twenty (120) white triangles.

Assembling the quilt top
Step 1
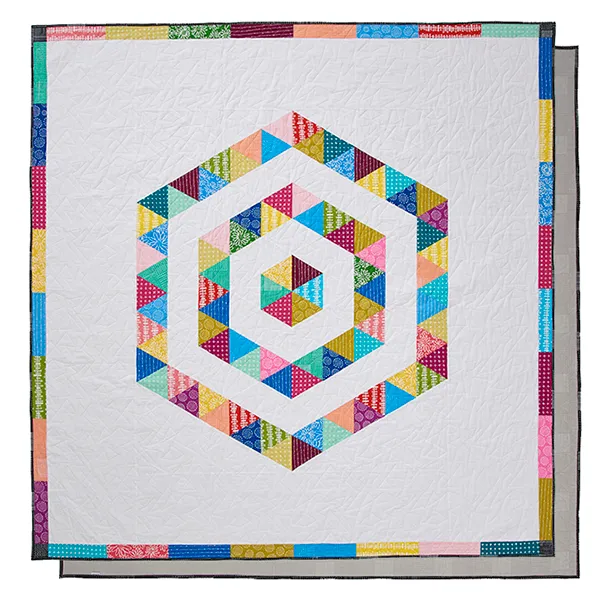
Arrange the print and white triangles into ten rows of twenty-one triangles each as shown (Fig 1). The print triangles are arranged into three concentric hexagons.

Step 2
Sew the triangles into rows, then join the rows, making sure care to match the points.
Step 3
Square up the quilt top, cutting ¼in beyond the points of the triangles at the side edges and taking care to create a 90-degree angle at each corner. The quilt centre should measure 48½in x 42½in.
Step 4
Take the three 10½in x WOF white strips and sew together end-to-end with straight seams. Measure the height of the quilt centre and cut two strips to this measurement – it should measure approx 48½in high. Sew a strip to each side of the quilt centre.
Step 5
Take the four 13½in x WOF white strips and sew together end-to-end with straight seams. Measure the width of the quilt and cut two strips to this measurement – it should measure approx 68½in wide. Sew a strip to the top and bottom of the quilt centre
Step 6
Take eight different 9in x 2½in print rectangles and join on their short ends to make a 68½in x 2½in pieced strip. Repeat to make a total of four pieced strips.
Step 7
Join a pieced strip to two opposite sides of the quilt centre.
Step 8
To each end of the two remaining pieced strips join a 2½in print square. Then join these strips to the two remaining sides of the quilt centre to complete the quilt top.

Quilting and finishing
Step 1
Cut the backing fabric in half across the width. Remove the selvedges and re-join the pieces along the length with a ½in seam. Press the seam open.
Step 2
Press the quilt top and backing well. Make a quilt sandwich by placing the backing fabric right side down, the batting on top, then the quilt top centrally and right side up. The backing and batting are slightly larger than the quilt top. Baste the layers together using your preferred method.
Step 3
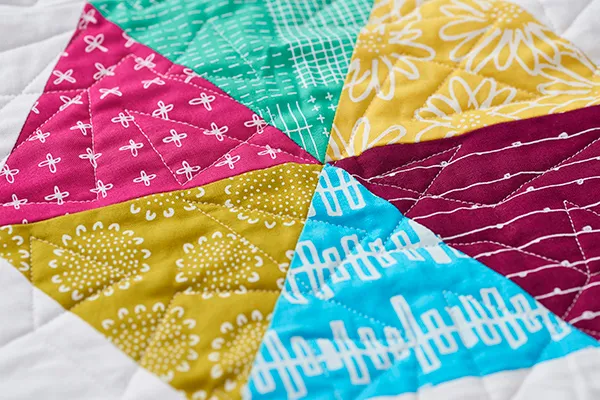
Quilt as desired. Jenny quilted an all over Triangle Meander design by Birgit Hoffman of Black Sheep Quilting
Step 4
Trim off the excess batting and backing fabric, and square up the quilt.
Step 5
Sew the binding strips together end-to-end using diagonal seams. Press the seams open and trim away the dogears. Fold in half lengthwise, WST, and press.

Step 6
Sew the binding to the right side of the quilt, folding a mitre at each corner, then fold the binding over to the back of the quilt and hand stitch in place to finish.