How to make a fabric plant pot cover

Learn how to make a fabric plant pot cover with our free tutorial! It's a fab upcycle project that will make your blooms look even more beautiful.

Try 6 issues of your choice of craft magazine from just £9.99

Published: August 3, 2021 at 9:30 am

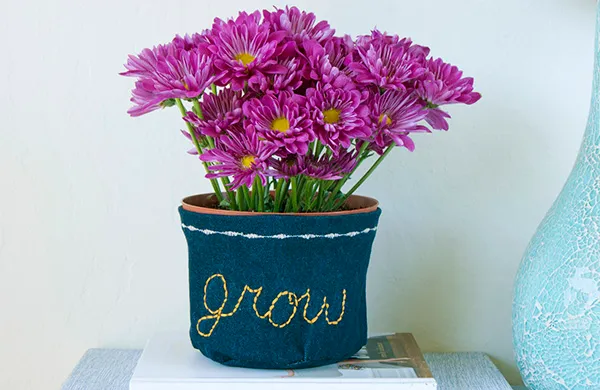
Renters, step away from the no-nails. We have the perfect alternative to motivational posters that's both good for the planet and your bank balance. Oh and your craft stash since it's a great stashbuster project! We show you how to make a fabric plant pot cover using some old fabric, thread scraps and a needle. It's a really simple beginner project that will allow you to practice your sewing and embroidery skills (first head to our sewing for beginners and embroidery stitches guide if you're a newbie). You can make yours in a fabric that matches your blooms and stitch your favourite motivational quotes to the front for a pick me too. Good vibes only. This fabric plant pot cover will also up your flower giving game, be gone plastic wrap and boring brown pots! You could customise the cover with your pal's name, favourite quote or name of the flower. Now let's get stitching, here's how to make a fabric plant pot cover.

How to make a plant pot cover step 3

You will need:

• Denim fabric or canvas • Embroidery hoop • Embroidery floss • Plastic flower pot • Tape measure • Scissors • Chalk pencil • Thread • Sewing notions • Sewing machine (optional) – check out our best sewing machines for beginners guide for reviews and recommendations

How to make a fabric plant pot cover

You will need:

  • Sewing machine
  • Embroidery Thread
  • Denim fabric

Step 1

How to make a plant pot cover

Measure the circumference and height of the plant pot (ours is 18″ x 5″). Also trace the base of the pot onto a piece of denim fabric: this will be the bottom of your plant pot cosy.

Step 2

How to make a plant pot cover step 3

Adding a 1cm sewing allowance, draw the measurements onto the denim fabric, then cut. Write your message on the fabric using the chalk pencil. For a little encouragement, we chose ‘grow’.

Step 3

How to make a plant pot cover step 3

Using a simple back stitch, embroider your message with embroidery floss in your favourite colour.

Step 4

How to make a plant pot cover step 3

Hem the top of your fabric by hand or use one of the embroidery settings on your sewing machine to add a little interest.

Step 5

How to make a plant pot cover

Right side facing, sew the two short edges of the fabric together. Ride sides facing, pin the base of the plant pot cosy to the bottom of the tube piece and stitch in place but hand or using your sewing machine. Turn then place your plant in its cosy.

We hope you’ve enjoyed our how to make a fabric plant pot cover tutorial. We have plenty more upcycling tutorials here on Gathered including our upcycling clothes ideas and our recycled craft ideas for adults.

How to make a plant pot cover step 3

About Enid Gonzalez

Enid is the maker behind A Charming Project. She has a passion for home décor, crafts, plants and coffee!

Share your crafty adventures with us using #molliemakers on Instagram and Twitter or post it on our Facebook wall. Pinning too? See our Pinterest boards.