Step 1
Mixing your polymer clay colours
Mix ten different colours using the polymer clay blocks – three colours for the hook bases and seven for the rainbow colours.
To do this, cut each block of clay into equal-sized pieces and group them according to the following recipes.

For the bases:
Pink – One bar of white + ¹⁄₁₆ of red
Blue – One bar of white + ¹⁄₁₆ of blue
Purple – One bar of white +¹⁄₁₆ of blue + ¹⁄₁₆ of red
For the rainbows:
Red – Half a bar of white + ¹⁄₁₆ of red
Orange – Half a bar of white + ¹⁄₃₂ of red + ¹⁄₁₆ of yellow
Yellow – Half a bar of white + ¹⁄₁₆ of yellow
Green – Half a bar of white + ¹⁄₃₂ of blue + ¹⁄₃₂ of yellow
Blue – Half a bar of white + ¹⁄₃₂ of blue
Indigo – Half a bar of white + ¹⁄₁₆ of red + ¹⁄₁₆ of blue
Violet – Half a bar of white + ¹⁄₁₆ of red + ¹⁄₃₂ of blue
For a deeper colour, add more of the coloured clay. For a lighter colour, add more white.
Step 2

To mix the clay colours, condition the clay by warming it up. Take the clay pieces for the first colour and roll and twist them together, working until the colour is a solid shade with no marbling.
Indulge in beautiful crochet hooks
If you fancy treating yourself then check out our roundup of the best luxury crochet hooks. They’re both pretty and practical!
Step 3

Repeat Step 2 with the remaining clay colours until all ten shades are thoroughly mixed.
Step 4
Now let’s make the decorative clay rainbows

Take a quarter of the violet clay and roll it into a sausage roughly 4cm (¹⁵⁄₈") long. Make two piles of six playing cards, or business cards, with a gap in between them – these will act as depth guides.
Place the rest of the violet clay in the gap, then use the rolling pin to roll it out to an even thickness – it should be the same length as the 4cm (¹⁵⁄₈") sausage.
Step 5

Cut one long edge of the rolled-out clay to straighten it out, then wrap it around the violet clay sausage as shown.
Once the cut long edge wraps around the clay completely, cut off the excess to create a long tube. Any leftover clay can be put aside and reused for future projects.
Step 6

Roll out the blue rainbow clay between two piles of six playing cards as per Step 4.
Then cut one edge and wrap it around the violet tube as per Step 5.
Step 7

Repeat to wrap a thin layer of green clay around the outside of the blue clay, then add a layer of yellow, orange and finally red.
Step 8

Next, reduce the rainbow cane by squeezing it in your hand, squashing the layers of clay together and making it longer.
Once it’s roughly 1.5cm (⅝") in diameter, cut the cane into quarters. Then reduce three of the canes again, making each one smaller than the last.
Step 9

Cut the canes in half along the length, creating long rainbow shapes. Using a sharp craft knife, cut paper-thin rainbow slices from each cane. Put them to one side to use later.
Step 10
Covering your crochet hooks with clay

Roll out the pink base clay to three playing cards thick – it should be long enough to cover the handle of a crochet hook, and wide enough to wrap around it a few times, as shown.
Place the hook along one long edge of the clay, then carefully roll up the clay around it, making sure not to trap any air bubbles. If there are any air bubbles, use the craft knife to burst them, then continue rolling.
Step 11
Carefully rub the clay from the top layer into the layer underneath until they merge and the join is no longer visible. Repeat to wrap the remaining two hooks, one in blue base clay and one in purple.
Step 12
Time to add the mini rainbows to your hooks

Take the thin rainbow slices from Step 9 and lightly press them into the base layer of clay around each hook. Make sure to keep the shape.
Mix up the placement of the different-sized rainbows along each handle to add interest.
Step 13
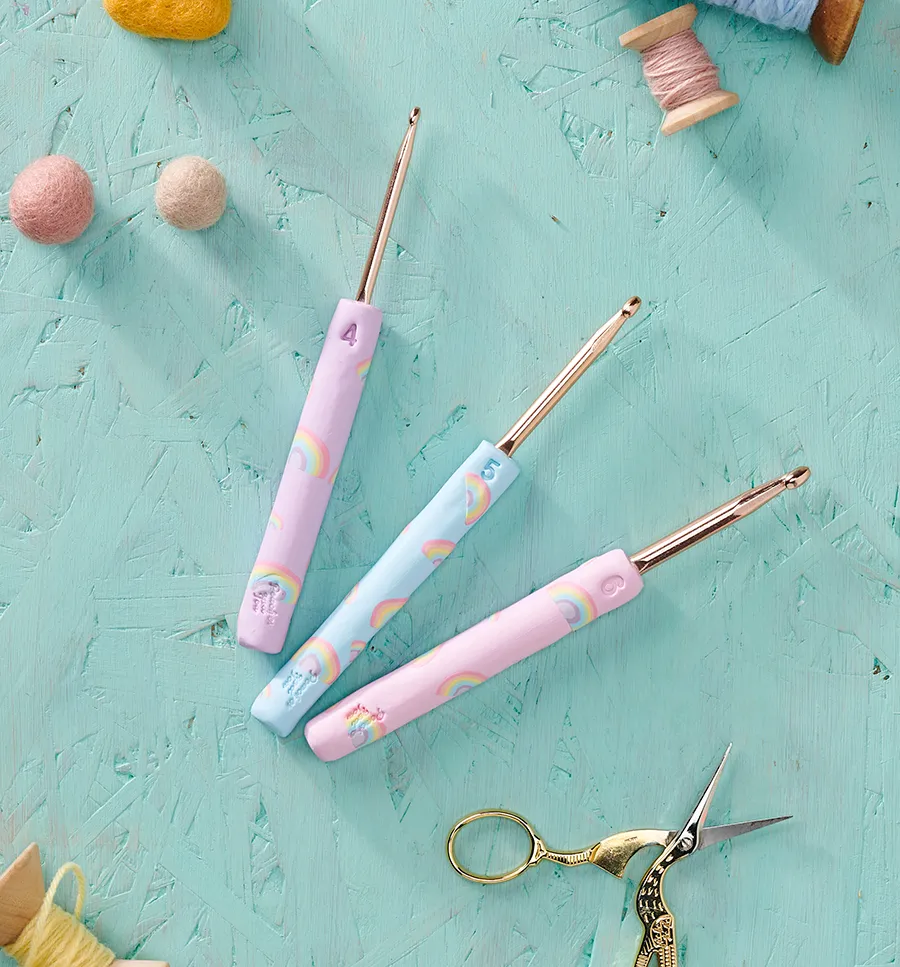
Customise your hooks with stamps
Use the stamps to print the hook size into the clay near the top of the hook.
Place the hooks on the ceramic tile, or on a tray lined with baking paper, and bake following the manufacturer’s instructions.
Step 14
Finishing off your polymer clay crochet hooks

Once the hooks have been taken out of the oven (follow the instructions on your clay packet), leave them until completely cool before using.