
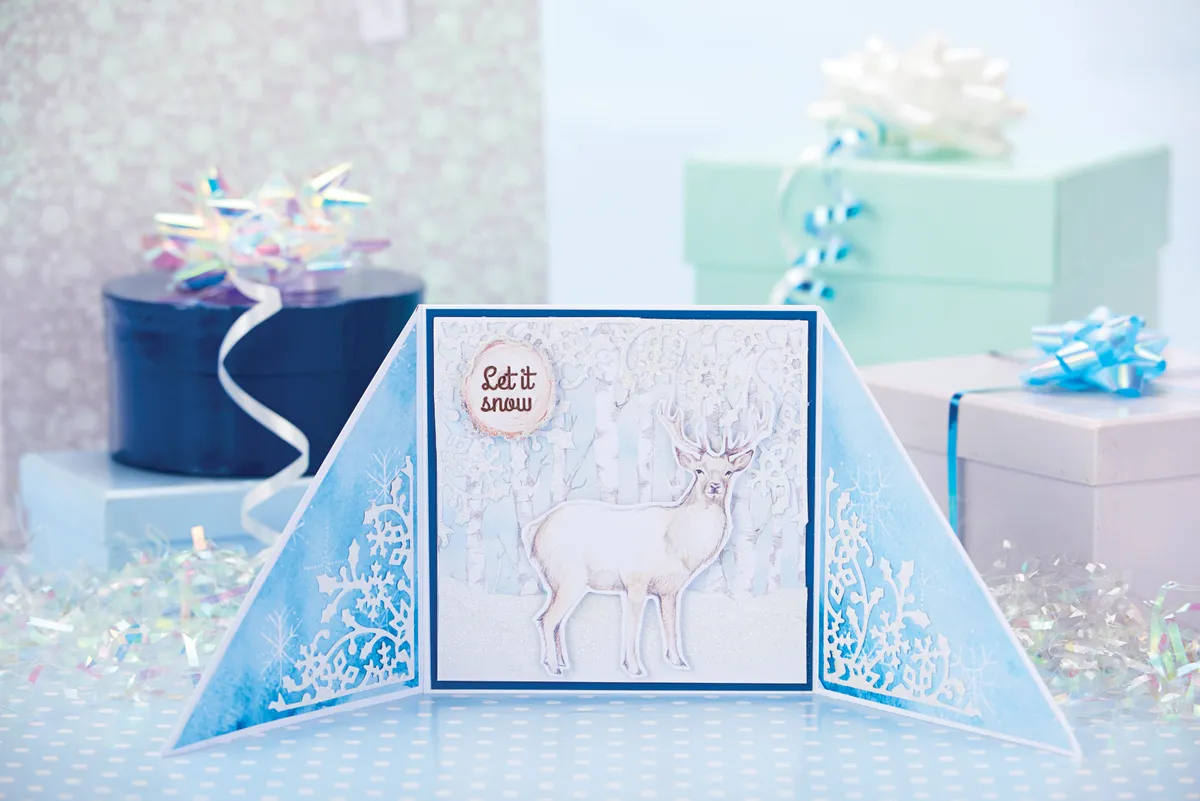
This is a creative take on the traditional gatefold card. The two triangular flaps overlap to hide the stag when closed, revealing him when the recipient opens the card. This is a very simple card, ideal for beginners to learn about layering papers, or for experienced crafters who are looking for quick and easy card ideas for Christmas.
Download your free winter woodland printables to get started, and why not check out some more card inspiration for what to do with these cool freebies.
If you like these free papers, check out our other free patterned papers, there are lots to choose from and there are lots of different festive themes. We love these Nativity characters, or for non-traditional free papers, how about these free sloth downloads for making your own sloth Christmas cards? Or, for more general card making, let us show you how to make cards.
We love seeing what you make with our free printable papers, so don’t forget to share your cards and papercraft projects with us on Facebook and Twitter, too!
 First, download your free winter woodland printables
  Using two contrasting blue papers, cut four triangle-shaped papers and mat them onto the inside and outside of the side flaps, leaving a thin white border around the edges.
 Trim some of the forest paper to measure 11.75 x 11.75cm and mat onto slightly larger dark blue card. With strips of spare white card, gently tear along the long edge on one side as shown.
 Cover the torn card strips with a thin layer of tacky PVA glue, then sprinkle some glitter over the top. Once dry, dust off any excess glitter and layer the strips onto the forest panel.
 Die-cut some decorative corners using some adhesive sheets. Peel away the protective layer and cover the decorative corners with glitter. Stick them onto the side panels of the card. We’re using the Snow Corner die from Wild Rose Studios, but you could easily substitute this with any other frosty-themed doe or even small snowflake-shaped punched shapes. Or – you could even leave it blank and show off the papers instead.
 Carefully cut out the large deer leaving a narrow white border around the edge. Add some sticky foam pads onto the back and stick the deer onto the forest scene.
 Stamp the greeting and add onto the centre panel. Attach the forest scene panel onto the centre of the card. Finish by adding some Stickles (or glitter glue) around the sentiment for added sparkle.

