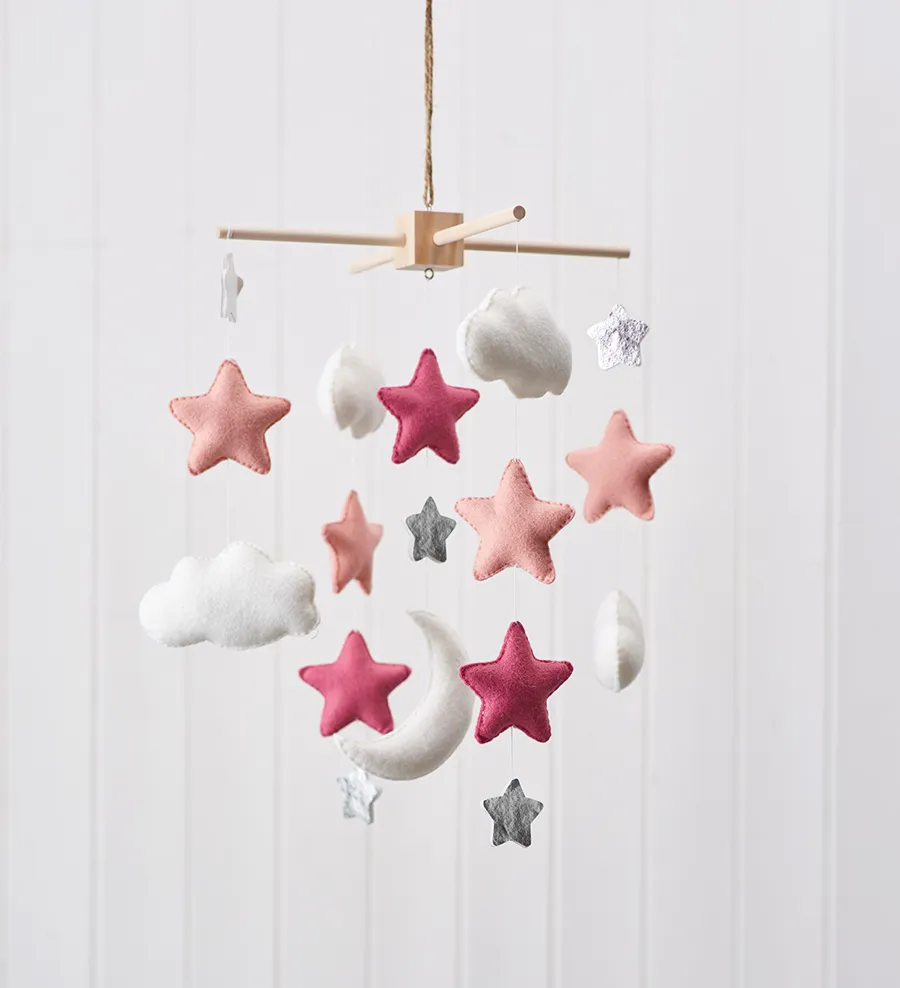
Make our adorable moon and stars baby mobile – so simple even complete craft beginners can try it!
We love making gifts to welcome a new baby, especially when they’re as sweet as this easy-sew moon and stars mobile. Designed to catch the attention of inquisitive eyes, this night sky display will keep little ones entertained by day and soothe them to sleep at bedtime.
- Make your own fun felt vegetable toys
- How to make balloon animals for beginners
- How to make a felt doll family
If you want to keep things really simple just stick to using felt shapes and skip the faux leather and glue gun. Pick similar felt shades for your version, or stay true to the stargazing experience with blues and greys.
When hanging this mobile in a nursery or young child’s bedroom, always make sure it’s kept well out of reach. Avoid suspending it over cot or crib, and always make sure it’s properly secured to the ceiling. Now you know all the basics lets get making your DIY kids mobile!
You will need
- Download and print these mobile templates
- Mobile hanger (see notes)
- Assorted coloured felt
- Metallic faux leather
- Matching sewing thread
- White embroidery thread
- Hot glue gun
- Soft toy stuffing
- Tapestry needle
Notes
You can buy pre-made mobile hangers online like the one used in our pictures. If you feel like getting creative, you could easily make your own by glueing or tying two sticks together, or you could also use a circular embroidery hoop to suspend your moon and stars from, like we've done in this bird baby mobile pattern.

If you want a more challenging sewing project, you could try our free baby romper sewing pattern, complete with a super-cute bonnet!
DIY Stars and moon baby mobile
Step 1
Using the templates, cut out all the pattern pieces from your fabric – you’ll need two for each shape.
Step 2
Pin the two felt pieces for your first shape together, aligning the edges. Sew around the outside, as close to the edge as possible, leaving a gap for stuffing.
Step 3
Repeat Step 2 with your remaining felt shapes, then stuff each one to roughly the same thickness.
To join the metallic faux leather stars, glue the pairs together with wrong sides facing.
Step 4
To hang the shapes, you’ll need to suspend your mobile hanger from a shelf or similar to balance it. Tie a long length of embroidery thread from each of the four hanger arms, then thread the needle with the hanging end of one thread.

Step 5
Using the main image as a guide, sew through the top of the shape that’ll sit nearest the mobile arm. You’ll only need to thread the needle through once or twice – enough to hold it in place, but loose enough so you can adjust its position on the thread if needed.

Step 6
Continue adding the rest of the shapes in the same way, adding or taking away stuffing where necessary to keep the mobile level.

Step 7
Once you’re happy with the positioning of the shapes, neatly sew the gaps on each one closed, checking each time to make sure the mobile is still balanced.

Step 8
Firmly sew each shape in place – you can try adding a tiny bead of hot glue where the hanging thread meets a shape for extra security, and you can also glue the thread to the hanger arms to help secure it in place.

More super-speedy sewing makes
If this felt baby bunting has got you in the mood for more making, check out our list of 40 easy sewing projects – there's something for everyone!