All products were chosen independently by our editorial team. This review contains affiliate links and we may receive a commission for purchases made. Please read our affiliates FAQ page to find out more.

How to make a patchwork butterfly tote bag

Discover the joy of foundation paper piecing and whip up Susi Bellingham's pretty and practical patchwork butterfly tote bag to carry around your quilty essentials

Try 6 issues of Love Patchwork & Quilting magazine for £9.99| SAVE 76%

Published: February 5, 2021 at 5:21 pm

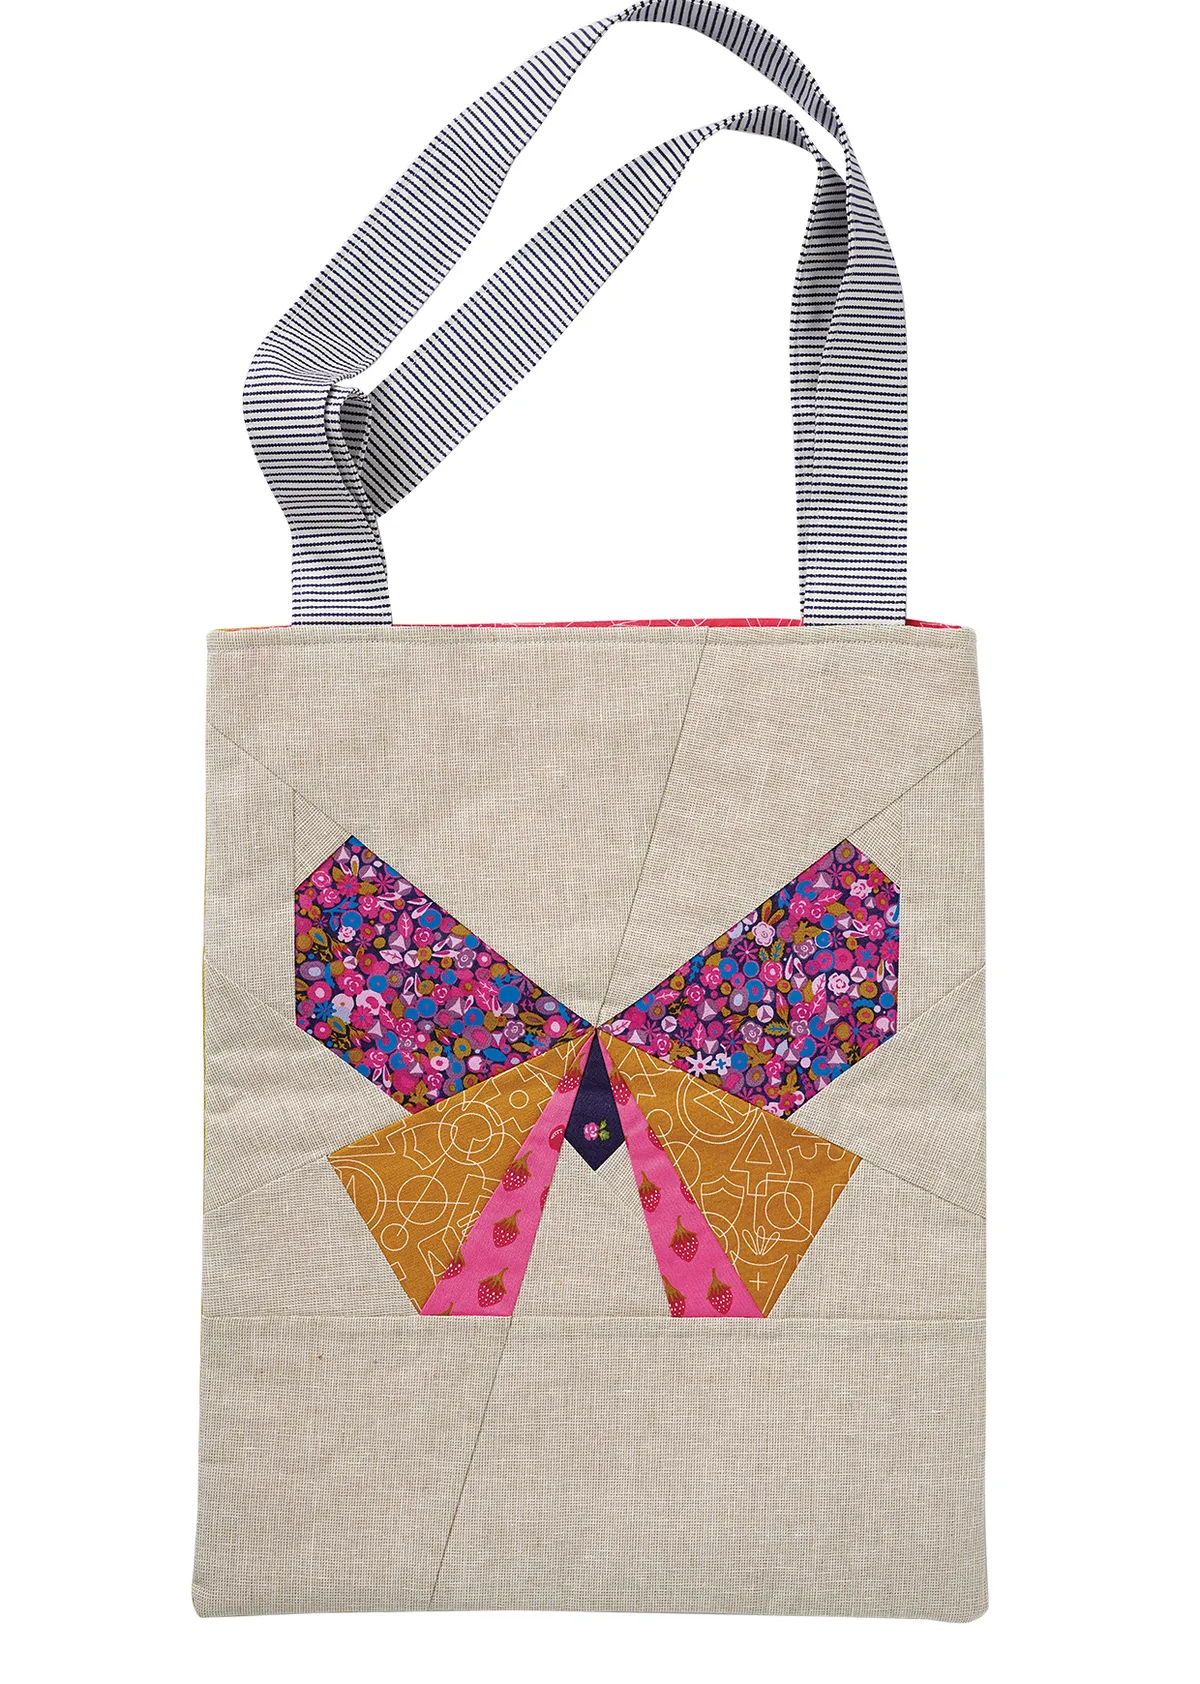
Rescue your fabric scraps from the corner of your craft drawer and turn them into a beautiful patchwork butterfly with this cheerful DIY tote bag. While we've made our butterfly into a pretty yet practical bag, you could also easily turn our butterfly pattern into a quilt block and whip up a batch to make a flutterby quilt top too.

In this step by step guide, we'll show you how to make your own butterfly tote using the patchwork technique of Foundation Paper Piecing (also known as FPP by quilting fans and those short of time!). This clever method involves you sewing small scraps of fabric to a paper pattern to achieve wonderfully crisp and intricate shapes, then removing the paper base to reveal your finished patchwork picture. We've got a free butterfly paper piecing template below for you to download and trace or print at home.

Head to our guide to quilting for beginners if you like the idea of using this butterfly as a foundation for a quilt top but you haven't made a whole quilt before. Similarly if you get the bug for paper piecing from this project, we've got all sorts of extra paper piecing patterns to keep you busy. This project was designed by FPP pro Susi Bellingham (also known as Tiny Toffee Designs) for Love Patchwork & Quilting magazine. Let's go!

Looking for more projects to use up your fat quarters? Learn how to make a bento bag with our free sewing project.

How to make a patchwork butterfly tote bag

You will need

To make one tote bag:

Fabrics used

  • We've used print fabrics from the Road Trip collection by Alison Glass for Andover Fabrics, in Apples in Tarte and Sharp, Tuesday in Risk and Woods, Twenty in Companion and Fire, Daydream in Mystery and Union Jack in Happy.
  • Solid fabrics from Essex Yarn Dyed Linen in Limestone and Pickle by Robert Kaufman.

Finished size

Approx. 15½in x 12½in

Free patchwork butterfly template

Download this free template to get started with foundation paper piecing your butterflies: Free butterfly paper piecing template(PDF)

New to foundation paper piecing?

This technique is best suited to intermediate sewists or confident beginners. Either way you'll need a sewing machine, and some thin paper (printer paper will do) for best results, set it to a short stitch length of 1.5 for the foundation piecing part of your project. And if this is your first time, you're in for a treat! Read our Beginner's Guide to Foundation Paper Piecing before you begin.

You will need:

  • Fabric
  • Iron-on interfacing
  • Paper
  • Sewing machine
  • Thread
  • Basic sewing kit

Foundation paper piecing the butterfly

Step 1

Using our template (above) as a guide, cut the fabric pieces for each section of the FPP template, making sure the pieces will be at least ¼in larger than the section they will cover, all the way around.

Step 2

Foundation Paper Piece Section A as follows. Place the fabric piece for Section 1A right side up on the unprinted side of the template against the section. Ensure that the fabric covers the whole section, plus at least ¼in all around. Pin in place.

Step 3

Place the Section 2A fabric piece right side down on top of the Section 1A piece, matching up raw edges on the side where Sections 1 and 2 will be joined and making sure that when folded back along the seam line, Section 2 will be covered by the fabric plus at least ¼in all around. Pin in place.

Step 4

Turn the template over to the printed side and stitch along the marked line between Sections 1 and 2 backstitching at the beginning and end of the seam. Fold the template away from the seam and trim to ¼in. Fold the template back, turn the work to the fabric side, flip Section 2 open and then press.

Step 5

Continue working in this way to piece the remaining sections on the FPP template, in numerical order. Trim along the dotted seam allowance line.

Step 6

Repeat steps 1–5 to piece each of the butterfly template Sections A–D.

Step 7

Pin together completed sections A and B, carefully matching points at the ends. Return your stitch length to its normal length for piecing. Sew the pinned Sections A and B together. Remove the paper from the seam only and press the seam open.


Step 8

Repeat step 7, adding Section C to Section D. Then sew Section AB to Section CD to complete the block. Trim around the dashed lines on the template to make a 13in x 16in tote front. Remove the papers and press (Fig A).

Patchwork butterfly tote bag tutorial Figure 1
Figure A

Making the tote bag

Step 1

Fuse the interfacing onto the wrong side of your pieced front and tote back pieces, according to the manufacturer’s instructions.

Step 2

Fold your handle strips in half, WST along the long edges and press. Fold the raw edges into the centre crease and press again. Topstitch down both long edges, leaving the short ends open (Fig B).

Patchwork butterfly tote Figure B
Figure B

Step 3

Pin the two ends of one handle to the top edges of the butterfly block, 1¾in from each edge. Stitch in place within the seam allowance (Fig C) and repeat with the second handle and back piece.

Patchwork butterfly tote bag tutorial Figure 3
Figure C

Step 4

Pin the tote front and back right sides together and sew around the sides and bottom edge using a ¼in seam allowance. Clip the corners and turn right side out.

Step 5

Repeat step 12 with the two lining pieces, leaving a 4in turning gap in the bottom seam. Clip the corners and leave wrong side out.

Step 6

Insert the tote exterior inside the lining, right sides together. Match the side seams and pin along the top raw edges, tucking the handle down into the tote (Fig D). Sew around the top edge and carefully turn the tote right side out, through the gap in the lining.

Patchwork butterfly tote bag tutorial Figure 4
Figure D

Step 7

Hand stitch the opening closed and push the lining inside the bag. Press and topstitch around the top edge to finish.

Butterfly patchwork pattern tote bag tutorial