Quilting for beginners: your go-to guide!
Making your own quilts is one of life's greatest pleasures, and we're here to show you how quilting for beginners is easier than you think. You'll be hooked on making cosy quilt projects in no time.
When we talk about quilting, we're referring to the process of making quilts, and more specifically, the part of the process where you sew layers of fabric together. Quilters use these skills to make beautiful heirloom quilts, lap quilts and mini quilts, as well as quilted clothes and smaller homewares too.
It's a craft that's been passed down from generation to generation for centuries. Recently, there's been a surge in new makers taking up sewing and there's never been a better time to learn! We're here to show you how it's done in this essential guide to quilting for beginners.
The good news is, you don't need to be a confident sewist to give it a go. You don't even need a sewing machine – it's possible to make a whole quilt by hand, with the added bonus of being hugely therapeutic too.
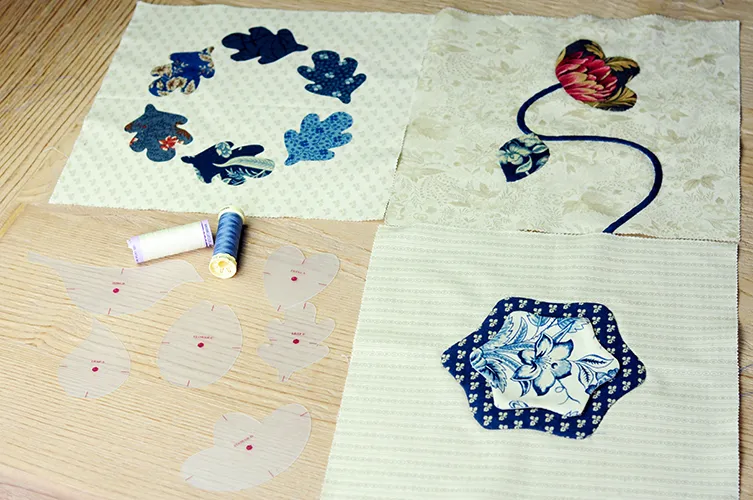
To try soothing hand piecing, download our free hexagon templates. We'll talk you through all the basics of how to make your first quilt (by hand or machine) in this beginners guide to quilting.
Quilting for beginners: start here
Your complete quilting for beginners guide

What is quilting?
Quilting is the process of securing three layers of fabric together, usually by stitching them by hand or machine. Most quilts have the following layers, which form a "quilt sandwich"...
- A fabric top layer (also known as a quilt top)
- A fabric backing layer
- A layer of wadding or batting in the middle.
Quilting can be done with simple hand stitches or knots, or with a sewing machine. The pattern of the quilting stitches can be simple for beginners or elaborately decorative.
Most quilters use a basic sewing machine to make their quilts, but you can also get specialist long arm machines, which have a bigger area to hold your quilt, making it easier to feed larger quilts through the machine.
Whether hand or machine-sewn, quilting stitches are usually small and spaced close together, to prevent the fabric from shifting and moving around over time.
Quilting dates back to before medieval times – the word 'quilt' was first used in England in the 13th century, based on the latin for "cushion". Early quilters would typically make bed covers, with quilts often being listed in medieval house inventories.
They would often became family heirlooms – a tradition that continues to the present day. Historically, quilting was also used to make warm clothing – this was especially popular with the wealthy in 17th century England.
Many beautiful historical quilts have been preserved in collections around the world, with impressive UK collections held by The Quilter's Guild of the British Isles, The V&A Museum and the American Museum.
Quilting took off in the United States in the late 17th century, where quilt-making became a cornerstone of communities, offered practical warmth to homes and evolved into a thriving creative art.
Quilting essentials for beginners
There are plenty of tools and supplies when it comes to quilting. To help you work out what you need, we've created a complete guide to quilting tools that goes into more depth about each piece of equipment.
For beginner quilt makers, here are a few supplies that you'll find come in handy when making your first quilt...
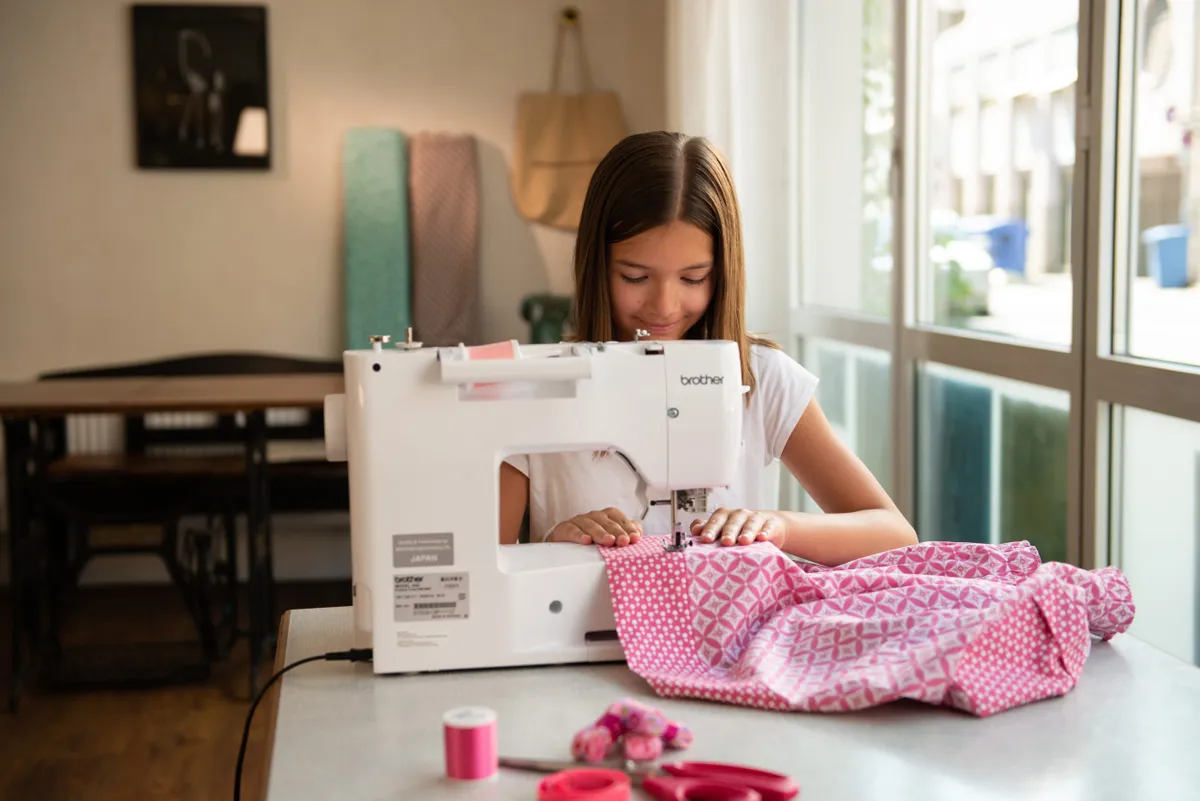
Sewing machine
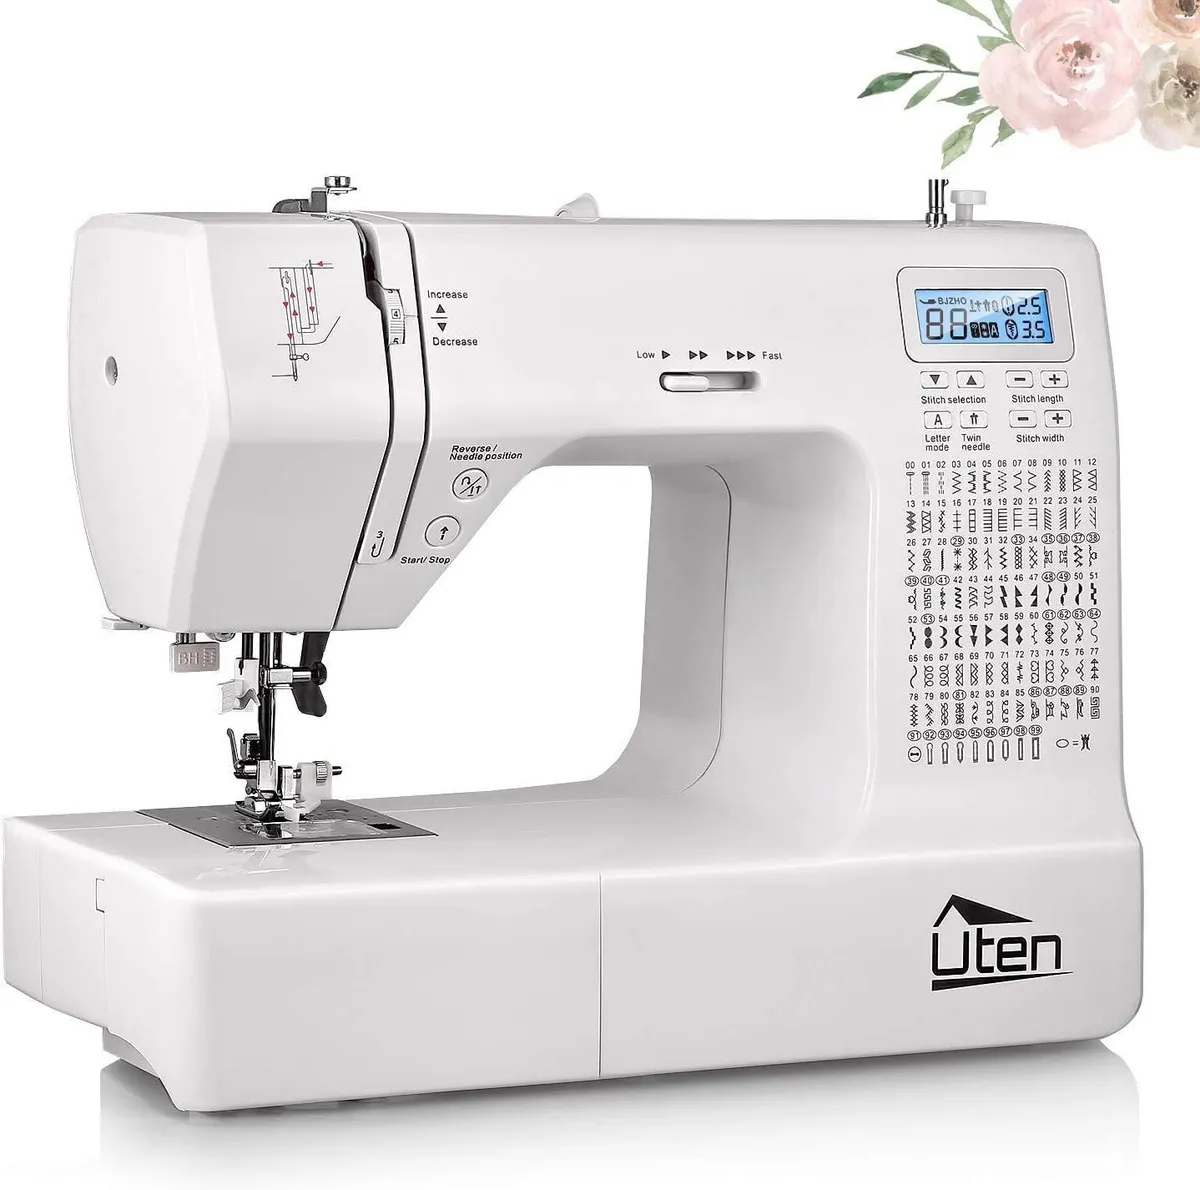
No guide to quilting for beginners would be complete without a mention of your most essential piece of kit! Forget the fabric, if you're going to make your quilts with a sewing machine, you'll get to know it like a trusty friend. The good news is, you don't need an industrial machine to make quilts.
Essentially all you need is a quarter inch foot, a quilting foot and a walking foot. You'll need a machine that allows you to lower the feed dogs (this will free you up to try free-motion quilting once you've gained confidence).
A top-loading, drop-in bobbin is also handy, so you can see how much thread you’ve got left – there's nothing worse than running out halfway through quilting but not realising for ages and then having to go back and re-sew a section.
Sewing machines are a time-effective way of quilting big designs and they give a professional-looking edge to your finished piece. There's plenty of sewing machines on the market in a huge range of price points. Head over to our best sewing machines for quilting guide where we've reviewed all the top machines.
You can also find your perfect sewing machine in our guide to the best sewing machines.
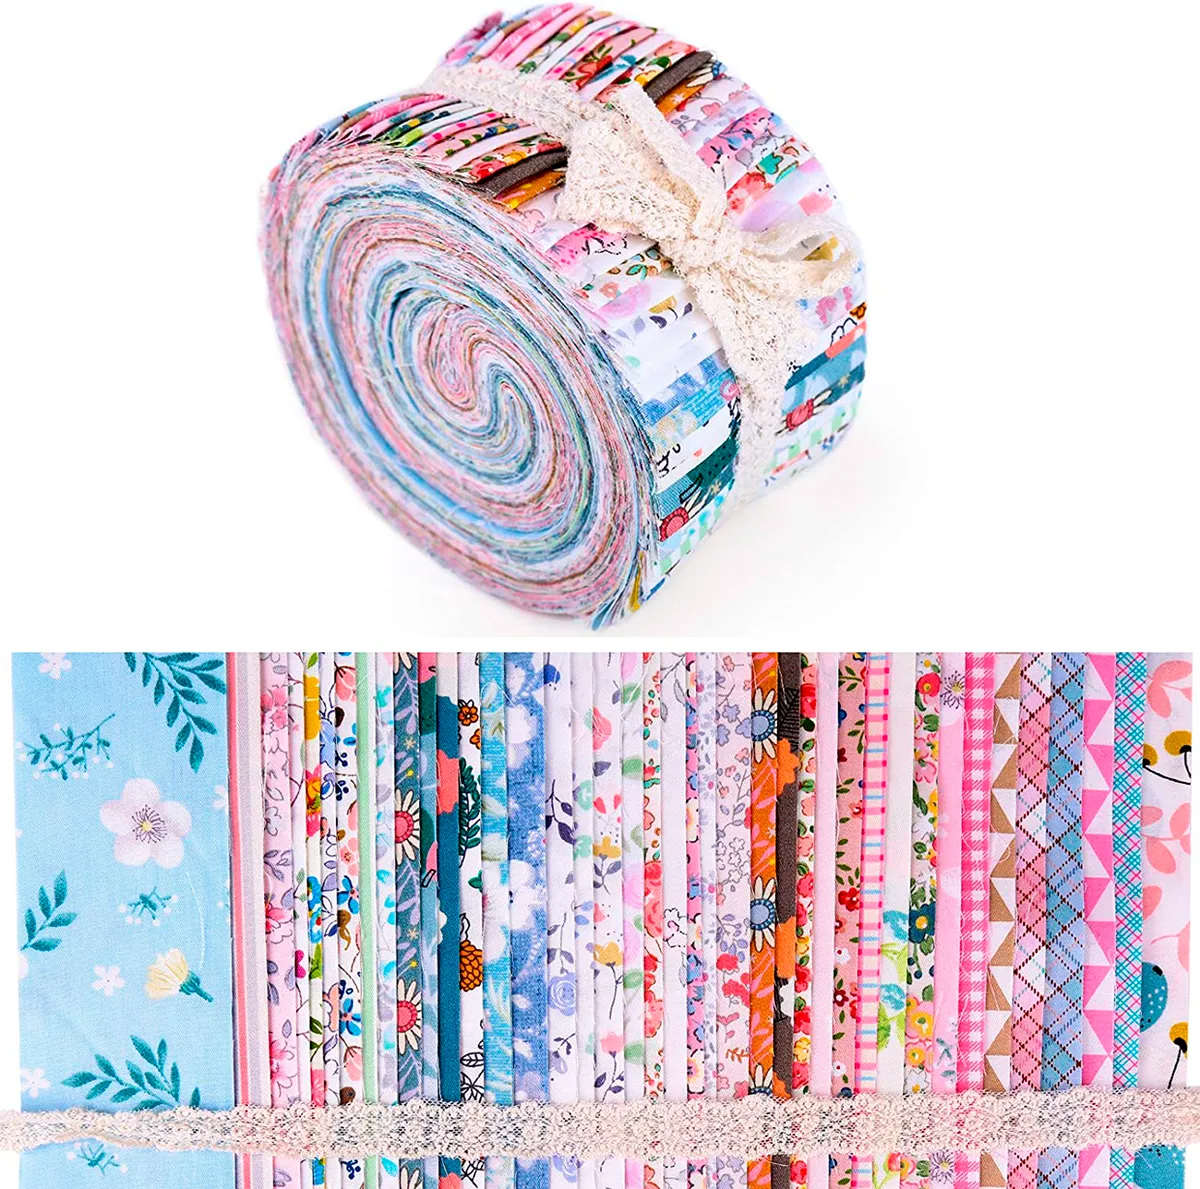
Fabric
SQUIRREL_13079256
Of course, you'll need some fabric to quilt with! You can use whatever fabric you like. There's a huge range of beautiful fabrics on the market, all of which would make lovely quilt designs.
We love this 40 pack of jelly roll fabric from Axmru Store. It includes a gorgeous selection of patterned fabrics in a range of vivid colours. This pack is perfect for beginners as it'll allow you to experiment with different colours and also makes great fabric for patchworking.
If you're searching for specific seasonal fabrics then check out our collection of the best spring fabrics and best Christmas fabrics.
For those of you looking for a selection of fabrics at a great price, we'd recommend buying charm packs or fat quarters. We have a round-up of the best fat quarter bundles and best charm packs for quilting here on Gathered.
Tape measure
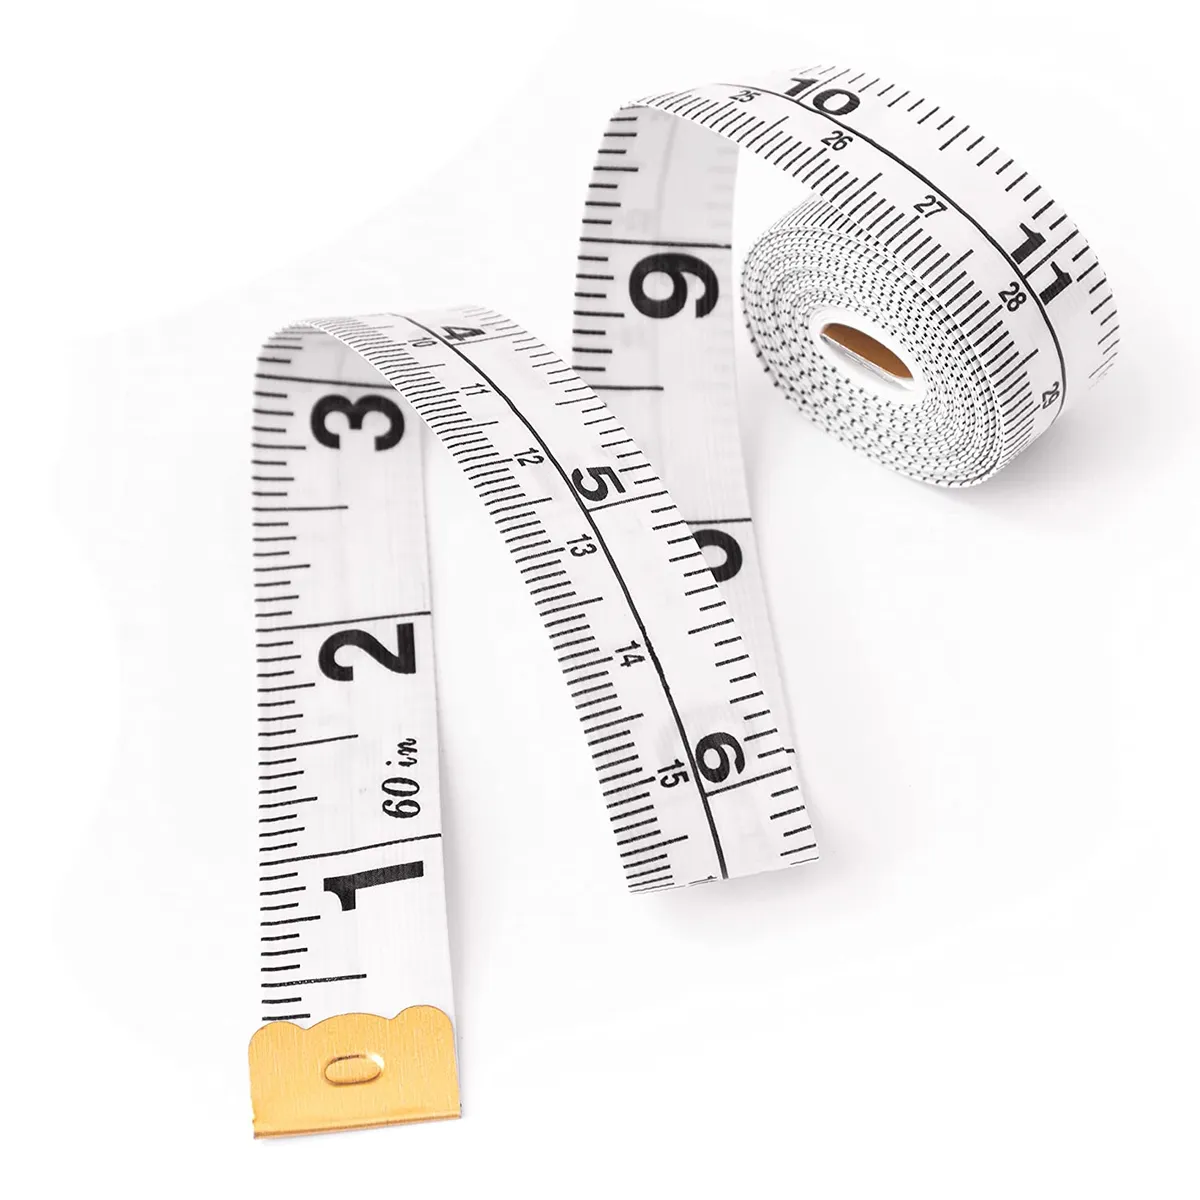
SQUIRREL_13079264
Many quilt designs require precise measurements to ensure the finished piece looks professional.
A tape measure will be your best friend when you're working out sizes and seam allowances.
Pins
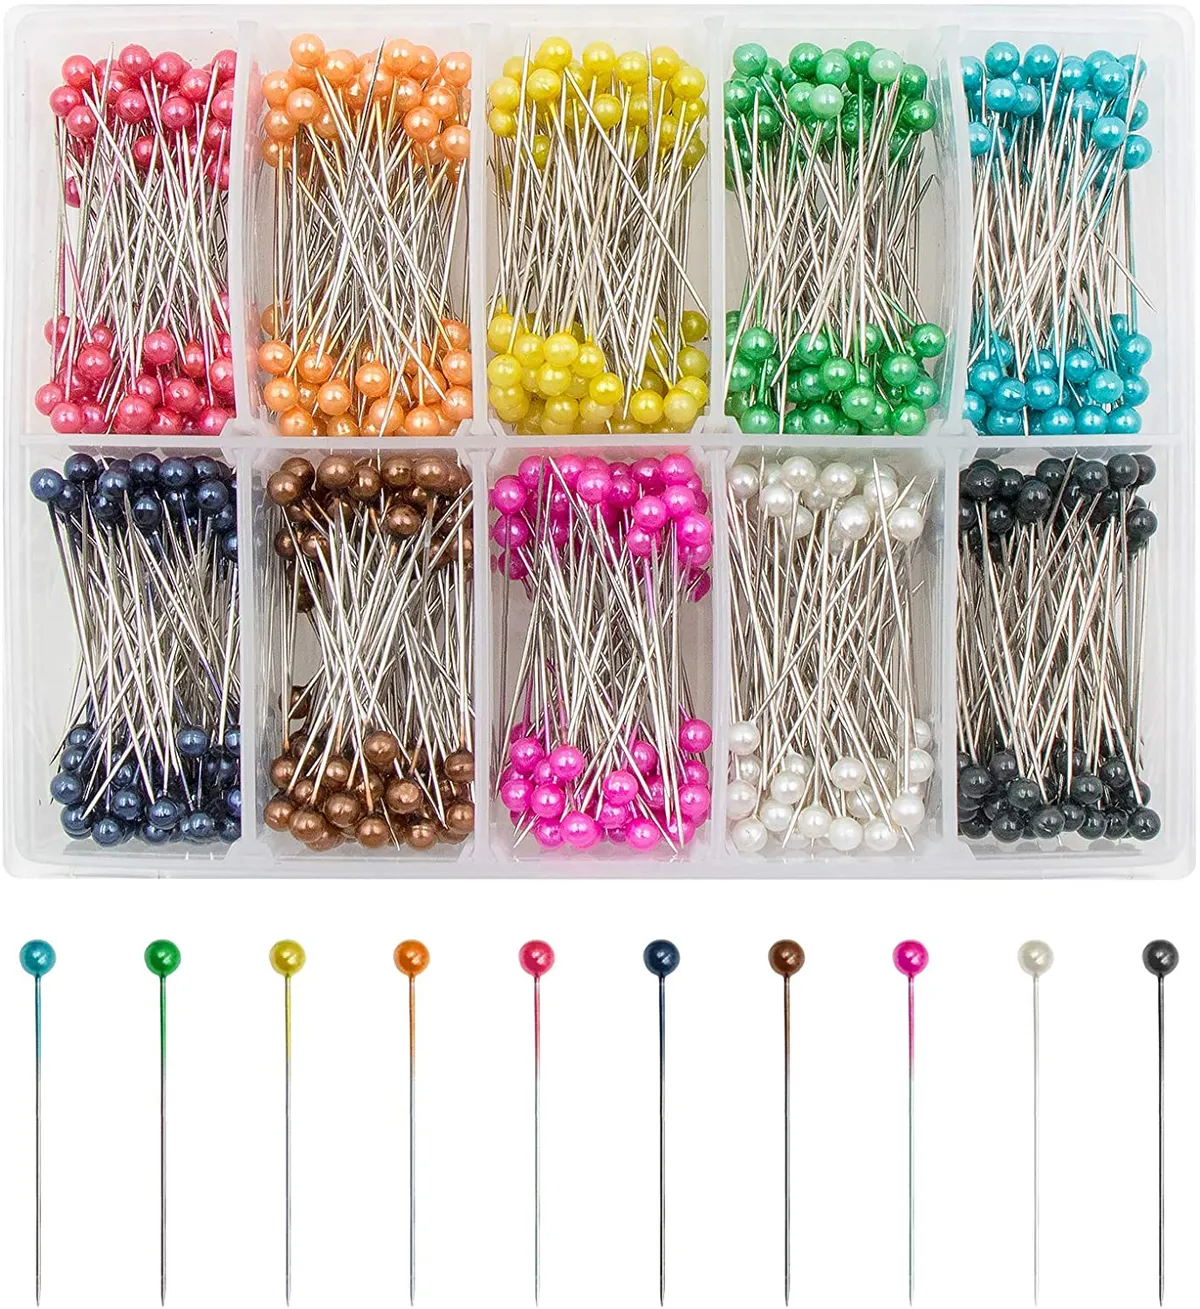
SQUIRREL_13079255
Pins are handy for a number of different uses. They're a necessity for securing fabric pieces together but can also be used to secure appliqué designs.
They're also handy if you're dressmaking, stretching crochet squares and much more. Small safety pins also come in useful when making a quilt sandwich.
Quilting Ruler

SQUIRREL_13079253
Quilting rulers are great for helping you to measure and cut fabric pieces. They're a quilter essential and we think everyone needs one.
We rounded up the best quilting rulers here on Gathered to help you find the most useful one.
Experienced quilters may also be interested in free motion quilting rulers which are brilliant for those wanting to experiment with their sewing machine.
Scisssors
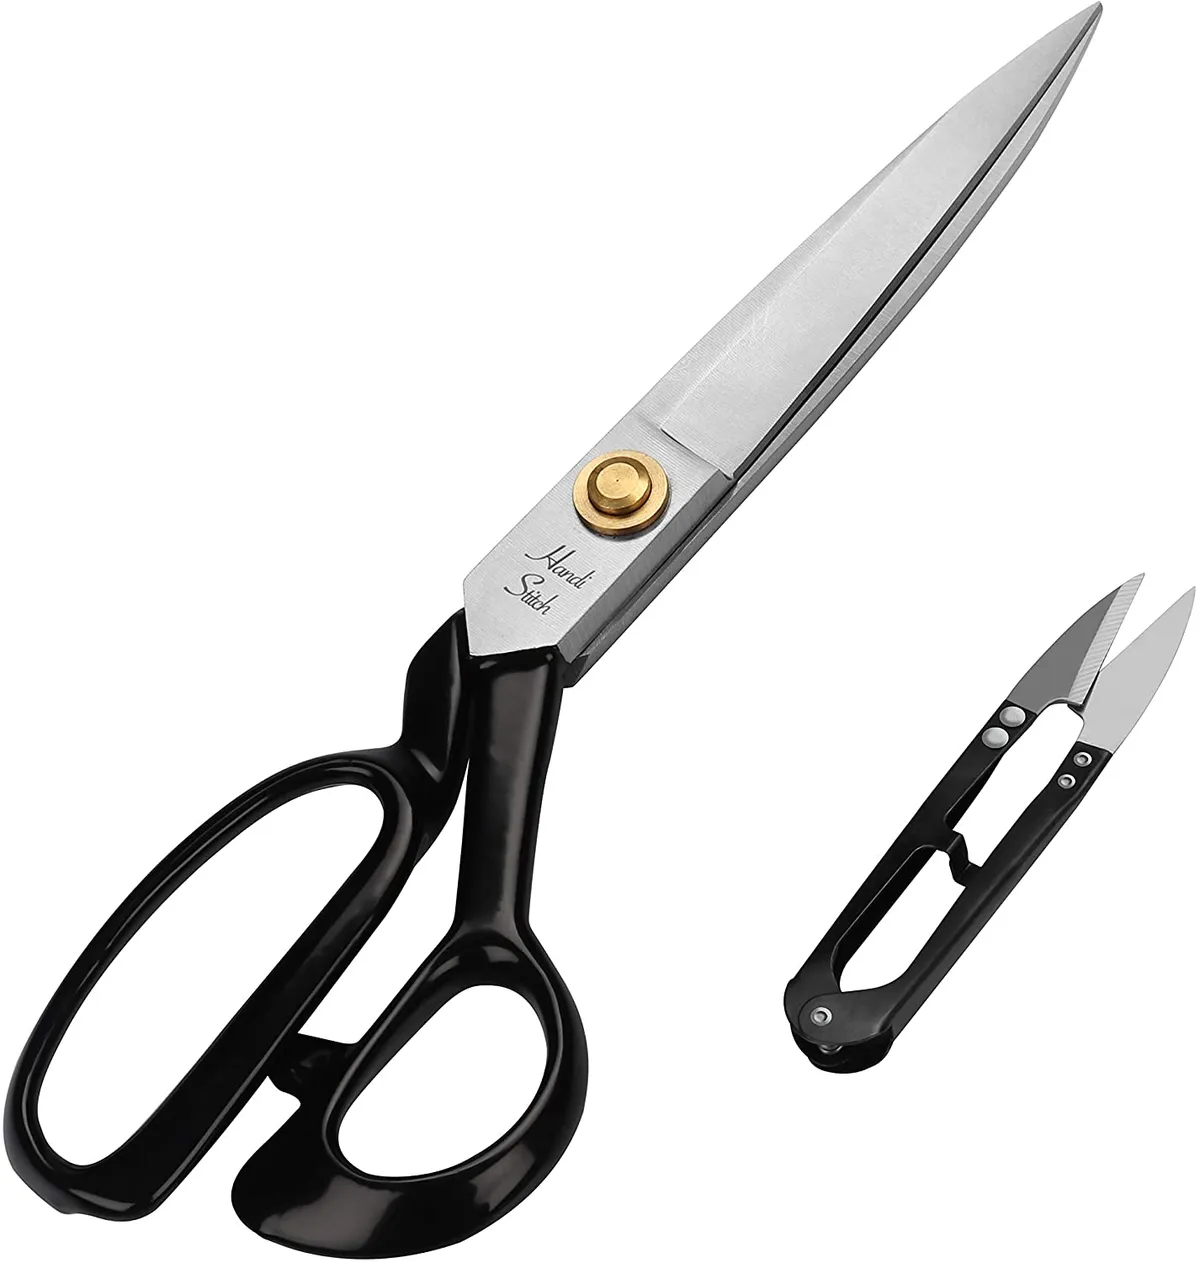
SQUIRREL_13113577
Scissors are a crucial quilting tool! You can use dressmaking shears for cutting fabric and embroidery scissors are handy for cutting small threads. We've rounded up the best scissors to help you find the perfect set.
It's also worth getting a seam ripper. It'll be your new best friend! It's very handy to help you undo stitches if you make a mistake.
Steam iron and board
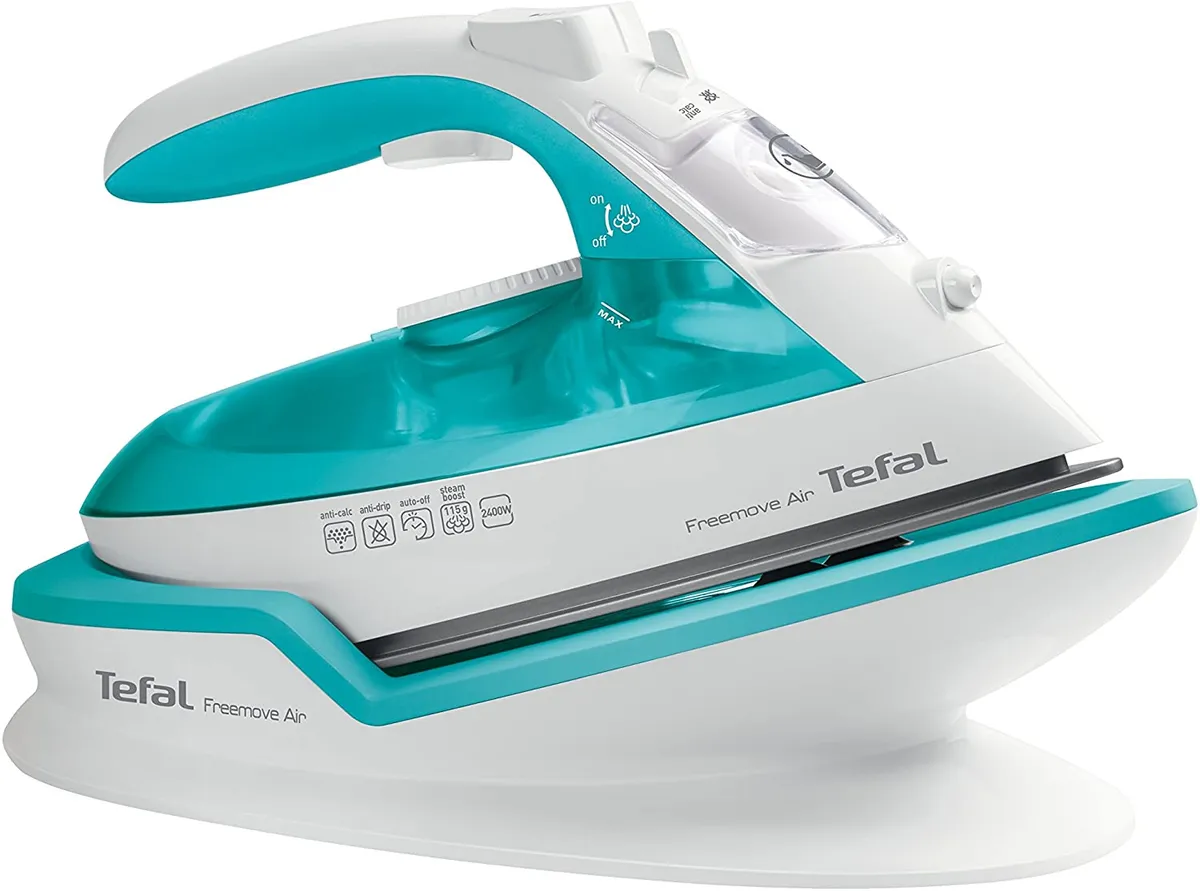
SQUIRREL_13079250
Give your design a professional look by pressing your fabric before and after making. There's plenty of nifty little irons on the market but you can also use your own.
If you're looking for a new iron then have a read of our best irons for quilting round up.
Fabric or chalk markers

SQUIRREL_13195833
You'll use these to mark your quilting design onto your fabric. It's best to pick an erasable one like the marker above so you don't leave trace marks on your finished designs.
We have a complete guide to fabric markers here on Gathered.
Fabric glue
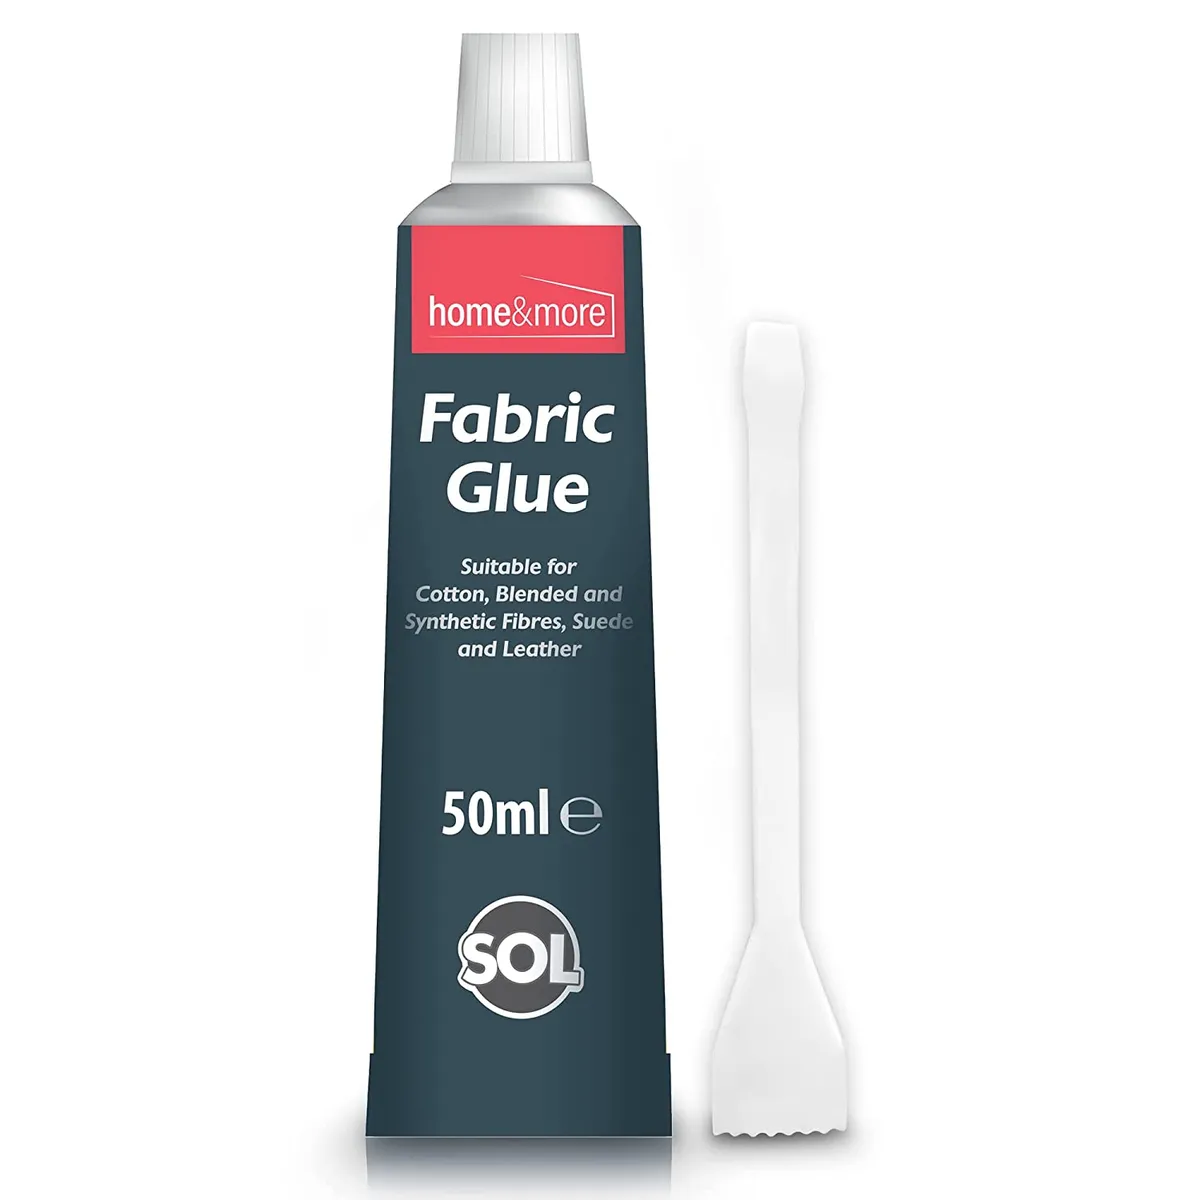
SQUIRREL_13079249
You might need this to baste fabric if you're doing hand piecing, or spray glue is often used to baste the layers of your quilt together.
To help you differentiate between all the glues on the market, we've created a complete guide to craft glue. This guide covers the best fabric glue for both quilting and sewing.
Quilting kits for beginners
Alternatively, you could pick up a quilting kit. Quilting kits are great for beginners because they include everything you need to make your first project.
Often kits include pre-cut fabric (ideal for newbies as cutting, measuring and piecing fabric can be tricky), full instructions, patterns and thread.
You will need some of the basic quilting essentials we've mentioned above, but they're still brilliant for those who don't know where to start.
If you're interested in picking up a kit, head over to our round-up of the best quilting kits for beginners which includes a range of types.
How to make a quilt
OK let's get ready! We're going to show you how to make a quilt, step by step. We'll show you how to make a basic patchwork quilt top, turn it into a quilt sandwich, then quilt it by machine or hand.
How to make a patchwork quilt top
To begin making your quilt, you'll need to cut squares or shapes out of fabric and sew them together to create your "quilt top".
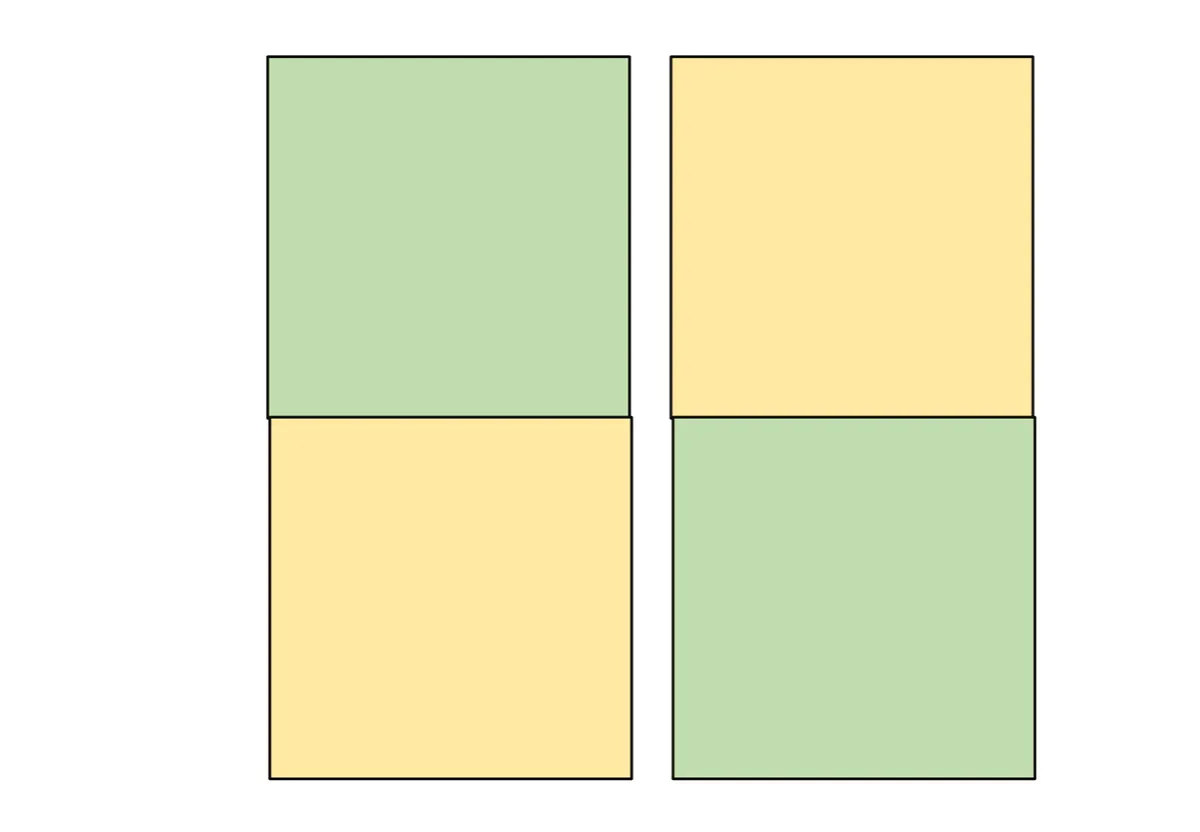
There are all sorts of ways to arrange your fabric shapes, from curved piecing to log cabin quilt blocks, but we're focusing on quilting for beginners here, we'll show you how to get started with what's known as a four-patch quilt block.
You'll basically cut out a batch of fabric squares and sew them together into larger squares of 4 units each – this looks a bit like a Battenberg cake. For the sewing part, you can either use a sewing machine or hand sew using a simple running stitch.
Step 1
Cut out four equal-sized squares of fabric – the basic elements of your Four Patch block.
You could opt for two different colours or all four can be different colours. If this is your first quilt, try cutting your squares to be 8x8in or 12x12in.

Top tips for cutting your fabric with a rotary cutter
- Use a strong acrylic quilter’s ruler when cutting – normal rulers are not suitable.
- Always cut away from you, replace the guard the moment you have finished cutting and wear suitable shoes in case you drop the cutter.
- As you cut, keep your fingers away from the ruler’s edge.
- Replace the blade when the cutter starts skipping threads.
- Take care! Rotary cutters are extremely sharp.
- Cutting fabric pieces so they are right-angled and on the straight grain will get the best results in patchwork
Step 2
Place two squares, right sides together. Pin them together and sew along the edge to join them, using a ¼in seam.
Press the seam open or to one side. Repeat with the other squares, to make two pairs.
Measurements & seam allowances
Most quilters describe their measurements in imperial numbers (inches), although either imperial or metric measurements (sometimes both) can be included in a project depending on the designers preference.
Don't convert figures unless you have to. If possible, use the measurement system stated within the project you are working on; where both imperial and metric are given, choose one and use that consistently throughout the project.
A ¼ inch seam allowance is commonly used by quilters and designers, but always check the specific measurements given for the project you are working on.
Step 3
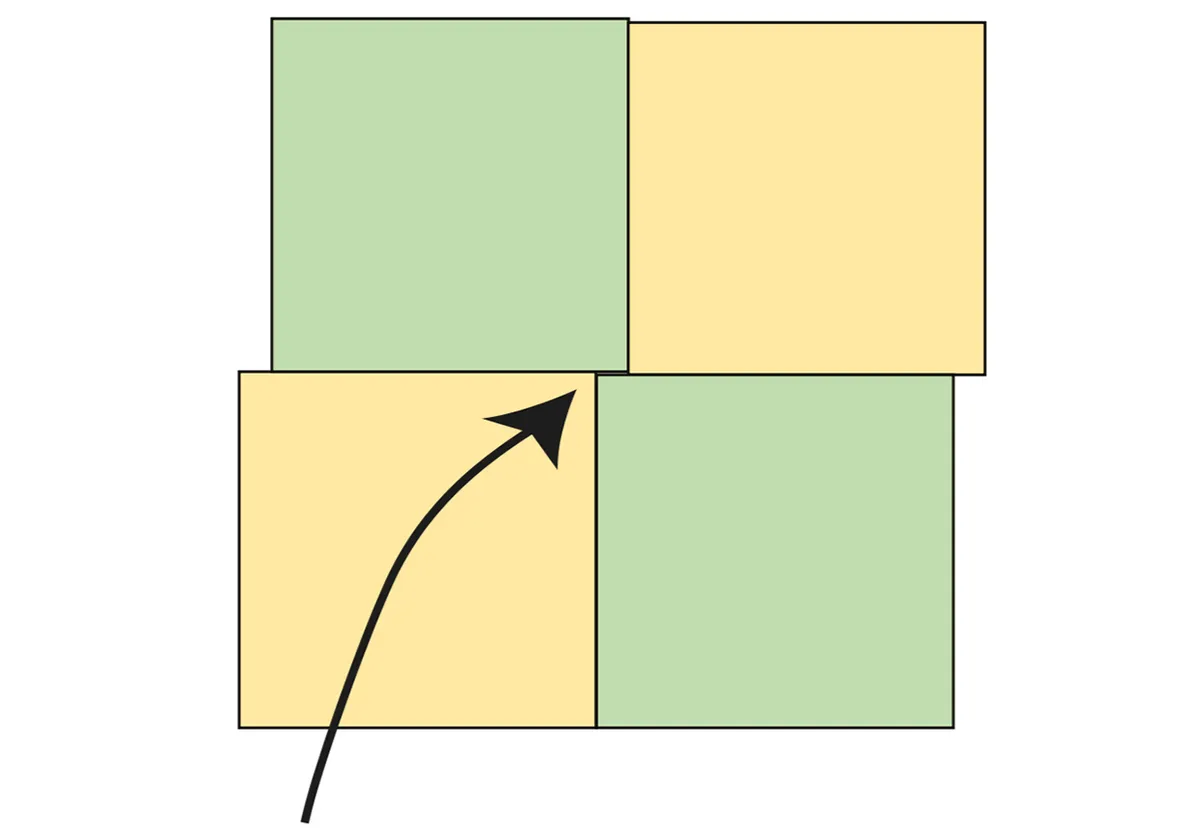
Now put the two pairs of squares right sides together, lining up the edges at the top and bottom, and making sure the seams at the centre match our illustration.
Pin and sew together and then press the seam.
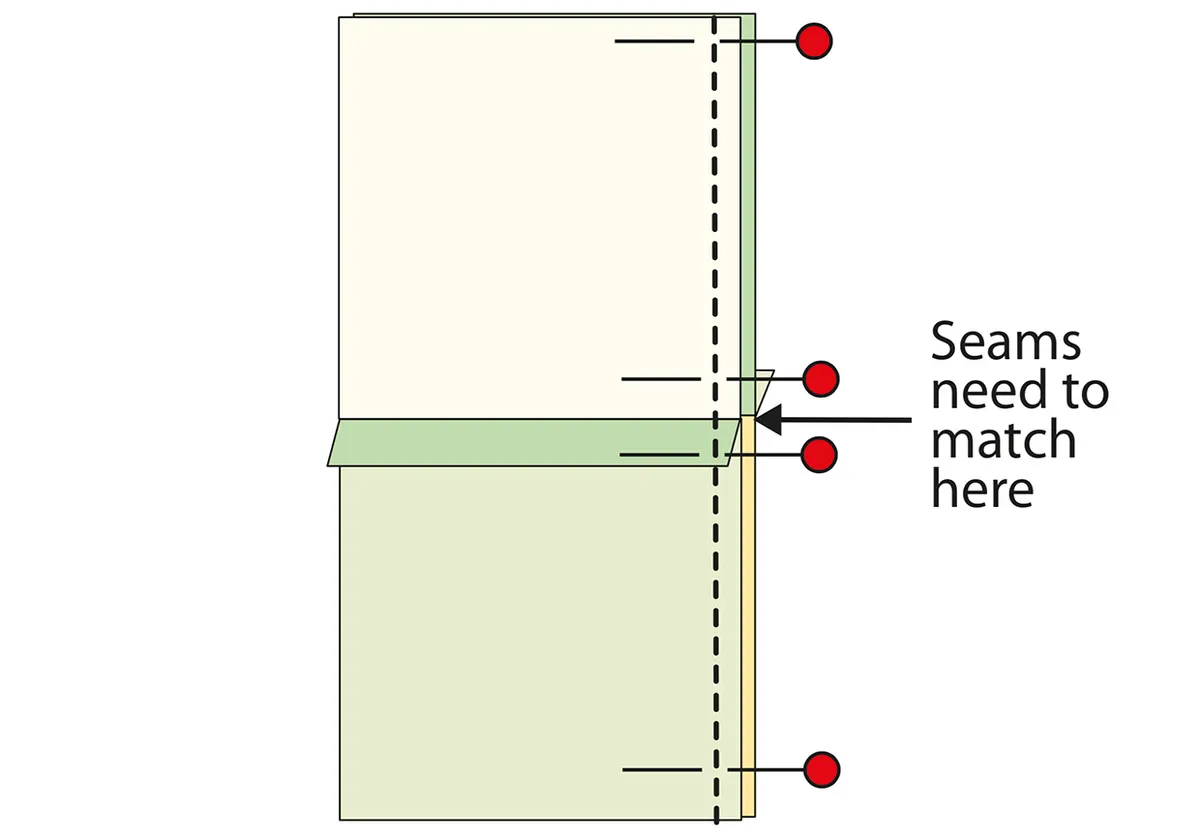
Pin fabric pieces together well, especially at seam junctions. If you press the seams on one unit in the opposite direction to its neighbouring unit this will help the seams fit together neatly.
Step 4
Turn your quilt block right side up. The point where all four squares meet should match up.
If it looks like this, your seams must have not quite lined up evenly. No problem – grab a couple more fabric scraps and try again!
Step 5
Whip up a batch of these 4-patch blocks and them join them into larger groups of four, and the same again, until you've made your quilt top.
Step 6
Once you've made your quilt top, it's time to "square up" – which means trimming the edges to tidy them into one large, neat rectangle or square.
Place the fabric on your cutting mat so a selvedge is aligned with a horizontal marking on the mat.
Check the right-hand side of the fabric – if it is also following a horizontal line on the mat then it is square; if not trim that fabric edge.
Do the same on the other side of the fabric piece. You can also check that a finished quilt top is right-angled using the same technique.

Perfect patchwork
Learn more in our complete guide to patchwork for quilting.
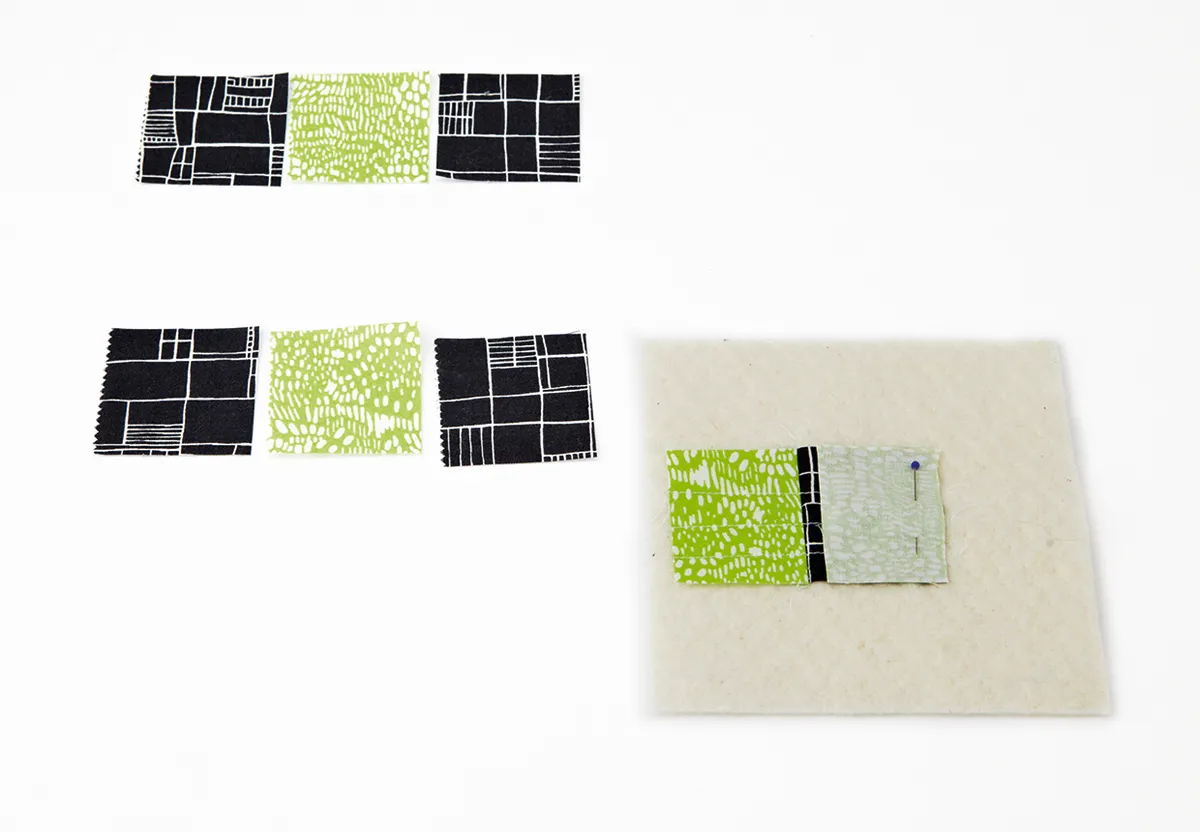
How to make a quilt sandwich
After you finish making your quilt top, it's time to create a ‘quilt sandwich’ – this is a layering of the quilt top, wadding and backing.
See our guide to How much fabric do I need to make a quilt? for tips on how to calculate how much fabric you need for your wadding and backing layers.
Wadding is also known as ‘batting’ in some countries. To use wadding, first shake it out and lay it flat for a day or longer to remove any creases. Some waddings can be pressed with a cool iron, but take care to do a test first. Never iron polyester wadding or it will melt.
Cut the wadding so it’s a little smaller than your backing fabric but larger than your quilt top.
Our complete guide to wadding and batting is here to give you all the information you need on this step – We'd recommend reading through this article to get to grips with these materials!
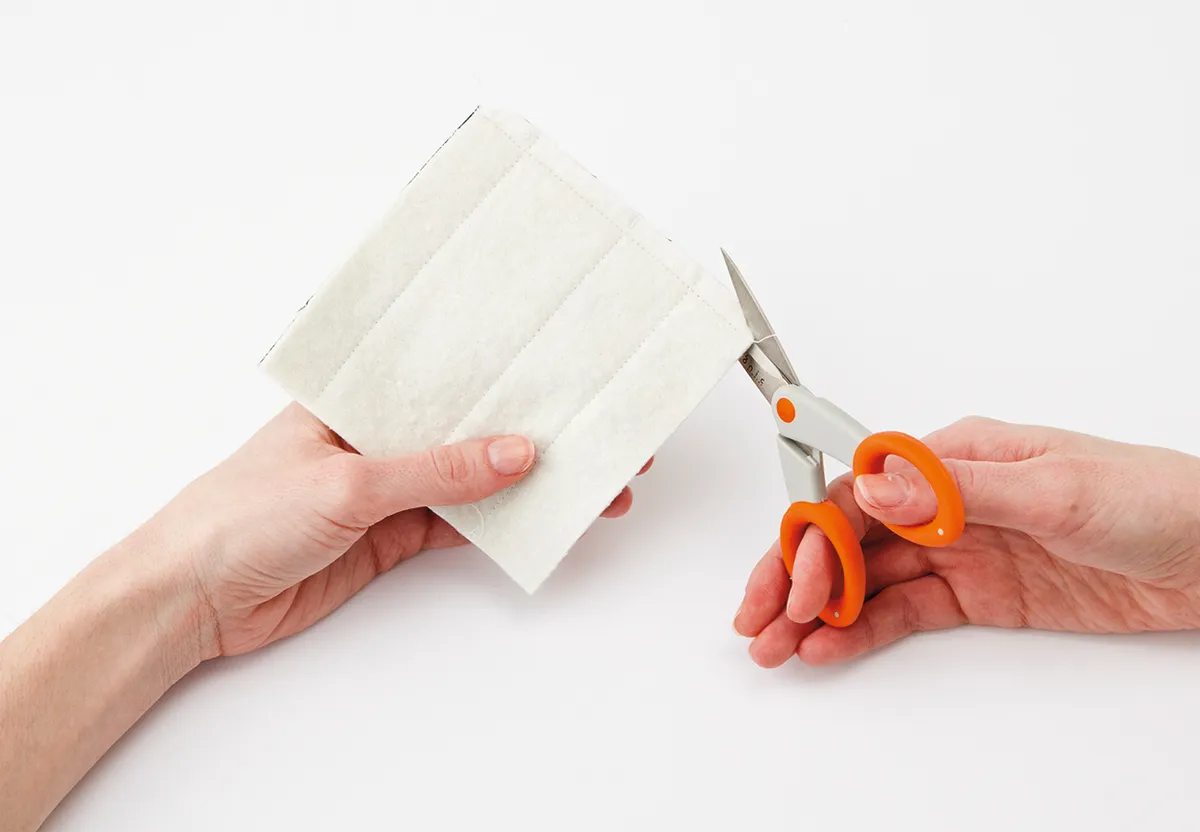
How to make a quilt sandwich – step by step instructions
Step 1
Prepare the three parts of your sandwich! Start by pressing the quilt top on both sides with an iron, checking seams are pressed in the neatest directions and trim any trailing threads.
Cut your wadding and backing so they are several inches larger than the quilt top all round.
The sandwich can be fixed together in various ways, including tacking, pins and spray glue.
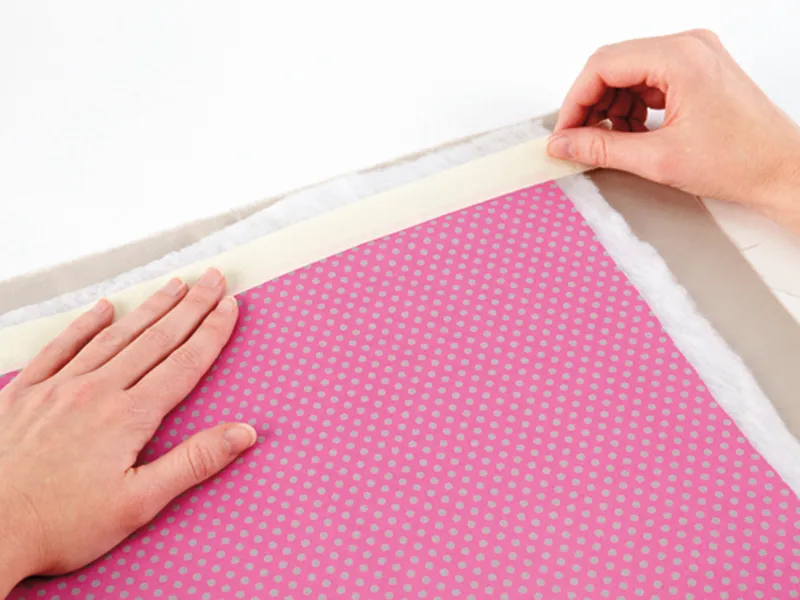
Step 2
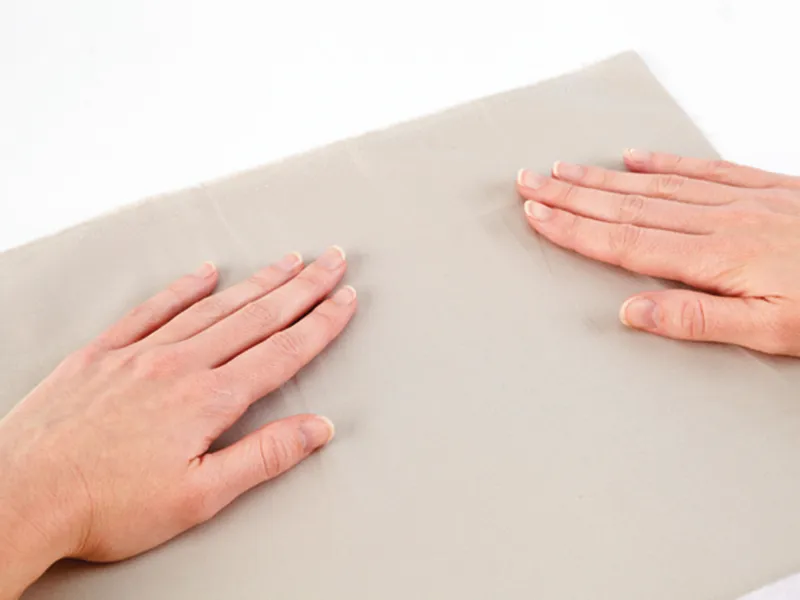
Lay the pressed backing fabric right side down on a flat surface and smooth it out.
Step 3
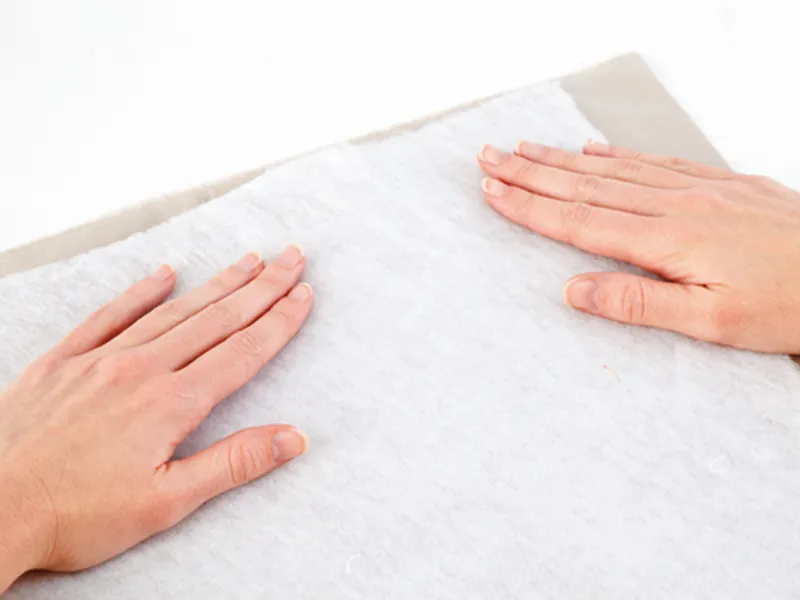
Lay the wadding on top of the backing and smooth out any wrinkles.
Step 4
Lay the pressed quilt top right side up on top of the wadding, with backing and wadding showing all round.
Fix the layers to the surface with masking tape.
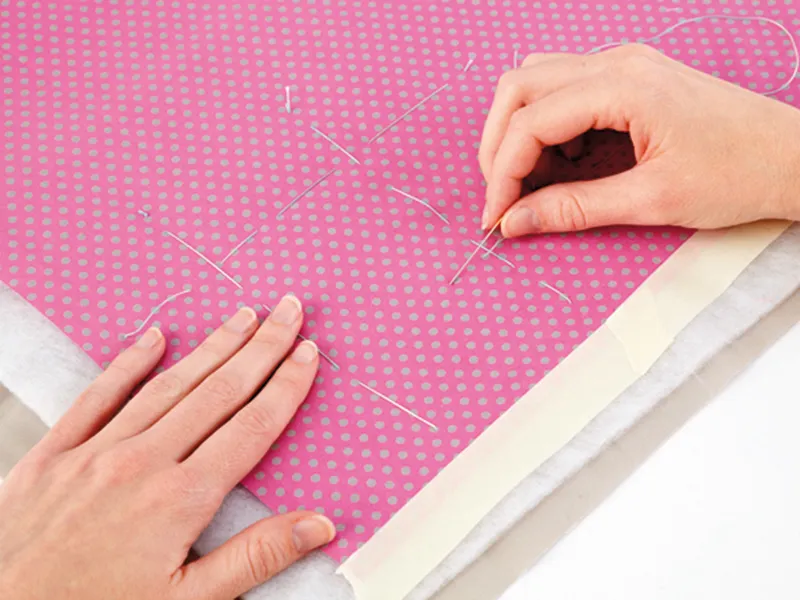
Step 5
Tack all three layers together with long lengths of thread, working from the centre out in a grid pattern, with lines about 4in (10cm) apart.
Alternatively, you can use pins or safety pins or spray basting glue to secure the layers.
Quilting for beginners: Techniques and tips
Now you've made your sandwich, it's time to turn it into a quilt. There are many quilting options out there for you to try. You can stitch by hand or machine, stitch ‘in the ditch’ in straight lines, sew geometric patterns or get creative with free-motion stitching. But first, here are the basics...
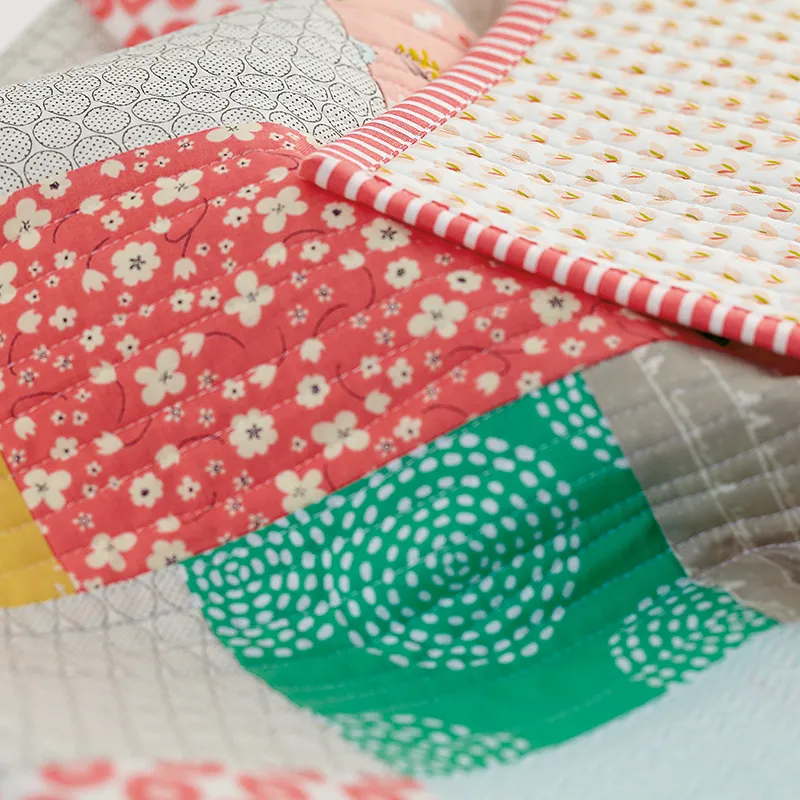
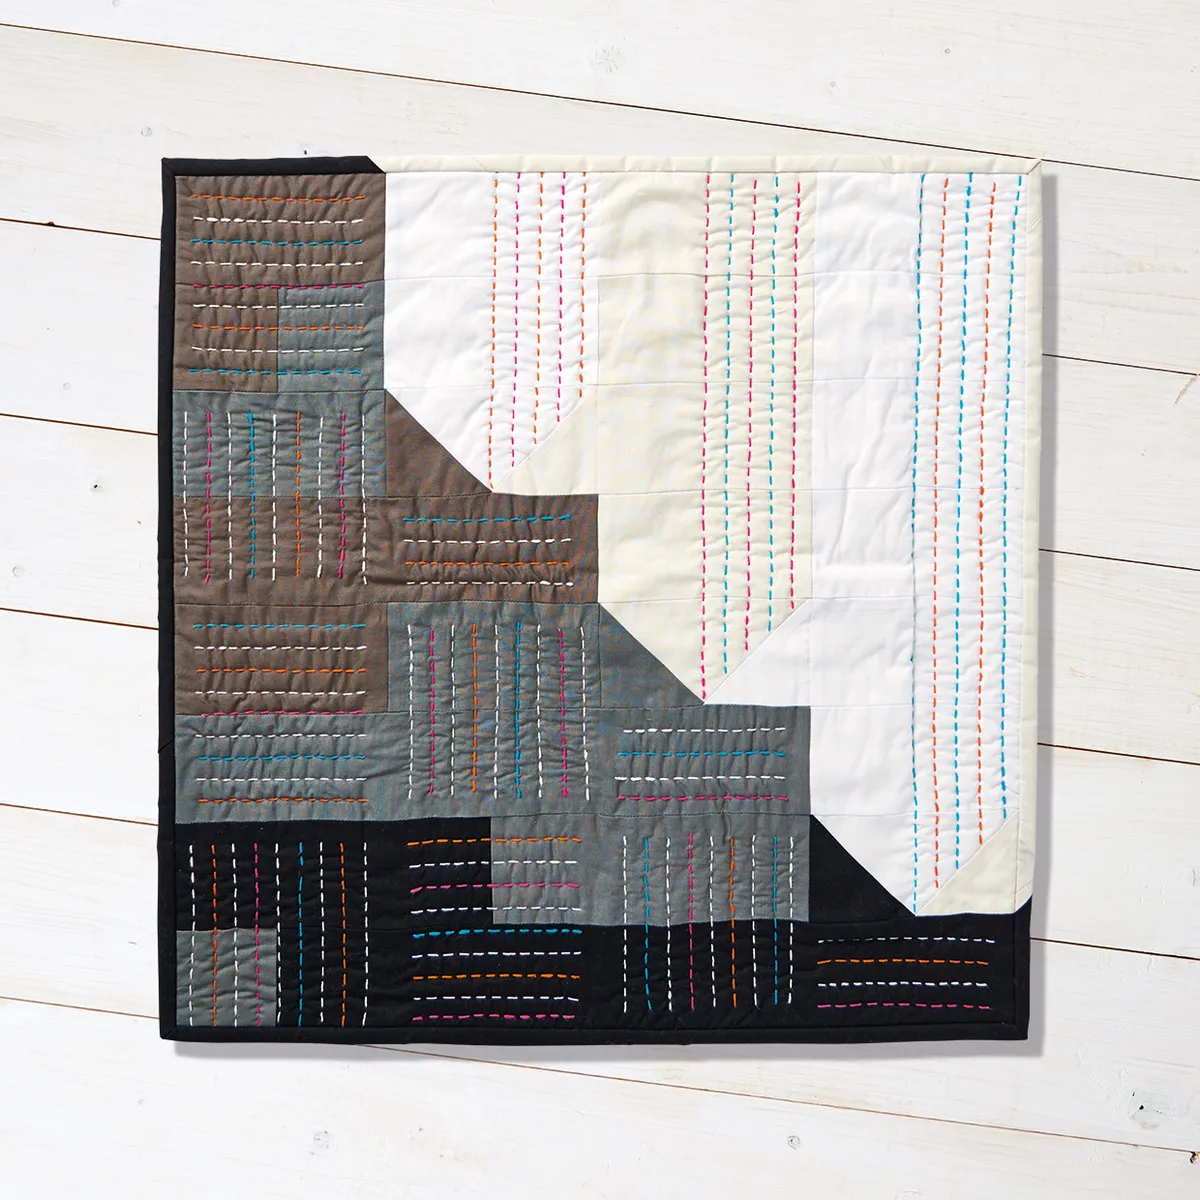
When we talk about ‘quilting’ we don’t just mean making a quilt. We’re actually talking about the straight or decorative stitching that you sew through all three layers of your quilt sandwich to secure them, and to add depth and texture.
Before you start to quilt, you may find it helpful to mark your quilting design on to your fabric before the quilt sandwich is assembled or after. Marking methods include pencil, chalk, erasable pens, templates and masking tape.
When you’re starting out, straight-line quilting is easiest. You’ll only need minimal marking before you get stitching and you can gradually build up patterns as you go. The following are just a few of our favourite techniques.
- In-the-ditch quilting: Follow the seam lines of your patchwork blocks or the smaller units that make up the blocks. Most quilters stitch in the ditch with a machine, but you can easily stitch by hand if preferred.
- Outline or contour quilting: Follow the patchwork or appliqué shapes in your quilt top. Work a small distance away from the seams usually ¼ or 3/8in, keeping a consistent distance for a neat effect.
- Grid or crosshatch quilting: Quilt in parallel lines in a grid pattern or diagonal crosshatch pattern. This is very easy and great for adding interest to plain fabric sections.
- Echo quilting: This is similar to contour quilting but you repeat the shape lines again and again in an outwards direction, rippling out and following the shape.
For a neat finish, mark the patterns you want to quilt before you start stitching. For in-the-ditch quilting or following designs in your patchwork, you may not need marks, but for other techniques, it works as a handy guide.
Simple quilting lines can be marked with a ruler and pencil or erasable pen, alternatively, run tailor’s chalk against the edge of strips of masking tape. Another option is to use a ‘hera’ marker or blunt needle to make a temporary crease, which you then quilt over.
Tracing a design
With light-coloured quilt tops you can trace your design directly on top before you add the batting and backing.
First draw the design at its correct finished size on to some paper in a dark pen or pencil. Place or tape this against a light source (for small projects, you can use a window, while for larger ones it's best to use a light box), then place or tape your quilt top over it.
Trace the pattern on to the fabric using a light pencil or erasable pen. If you're tracing part of the pattern in stages, reposition the pattern and fabric again and again until you've marked the whole quilt top.
Test your marking tools first – how well do they mark? Do the marks come out easily after you’ve stitched along them? And take care – some marks are fixed by the heat of an iron!
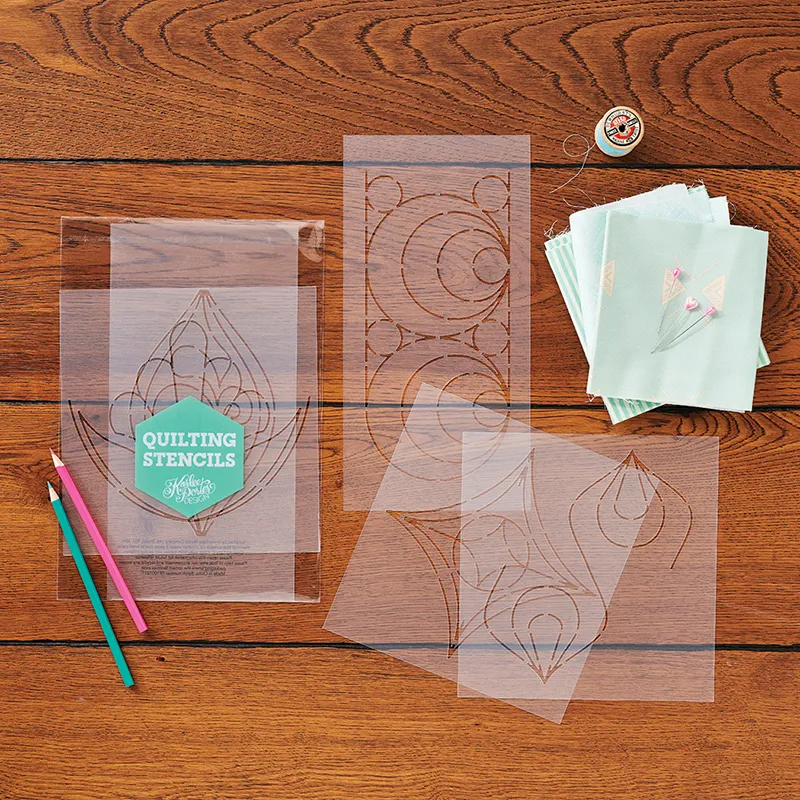
How to use quilting stencils
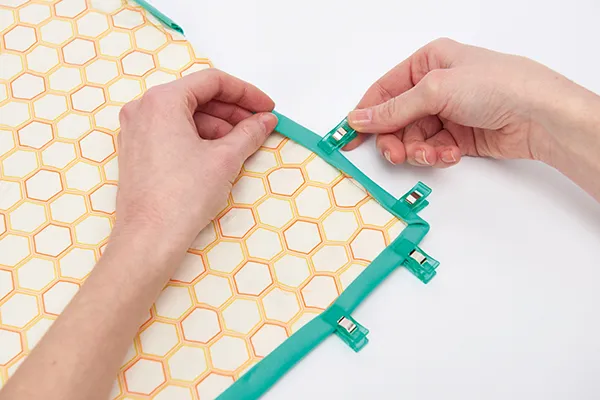
Another option is to make pattern templates from clear plastic or thin card. Templates are often provided with quilting projects in books, but you can always raid your kitchen for household items that make handy shape templates – drinking glasses and cookie cutters work well!
Place the template onto the fabric and mark lightly around the outline with a marker. If you’re repeating a shape, make sure you line it up correctly each time.
Templates are especially handy if your design includes circles or curves. You can buy plastic stencils in all shapes and sizes that are useful for marking quilting patterns. Once you’ve chosen your stencil, make sure it fits into the space you want to mark.
Fix the quilt top on a firm surface, place the stencil in position and use a marker to draw along the cut-out lines on the stencil. If you need to repeat the pattern for a border, take care to line up your pattern as you move the stencil – most stencils have little marks to guide you.
For more on this, see our guide to how to use quilt stencils
How to hand quilt
No beginners guide to quilting would be complete without a section on how to hand quilt. Hand quilting is great for first-time quilters and can be very sociable as you can take it anywhere.
A good first quilting stitch to learn is a simple running stitch. This will go through all three layers of the quilt in order to secure them together.
The length of quilting stitches can be whatever you are comfortable with. The consistency of the stitches is more important than size.
Hand quilting supplies
- Needles For hand quilting, ‘betweens’ are best (also called quilting needles). They're short, strong and better suited to making several stitches through all the layers of a quilt. They come in various sizes – start with a size 7 or 8. Shop quilting needles here
- Thimble: The needle needs to be pushed into the work vertically, so to protect your digits, wear a thimble on the middle finger of each hand. We like this Clover rubber thimble.
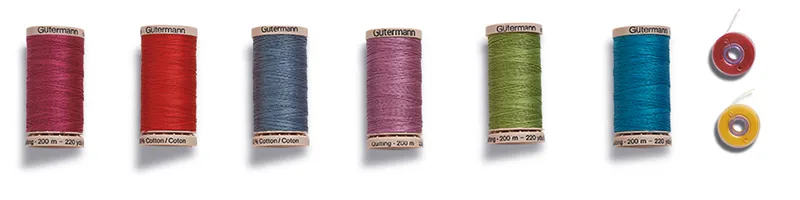
- Threads: There are many threads you can use for hand quilting. Your local fabric shop or favourite website will have lots to choose from. Pick a thread that complements your fabric. Try cotton thread for cotton fabrics or one that contrasts so the stitches stand out – for example, shiny rayon thread on linen fabric. Shop Aurifil thread on Etsy
When quilting by hand, the stitches can be worked on your lap or with the help of an embroidery hoop or quilting frame (a wooden stand). These are normally rather large so you may find it easier to start off with a hoop before going onto your frame. You usually start at the centre of your project and work outwards.
Start quilting at the centre of the quilt and work outwards.
Hand quilting – step by step instructions
Step 1
Thread a needle with 12–18in of thread and tie a knot at the end. Push the needle through the quilt top and batting then bring it up to the surface. Pull the knot through the fabric into the batting.
Make a small backstitch, take the needle back into the batting and bring the needle up to the surface to start quilting.
Step 2
To start a line of quilting, place your middle finger at the back where the needle will poke through. Push the needle through vertically until it touches the finger, then push the tip of the needle back up.
Swing the point of the needle over the fabric, forwards and then back as vertically as possible into the fabric. Repeat this to several stitches on the needle.
Step 3
Pull the needle through the quilt layers so the stitches sit neatly. Continue in this way, keeping the stitches a similar size and spacing.
The seam junctions may make quilting difficult, so just make one stitch at a time in these areas.
Step 4
To finish, make a knot and run the needle into the batting, pop the knot beneath the top fabric and trim.

Find out more about how to make a quilt by hand and try your first project.
How to machine quilt
The secret to machine quilting is taking your time and starting small. To practise, start off with a simple project, such as a cushion, to get a feel for the technique. Once you’re feeling confident, why not try free-motion quilting? It’s more like drawing but with a needle rather than a pen.
Before you begin, select a stitch length of about 10–12 stitches per inch (2.5cm). Check your machine tension to make sure the stitches look good from the front and back.
Machine quilting supplies
- A sewing machine for quilting: Check the manual to see what it’s capable of, and if you can vary the stitch length.
- A walking foot: This helps feed your fabric layers through the machine evenly when quilting in straight lines.
- Needles: Machine-quilting needles, or ‘sharps’, will pierce through all the layers of the quilt. The size of needle will depend on the batting thickness. Try a 75/11 for thin batting and increase to 80/12 or 90/14 for thicker types.
- Threads: 100% cotton thread is ideal for machine quilting but you can easily swap for metallics or other decorative threads. Aurifil cotton threads are popular with quilters.
Machine quilting – step by step instructions
Step 1
Prepare the quilt sandwich and mark the quilt top with the pattern you want to quilt. If the quilt is large, support it with an extra table on the left-hand side of your sewing machine, if needed.
To reduce bulk, roll up the sides of the quilt or fold them inwards and secure with quilting clips.
Step 2
Start quilting near the centre of the quilt and work outwards. Begin a line by stitching on the spot (stitch length set to 0). Stitch in a consistent direction where possible.
Step 3
Follow your marked lines, stitching in long lines. If possible, start and finish quilting at the sides of a quilt or project, to reduce the number of thread ends.
If you’re quilting parallel lines in a grid or crosshatch pattern, use the width of the machine foot or a quilting guide to space the lines out regularly.
Step 4
Finish the quilting by stitching on the spot. Some quilters just trim the thread ends off before moving onto the binding; others prefer to push the thread ends in the batting using a hand-sewing needle.
Read our guide on how to use a sewing machine for more advice about making your quilt by machine.
So you’ve finished your quilting, what next?
Remove any tacking or safety pins and hide any pesky thread ends by tying them off and burying them in the batting. If your thread ends are at the sides of the quilt you can leave them, as your binding will tidy them up later on.
Press your quilt on both sides and trim the edges of all three layers so they’re even with the quilt top all the way around.
Check your quilt is straight and right-angled, then you’re ready for the final stage – binding!
Quilting for beginners: How to bind your quilt
We've put together a full guide to this stage of making a quilt as well as a video! Watch our video above, or head over to our sister post about how to bind a quilt.
How to quilt as you go
With the quilt method above, you'll make a whole quilt top, then a whole quilt sandwich, and this can be pretty large depending on your quilt choices.
Quilt as you go is an alternative way of sewing up quilt blocks in which you make each one into its own mini sandwich as you go. This is a perfect method for completing larger projects, where you may find the completed piece too large to carry around with you.
Essentially, the idea is to make a mini quilt sandwich for each smaller section of your quilt top and then sew them together, rather than sewing up all the pieces and quilting it afterwards. You can either build up quilt blocks gradually as you piece them together, or piece up a single block and then quilt it, one at a time.
Once all of your individual blocks are completed, you can then simply join them together and add a backing fabric. Whichever method you prefer, choose a natural fibre wadding, which will be able to withstand the heat of pressing and won’t clog up your machine while you stitch.
Quilt as you go – step by step instructions
Step 1
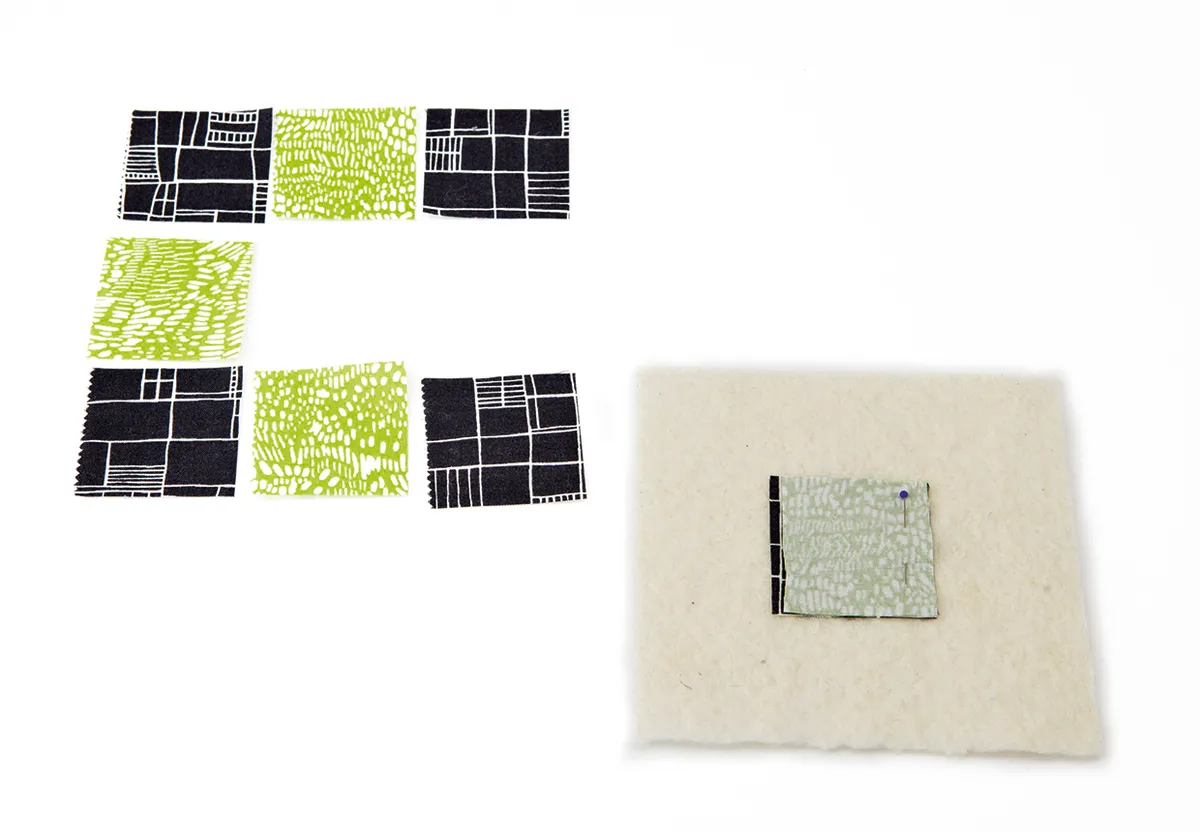
Cut a piece of wadding 1in larger than the quilt block you want to make and press the wadding into quarters to find centre. Cut out the smaller fabric units of your quilt block pieces.
Lay the first piece, Right side upwards, in the centre of the wadding. Place the second piece, Right sides together on top of the first and stitch a ¼in seam.
Step 2
Open your stitched piece out and press. Quilt over the top of both pieces. Add the next piece and stitch, press and quilt as you did previously. Continue until the block reaches the desired size.
Step 3
Use a large square ruler, or the lines on your cutting mat, to square up the block edges. Ensure blocks are the same size. Arrange in rows, and sew together using a ¼in seam. Clip seams at an angle to reduce bulk.
Step 4
Press open the seams on your rows and join rows together, using a ¼in seam. Press your seams open again. Baste all your joined quilt blocks onto a sheet of backing fabric.
Stitch in the ditch through all joins to create a grid and bind edges to finish.


Find out more this technique and try it out yourself by making our cute mini quilt using the quilt as you go technique.
Quilting for beginners: Patterns and projects
If you're new to making quilts, here's some simple quilt patterns to practise your new skills.
Easy quilt patterns from the Gathered Shop

The Gathered Shop is teeming with beginner-friendly projects for you to make. Whether you're starting with a mini quilt like the Sausage Dog FPP Quilt Pattern or fancy trying something festive like our Patchwork Christmas Quilted Stocking Pattern, there's plenty for you to begin with.
Head over to the Gathered shop to see the full range of quilting patterns.
Easy quilt blocks that look difficult
Quilt blocks are a wonderful project for beginners to start with. They're quick, fun and take very little fabric to make.
We have a huge collection of quilt block patterns here on Gathered. Our round-up of easy quilt blocks that look difficult includes some beautiful beginner-friendly projects.
Easy quilt patterns
Fancy getting stuck into something a little bigger? Our beginner quilting patterns section is full of starter quilt projects that suit quilting newbies. From baby quilt patterns to pot holder quilt patterns, there's a project for everyone.
Dive into the wonderful world of quilting
Quilting is a craft for everyone. It doesn't matter whether you're an experienced crafter or new to the world of sewing, quilting is for you. We guarantee with a little practice, you'll find quilting a rewarding, relaxing and creative process.
Keep referring back to our quilting for beginners guide to help you on your journey. Happy quilting!
Become a quilting pro with Gathered
Once you've mastered the quilting basics it's time for a challenge! Head over to our how to applique guide and learn how to add extra detail to your finished quilts.