Our team independently selects products featured in our editorial content. Some articles may contain affiliate links and we may earn a small commission through them. For more information, please see our Affiliates FAQ
Easy Hearts Quilt Pattern and DIY changing mat
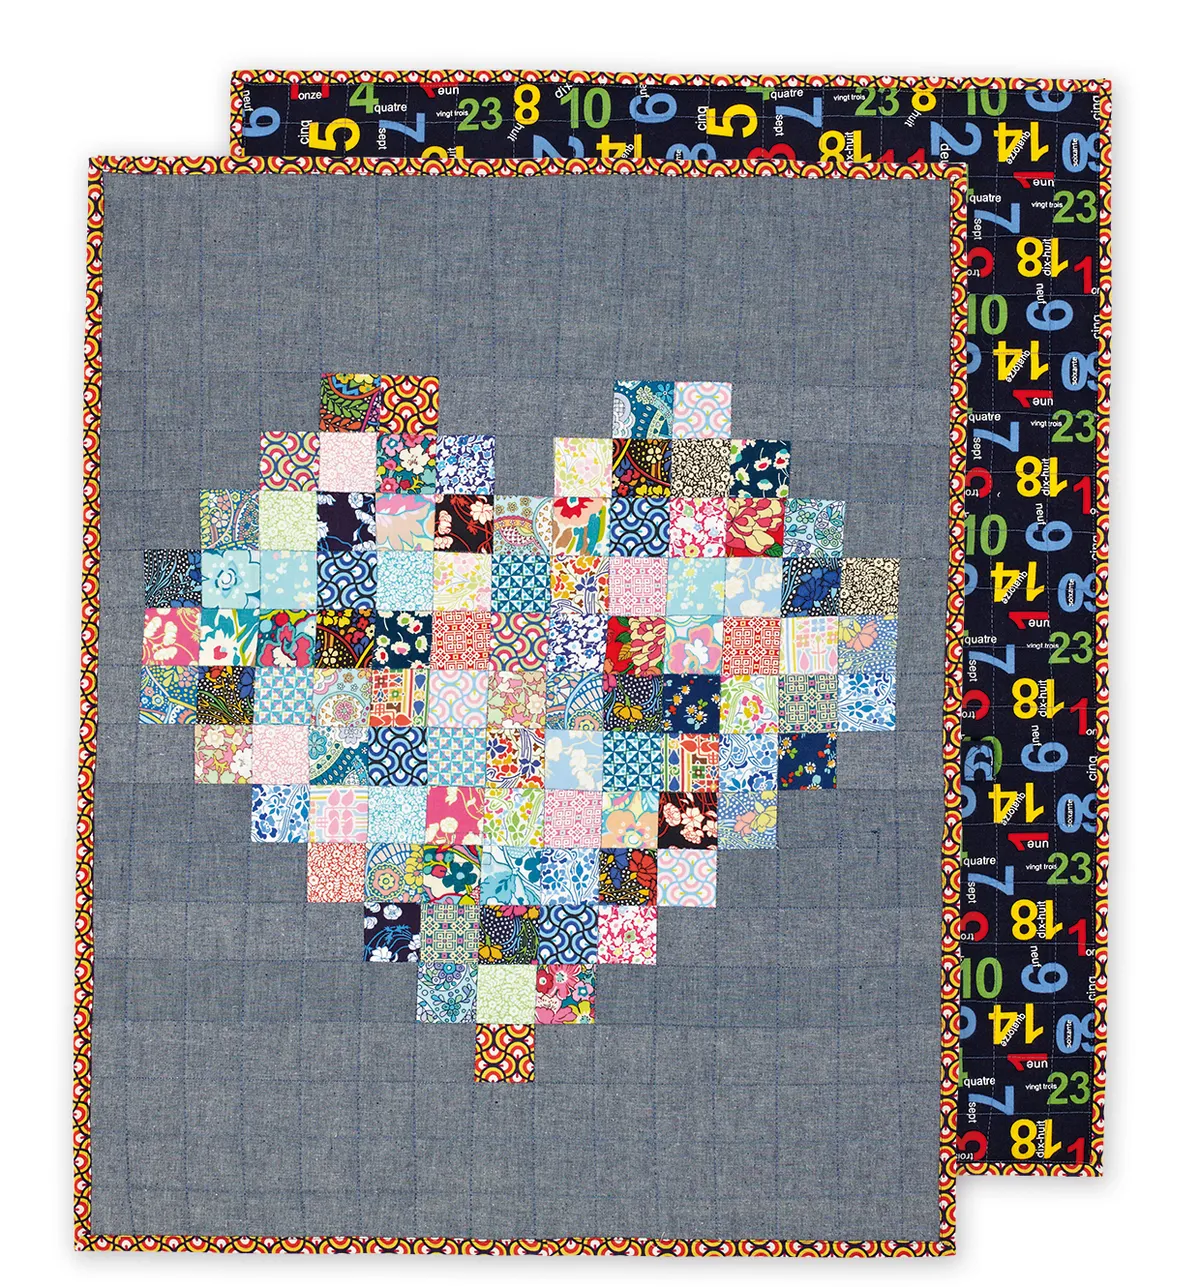
We’ve got on-the-go patchwork style all wrapped up with Judith Dahmen’s Liberty heart mini quilt pattern. Make it as a baby blanket, changing mat or simply give it to a friend to show them some love
Made using Liberty fabric, this easy heart mini quilt can double up as a changing mat or baby blanket. Sew your next family heirloom with our free quilt pattern and step by step instructions below. It's a really easy first quilt if you're new to patchwork. If you need some starter tips, our complete guides to quilting for beginners, how to bind a quilt and best sewing machines for quilting are here to help.
This quilt was designed by Judith Dahmen and was first featured in issue 7 of Love Patchwork & Quilting magazine.
Mini Heats Quilt Pattern: Fabric requirements
Assorted patterned fabric scraps for the heart no smaller than 2in (5cm) square (98 squares needed in total)
Contrasting background fabric for the top (a solid or almost solid) ¾yd
Backing fabric in a light to medium home-decor weight 1yd
Batting 27in x 32in (70cm x 82cm)
Binding fabric ¼yd
Sew-on Velcro 1in (2.5cm) long piece
We've used Liberty Lifestyle fabric – you can find a great range of Liberty fabric over on Etsy
Finished Size
23in x 28in approx
How to make a hearts mini quilt
Judith has designed this lovely little baby quilt to double up as a DIY changing mat or fold-away quilt for babies – so you can take it out and about on the go. So we've included instructions for how to add a strap so you can easily fold it away. To make this as a straight forward quilt instead, simply leave out the strap section towards the end of the step by step guide below.
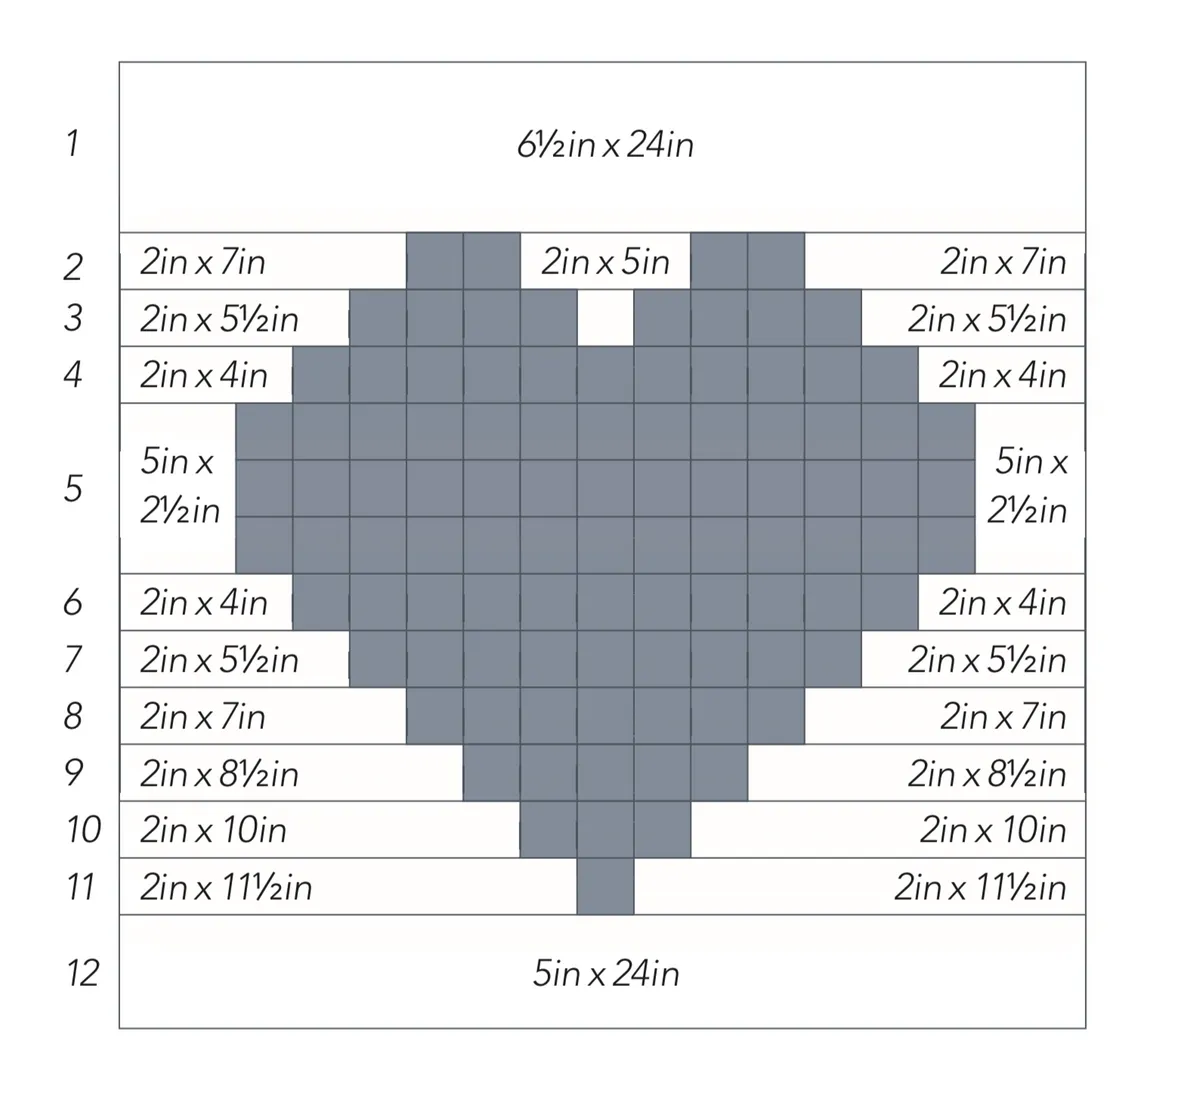
Hearts quilt pattern layout diagram
You will need:
Fabric (See fabric requirements) (Assorted fabric scraps)
Fabric (See fabric requirements) (For the background, backing and binding)
Wadding (27in x 32in (70cm x 82cm))
Velcro ((Optional) Sew-on velcro – 1in (2.5cm) – if you want to make a baby mat)
Sewing machine
Thread
Basic quilting kit
Cutting out
Step 1
From the patterned fabric cut 98 squares of patterned fabric, each 2in square.
Step 2
From the background fabric cut the following (see layout diagram, above):
One 6½in x 24in rectangle in (row 1)
One 5in x 24in rectangle (row 12)
One 2in x 5in rectangle (middle piece in the 2nd row)
One 2in square (middle square in the 3rd row)
Four 2in x 7in rectangles (end pieces for 2nd and 8th row)
Four 2in x 5½in rectangles (end pieces for 3rd and 7th row)
Four 2in x 4in rectangles (end pieces for 4th and 6th row)
Two 5in x 2½in rectangles (end pieces for 5th row)
Two 2in x 8½in rectangles (end pieces for 9th row)
Two 2in x 10in rectangles (end pieces for 10th row)
Two 2in x 11½in rectangles (end pieces for 11th row).
Step 3
From the backing fabric cut one 4in x 9in rectangle (the closure strap).
Step 4
From the binding fabric cut three strips 2½in wide x the width of the fabric.
Piecing the rows
Step 1
Lay out the patterned squares for the heart shape until you are happy with your design. Try to use a great variety of fabric pieces (Fig a).
Figure A
Step 2
Referring to the layout diagram, piece together the three sub-rows of section 5 shown in the layout diagram and attach the background fabric end pieces. Press the seams of alternate rows in opposite directions (Fig b).
Figure B
Step 3
Piece rows 2 to 4 and 6 to 11 and add these to the finished row 5 until the heart shape is complete.
Step 4
Add the larger background pieces of row 1 and 12 last.
Step 5
The end pieces of the background fabric were all cut a little longer than the finished quilt size. Piecing so many rows together will lead to uneven row endings, which makes it necessary to square off the quilt top. At this point in the process you could square the quilt to its intended size but it is best to leave this step until you have finished quilting.
Quilting and binding
Step 1
Prepare the backing fabric (it should be a little longer and wider than the quilt top). Make a quilt sandwich of the backing fabric (right side down), batting and quilt top (right side up) and baste together.
Step 2
Quilt as desired. The quilt shown was quilted in the same width as the finished squares, i.e., 1½in. The quilt benefits from fairly dense quilting as changing mats are usually heavily used and laundered often.
Step 3
Sew the binding strips into one long length of about 120in, fold in half along the length (wrong sides together) and use to bind the mat all round.
Adding the straps
Step 1
Fold the quilt top in half on the short side, and again in half. Now fold it in by a third from the left side and finally fold the right side over the left so that you have neat square package (Fig c, d, and e).
Figure C Figure D Figure E
Step 2
Mark with a pin the middle of the package on the front and on the back (we've used a pin to do this below). You will be attaching the strap and Velcro at these points (Fig f).
Step 3
To make the strap take the 4in x 9in piece of backing fabric and fold the short sides in by a ¼in on each side and iron. Fold the long sides in towards the middle, iron again and fold over once more, so you have a strap that has all its raw edges inside and is 1in wide and about 8½in long. Iron flat and sew all around the strap.
Step 4
Sew the rough side of the Velcro onto one end of the strap and sew the soft side of the Velcro onto the quilt (where you put the pin) on the side where the binding is visible when it is folded.
Step 5
Lastly, sew the strap onto the other side of the mat (where you put the pin), refold the mat as before, secure with the strap and admire your gorgeous, foldable, transportable and utterly unique quilted changing mat.
Folding tips
With the heart lying sideways, pointed end to the right and the velcro strip hanging down at the back, fold the left and right sides in towards the centre.
Fold the left side over on top of the ride side. Fold the bottom-third up to the centre.
Fold the top third down to cover this. Press the two velcro pieces together.
London-based Judith’s sewing and quilting designs have been featured regularly in Love Patchwork & Quilting magazine. She started knitting at an early age before getting into sewing as a teenager. She got into quilting after seeing a quilt in a craft store in St Ives, Cornwall, and realising she couldn’t afford it so would have to make her own. She blogs over at Needles and Lemons where you will find quilt inspiration aplenty, plus handy tips, in-depth tutorials and patterns – www.needlesandlemons.com. She also has a great passion for fine art photography, and she sells her quilts in her Etsy store www.etsy.com/shop/needlesandlemons.
This website is owned and published by Our Media Ltd. www.ourmedia.co.uk