How to make eco friendly gift wrap – fabric gift wrap tutorial
How to make eco friendly gift wrap – fabric gift wrap tutorial
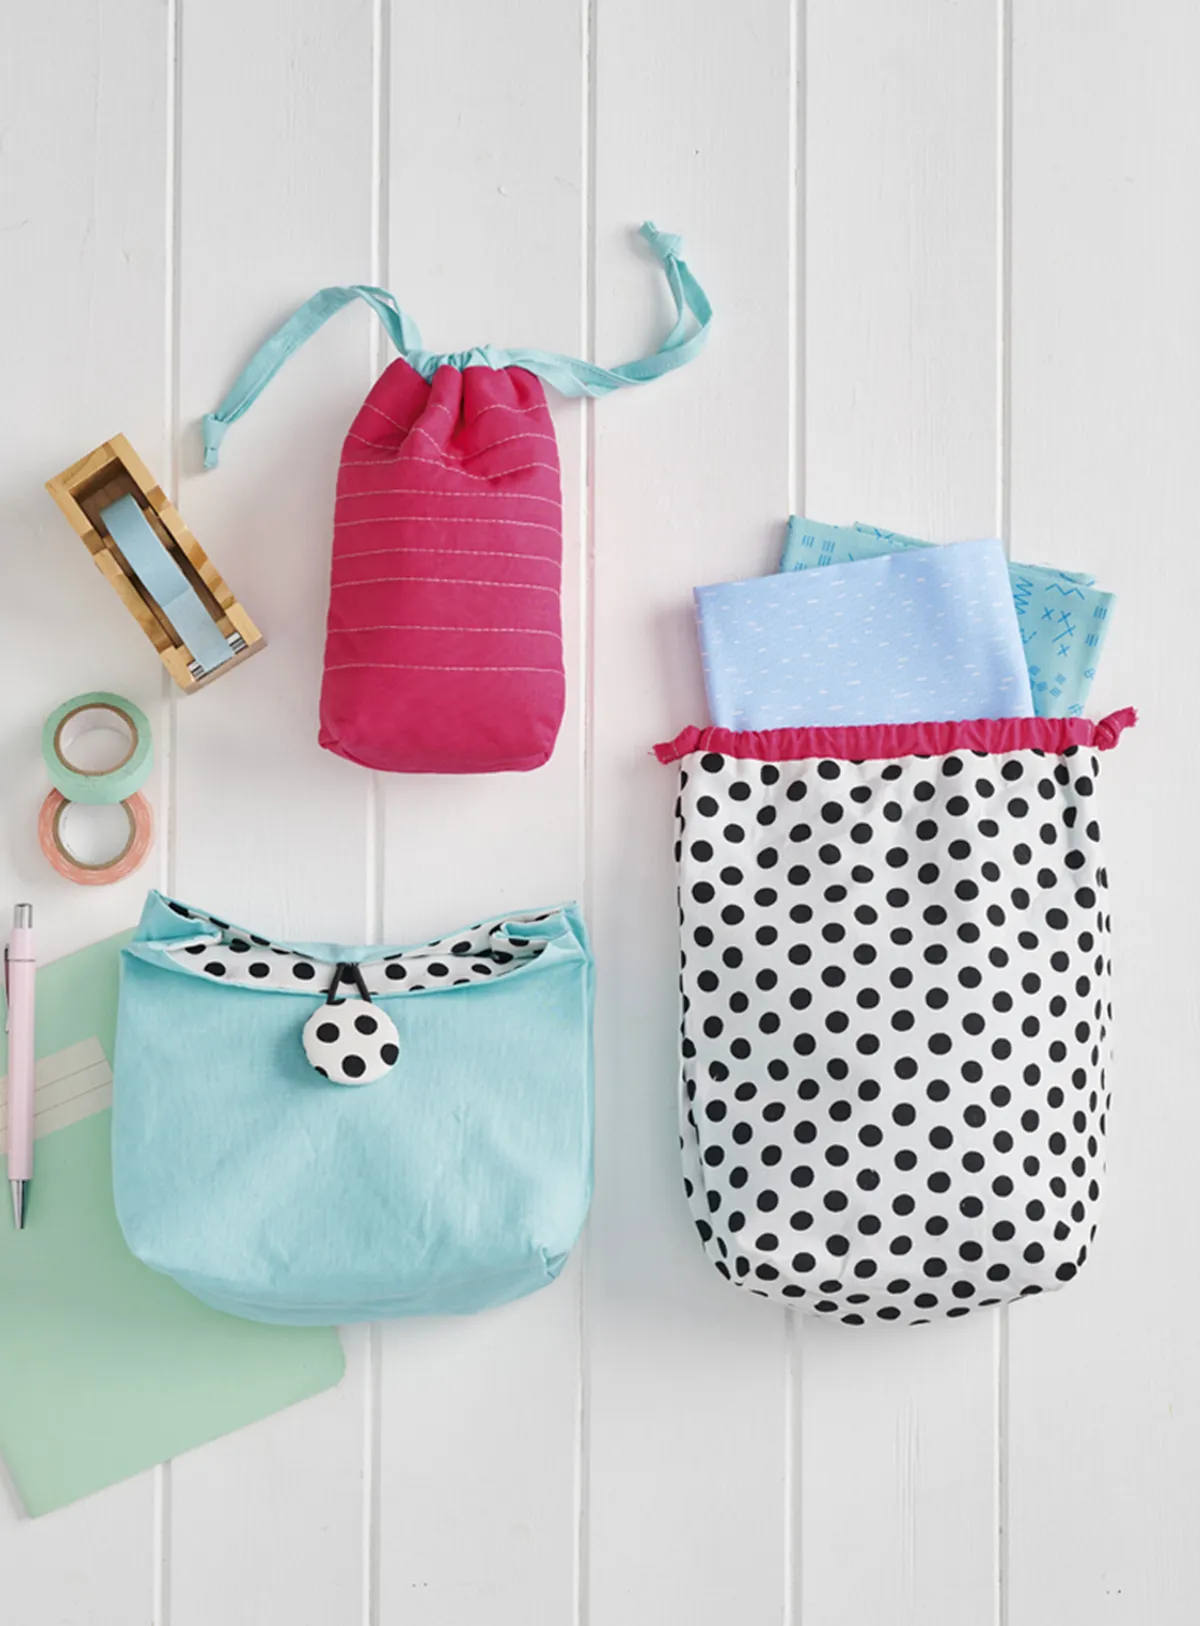
We're here to help you make this Christmas more sustainable! Why not swap glitter-filled, shop-brought wrapping paper with Laura Cunningham's easy ideas for turning your fabric stash into reusable fabric gift bags?
This Christmas, raid your fabric stash and reach for your sewing machine – we've come up with two easy ways to turn your favourite fabric scraps into reusable, eco friendly gift wrap with this pair of DIY fabric gift bags. Read on for our step by step guide to making your very own fabric gift wrap this year. You'll find instructions and materials below for How to make a Drawstring Fabric Gift bag, and how to make a Button-up Fabric Gift bag.
These gift bags have been designed by Laura Cunningham for Love Patchwork & Quilting magazine. If you're brand new to sewing and quilting, check out our guide to quilting for beginners or if you're searching for more festive sewing projects, head over to our favourite Christmas quilt patterns round-up.
For the drawstring bag, you will need...
To make a large bag
Main fabric: one (1) fat quarter
Lining fabric: one (1) fat quarter
Casing strip: one (1) fat eighth
Batting: two (2) 10in x 12in pieces (for the large bag) or two (2) 7in x 9in pieces (for the small bag)
Cord: 40in length
Cord: 40in
Two (2) beads (optional)
To make a small bag
Use the same materials as for the large bag but you'll need to cut smaller pieces. See Cutting guide below.
Notes
Seam allowances are ¼in, unless otherwise noted.
RST = right sides together
WST = wrong sides together
Finished size
Large bag: 9in x 10in approx.
Small bag: 6in x 7in approx.
For the Button-up gift bag, you will need...
1 fat quarter of fabric
Medium weight interfacing – 101½in x 17½in
Elastic: 4in length
Button
Notes
Seam allowances are ¼in, unless otherwise noted.
You will need:
Fabric (See fabric requirements, above)
Batting
Cord
Beads (Optional)
Interfacing (Medium weight)
Elastic
Button
Sewing machine
Basic sewing kit
How to make a Drawstring fabric gift bag: Cutting out
Step 1
For the large bag, from the main fabric cut two (2) 9in x 11in rectangles.
For the small bag, from the main fabric cut two (2) 6in x 8in rectangles.
Step 2
For the large bag, from the lining cut two (2) 9in x 11in rectangles.
For the small bag, from the lining cut two (2) 6in x 8in rectangles.
Step 3
For the large bag, from the casing strip cut two (2) 9in x 1¾in rectangles.
For the small bag, from the casing strip: cut two (2) 6in x 1¾in rectangles.
Drawstring bag: Quilting the panels
Step 1
Place one of your main fabric pieces on top of your batting, right side up. Quilt as desired (Fig A). Leave the top ¾in and bottom 2in unquilted. Repeat for the second main fabric piece. Trim the excess batting and square up to measure 9in x 11in.
Figure A
Drawstring bag: Prepare the casing strips
Step 1
Take one of the 9in x 1¾in casing fabric strips. At each short end, press under ¼in, then press under ¼in again. Topstitch approximately 1⁄8in from the edge. Fold the strip in half lengthways, WST and press to complete one casing strip (Fig B). Repeat to make a second casing strip.
Figure B
Drawstring bag: Making the bag panels
Step 1
Place one of the quilted panels right side up. Lay one of the casing strips along the top edge, matching up the raw edges. The casing strip is shorter than your quilted panel, so there will be space at each end. Clip or pin in place (Fig C). Machine baste the casing in place using a 1⁄8in seam allowance.
Figure C
Step 2
Place a lining rectangle RST on top of the quilted panel. Pin or baste in place. Sew together along the top edge using a ¼in seam allowance. Press the lining away from the quilted panel to complete one bag panel. Repeat steps 6–7 to make two bag panels (Fig D).
Figure D
Drawstring bag: Joining the sides
Step 1
Place one bag panel on top of the other, RST, with the quilted panels facing and the linings facing. Make sure that the centre seams where the panels and linings are joined match. Clip in place.
Step 2
For the large gift bag, mark a 1½in square in the four corners, and trim along the lines (Fig E). For the small gift bag, do the same but mark a 1in square instead.
Figure E
Step 3
Sew the bag panels together using a ¼in seam allowance, leaving the cut corners unsewn. Also leave an approx. 3in gap in the bottom of the lining, which will be used for turning later. Press the seams to set the stitches.
Drawstring bag: Boxing out the corners
Step 1
At one corner, pull the fabric open and pinch the two edges flat together, matching up the side and bottom seams (Fig F). Clip in place and sew together along the open edge using a ¼in seam allowance. Repeat to box out the remaining three corners.
Figure F
Drawstring gift bag: Finishing the bag
Step 1
Turn the pouch right side out through the opening in the lining, carefully pushing out the corners. Close the gap in the lining either by hand or by sewing machine, using a 1⁄8in seam allowance. Push the lining inside the bag, then press around the top edge.
Step 2
Trim the cord into two equal lengths. Starting at one side, insert the cord through both casings. Add a bead over both ends and knot off. Repeat with the second length of cord, starting at the other side to finish (Fig G).
Figure G
How to make a Button-up fabric gift bag: Cutting out
Step 1
Cut the fat quarter into two 18in x 11in.
Step 2
Take one piece and press the interfacing on the wrong side (WS). This will be the outer bag.
Step 3
Fold the outer bag fabric in half widthways with WS together and draw two boxes in the corners along the folded edge, 2in wide and 1¾in deep.
Step 4
Cut out the boxes along the drawn lines through both layers of the folded fabric.
Step 5
Repeat this with the other piece of fabric, which will be used for the bag lining.
Adding the button loop
Step 1
Fold the elastic in half to make a loop then pin the ends to the right side (RS) of the back of the outer piece of fabric, positioning it centrally across the top edge. The ends of the elastic should match up with the raw edges of the fabric.
Step 2
Stitch across the ends, through one layer only, within the seam allowance.
Button-up bag – Joining the outer to the lining
Step 1
Open out the outer and lining pieces of fabric and place them RS facing.
Step 2
Stitch along both of the top edges.
Step 3
Open out the fabrics and match the seams together.
Step 4
Sew together along the side edges, leaving the cut out boxes in the corners unstitched. Leave a 3in opening in the centre of one lining side unstitched for turning your bag RS out later.
Button-up Gift bag: Making the boxed corners
Step 1
Working on one corner of the outer fabric, open out the corner, matching the side seams with the bottom fold and press it flat.
Step 2
Pin across the corner then stitch.
Step 3
Repeat this to box the other corner of the outer fabric and the two corners of the lining fabric in the same way.
Step 4
Turn the bag RS out through the turning gap then slip stitch it closed.
Step 5
Press the bag well.
Button-up bag: Finishing your bag
Step 1
Pinch the sides together 1½in from the side seams at the top, then pin and press into place.
Step 2
At the top of each of the gathers, work a few holding stitches with your machine, stitching through two layers only, at each top corner. This will hold these sides in place to give the bag some shape and rigidity.
Step 3
Fold the top of the bag over then stitch the button into place to match up with the end of the loop. Now fill with treats!
Laura is an instagram superstar, filling our feed with her oh-so-pretty projects. Nobody does colour quilt like Laura – she cleverly combines bright, modern shades with fun fabric prints for her sewing patterns and designs. Her fresh, modern sewing projects have been featured in Love Patchwork & Quilting magazine. She sells her quilts worldwide and founded the Let’s Make a Quilt Together programme – connecting newcomers to quilting to share their sewing together. She lights up our Instagram feeds @sweetcinnamonroses and you can see more of her work on her website: sweetcinnamonroses.com
This website is owned and published by Our Media Ltd. www.ourmedia.co.uk