How to make mitten tree decorations

Simple scraps and trims are all you need to whip up a trio of mini mitten Christmas decorations to brighten up any tree

Try 6 issues of Love Patchwork & Quilting magazine for £9.99| SAVE 76%

Published: September 20, 2021 at 11:05 am

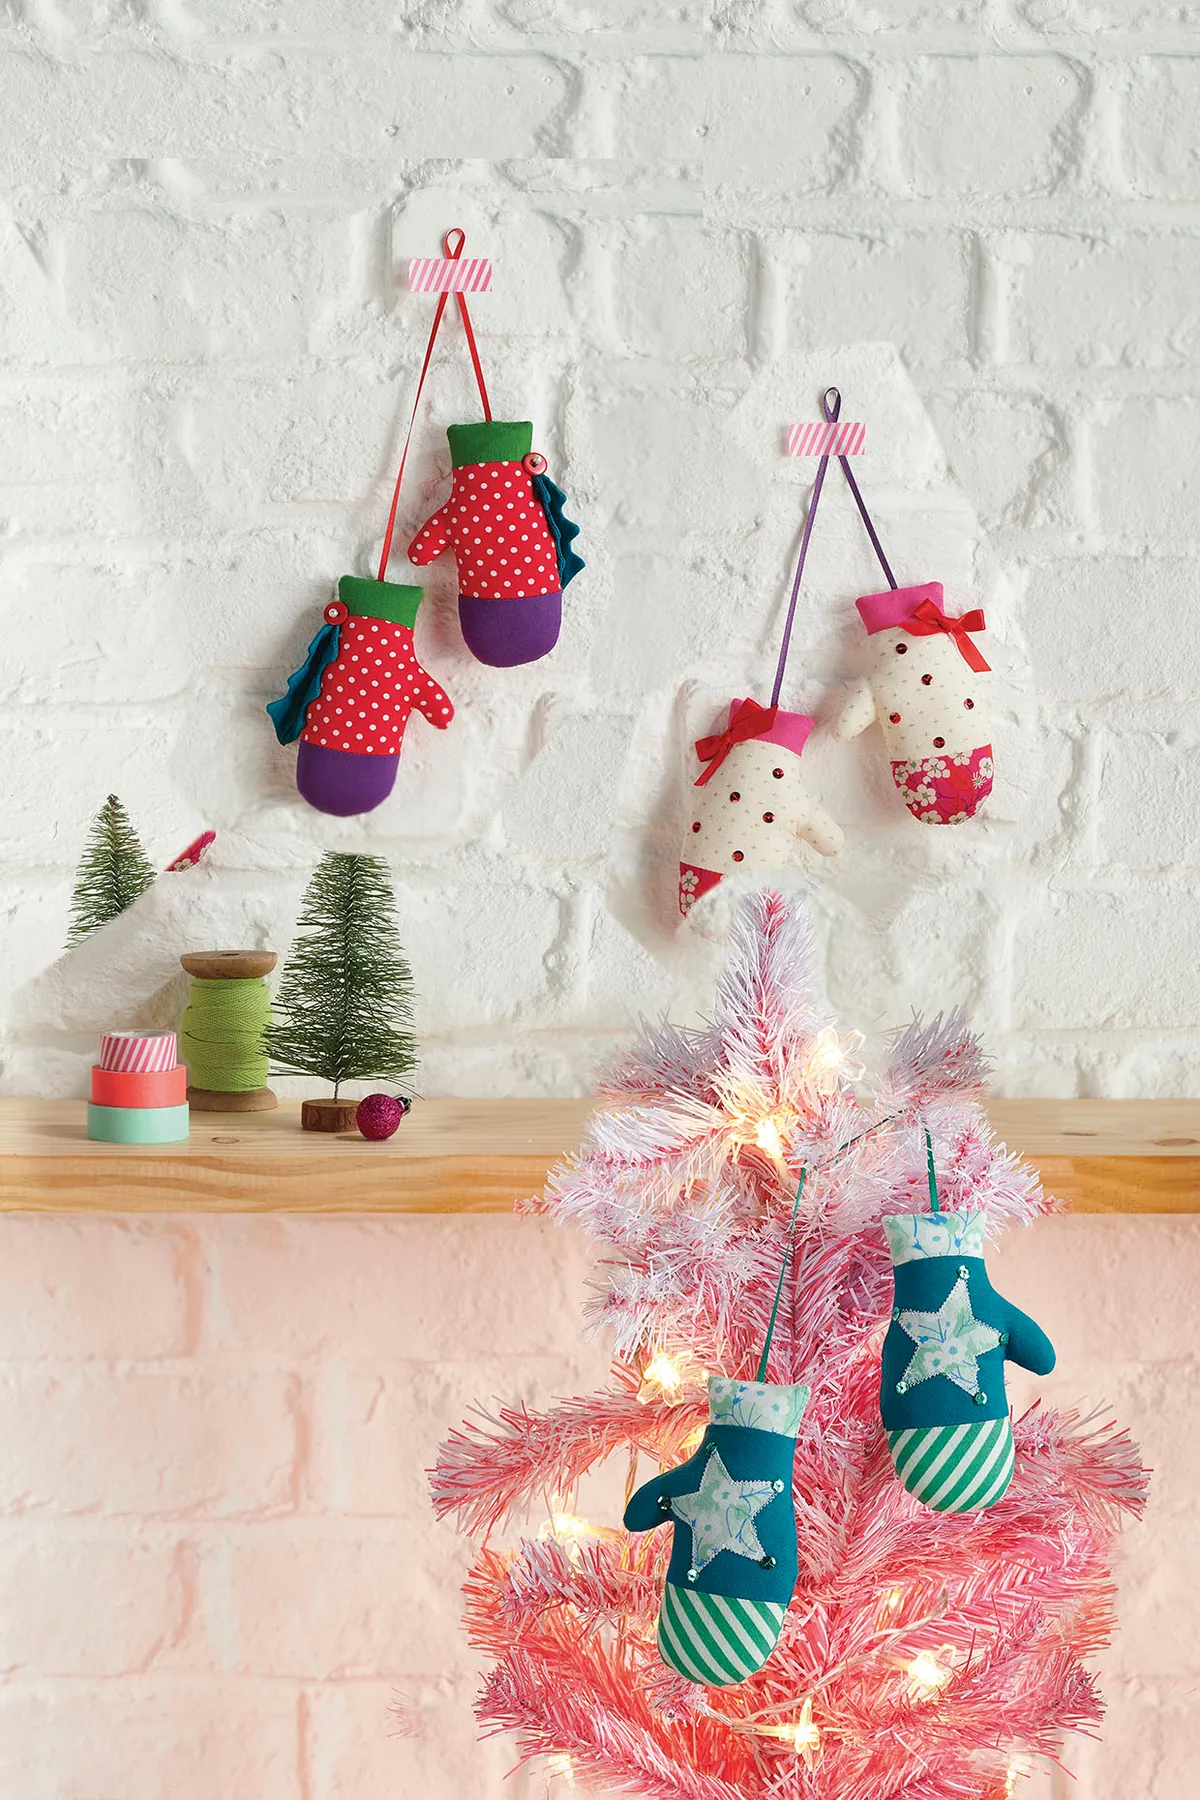
These adorable mitten tree decorations will add a charming homemade touch to your Christmas tree this festive season! Lucy Ward has created these mitten designs in three different styles, so you can choose the one you like best or mix and match the three looks. Pick the star design for your mittens, add holly details or make a sparkling sequin mittens to catch the light.

This is a really easy sewing project, so it's perfect for beginners. The pattern templates are the actual size you need, so there's no need to mess around with a photo copier to resize them. Once you've started, you may find yourself hooked on making mittens!

As the mitten decorations are very small, this is a great way to use up some festive fat quarters if you have any left over from another project. You can use fabric scraps from other makes too.

This mitten tree decoration project was created by Lucy Ward for Love Patchwork and Quilting Magazine. Love Patchwork and Quilting is the UK's favourite modern quilting magazine and it's packed with inspiration and practical advice for quilters of all levels. Lucy Ward is a designer and maker who regularly contributes to Love Patchwork and Quilting and Simply Sewing.

Looking for more Christmas craft projects? Try our crochet Christmas decorations, free Christmas knitting patterns and learn how to make a Christmas stocking.

If you're a new sewer, you might find it useful to read some of our how to guides. Check out our sewing for beginners, how to use a sewing machine, best sewing machines for beginners and sewing kits for beginners guides.

Read on to learn how to make mitten tree decorations…

Mitten tree decorations

Notes

  • Seam allowances are ¼in, unless otherwise noted.
  • Templates include seam allowances, where necessary.
  • When using the templates cut half the pieces, then turn the template over to cut half of the pieces in mirror image.
  • Use zig zag stitch for the appliqué star, stitch length 1 and width 2. Test the stitch size for your machine on a scrap of fabric.
  • Use lightweight interfacing if using light fabrics such as tana lawn.
  • Press fabrics well before cutting.
  • RST = right sides together.
  • WS = wrong side.
  • Download the mitten tree decoration templates (page 12 of the PDF)

You will need:

  • Mint floral fabric (5in x 8in)
  • Plain teal fabric (7 1/2in x 8in)
  • Green stripe fabric (3in x 8in)
  • Turquoise sequins (10)
  • Lightweight fusible interfacing (2 1/2in x 5in)
  • Narrow satin ribbon (11in length)
  • Polyester toy stuffing
  • One (1) copy each of the Mitten Top, Mitten Middle, Mitten Bottom and Star templates
  • Plain green fabric (5in square)
  • Red spot fabric (7 1/2in x 8in)
  • Plain purple fabric (3in x 8in)
  • Plain teal fabric (5in x 10in)
  • Lightweight fusible interfacing (5in x 10in)
  • Narrow satin ribbon (11in length)
  • Red buttons (2)
  • Small pearl beads (2)
  • Dark green stranded cotton
  • One (1) copy each of the Mitten Top, Mitten Middle, Mitten Bottom and Holly templates
  • Plain pink fabric (5in square)
  • Cream fabric (7 1/2in x 8in)
  • Pink floral fabric (3in x 8in)
  • Red sequins (10)
  • Narrow satin ribbon (11in length)
  • Medium width satin ribbon (18in length)
  • Polyester toy stuffing
  • One (1) copy each of the Mitten Top, Mitten Middle and Mitten Bottom templates

How to make the star mittens: cutting out

Step 1

From the plain teal fabric cut:

  • Two (2) regular and two (2) mirror image pieces using the Mitten Middle template.

Step 2

From the stripe fabric cut:

  • Two (2) regular and two (2) mirror image pieces using the Mitten Top template.

Step 3

From the mint floral fabric cut:

  • Two (2) regular and two (2) mirror image pieces using the Mitten Bottom template.
  • Two (2) 2½in squares.

Preparing the applique

Step 1

Draw one star onto the fusible interfacing, using the template, and cut out roughly. Fuse the interfacing to the wrong side of a print square, following the manufacturer’s instructions. Cut out along the drawn line. Repeat for the second star.

Making the star mittens

Step 1

Pin and sew each Mitten Top piece to a Mitten Middle piece, pressing seams open.

Mitten tree decorations step 1

Step 2

Then sew the Mitten Bottom in place. You will have two regular and two reverse mittens.

Mitten tree decorations step 2

Step 3

Position the prepared stars on the front of one regular and one reverse mitten. Baste in place. Neatly appliqué around the edges using a short zig zag stitch. Draw the threads to the wrong side of the fabric and knot off.

Mitten tree decorations step 3

Step 4

Take one of the appliqué mittens and place one end of the ribbon at the bottom, with the length running down the mitten. Pair a mitten without appliqué RST and pin in place.

Mitten tree decorations step 4

Step 5

Baste the ribbon end in place at the bottom of the mitten. Push the remaining length down inside the mitten, so it won’t get caught when you sew around the outer edge.

Step 6

Sew around the outer edge, leaving a gap for turning in one side. Clip corners and cut notches in the curves. Turn right side out and press.

Step 7

Arrange the remaining mitten pieces RST, and place the other end of the ribbon between the layers as before. Baste the ribbon end in place. Tuck the remaining ribbon and other mitten between the layers. Sew, clip and turn right side out as in the last step.

Step 8

Stuff each mitten carefully. Slip stitch the turning gaps using a matching coloured thread.

Mitten tree decorations step 5

Step 9

Hand stitch a turquoise sequin to each point on the stars to finish.

Mitten tree decorations step 6

How to make the dot mittens: cutting out

Step 1

From the red spot fabric cut:

  • Two (2) regular and two (2) mirror image pieces using the Mitten Middle template.

Step 2

From the plain green fabric cut:

  • Two (2) regular and two (2) mirror image pieces using the Mitten Bottom template.

Step 3

From the plain purple fabric cut:

  • Two (2) regular and two (2) mirror image pieces using the Mitten Top template.

Making the mittens

Step 1

Trace two regular and two mirror image Holly Leaves onto the fusible interfacing, using the template provided. Fuse the interfacing to the wrong side of the plain teal fabric. Cut along the marked lines for each leaf.

Step 2

Follow the process outlined in steps 1 and 3–8 of the star mittens instructions to assemble the mittens.

Step 3

Place two holly leaves RST. Stitch around the outer edge, using a 18 in seam, leaving a gap for turning. Clip the curves. Turn right side out and slip stitch the turning gap closed. Repeat for the second leaf.

Mitten tree decorations step 7

Step 4

Backstitch down the centre of each leaf using three strands of dark green embroidery thread. Fold each leaf in half at one end, and make a few stitches to hold in place. Hand sew to each mitten with the buttons and beads, to finish.

Mitten tree decorations step 8

How to make the cream mittens: cutting out

Step 1

From the cream fabric cut:

  • Two (2) regular and two (2) mirror image pieces using the Mitten Middle template.

Step 2

From the plain pink fabric cut:

  • Two (2) regular and two (2) mirror image pieces using the Mitten Bottom template.

Step 3

From the pink floral fabric cut:

  • Two (2) regular and two (2) mirror image pieces using the Mitten Top template.

Making the mittens

Step 1

Follow the process outlined in steps 1 and 3-7 of the star mittens instructions to assemble the mittens.

Step 2

Decorate the finished mittens by sewing five red sequins randomly placed on the front of each middle section, using a coordinating red thread. The placement of the sequins on each of the two mittens need not match.

Step 3

Cut the medium satin ribbon into two pieces. Tie a bow for each mitten and stitch to the front outer side of each one, just by the seam between the bottom and middle sections.

You’re all done! We hope you enjoyed making your mitten tree decorations.

Mitten tree decorations

This website is owned and published by Our Media Ltd. www.ourmedia.co.uk
© Our Media 2023