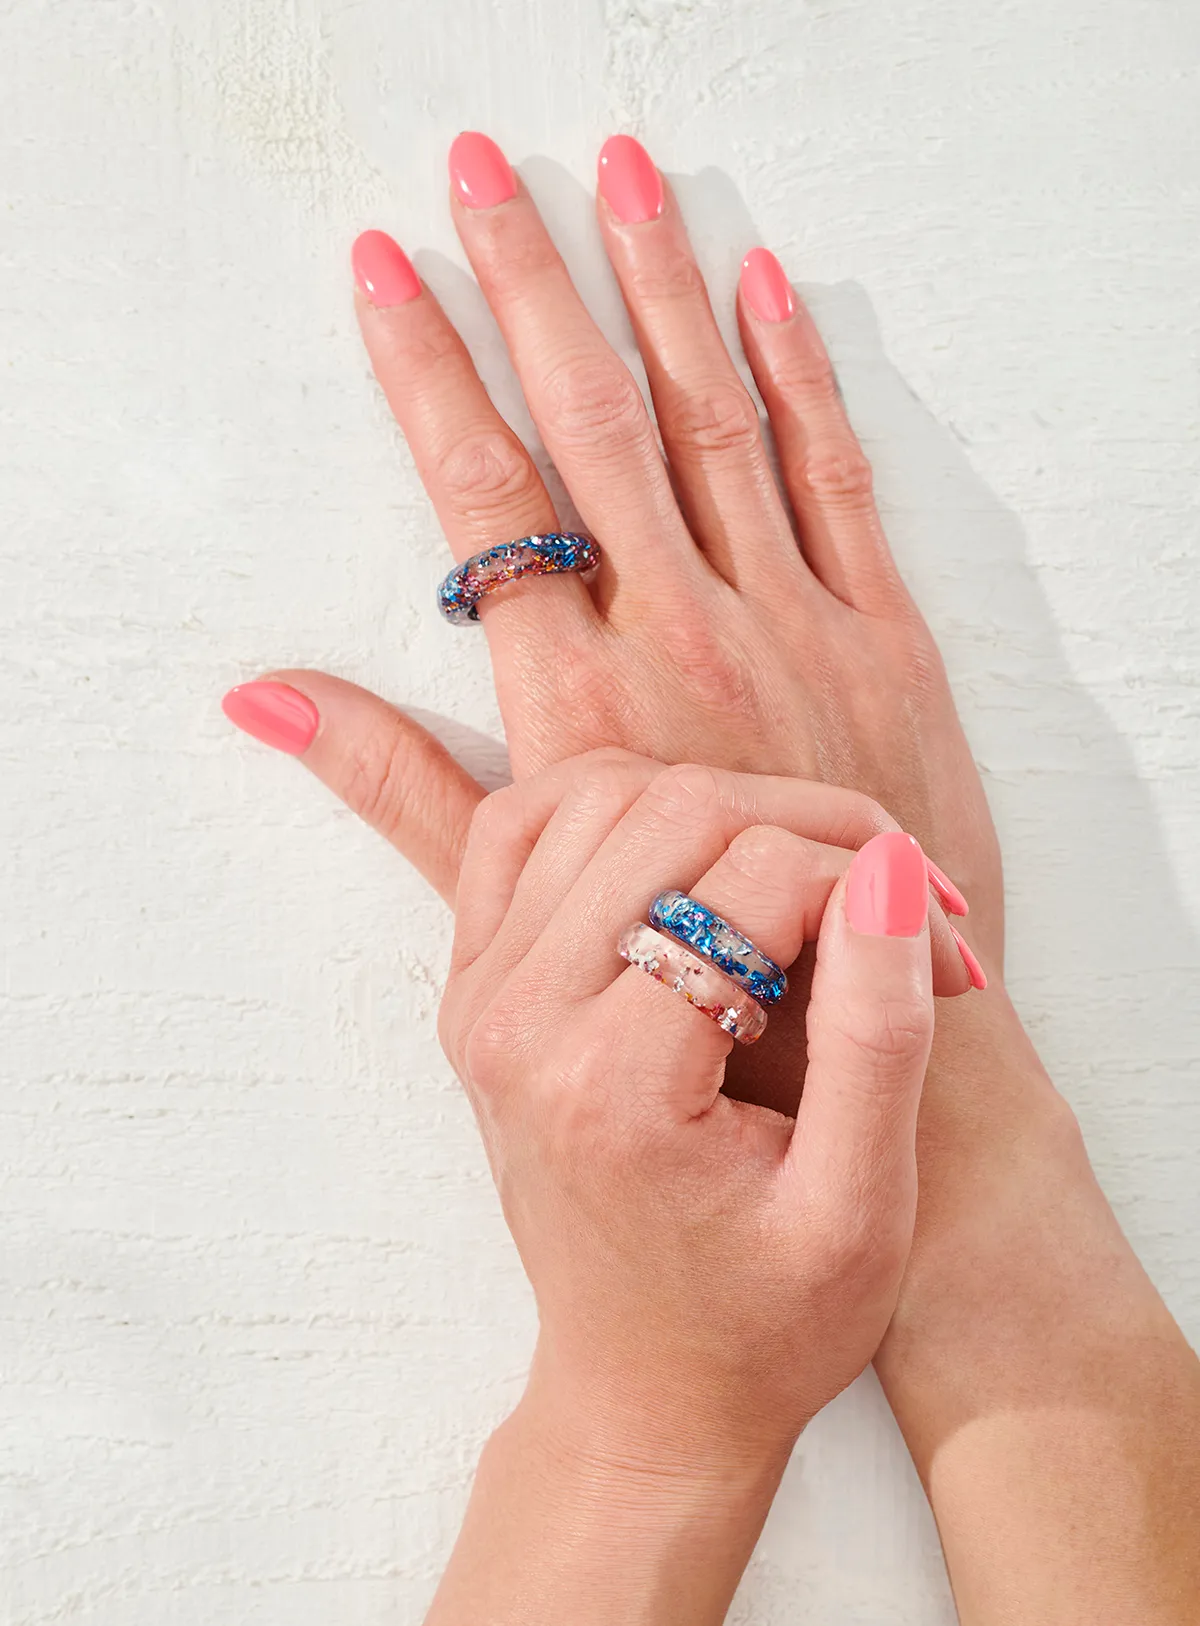
Get ready for some glitter craft action – we're here to show you how to make resin rings!
Not only will you get to practise the hottest craft trend of the year, this fun DIY will also show you how to make unique, handmade gifts for friends and family. The beauty of this project is you can use this technique to make rings in a thousand different looks and effects, by simply switching what you add to your resin rings before they harden.
We're already hooked on crafting our own jewellery and homewares from resin, but we've been looking for the chance to try DIY resin rings for ages, and this tutorial from Becki Clark has been the perfect excuse to give it a go!
We've used chunky glitter here for a maximalist effect, but you could easily add small flowers or use inks to change the colour from clear. We've got a really thorough beginner's guide to resin crafts if you're brand new to crafting with resin – it tells you more about this addictive craft technique and also runs through the different options you can use to change the effect of your finished resin.

If this tutorial gives you a taste for resin then check out our round-up of the best resin moulds and 41 Epoxy Resin ideas.
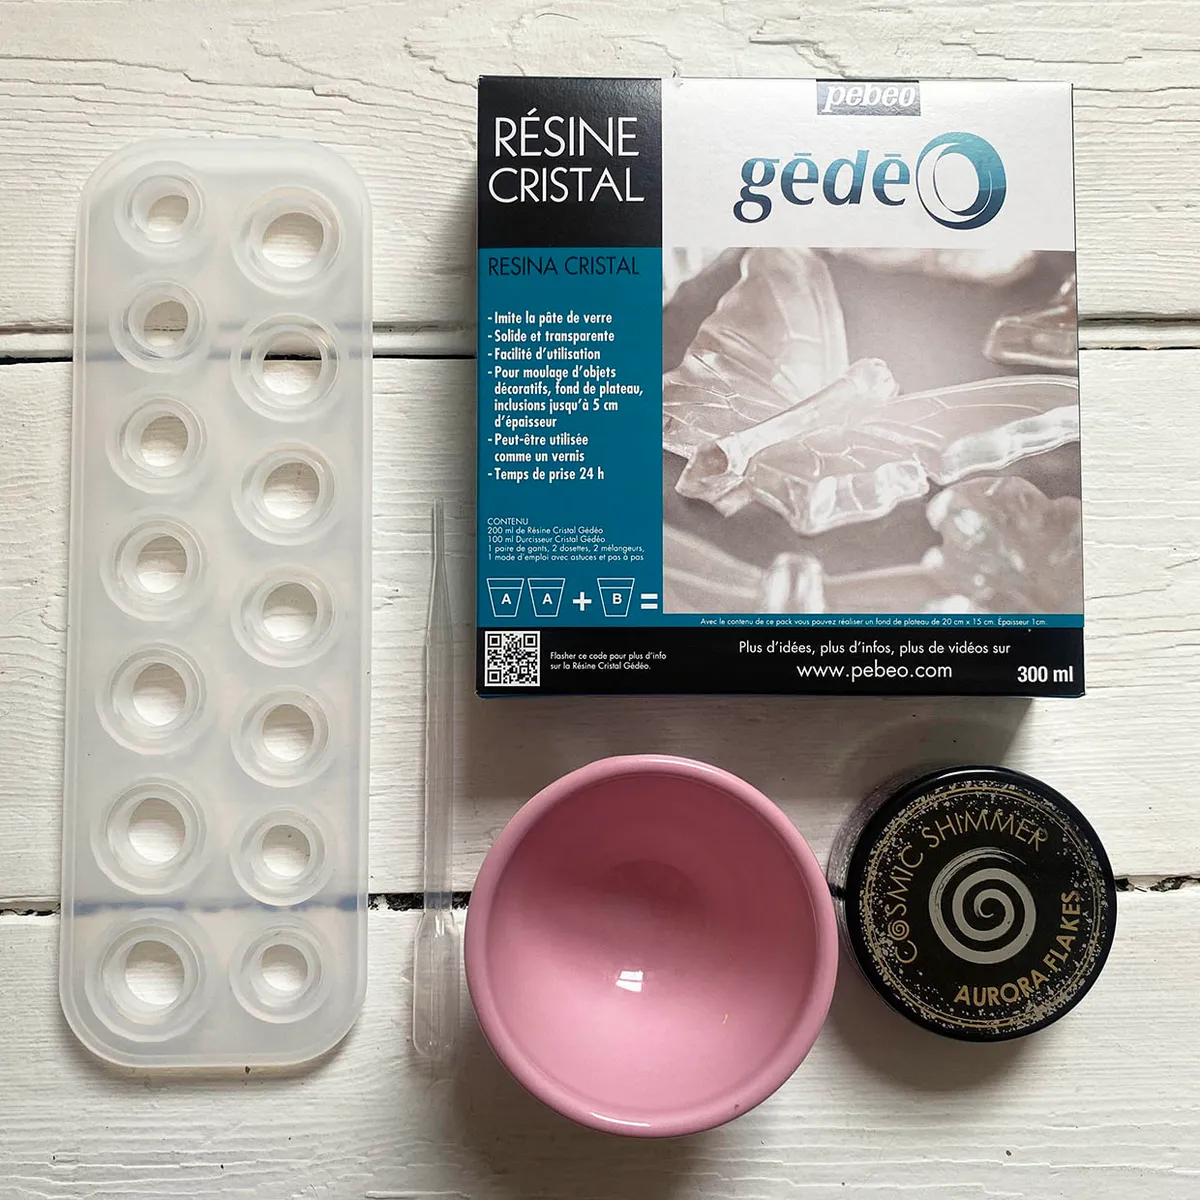
To make resin rings you will need
- Epoxy resin kit (this tutorial was made using a Gedeo Cristal resin kit from Hobbycraft).
- Ring mould
- Bowl
- Glitter
- Pipette
These rings will only take half an hour to make, but you'll need to leave 24 hours for the resin to harden before you can free them from their mould (curing times can vary for different types or brands of resin so check the instructions before you begin).
Quicker curing with the Resiners® G3 2-in-1 Resin Curing Machine

If you want don't want to wait 24 hours for your resin to cure, you should check out the new G3 2-in-1 Resin Curing Machine from Resiners®.
This clever machine will massively speed up your curing time, reducing conventional AB resin from 24 hours to just 2 hours, and with UV resin it's even quicker – just 60 seconds!

It features an enlarged 30 × 25 cm (11.8 x 9.8 in) workspace that can support molds up to 13 cm tall and has a built-in silicone mat. Plus, it also uses 3D thermal circulation, giving you uniform, bubble-free curing.
Exclusive offer - Get an extra 15% off when you order direct from Resiners.com using the code: Gathered15off
Find out more and order your G3 2-in-1 Resin Curing Machine from Resiners®
SQUIRREL_13317402
How to make resin rings – step by step
Step 1
Begin by your resin together in the small bowl, the kit I have used requires 2 part resin and 1 part hardener (but check your own resin instructions before you begin as the ratio can vary for different brands and types of resin).

The resin and hardener need to be mixed throughly but slowly so you don’t create bubbles in your resin mix. I used 10ml of hardener and 20ml of resin.

Step 2
Once you have mixed your resin and hardener you can add in your glitter to the mix and mix thoroughly with the mixing stick.
It’s totally up to you how much glitter you add, a few flecks will create a lesser glittery look and you’ll be able to see more of the resin however I added enough glitter to create a full coverage glittery resin look

Step 3
Using your pipette begin adding your resin to your mould, again this technique could work on any shape mould.

Step 4
Leave for 24 hours to fully dry and then remove your resin rings from the mould.

Your beautiful resin rings are now complete!

Create your own custom resin rings
We love these sparkly glitter rings, but you can totally get creative with what goes inside your rings. Try switching glitter for dried flower petals or small seed beads, or you could even try items like tiny shells.
Make some resin homewares
Enjoyed this guide to how to make resin rings? You might also like our tutorial for how to make resin coasters.