Step 1
Using yarn A and 3mm (UK 11, US 2/3) needles, cast on 10 sts using your preferred cast on method. Take a look at our how to cast on knitting article for a step-by-step guide.
Step 2
Row 1 Purl.
Increasing stitches to shape your pumpkin
Step 1
Row 2 Inc in every st. [20 sts]
Row 3 Purl.
Row 4 Inc in every st. [40 sts]
Starting with a purl row, work stocking stitch for 3 rows.
Step 2
Next row (K1, inc in next st) to end. [60 sts]
Starting with a purl row, st-st 3 rows.
Next row (K2, inc in next st) to end. [80 sts]
Starting with a purl row, st-st 3 rows.
Next row (K3, inc in next st) to end. [100 sts]
Starting with a purl row, st-st 3 rows.
Next row (K4, inc in next st) to end. [120 sts]
Starting with a purl row, st-st 3 rows.
Next row (K5, inc in next st) to end. [140 sts]
Starting with a purl row, st-st 5 rows.
Next row (K6, inc in next st) to end. [160 sts]
Starting with a purl row, st-st 7 rows.
Next row (K7, inc in next st) to end. [180 sts]
Starting with a purl row, st-st 9 rows.
Next row (K8, inc in next st) to end. [200 sts]
Knitting the middle section of your pumpkin
Step 1
Starting with a purl row, st-st 57 rows. We’re making the pumpkin longer with 57 more rows of stocking stitch. You won’t work any decrease rows at all in these 57 rows.
Decreasing stitches to shape your pumpkin
Step 1
Next row (K8, k2tog) to end. [180 sts]
Starting with a purl row, st-st 9 rows.
We’ll shape the pumpkin towards the narrow top by reducing the number of knit stitches between each k2tog in the decrease rows and reducing the number of stocking stitch rows between each decrease row, too.
Step 2
Next row (K7, k2tog) to end. [160 sts]
Starting with a purl row, st-st 7 rows.
Next row (K6, k2tog) to end. [140 sts]
Starting with a purl row, st-st 5 rows.
Next row (K5 k2tog) to end. [120 sts]
Starting with a purl row, st-st 3 rows.
Next row (K4, k2tog) to end. [100 sts]
Starting with a purl row, st-st 3 rows.
Next row (K3, k2tog) to end. [80 sts]
Starting with a purl row, st-st 3 rows.
Next row (K2, k2tog) to end. [60 sts]
Starting with a purl row, st-st 3 rows.
Next row (K1, k2tog) to end. [40 sts]
Next row Purl.
Next row K2tog to end. [20 sts]
Knitting your pumpkin stalk
Step 1
Change to yarn B. All stitches from now on will be worked in your secondary stalk colour. We’re using green.

Step 2
Next row Purl.
Next row K2tog to end. [10 sts]
We’re now done decreasing until we get to the top of the stalk.
Step 3
Starting with a purl row, st-st 10 rows.
Next row (WS) Knit.
Next row Knit.
Next row Purl.
Finishing off the top of your stalk
Step 1
Next row K2tog to end. [5 sts]
Step 2
Cut yarn and thread through sts. Gather round cast-on sts and pull up tightly.
Sewing up your pumpkin
Step 1
Sew seam, leaving an 8cm gap at top.
Step 2
Pull up sts of green stalk tightly and secure.
Step 3
Sew the seam of the stalk to the base.
Stuffing and shaping your pumpkin
Step 1
Turn cushion RS out and stuff with filling. Sew remaining seam.
Step 2
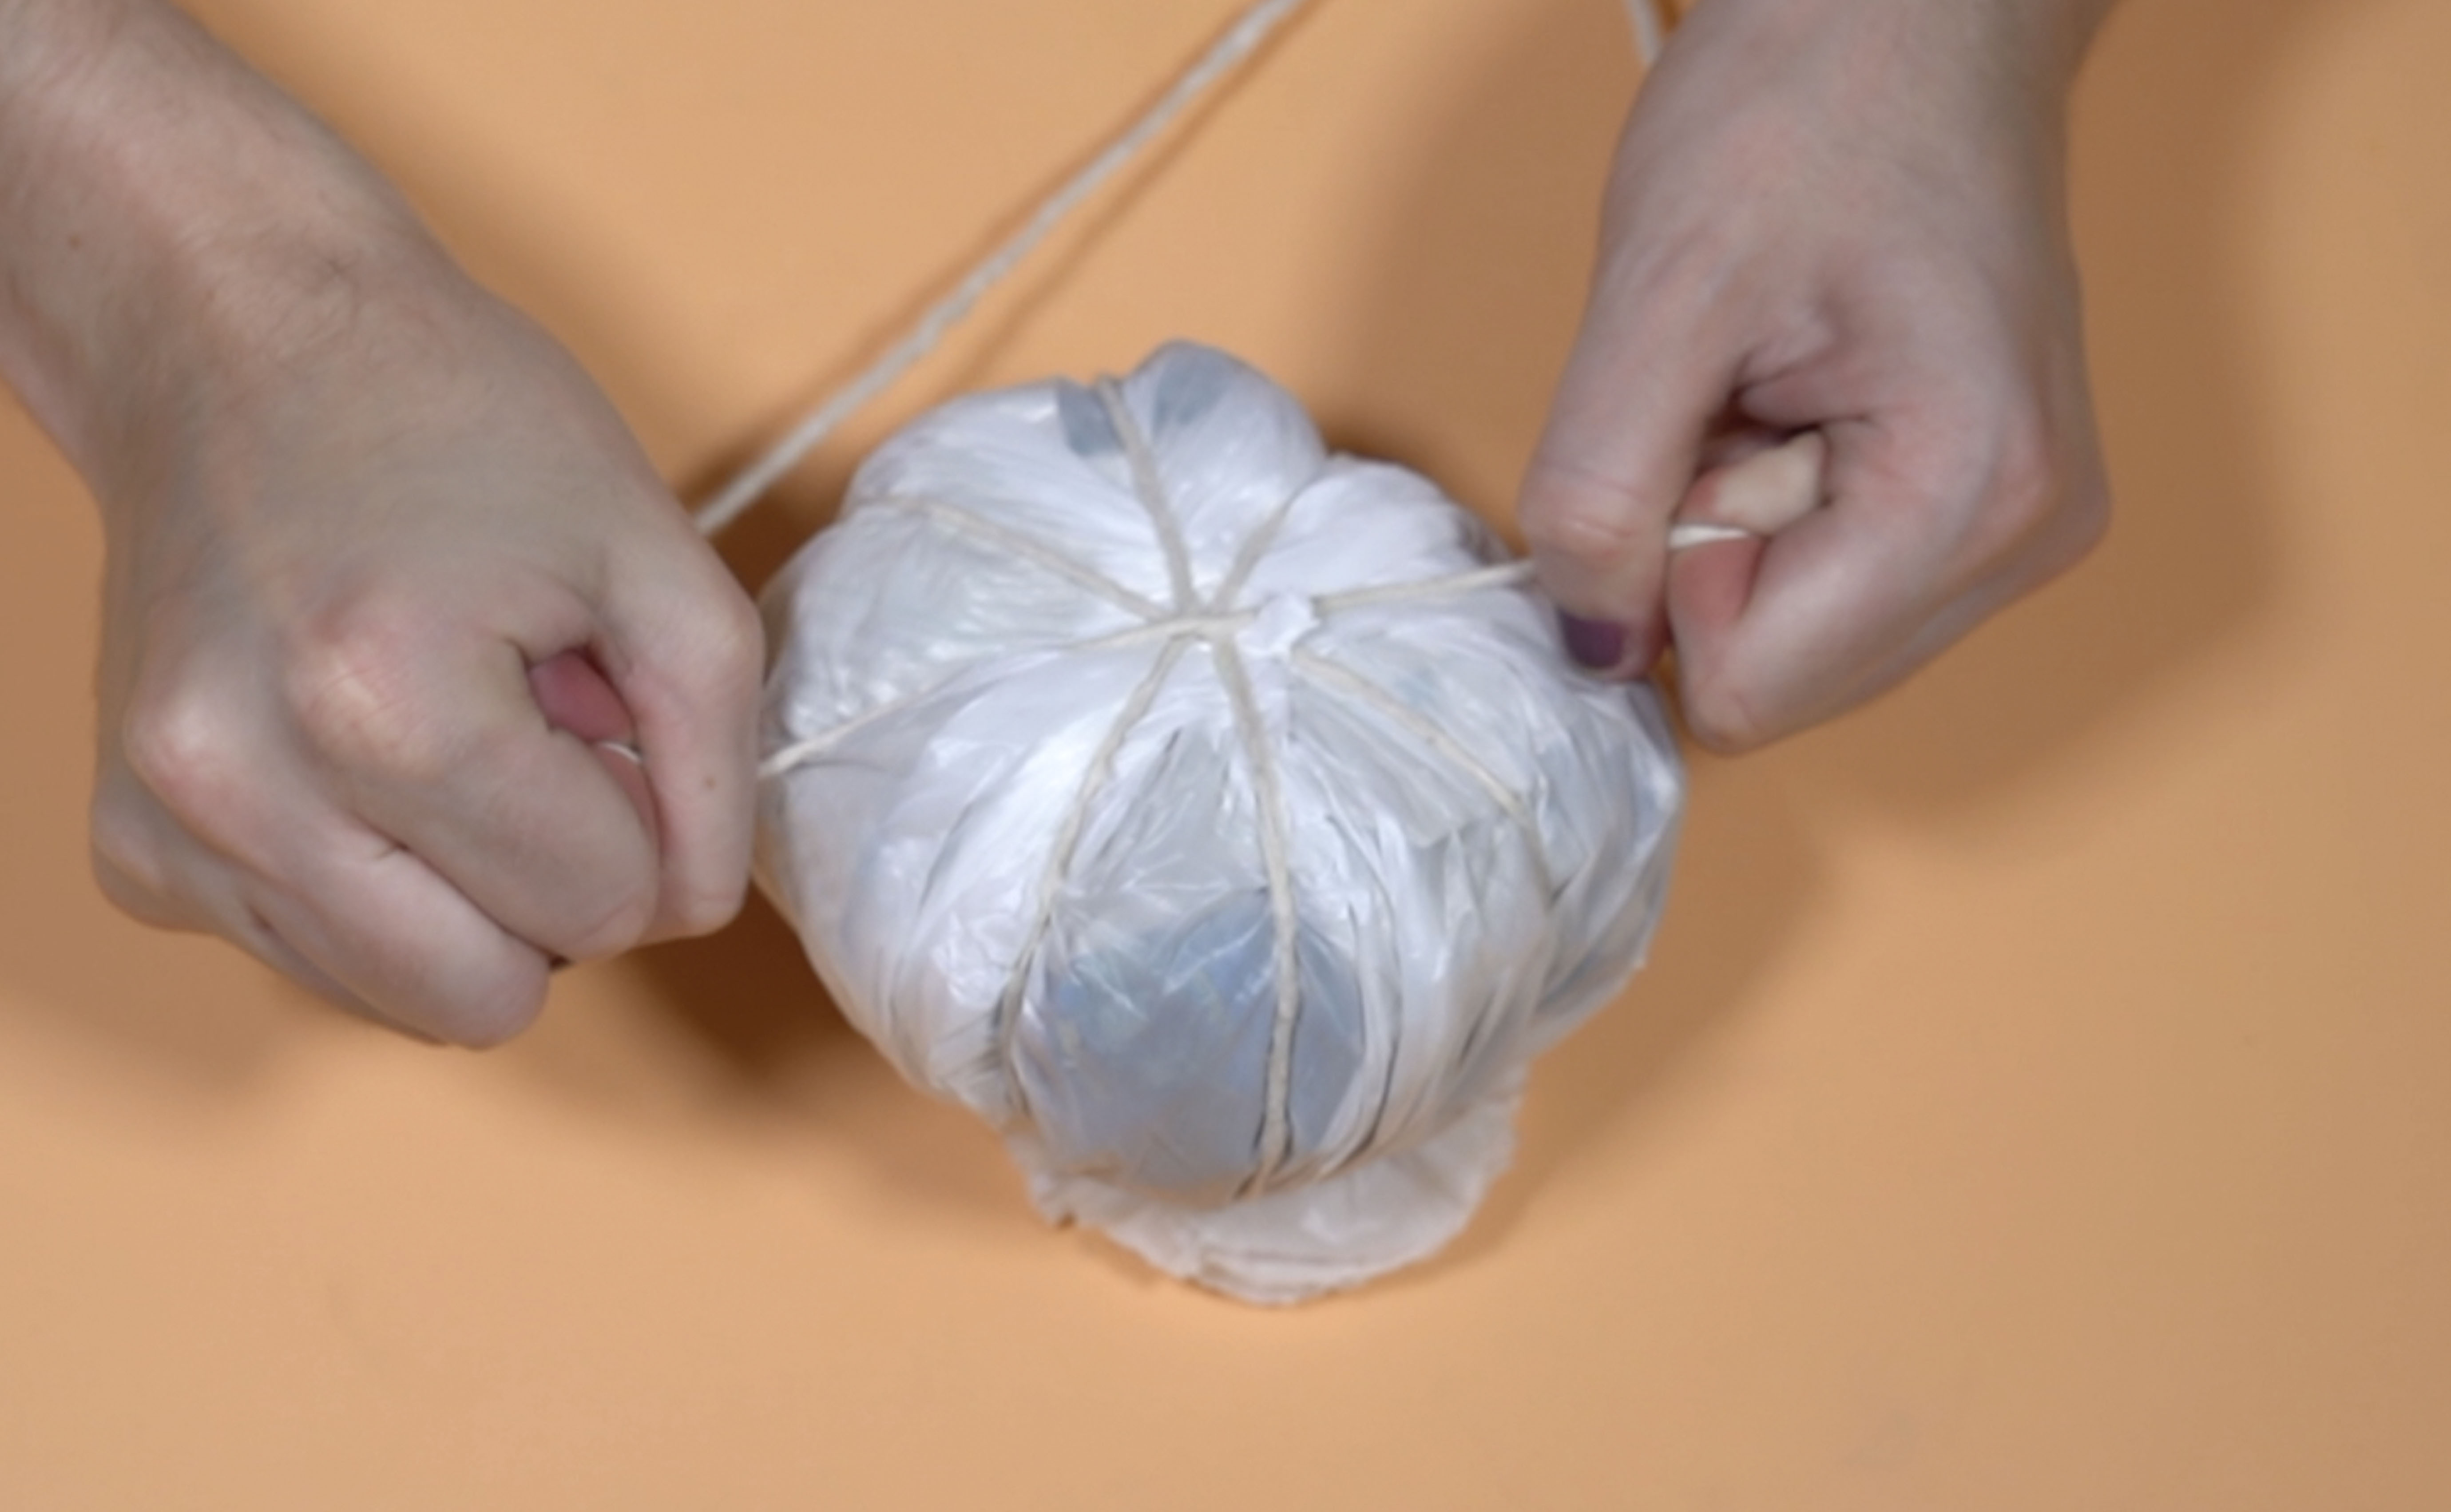
Cut 6 x 50cm lengths of yarn A.
With seam at back of cushion, run a length of yarn from top (at the base of the stalk) down the left hand side (if the seam is 12 on a clock face, the yarn would be at 9) to cast on sts at base, working 1.5cm running sts.
Step 3
Secure yarn at the base then pull up yarn from top tightly – this defines the pumpkin shape. Secure the yarn at the top then work a second length to the right (at 3 o'clock) in the same way.
Shape a paper pumpkin
We use the same segment shaping in our paper mache pumpkin, too. So if you want to see a video of the process in action, check out Gathered’s how to make a paper mache pumpkin article.
Step 4
Repeat for remaining lengths of yarn to create six segments in all at 1 o'clock, 5 o'clock, 7 o'clock and 11 o'clock.
Step 5
Use a length of yarn C yarn to gather round sts at base of stalk and pull up slightly to tighten it. Run the length of yarn to the centre top then back down again to base. Pull gently so that top of stalk becomes inverted.
Step 6
Tie in all loose ends. Your knitted pumpkin is finished!